 Welcome to the tutorial about SAP transaction variants and SHD0 transaction. After completing this tutorial you will learn how to create a transaction variant in SAP using the transaction SHD0. This tutorial is written around an example from SAP HCM module.
Let’s imagine that you have a requirement from the business to provide access to a certain group of users to only one infotype for all employees in the company. These users already have read access to some infotypes from Employee Self-Service tools. For example, they can view in read mode personnel data, organizational assignments, previous experience and qualification infotypes as part of the Employee Self-Service.
If you give these users access to PA20 transaction and a certain infotype, a collision between security roles will give them access to personnel data and qualification of all other employees.
As a solution to this problem, a transaction variant can be created in SAP. You should create a variant of the transaction PA20 and remove the field for infotype search. Next step is to create a user group and an infotype menu giving access only to the required infotype.
Below, we described the steps how to create a transaction variant in SAP.
Step 1 - Identify Technical Names of Fields
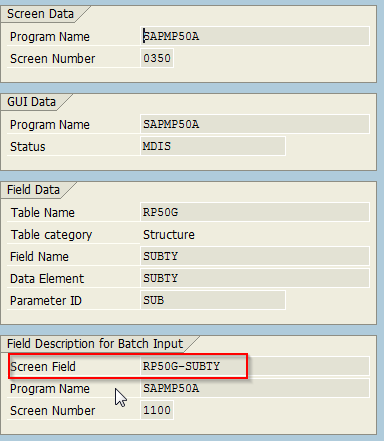
The first step is to identify the fields you need to hide. These are direct selection fields in PA20 transaction. The technical names of these fields are RP50G-CHOIC and RP50G-SUBTY.

You can easily identify the technical name of a field by positioning the mouse cursor in this field and pressing F1 key. In the Help window, you should click on the technical information button ![]() .
.
Step 2 - Create a Transaction Variant
Next step is to create a variant of a the standard transaction. This is done in the transaction SHD0.
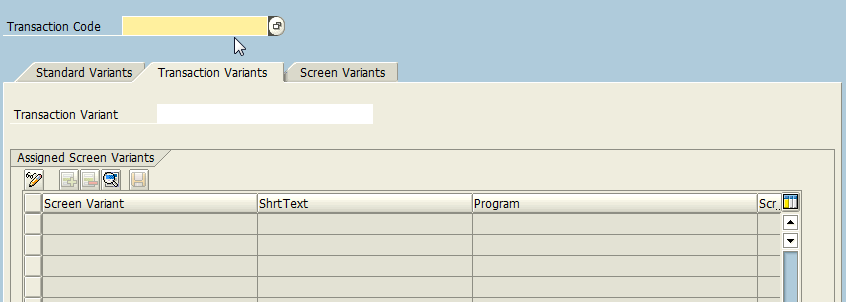
Give an appropriate name for your transaction variant. In the initial screen of SHD0, provide the name of the standard transaction (PA20 in our example) and the name of the variant to be created (for example, ZPA20_1).
Click on create icon ![]() on the initial screen. The SAP system will launch PA20 transaction. A series of screens will appear, providing you the possibility to choose what screen fields you want to be displayed in the transaction variant that you are creating. On the first few screens it is not necessary to do to any changes. Just press on Continue button
on the initial screen. The SAP system will launch PA20 transaction. A series of screens will appear, providing you the possibility to choose what screen fields you want to be displayed in the transaction variant that you are creating. On the first few screens it is not necessary to do to any changes. Just press on Continue button ![]() until you reach Direct selection - Program SAPMP50A:
until you reach Direct selection - Program SAPMP50A:

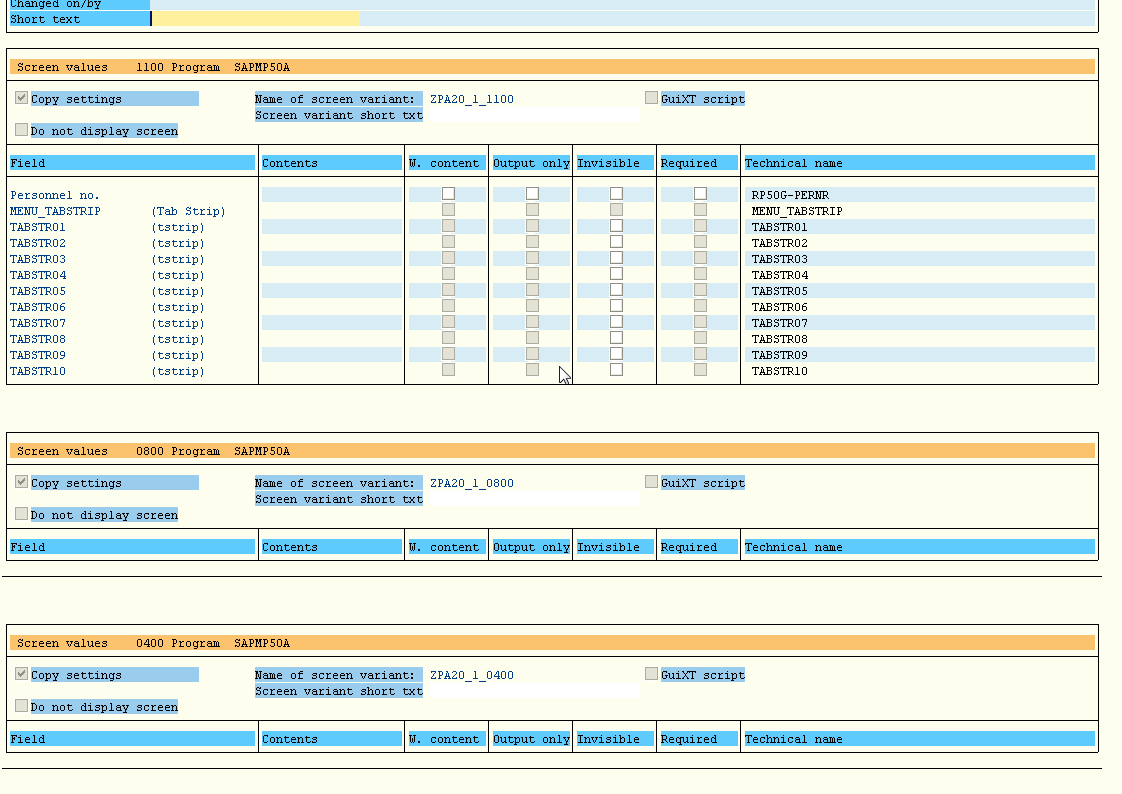
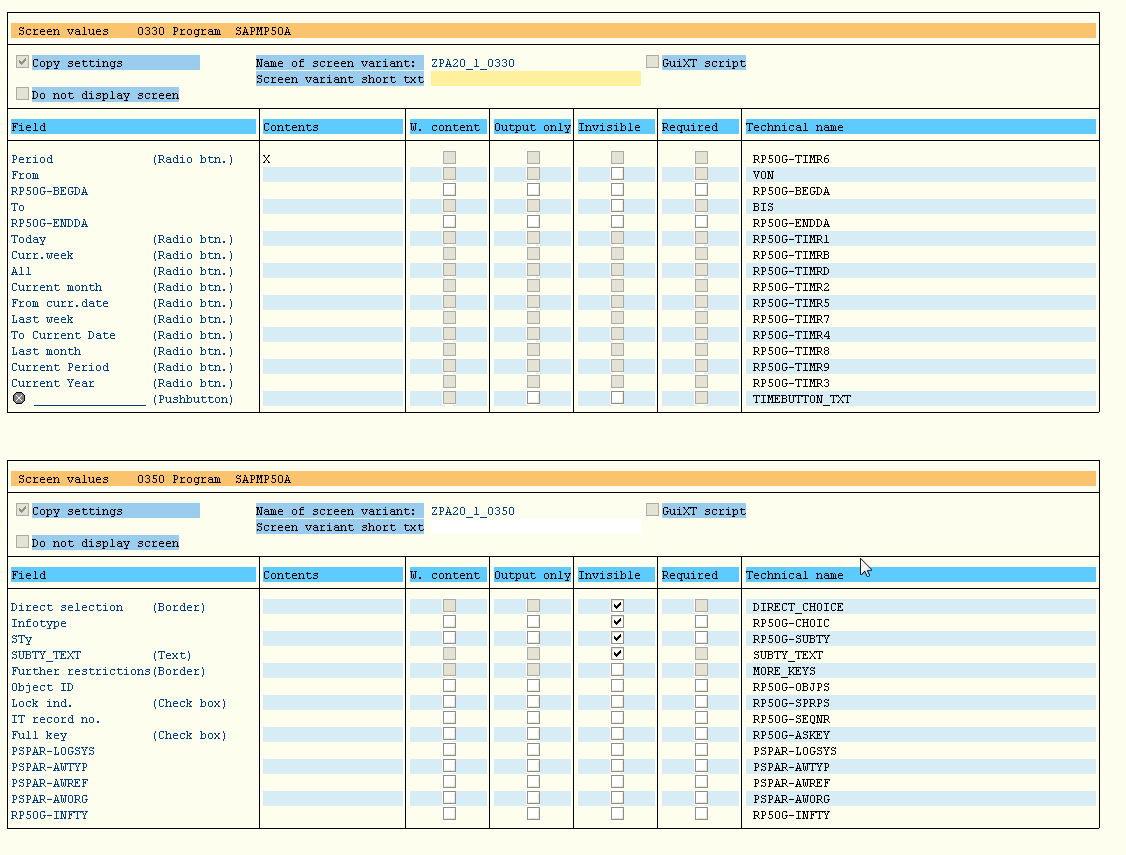
As it is shown on the screenshot above, tick in Invisible checkboxes. If Invisible is selected, the corresponding field or screen element (in a table control) is not displayed during processing of the transaction variant.
Click on Exit and Save. The SAP system will show a summary screen of all the settings made. Add short name of the transaction variant. Scroll down to review all the settings and save your work by pressing Save button ![]() or by pressing F11 key on your keyboard.
or by pressing F11 key on your keyboard.
You will be asked by the SAP system to provide a development package and asked again to confirm and save.

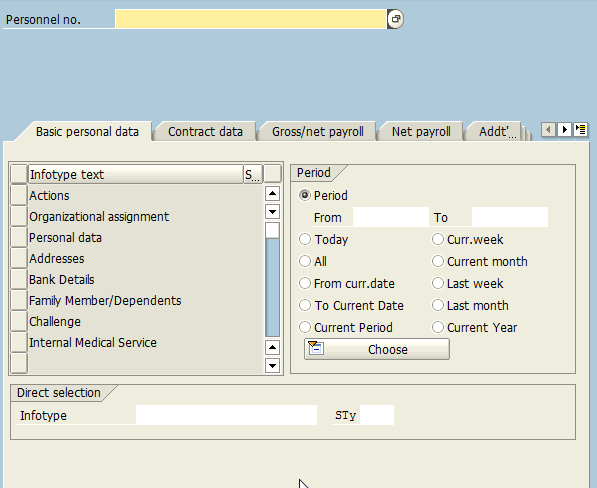
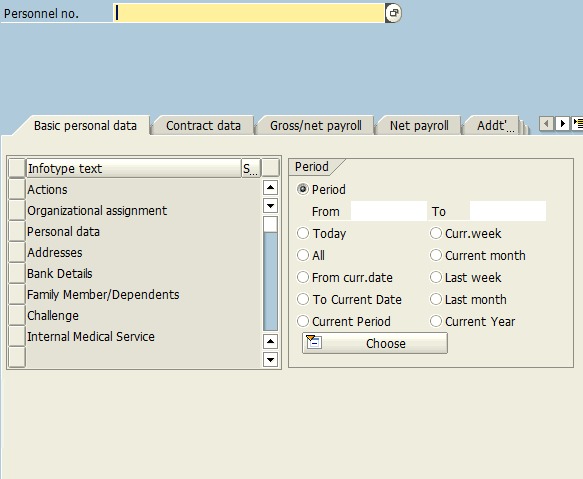
Carry on till you receive the message that the transaction variant and screen variant were saved. Now, you can run your new transaction variant ZPA20_1 and see the difference compared the standard transaction PA20.
Step 3 - Add the Transaction Variant to User Roles
The next step is to add the new transaction variant to the user roles. If we don’t do it, the users will not be authorized to run our new transaction variant ZPA20_1. This is done through PFCG transaction. Also, you can add new transaction variant to the user menu using the same PFCG transaction. And you have to inform users to add the new transaction variant to favorites in their menus. Assignment of roles is usually performed by SAP BASIS consultants working on your SAP implementation or support project.
Step 4 - Create an Infotype Menu
One other necessary step is to create an infotype menu containing only the required infotype. This step is not relevant to explaining how to create a transaction variant in SAP but it is necessary for the business example that we considered in this tutorial. You can create an infotype menu in SPRO transaction.
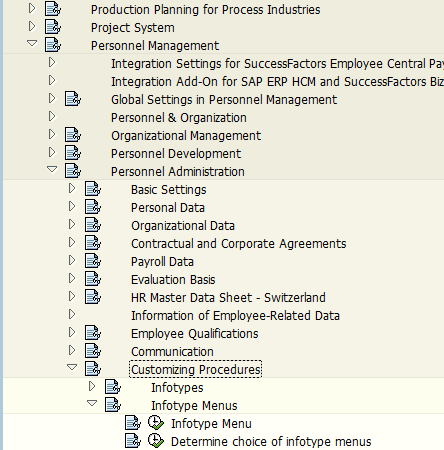
Start the activity Infotype Menu and proceed with customization of the menu.
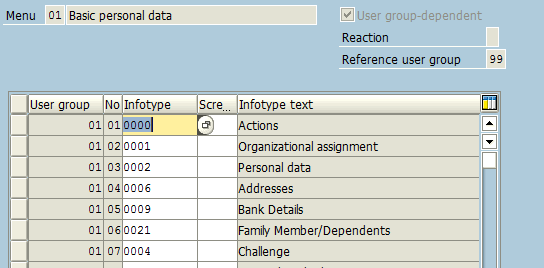
Configure the menu as user group dependent by clicking on User group-dependent checkbox. Now, when the users belonging to this user group launch the new transaction ZPA20_1, they will access the new screen without having the possibility to select other infotypes that provide access to sensitive employee data.
—
Did you like this tutorial? Have any questions or comments? We would love to hear your feedback in the comments section below. It’d be a big help for us, and hopefully it’s something we can address for you in improvement of our free SAP HR tutorials.
Navigation Links
Go to next lesson: SAP Ad Hoc Query – How to Create Ad Hoc Reports?
Go to previous lesson:
Go to overview of the course: SAP HR Training

Nice learning