
 Welcome to the tutorial on SAP Daily Work Schedule Configuration. In an earlier tutorial on SAP Work Schedules and their Elements, we have introduced you to the concept of Daily Work Schedules. In this tutorial, we will explain how to configure a Daily Work Schedule in SAP. We will then consider an example.
SAP Daily Work Schedule Configuration
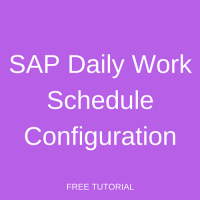
In this section, we will explain how to create a new Daily Work Schedule (abbreviated as DWS) based on your organization’s daily working time policy. To configure a Daily Work Schedule, access the Implementation Guide using the transaction code SPRO. Then follow the path mentioned below:
Time Management – Work Schedules – Daily Work Schedules – Define Daily Work Schedules
This path has been depicted in Figure 1.
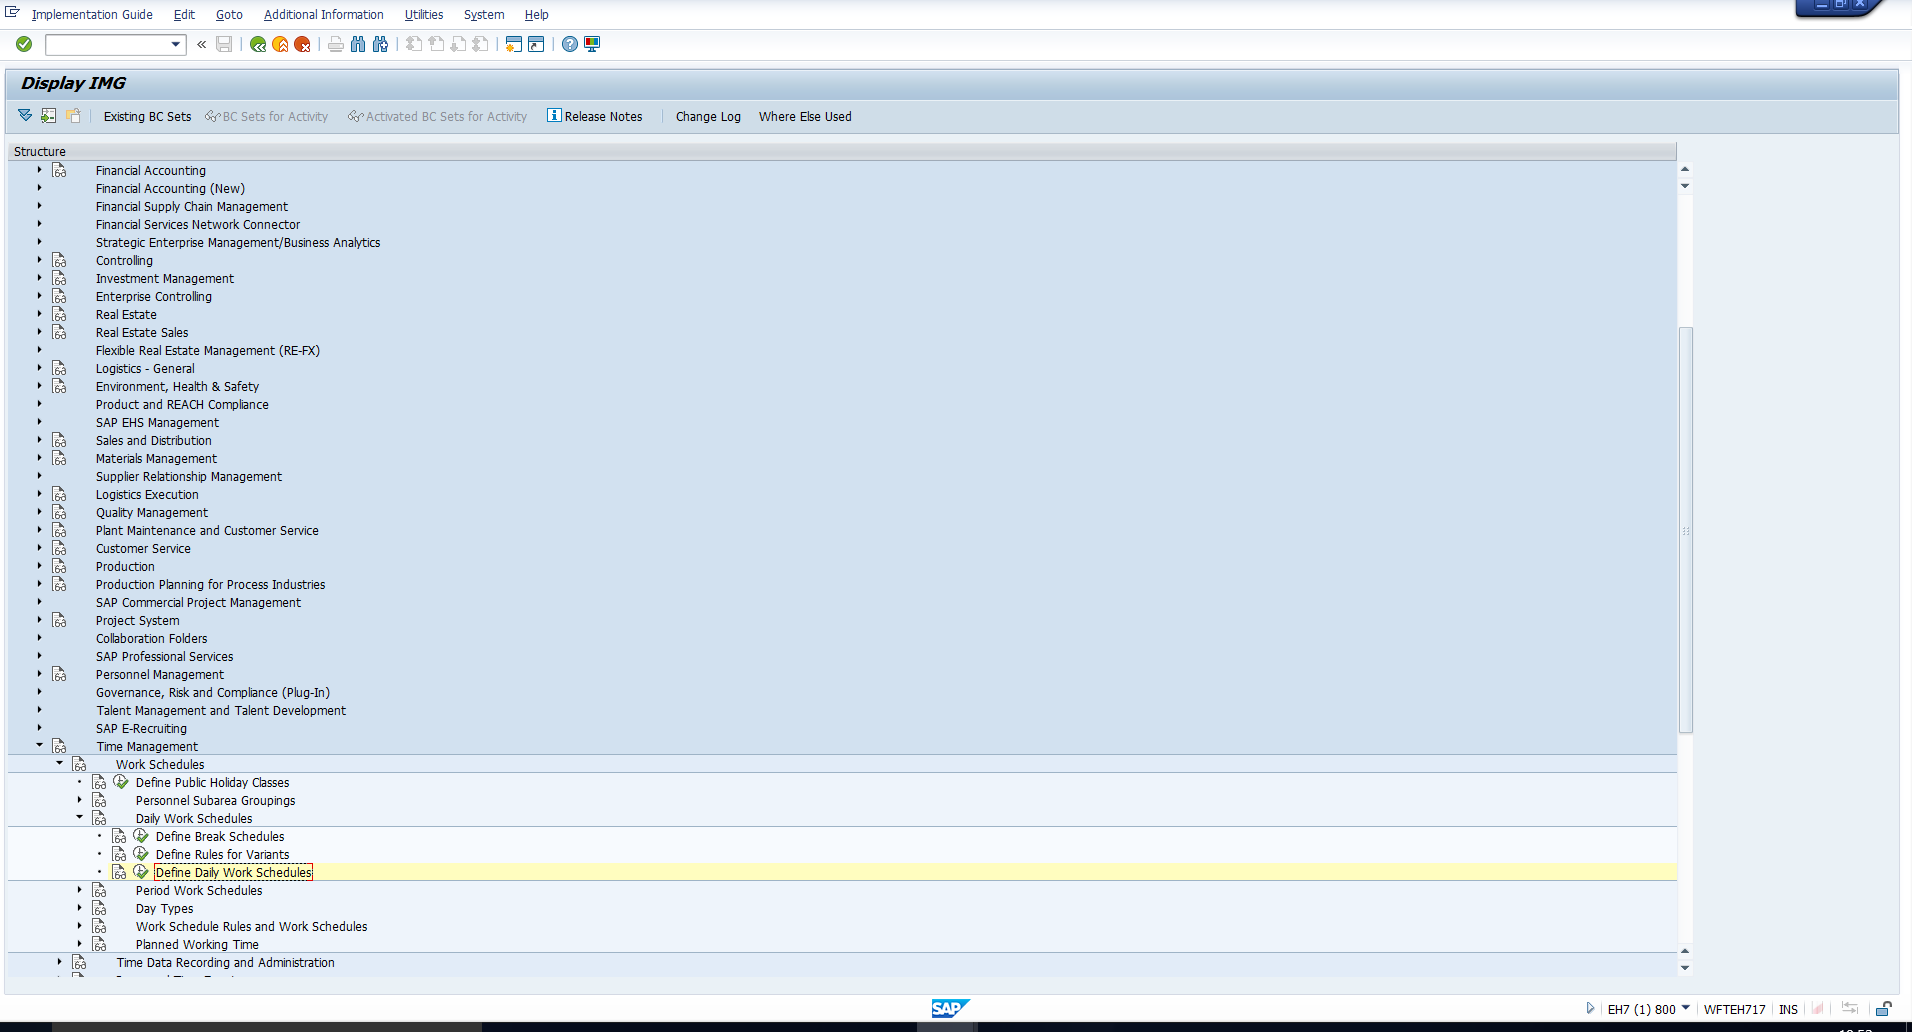
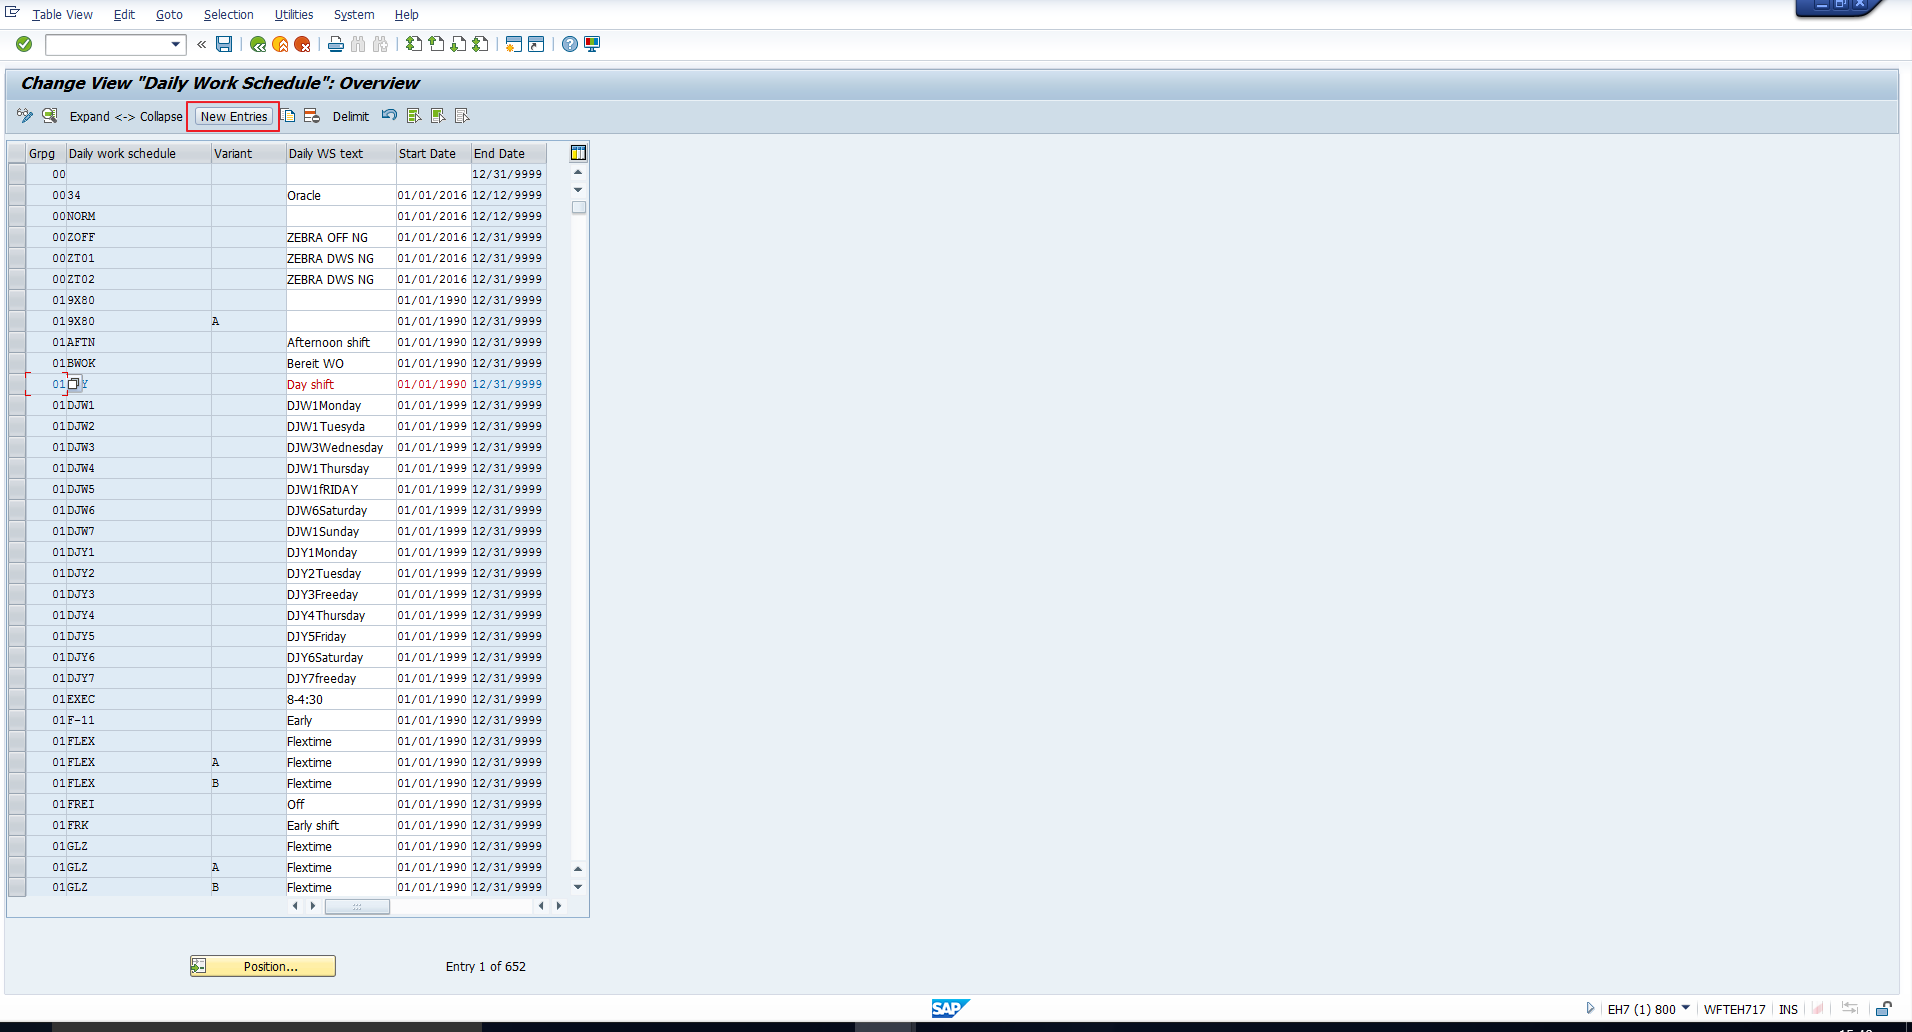
When you execute the highlighted activity, the screen shown in Figure 2 will follow.

This view is simply an overview of SAP Daily Work Schedules that have already been configured in the system. Each row corresponds to one SAP Daily Work Schedule. To view the detailed configuration of any of the Daily Work Schedules, select the corresponding row and click on the Details icon. This icon has been highlighted in Figure 3.
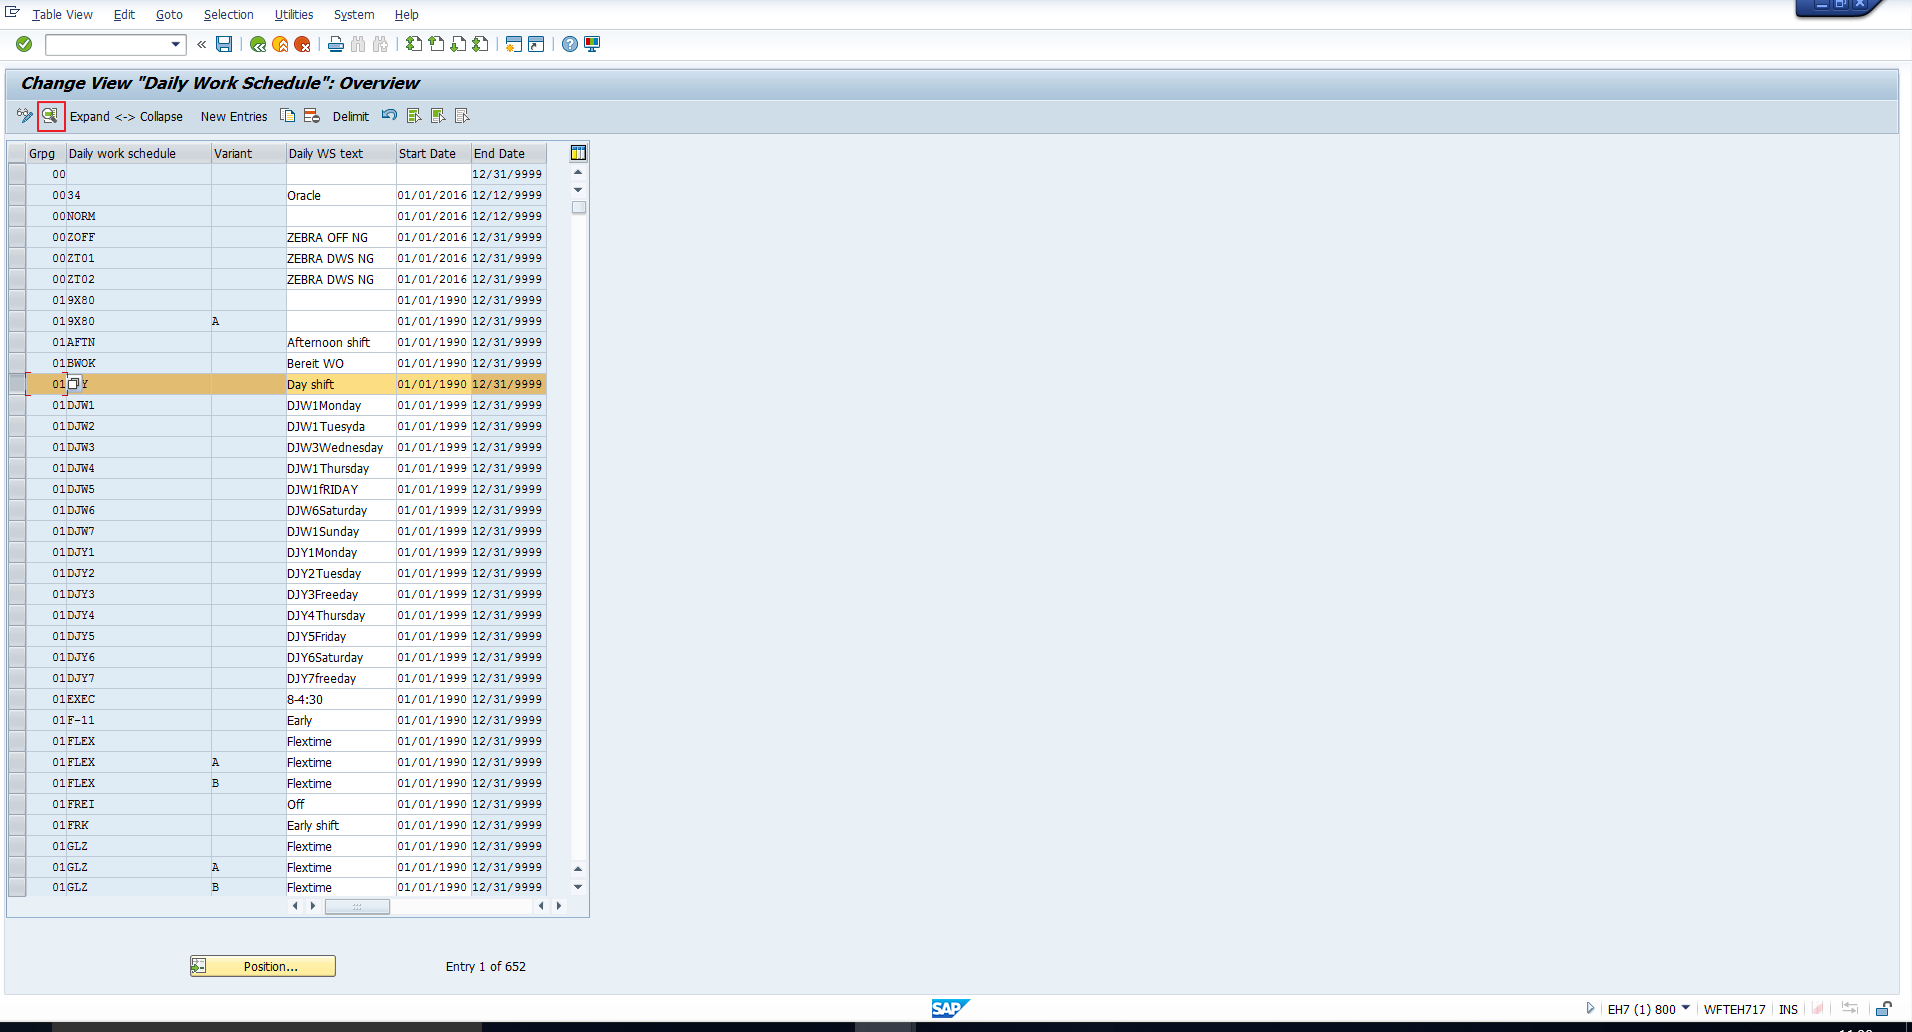
This will take you to the screen in Figure 4. In this screenshot, you can see the information that must be specified for a Daily Work Schedule.
Below, we will explain the significance of the main fields:
DWS grouping – You can see this field highlighted in Figure 4. This is the Personnel Subarea grouping for Daily Work Schedules. This concept has already been explained in the tutorial SAP Break Schedule Configuration, hence we will not get into it again.
Daily work schedule key and text – These fields have also been highlighted in Figure 4. Here you specify a unique key to identify the Daily Work Schedule. The length can be of maximum 4 characters. There is also a field where you should enter a meaningful Daily Work Schedule text, which cannot exceed 15 characters.
Planned working hours – You can see this field in Figure 4. It is located within the Planned Working Hours section, which has been highlighted. This field basically specifies the duration of an employee’s daily working time. The system calculates this by first computing the interval between the planned start time and the planned end time, then reducing this value by the unpaid break time. If the breaks are paid breaks, the planned working hours will be equal to the difference between the planned start time and the planned end time.
For example, if the planned start time is 9 am and the planned end time is 6 pm, and there is a paid lunch break from 1 pm to 2 pm, then the Planned Working hours will be 9 hours. However, if the lunch break from 1 pm to 2 pm is unpaid, then the Planned Working hours will be 8 hours.
No planned working hrs. – You can see this field within the Planned Working Hours section in Figure 4. This field should be checked to indicate zero working hours, which basically implies a day off.
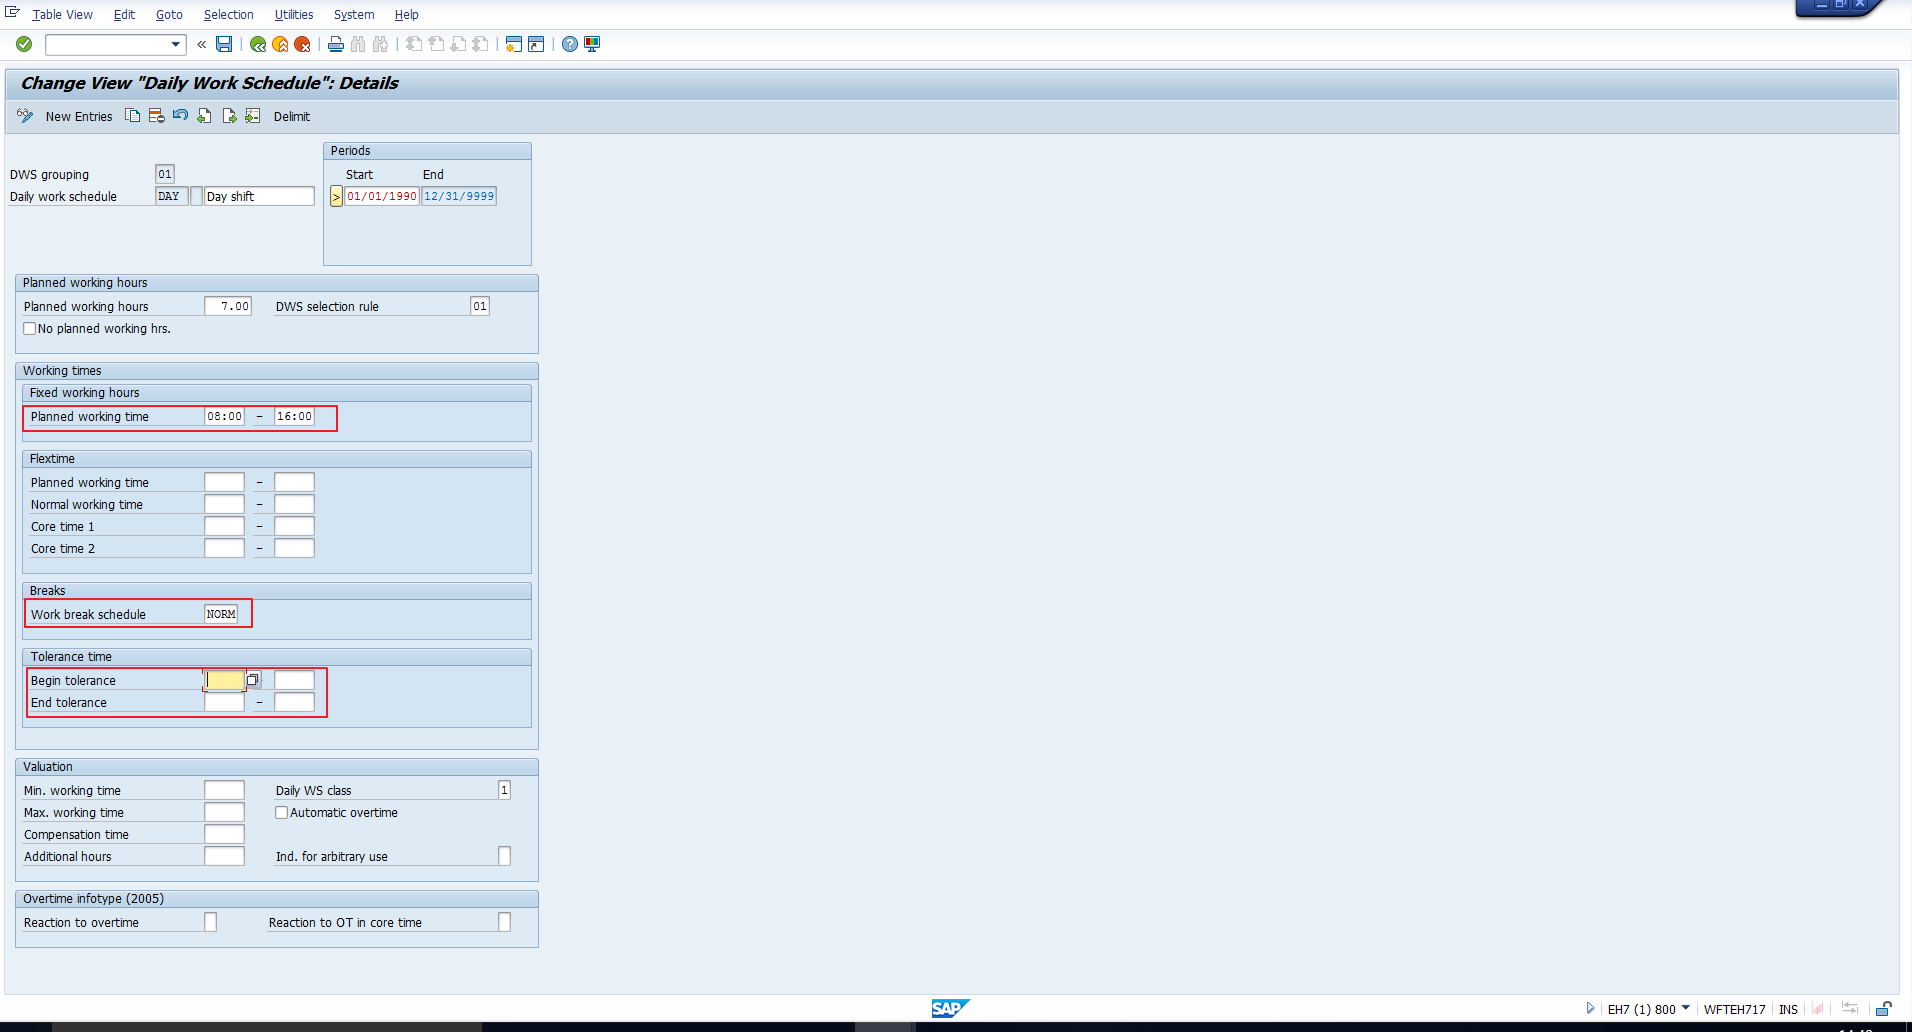
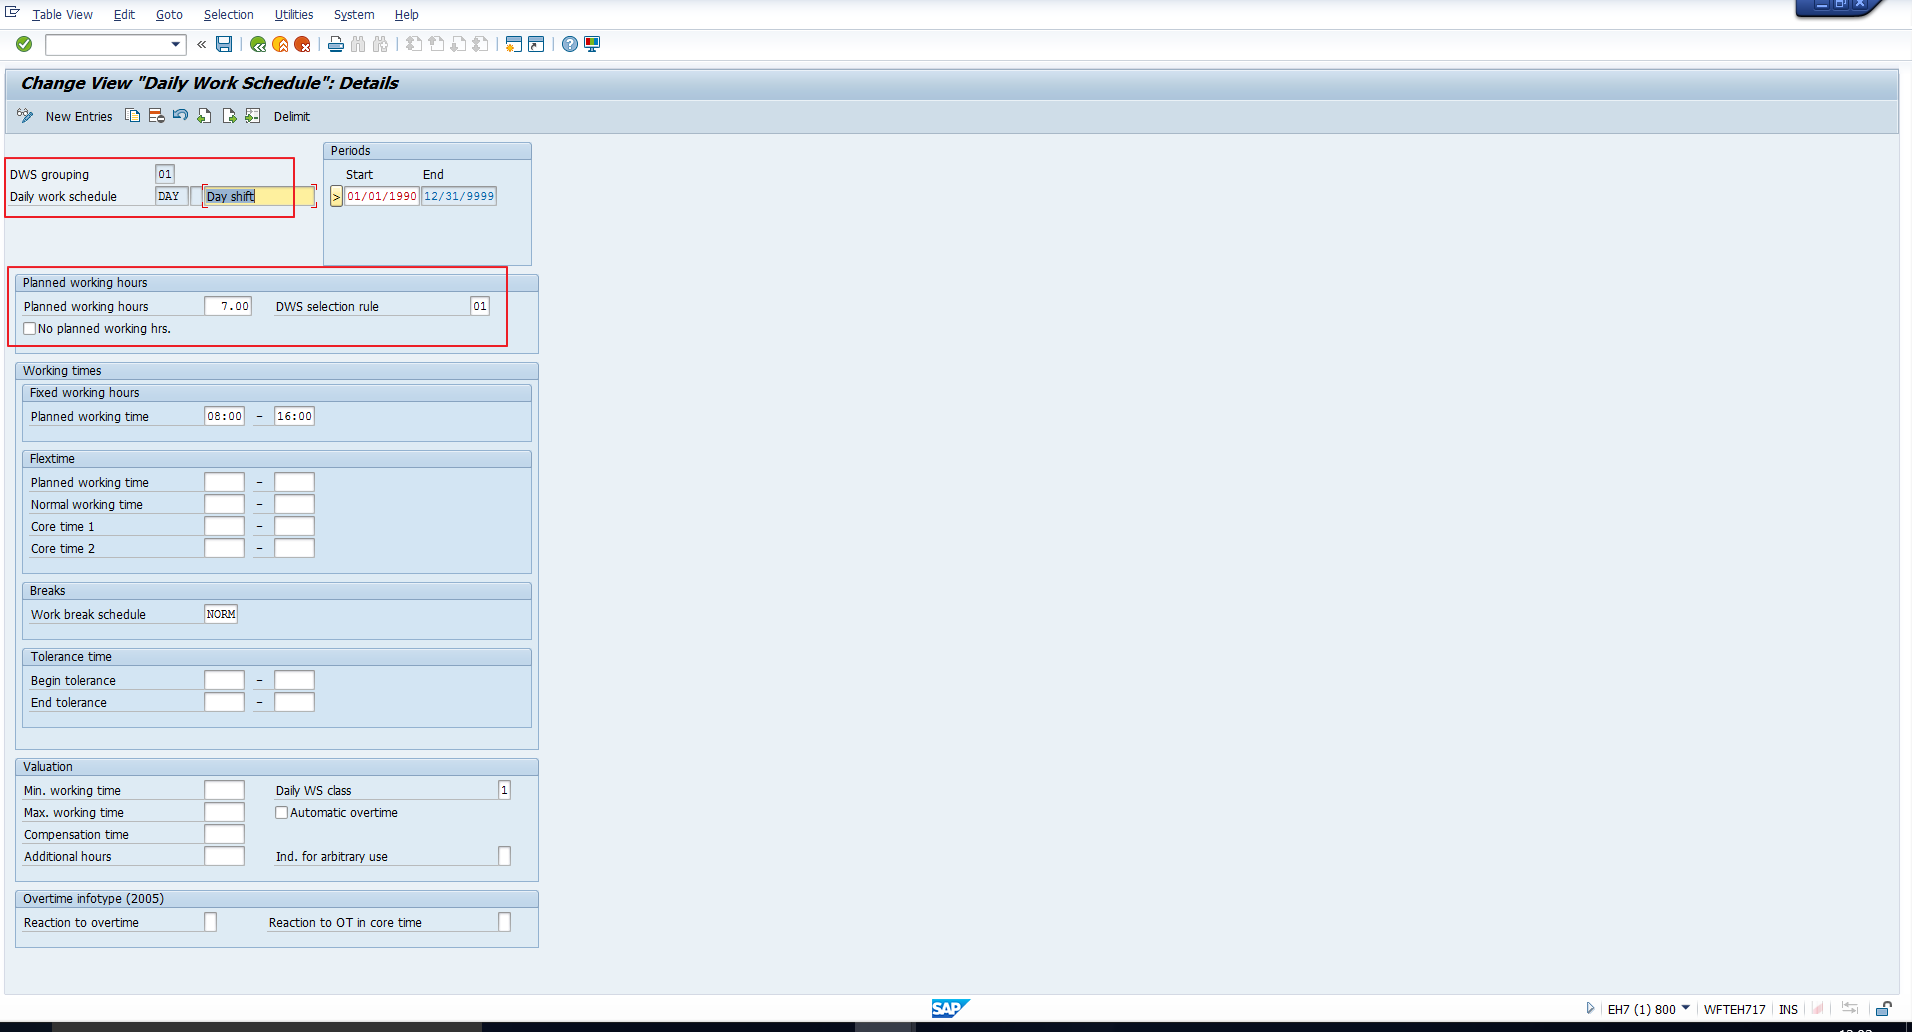
Planned working time – You can see this interval highlighted in the Working Times section in Figure 5. These two fields specify the planned start time of work and the planned end time of work.
Work break schedule – Assign the required Break schedule in this field. We have explained how to configure a Break Schedule in the tutorial SAP Break Schedule Configuration. Once a suitable break schedule has been configured according to the organization’s Time management policies, it must be assigned in this field so that the break can be incorporated into the DWS.
Begin tolerance (interval) and End tolerance (interval) – You can see these two sets of fields highlighted in Figure 5. Tolerance times define the period within which a clock-in or clock-out should be rounded up or down. Hence clock-in or clock-out times which are shortly before/after the start or end of planned working time will not be treated as a working time violation or as overtime.

Daily WS class – You can see this field highlighted in Figure 6. The daily work schedule class is a one- digit feature used to further define a daily work schedule. The daily work schedule class allows an additional evaluation of a daily work schedule. Its significance will become clearer in subsequent tutorials of SAP Time Management.
Example
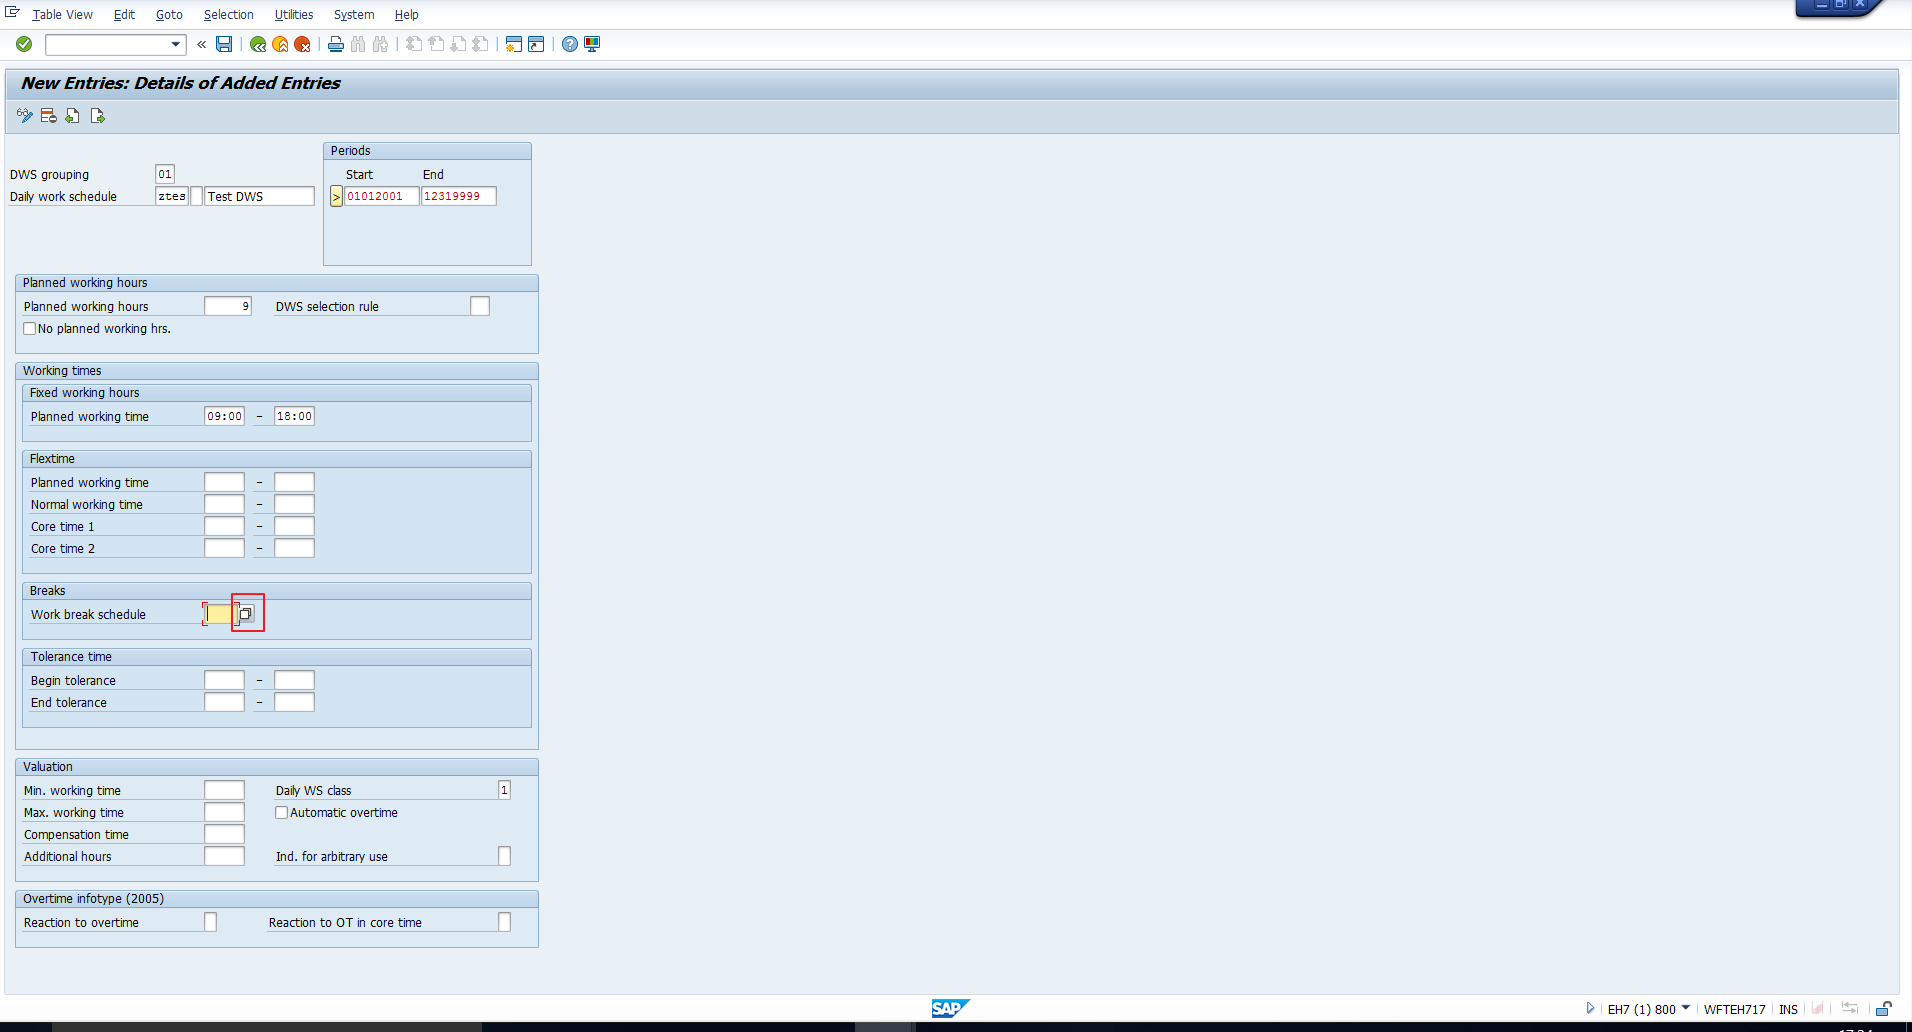
Let us create a new SAP Daily Work Schedule with the below specifications:
Planned Start time: 09:00
Planned End time: 18:00
Planned Daily Working hours: 9
Break Schedule: Paid lunch break from 1 pm to 1:45 pm.
To create a new Daily Work Schedule, click on the New Entries button that has been highlighted in Figure 7.
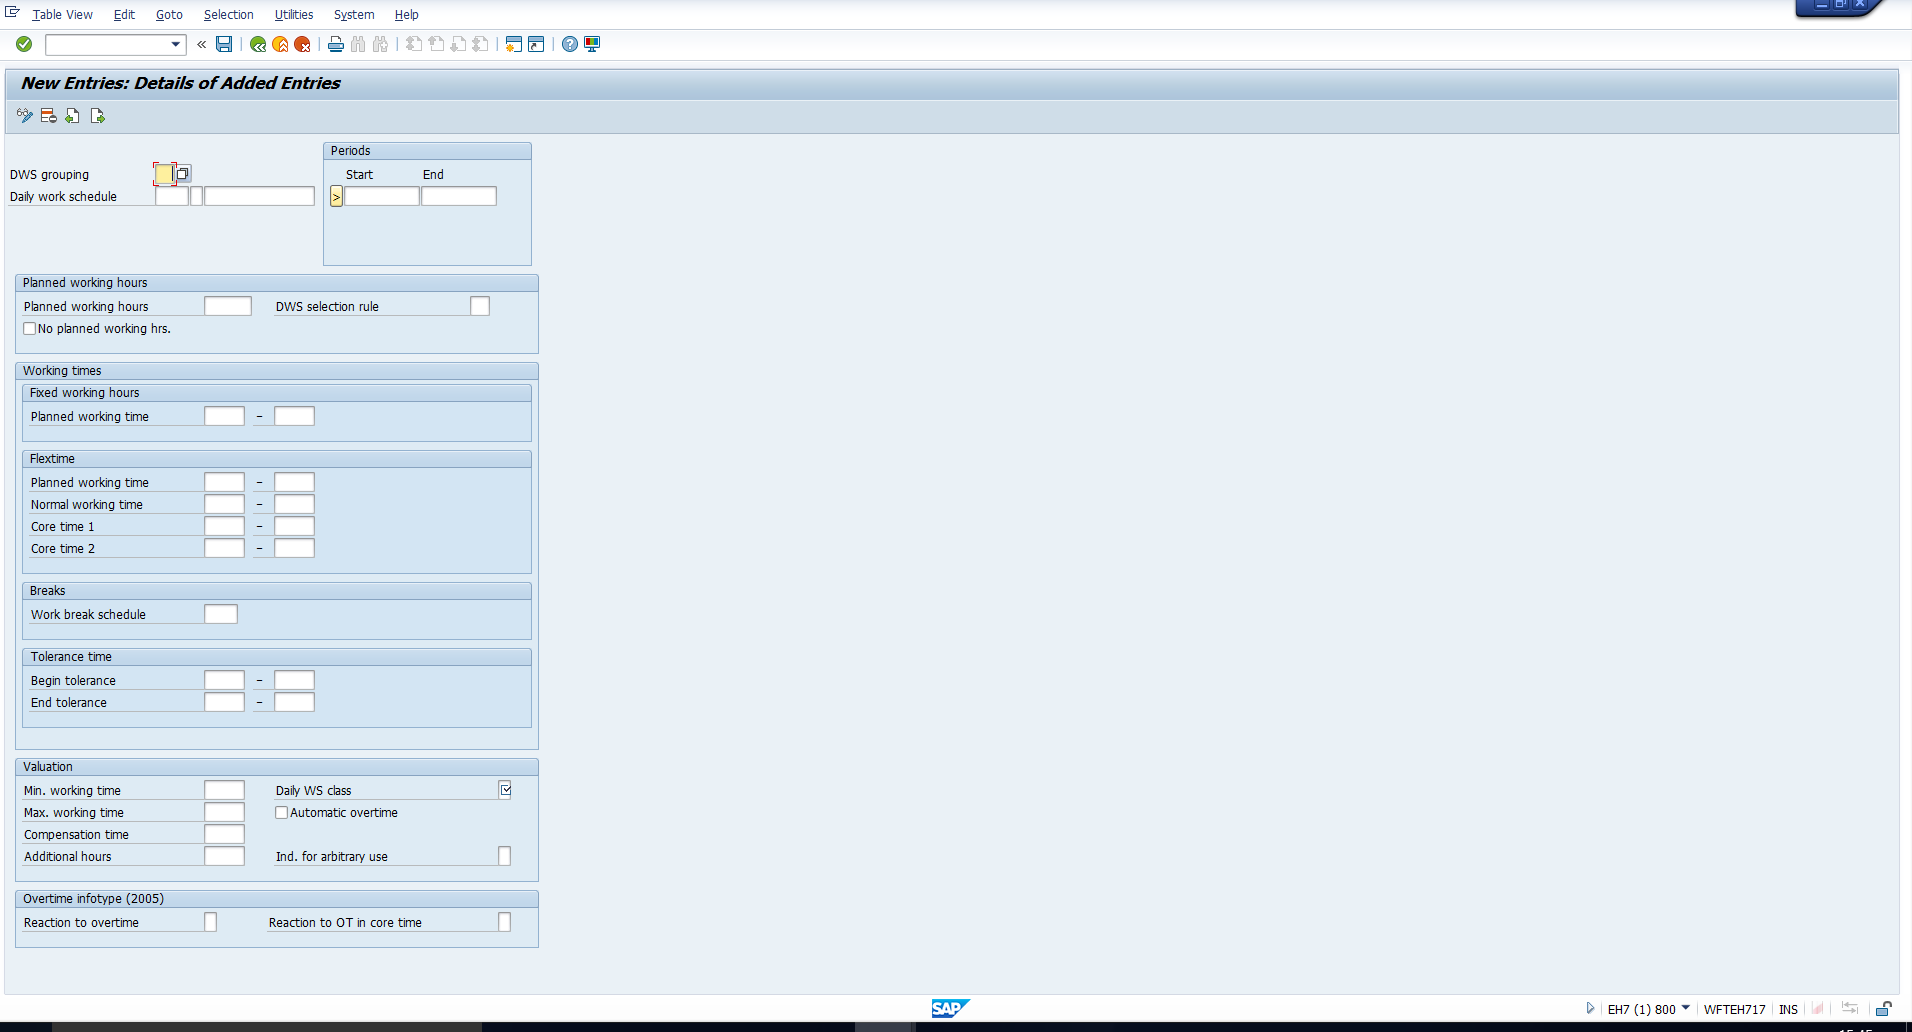
This will take you to the screen in Figure 8.
Enter the details as shown in Figure 9.

We can assign the break schedule ZFIX that we had created in the tutorial on SAP Break Schedule Configuration. To search for this break schedule, click on the icon that has been highlighted in Figure 10.
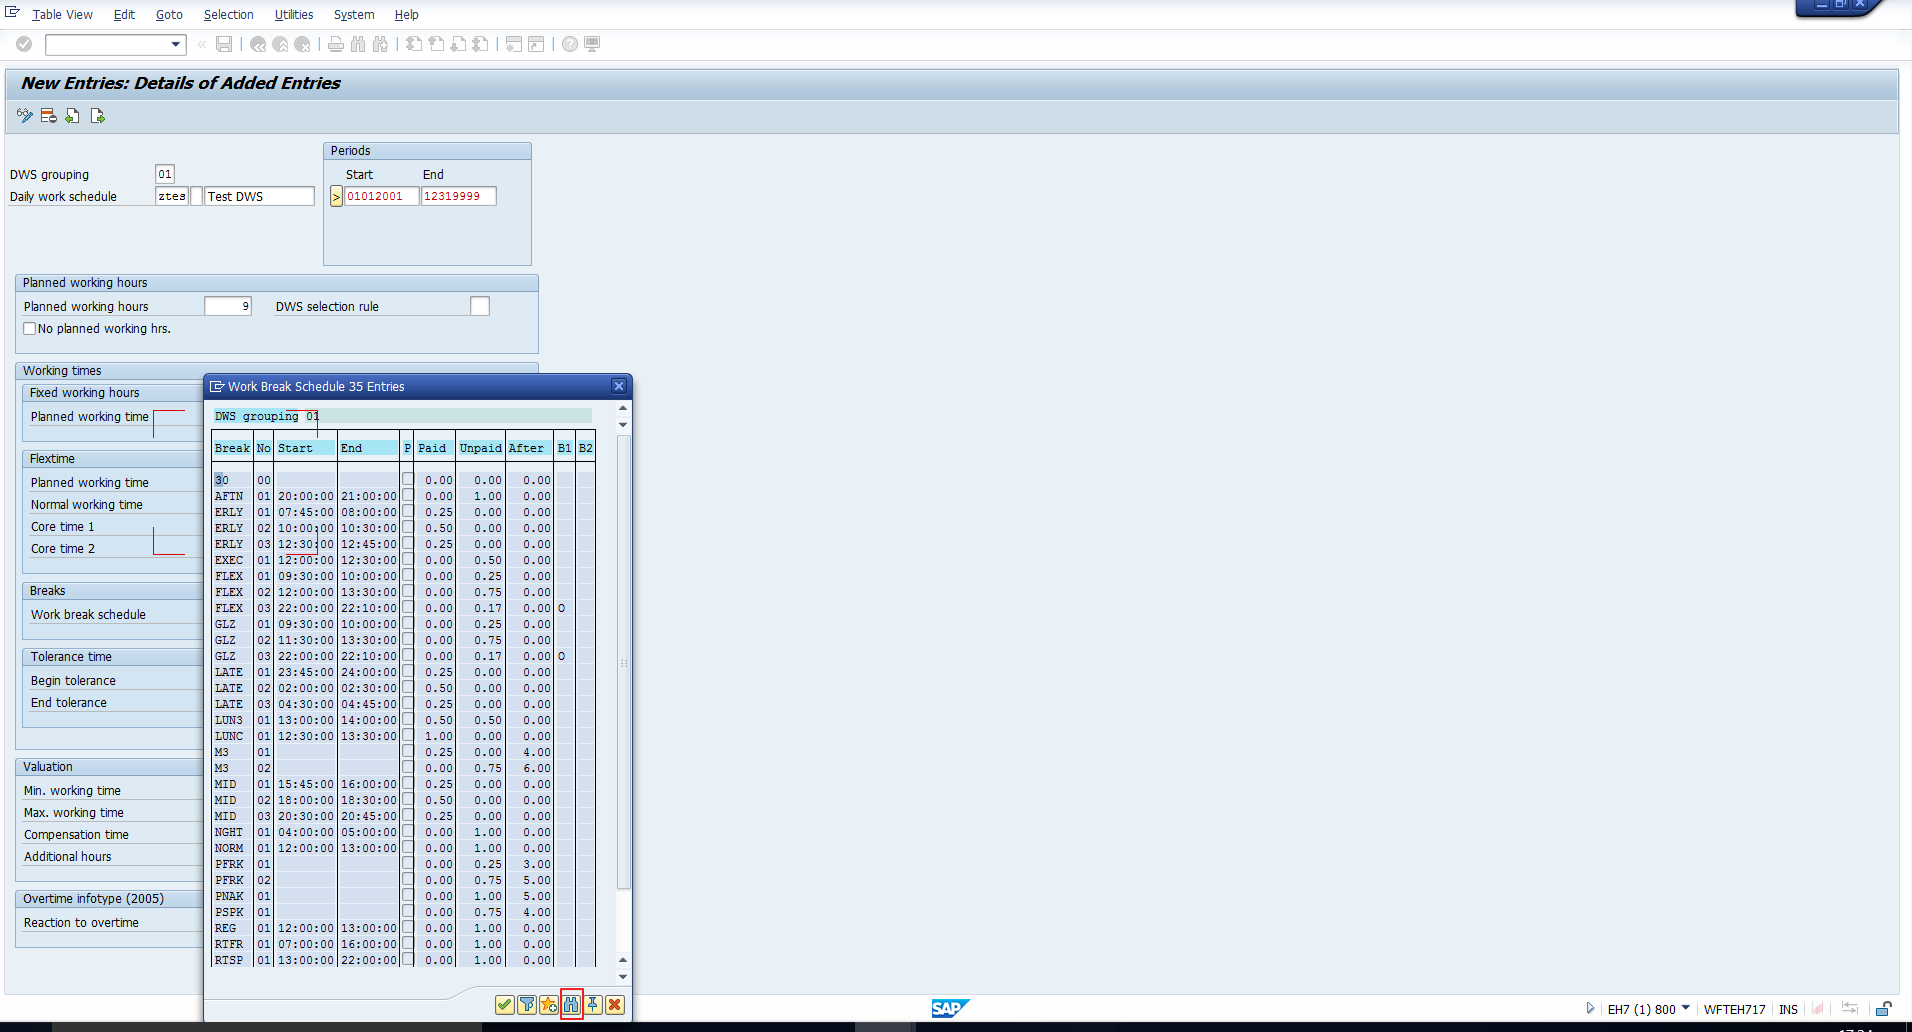
The system will then display the entire list of break schedules. To search for ZFIX, click on the icon that has been highlighted in Figure 11.
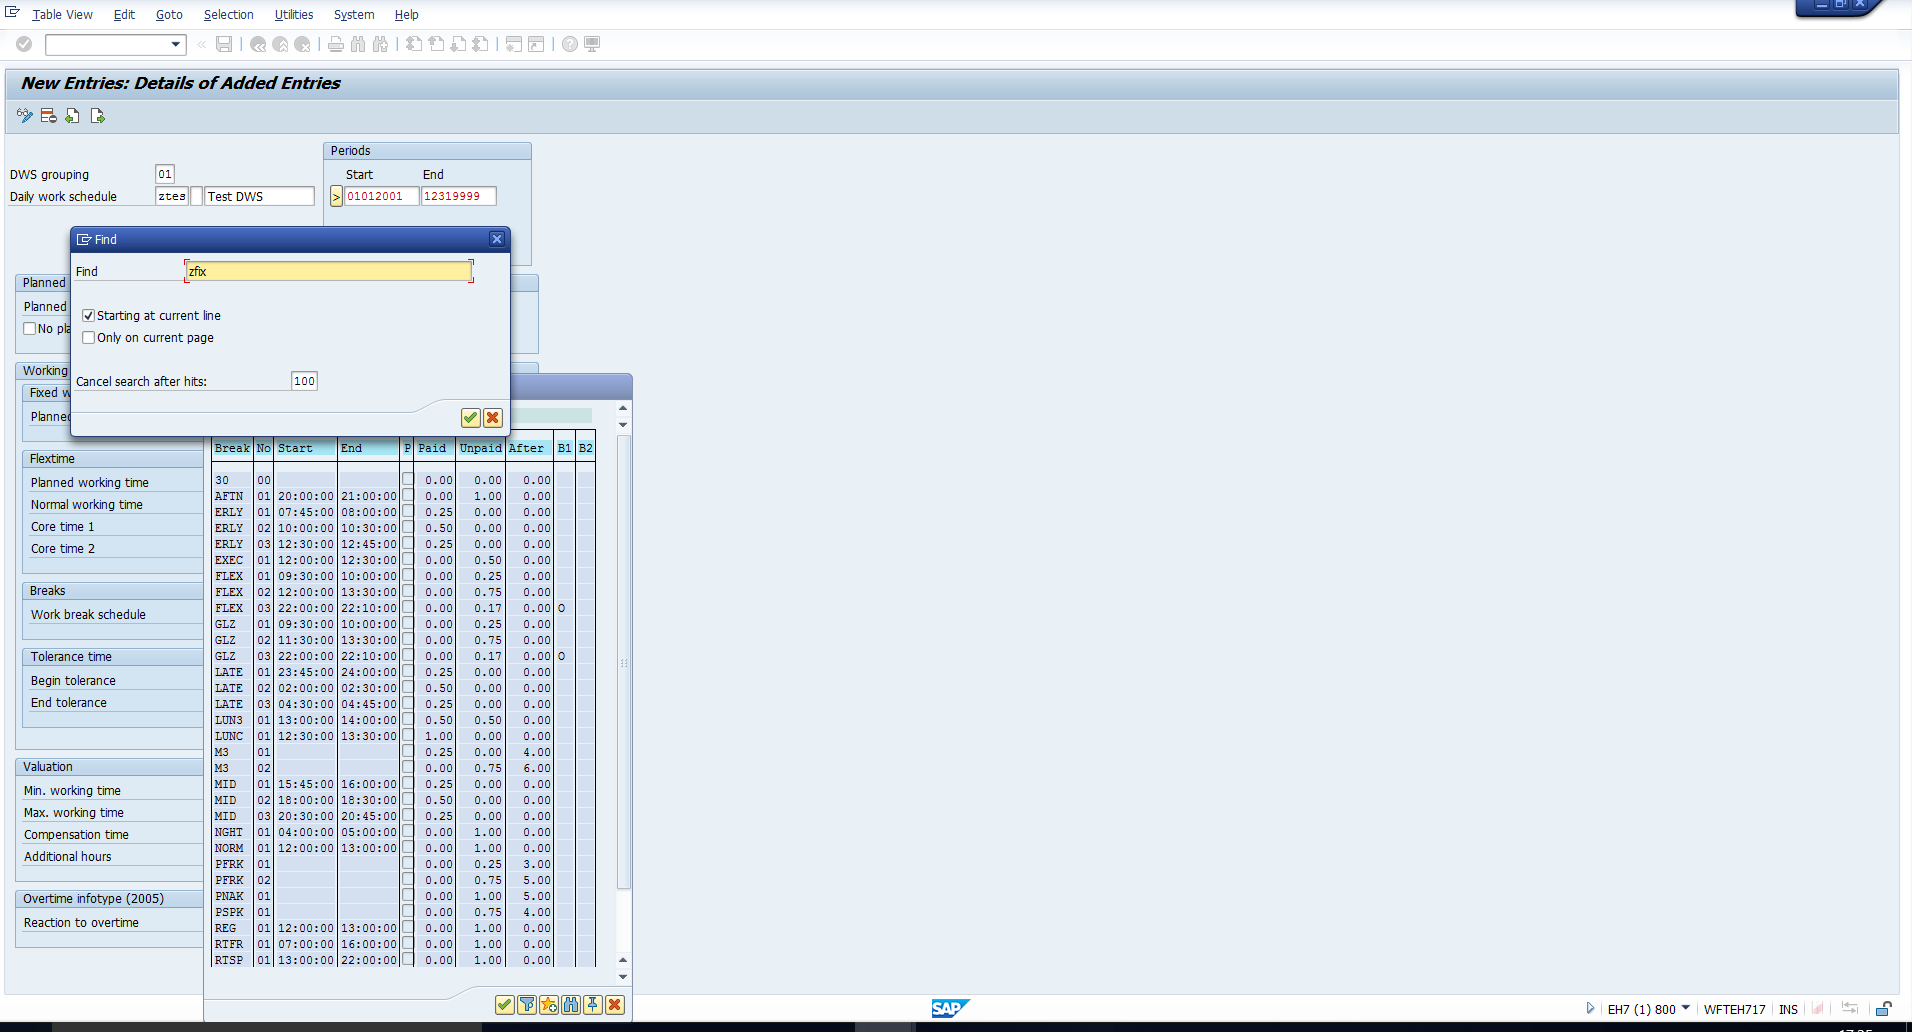
You will then see the Find window in which you can enter the value to be searched for. This has been illustrated in Figure 12. Then hit on Enter button.
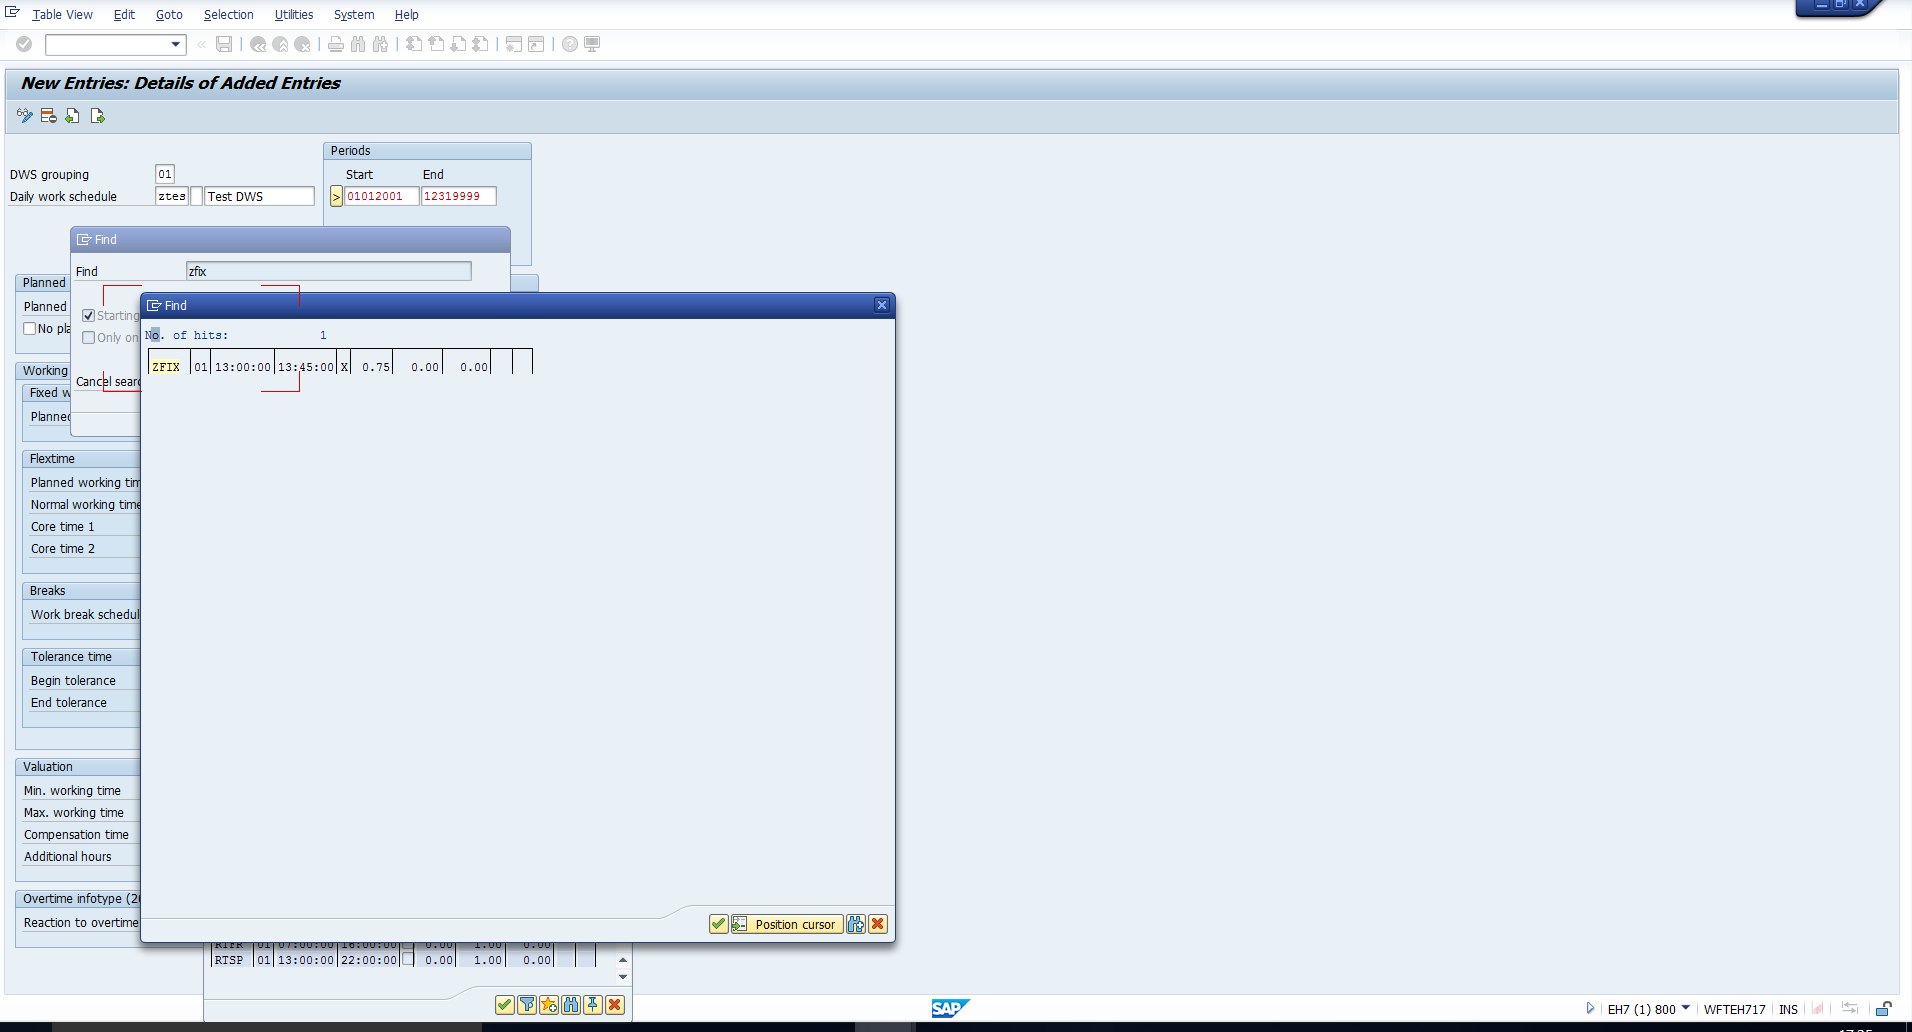
You will then see the search results with the ZFIX break schedule, as can be seen in Figure 13.
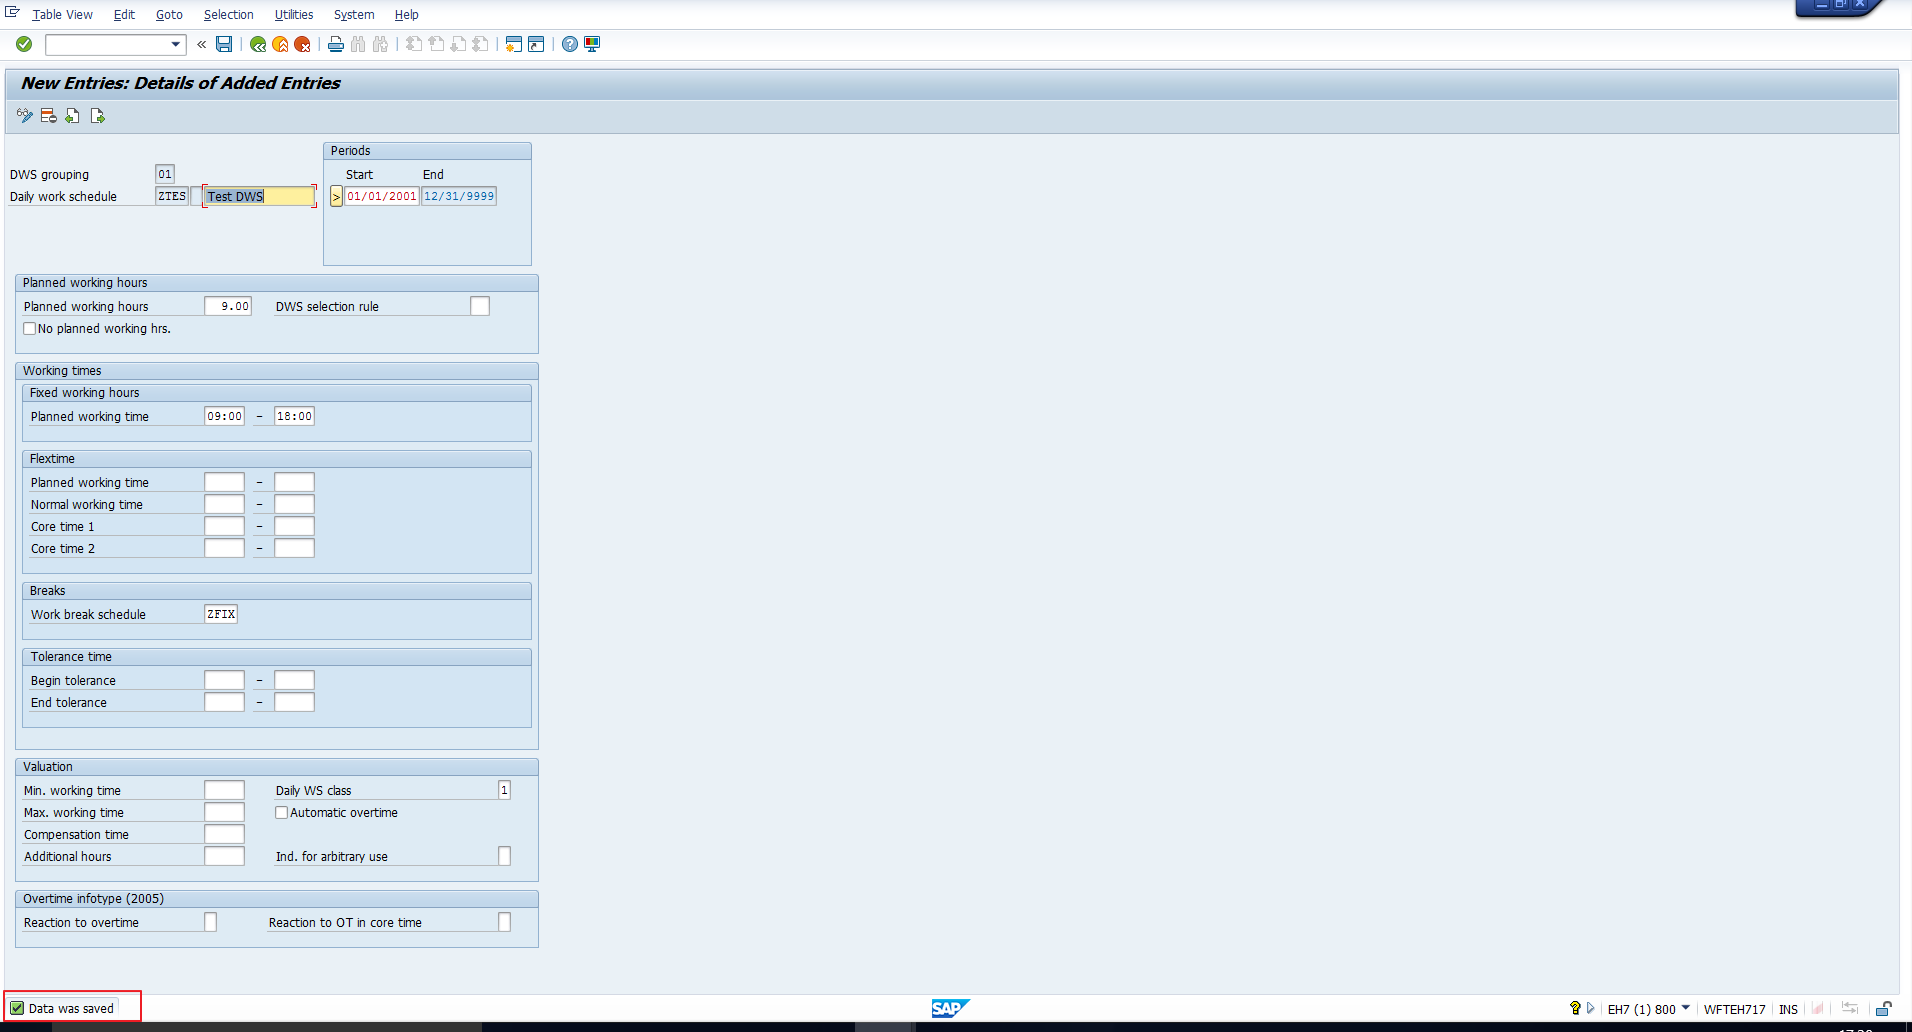
Select this break schedule so that it gets assigned, as you can see in Figure 14. Then, save the Daily Work Schedule by clicking on the Save icon.

You will then see the message “Data was saved” as shown in Figure 15.
—
Did you like this tutorial? Have any questions or comments? We would love to hear your feedback in the comments section below. It’d be a big help for us, and hopefully it’s something we can address for you in improvement of our free SAP HR tutorials.
Navigation Links
Go to next lesson: SAP Period Work Schedule and Day Types
Go to previous lesson: SAP Break Schedules Configuration
Go to overview of the course: SAP HR Training
Could you also please include what is the importance of DWS Selection rule check box and how this works with some examples in your article would help us.
Can some one please explain about the Daily work schedule selection rule and it’s role.