
 Welcome to the tutorial on SAP infotype header configuration. We will begin the tutorial by defining the infotype header. We will then proceed to explain how to customize the header for individual infotypes. This tutorial is part of our free SAP HCM course.
SAP Infotype Header
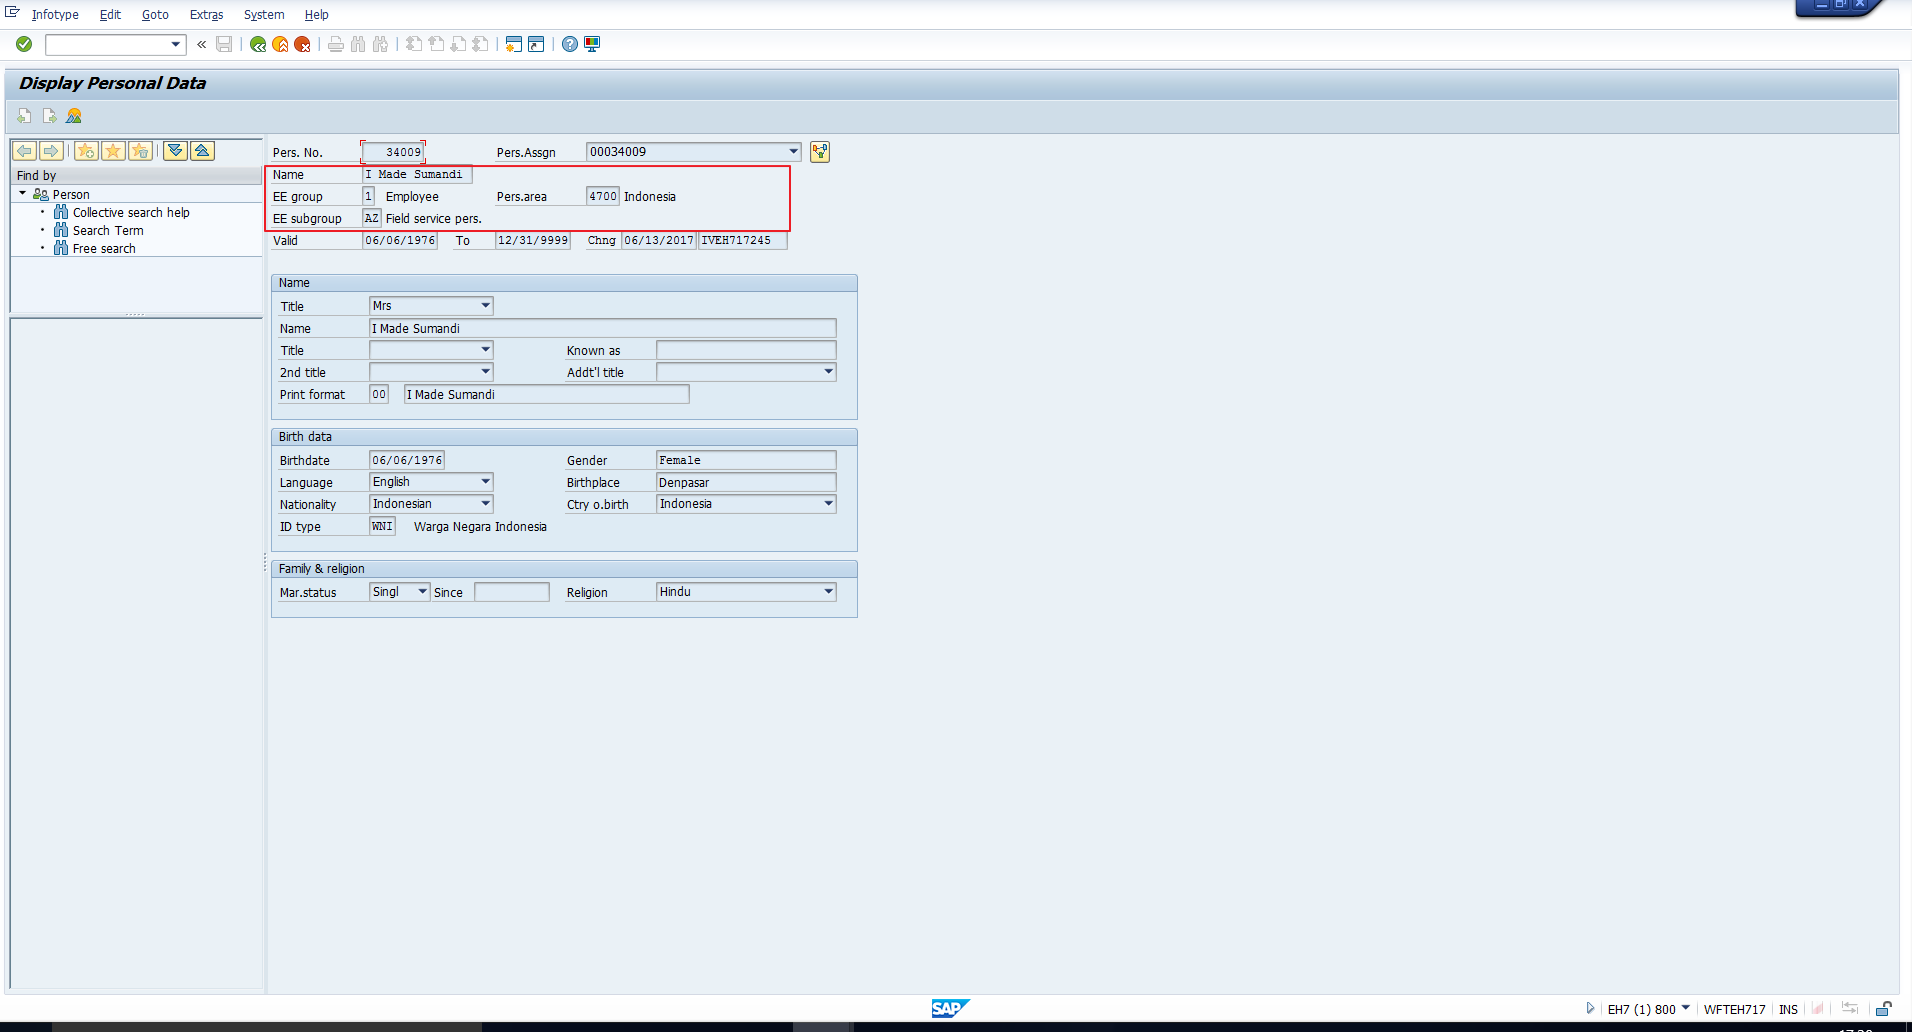
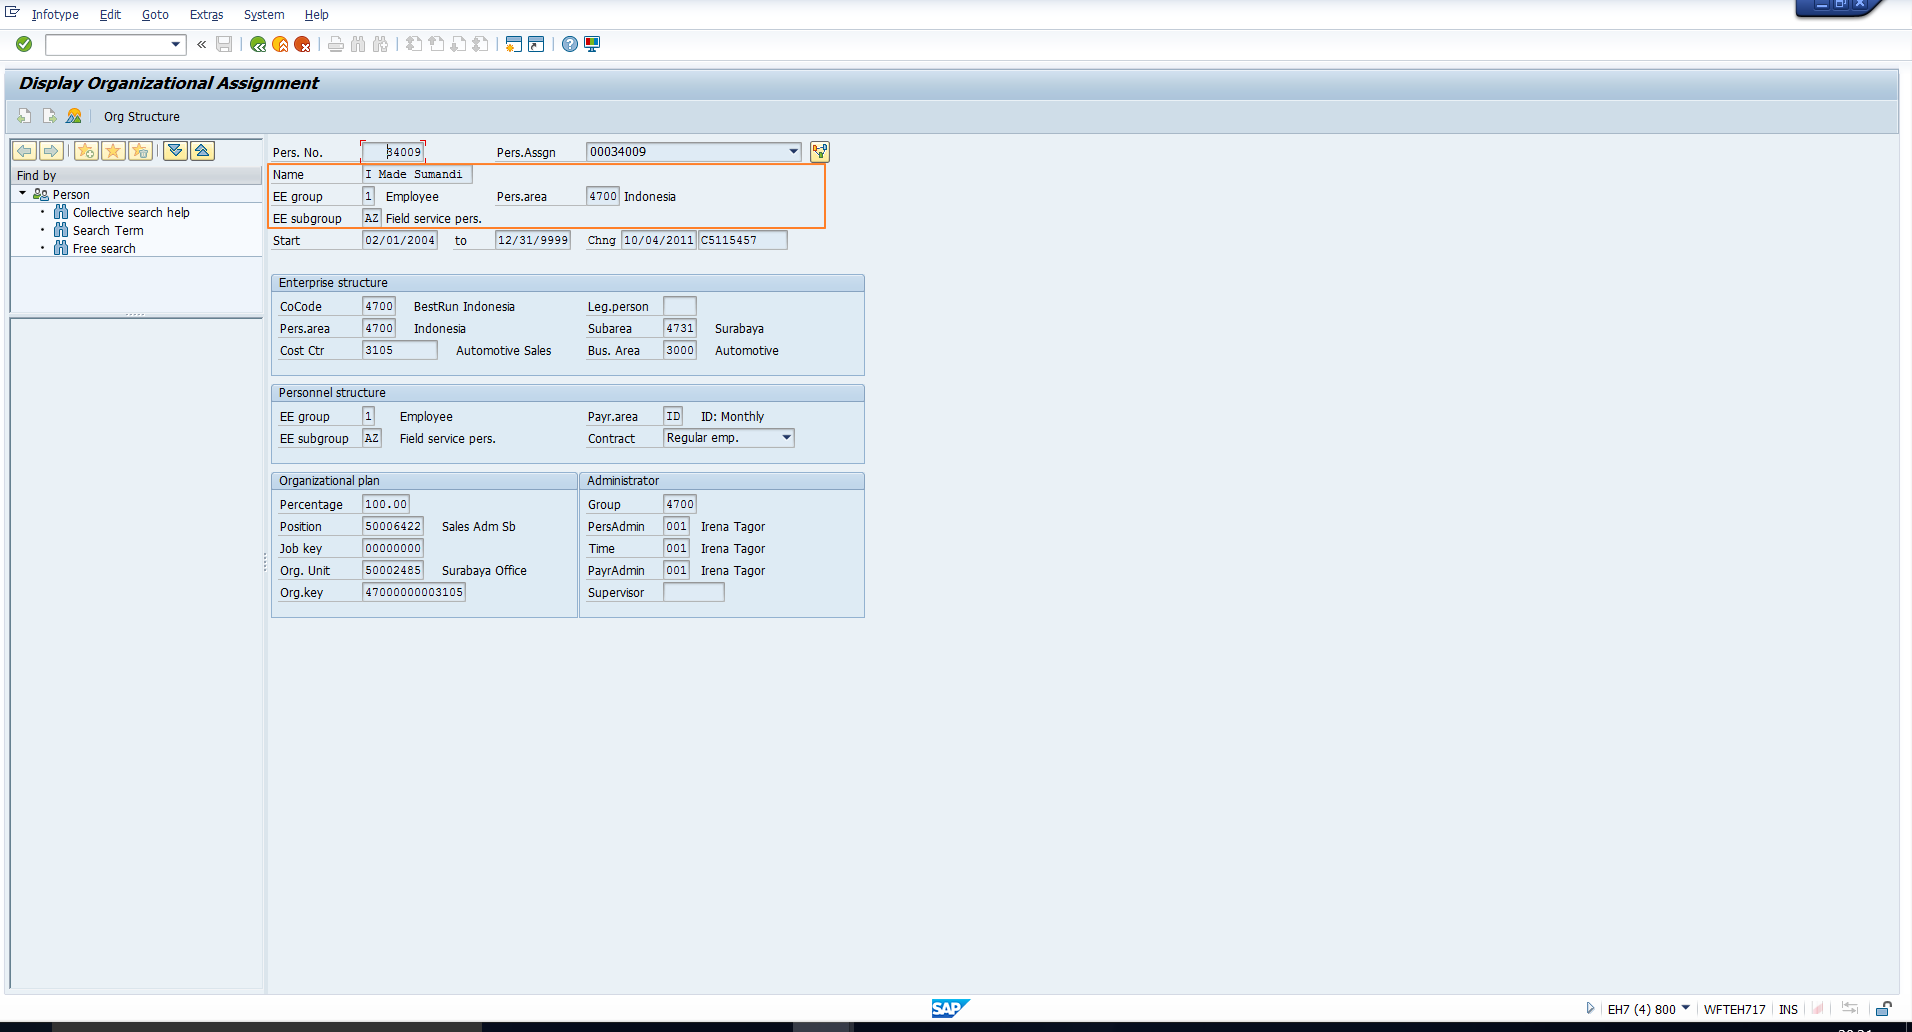
When you display or maintain any infotype using transaction codes PA20 or PA30, the header of the infotype is basically the first three lines of the screen, excluding the top line on which the personnel number is displayed. For example, the personal data infotype header is highlighted below:
SAP Infotype Header Assignment
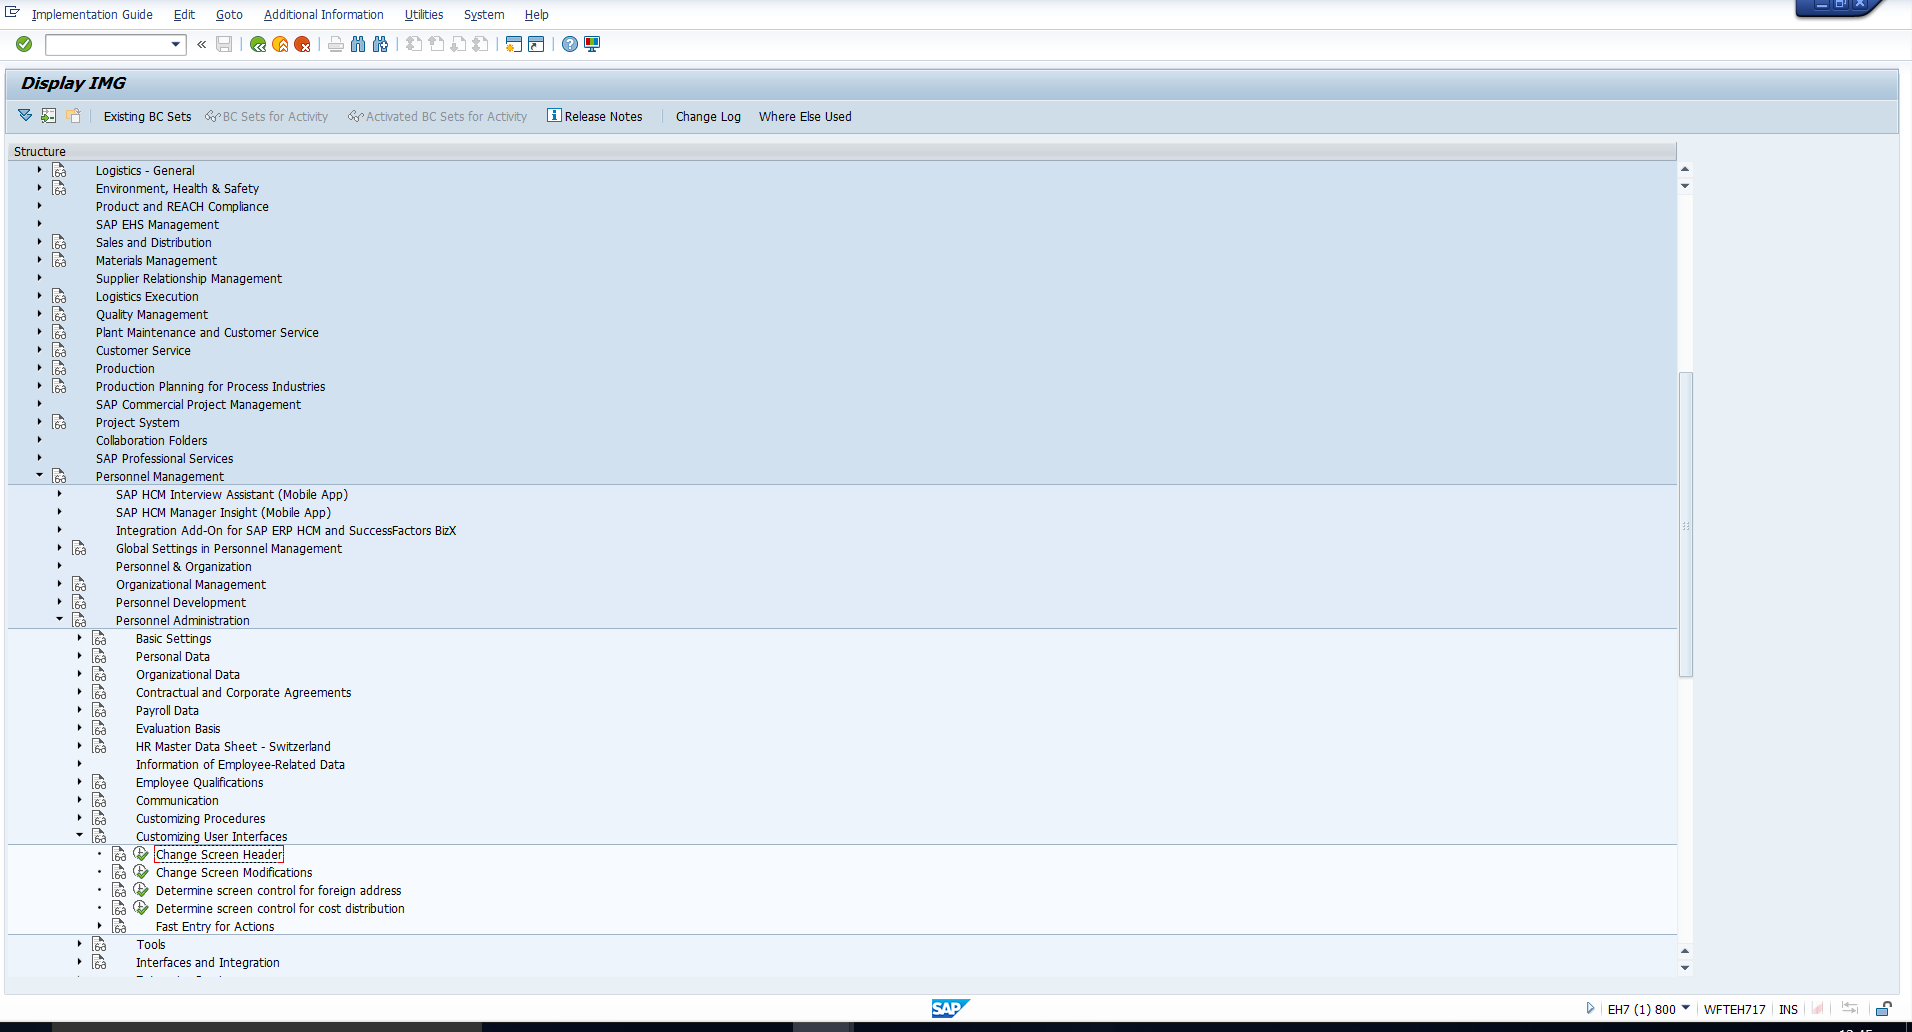
All the SAP infotype header configuration steps are done via the customizing path below in transaction code SPRO:
Personnel Management – Personnel Administration – Customizing User Interfaces – Change Screen header
This path is shown below:
Executing this activity takes you to the below activity list:
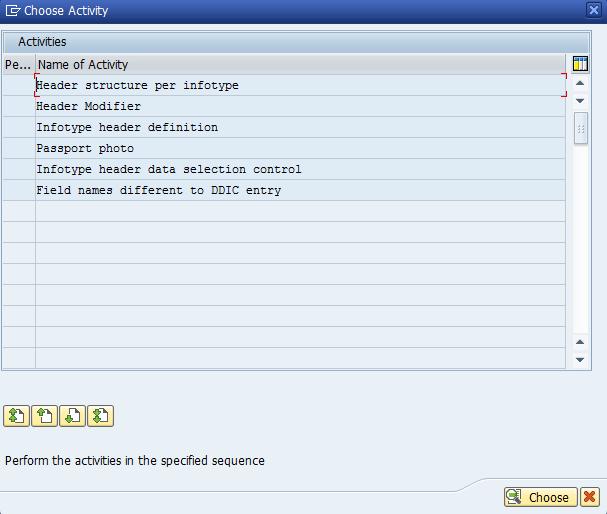
Three of these SAP infotype header configuration activities must be completed to control the assignment of the infotype header:
- Header structure per infotype
- Header Modifier
- Infotype header definition
We will now discuss each in further detail.
Header Structure Per Infotype
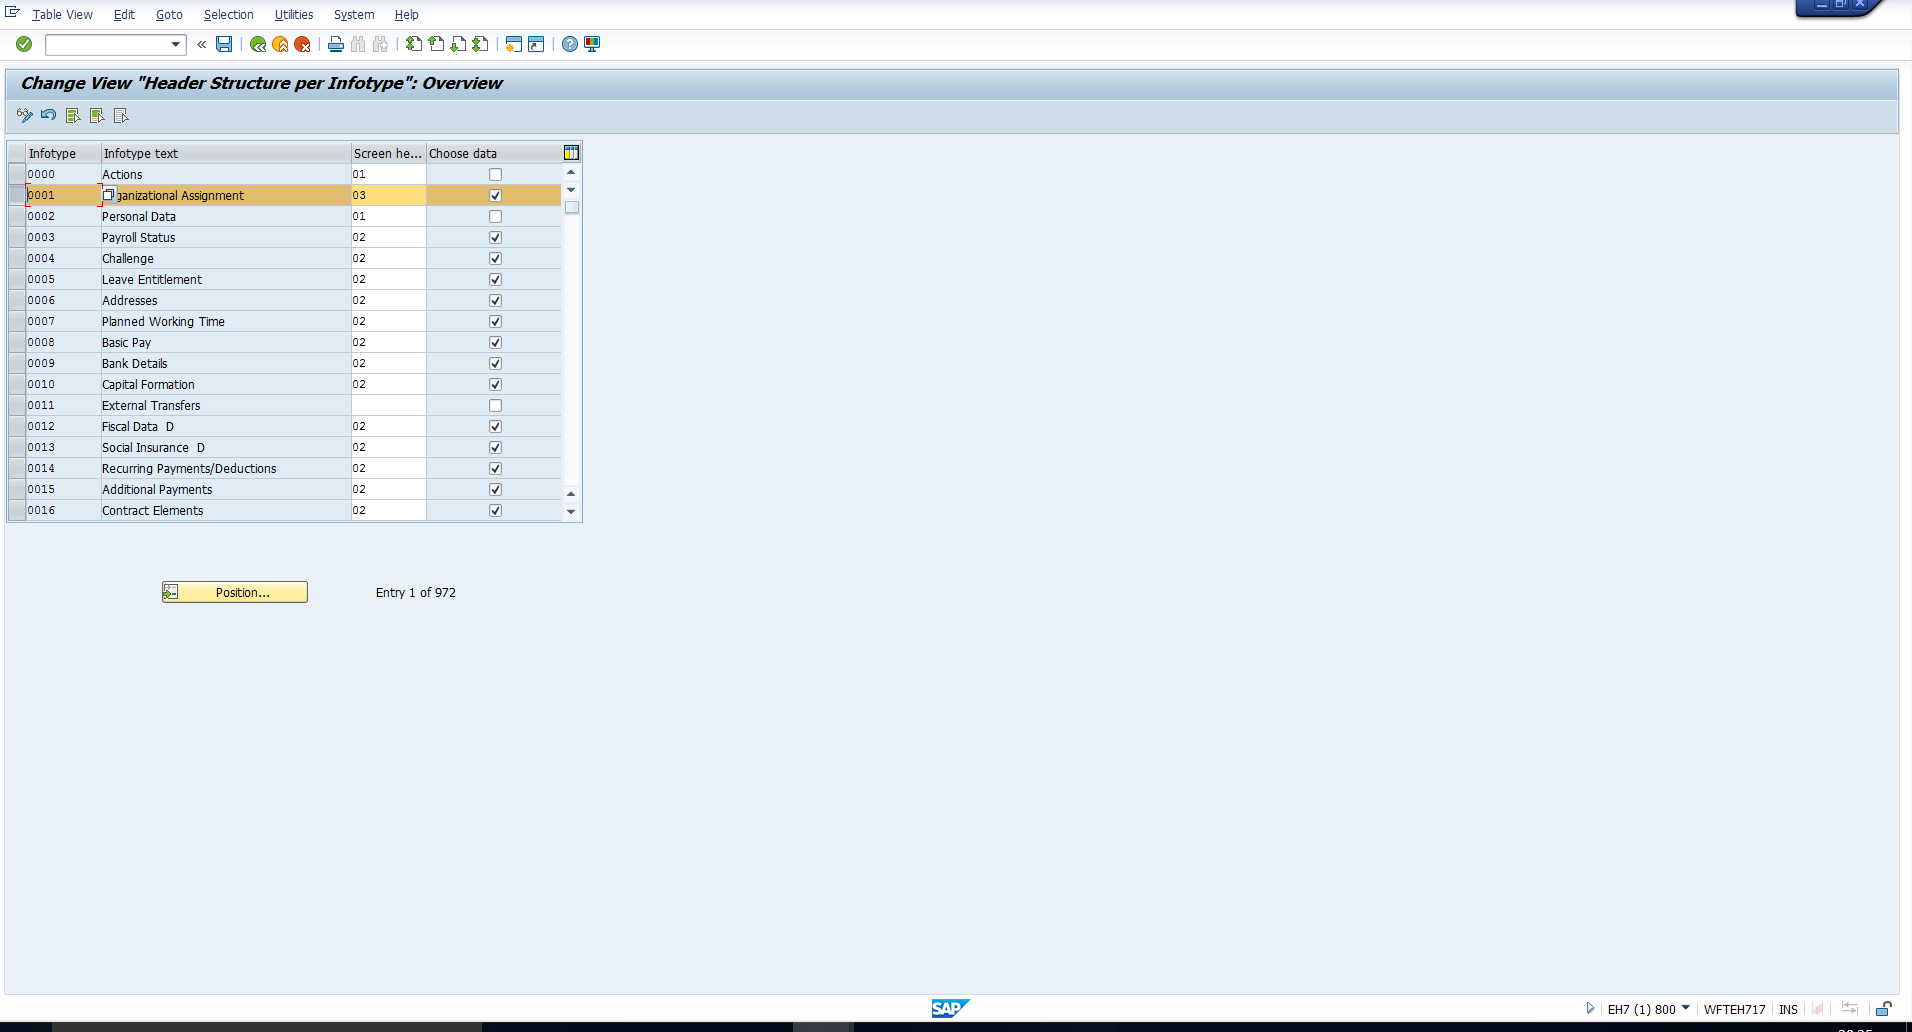
Double clicking on the first of the SAP infotype header configuration activities, you will view the header structure per infotype. Please note that you do not need to make any changes to this table. However, you need to refer to the entries in this table to understand what to edit in subsequent tables. Here, every infotype has been pre-assigned to a screen header, represented by a two-character ID. You can see this assignment highlighted below:
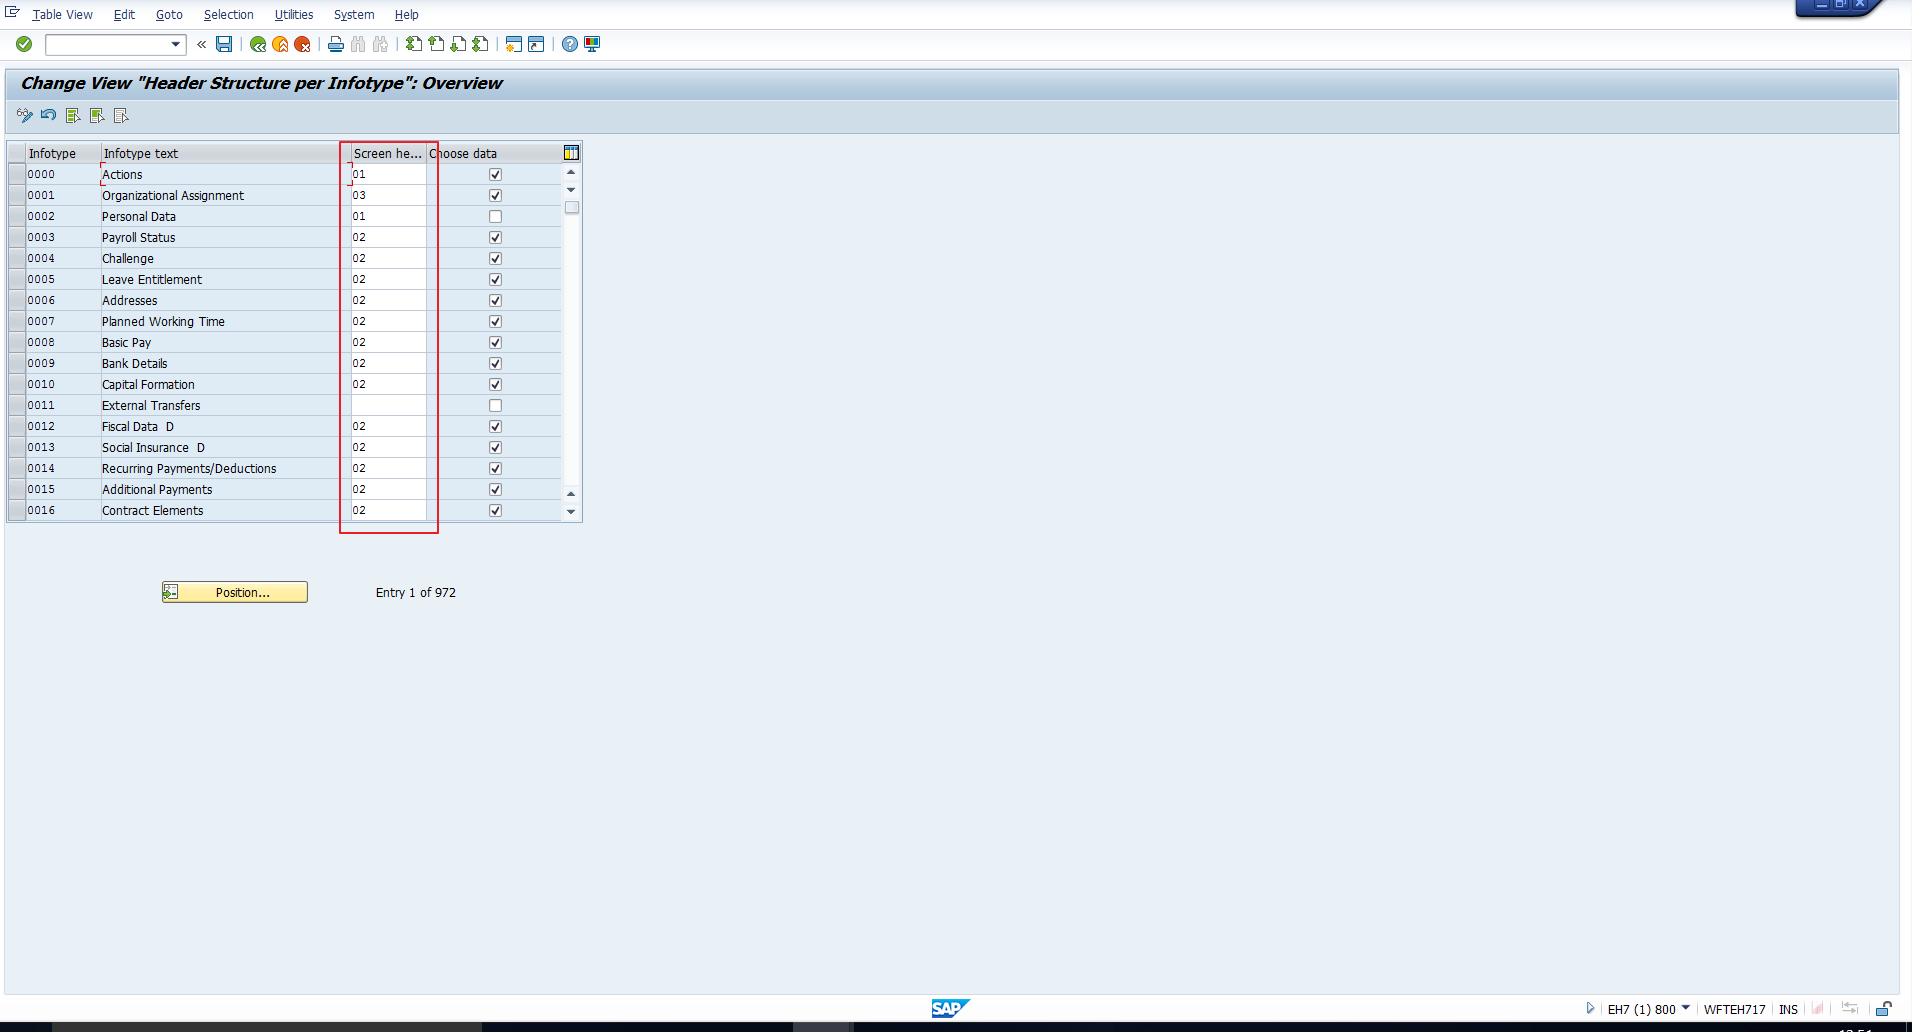
For example, infotype 0001 – Organizational Assignment has been assigned the header ID 03. infotype 0002 – Personal Data has been assigned the header ID 01. Likewise, every infotype has been assigned some header ID in this table.
The next column in this table is the Choose data indicator. This indicator is used to determine which data should be selected for display on the header based on the selection period.
- If the indicator is selected, the data that is valid on the start date of the currently displayed infotype is selected.
- If the indicator is not selected, the data that is valid on the system date is selected.
Header Modifier
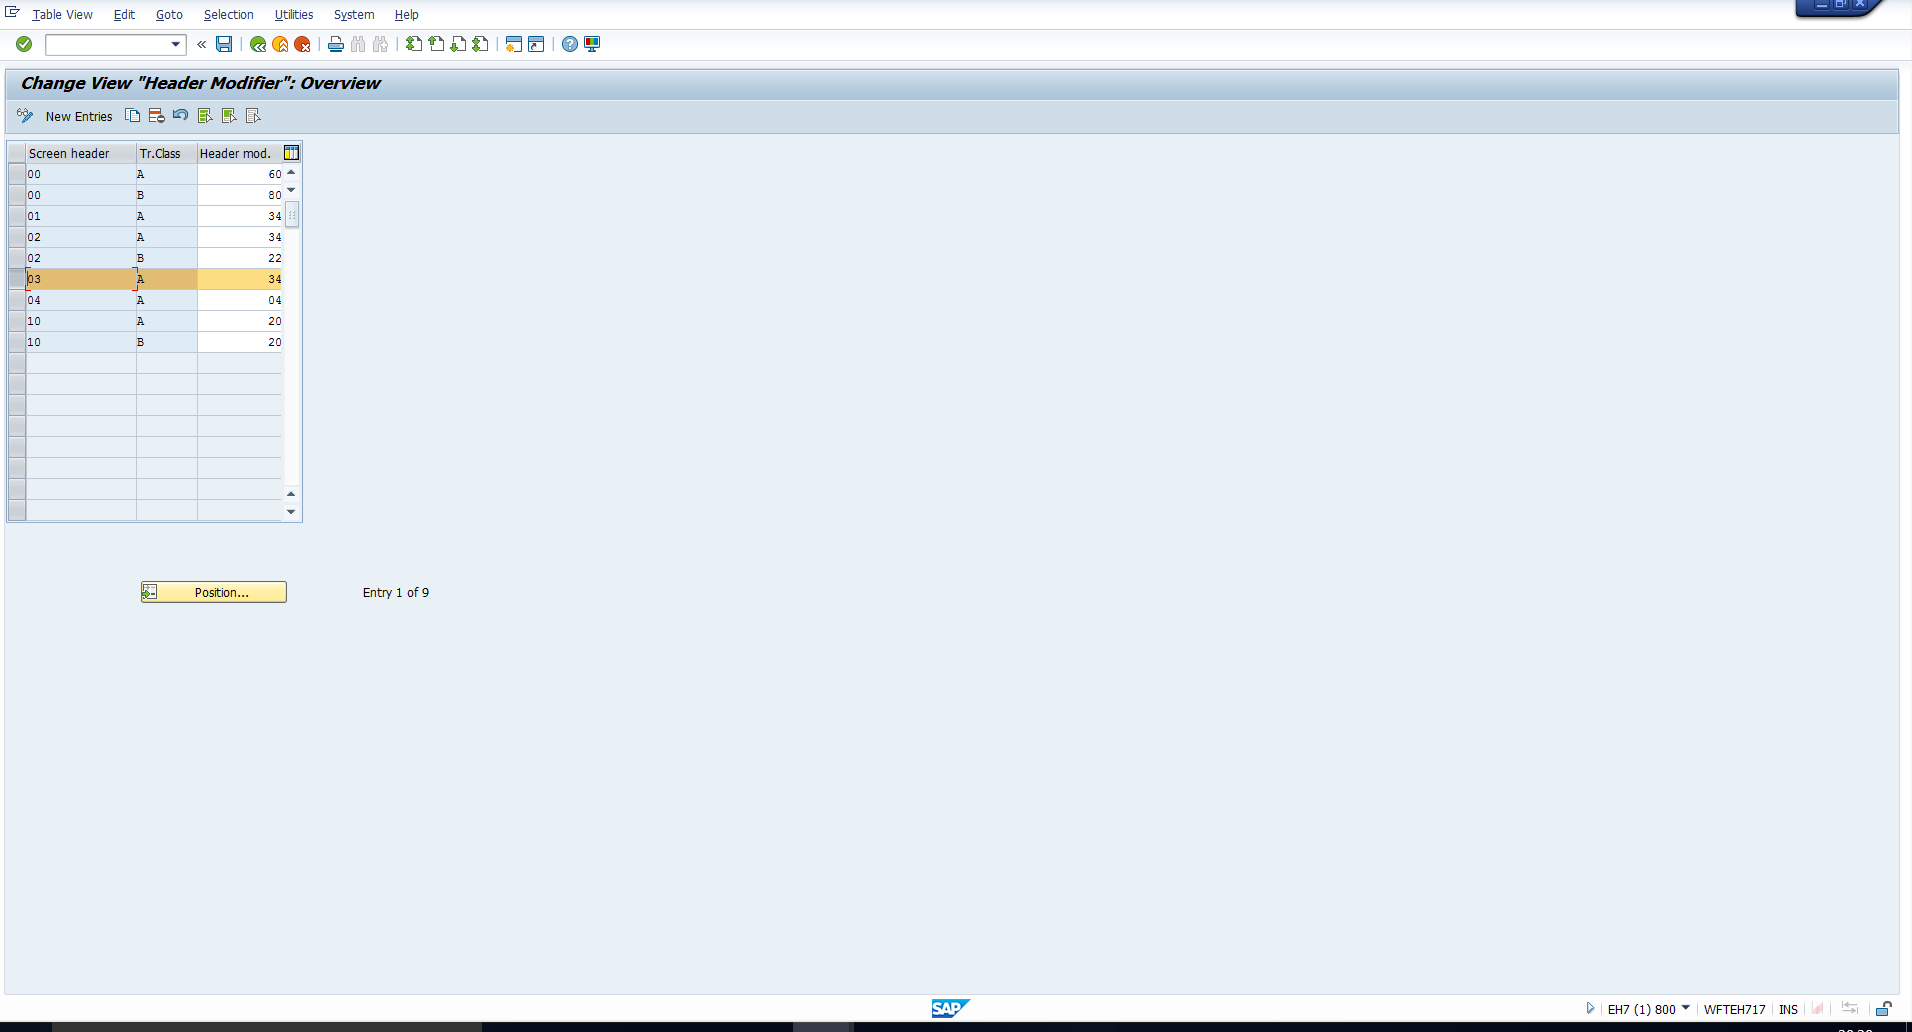
The next SAP infotype header configuration activity is to assign a header modifier to every screen header, as indicated below:
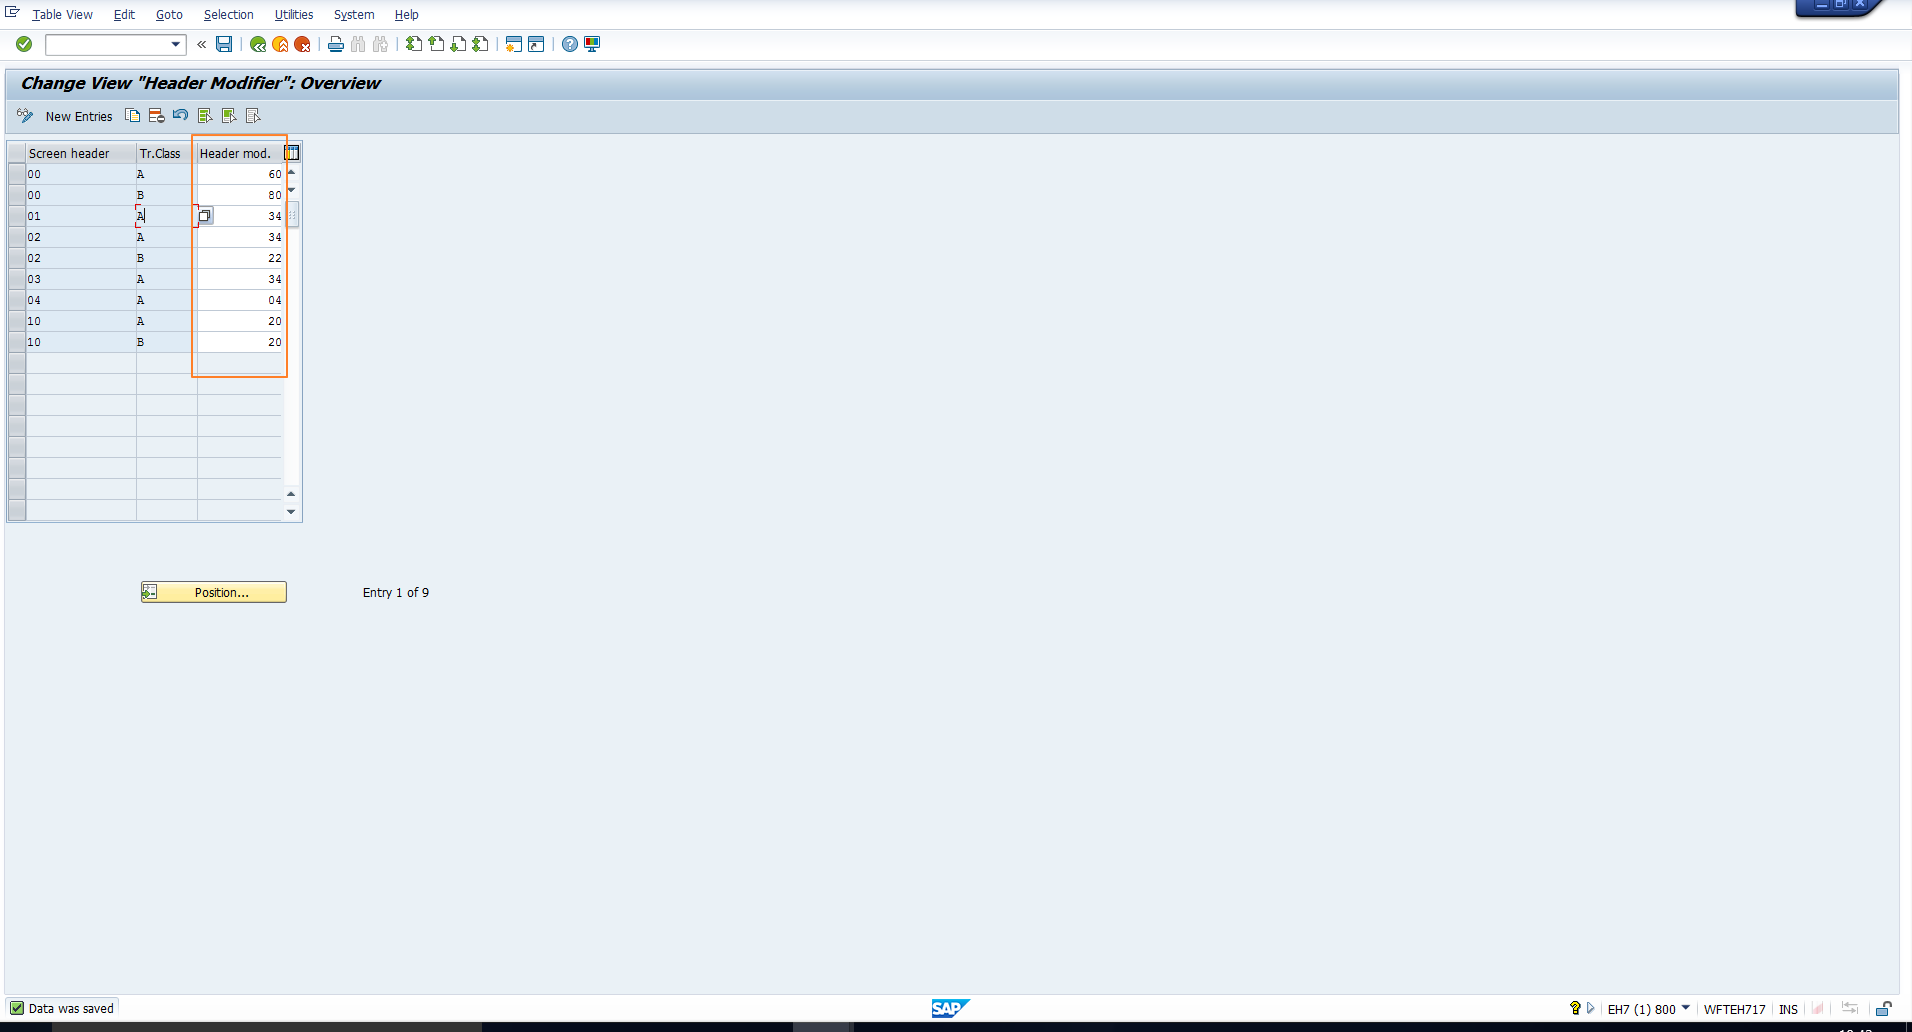
The first column displays the screen header ID assigned to every infotype in the previous activity. The second column contains the transaction class. Transaction class A is used for employee data, while transaction class B is used for applicant data. Here we will focus on employee data. The third column contains a 2-digit header modifier. The header of every infotype is customized using this attribute.
SAP Infotype Header Definition
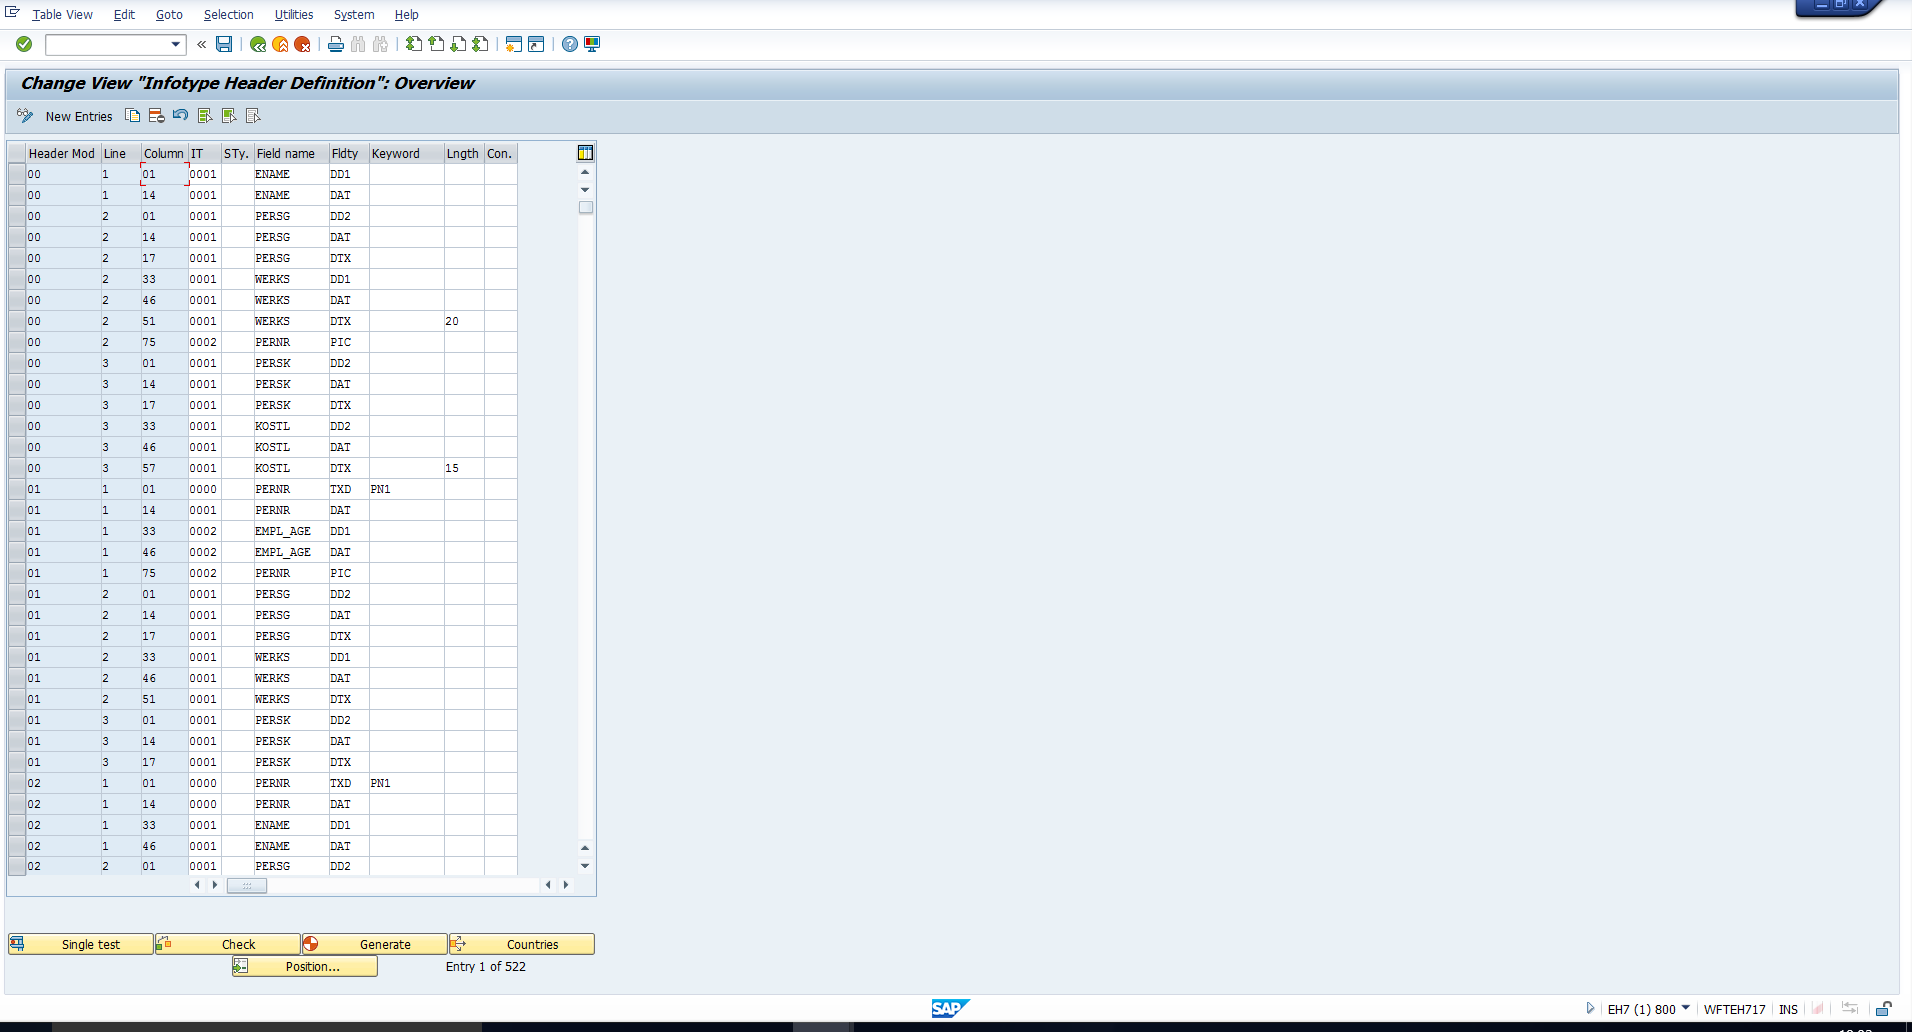
In the third SAP infotype header configuration activity, you will actually define the infotype header structure as shown below:
First, we need to understand the significance of the main attributes needed to customize the header:
Header Modifier – This is the 2-digit header modifier assigned in the previous activity. In this step, we define the header structure for every header modifier.
The next two columns together indicate the position of every field in the header structure:
Line – This attribute specifies the line number, and can contain a value from 1 to 3. This is because there are a maximum of 3 rows in the header.
Column – This denotes the column number as the number of character spaces, justified from the left, that the field begins.
The next set of columns elaborate on the data that must be displayed on the header. This data will then be displayed at the position defined in the previous two columns.
Infotype – This denotes the infotype from which we want to display the information in the header.
Subtype – This denotes the subtype from which we want to display the information in the header.
Field name – This is the technical name of the infotype field that should be displayed.
Field type – This is the type of the field. You can select from a list of SAP supplied field types. These are the most useful ones:
- DAT – Use this if you want to display field contents
- DTX – Use this if you want to display field content text (if available)
- DD1 – Field short text according to ABAP dictionary
- DD2 – Field middle text according to ABAP dictionary
- DD3 – Field long text according to ABAP dictionary
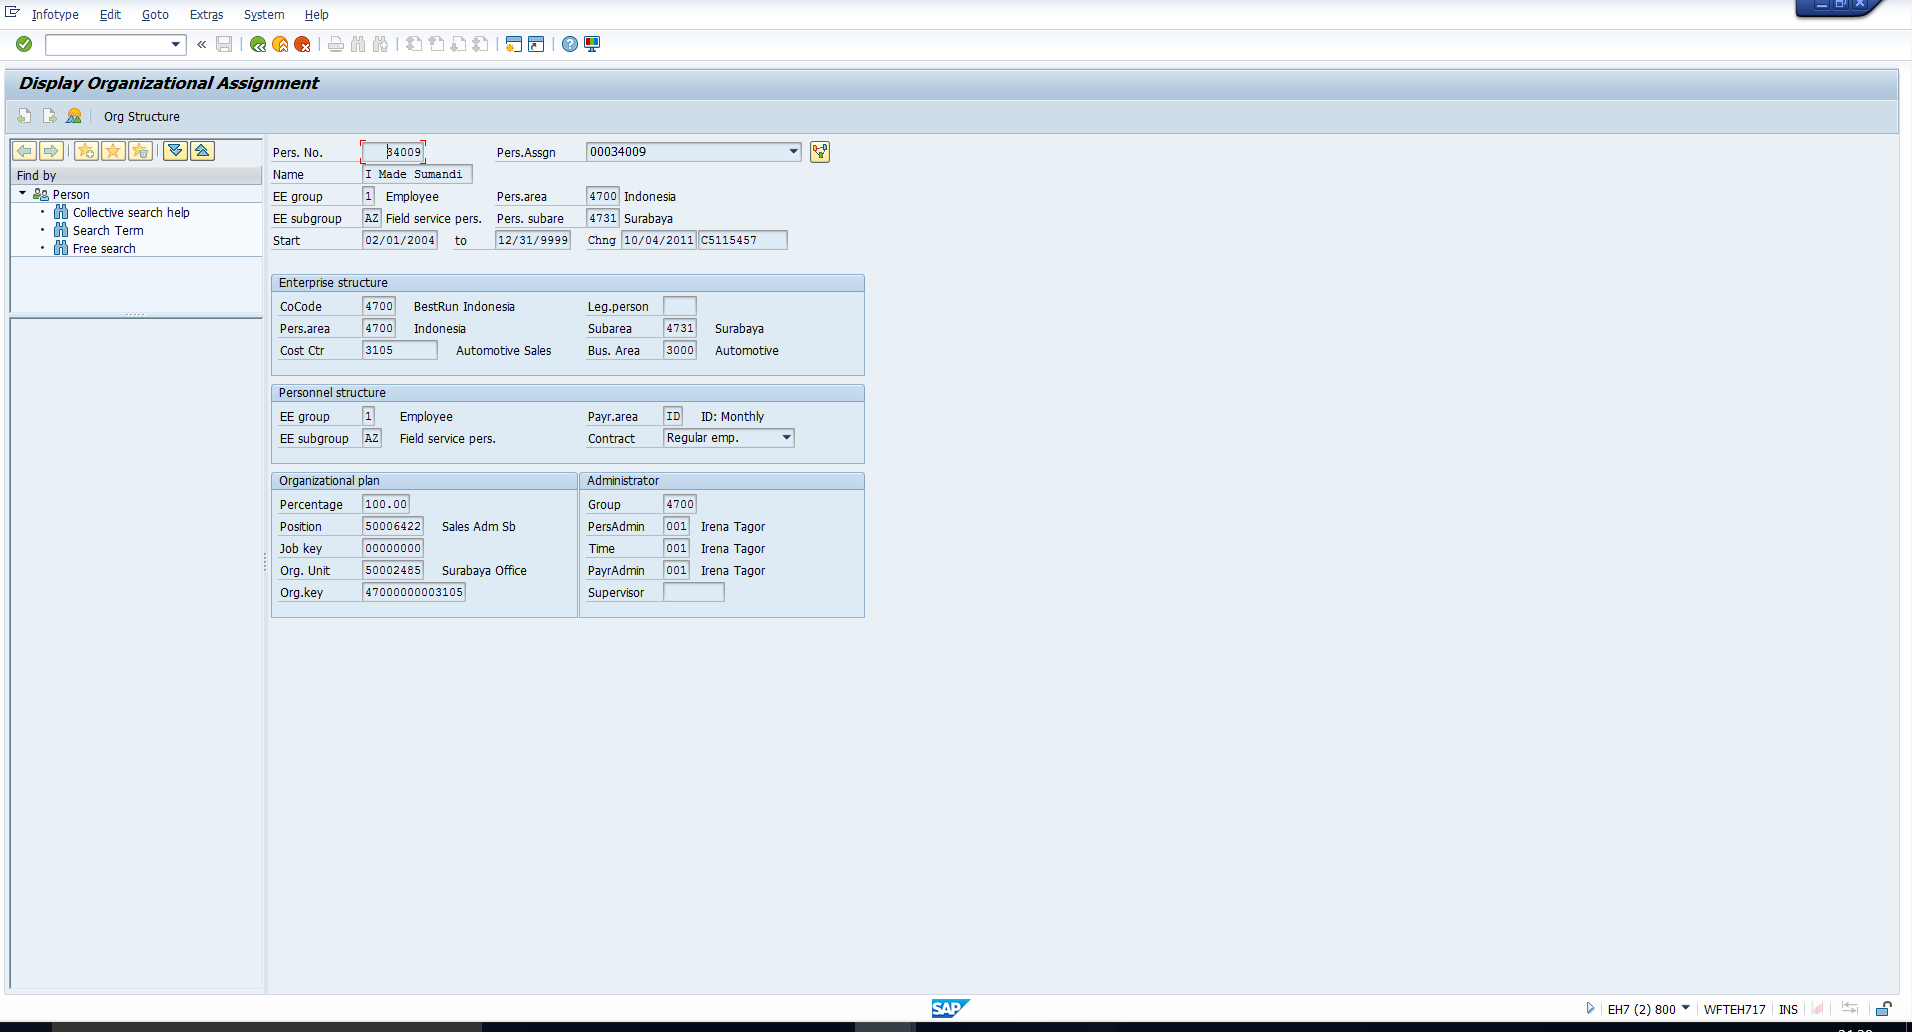
To better understand these columns, let’s execute the transaction code PA20 to look at the header for infotype 0001 – Organizational Assignment. Note the output fields highlighted below:
Now let’s reverse-engineer how this header has been configured to get this output. Let’s begin by checking the header structure per infotype activity to identify what screen header ID has been pre-assigned to this infotype. We can see that the screen header ID 03 has been assigned to this infotype:
Next, we should check the header modifier activity to see what header modifier has been assigned to this header ID. We can see that the screen header ID 03 has been assigned header modifier 34:
Now let’s tie it all together by checking the header definition of header modifier 34 as shown below:

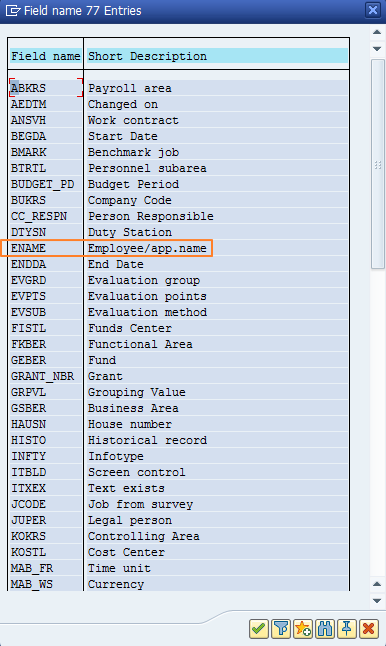
Looking at the entries above where the value in the “Line” column equals 1, we can derive that there are two fields in the first line of the header, both with the technical name of ENAME. If we position the cursor within the field name column and hit the F4 key on the keyboard, we can see the possible list of entries for field name as well as their meaning. For example, ENAME is the technical name for employee/applicant name as shown below:
As we continue to evaluate the attributes of header modifier 34, let’s check the field type attribute. The first line has the value DD1 which represents field short text. The second line has the value DAT which indicates the field contents. This definition explains why the field short text “Name” and field contents “I Made Sumandi” are output in the first line for this personnel number:

Next, to correlate the second line of our example, look at the entries below where the value in the “Line” column equals 2:

PERSG is the technical name for employee group. The three field types DD2, DAT and DTX indicate the field middle text, the field contents (the employee group code) and the field content text (the employee group text) respectively. Further, WERKS is the technical name for personnel area. The three field types DD1, DAT and DTX indicate the short field text, the field contents (the personnel area code) and the field content text (the personnel area text) respectively. This definition explains why we see the below output in the second line for this personnel number:

Finally, to correlate the third line of our example, look at the entries below where the value in the “Line” column equals 3:
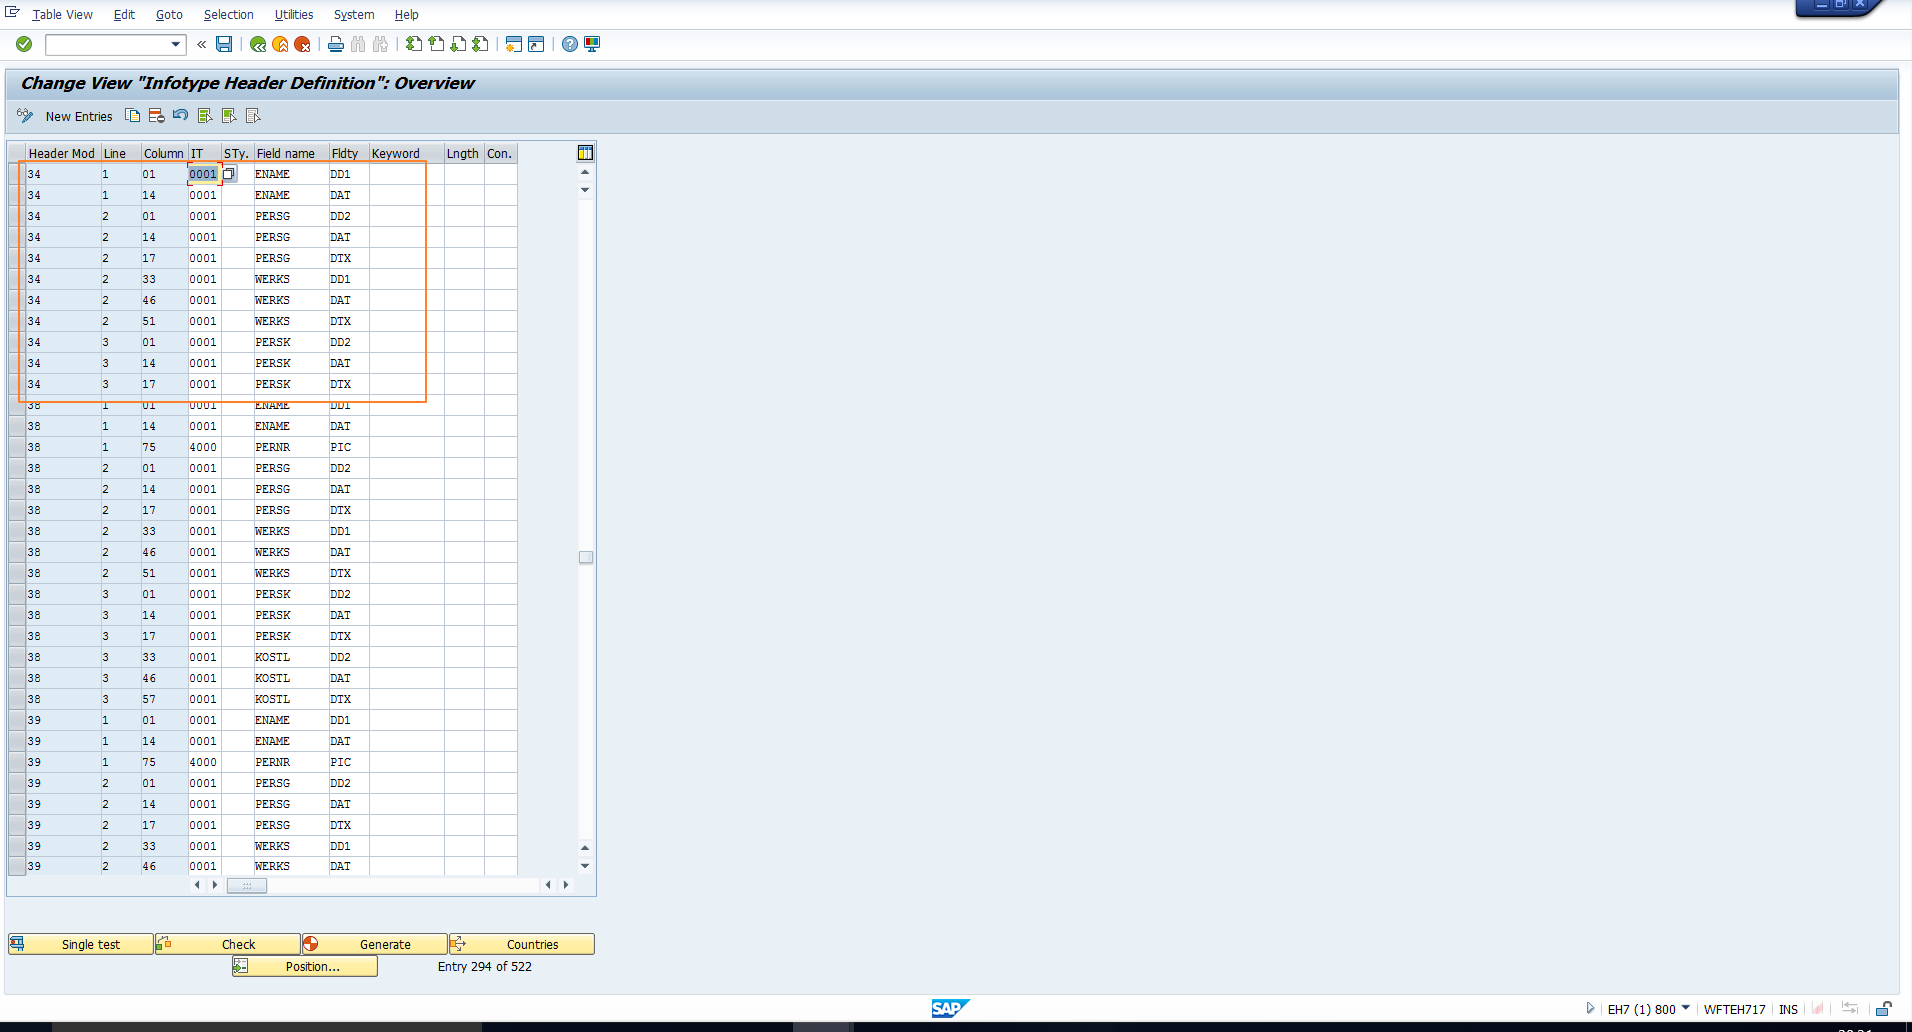
PERSK is the technical name for employee subgroup. The three field types DD2, DAT and DTX indicate the field middle text, the field contents (the employee subgroup code) and the field content text (the employee subgroup text) respectively. This definition explains why we see the below output in the third line for this personnel number:

SAP Infotype Header Configuration
Let’s consider a simple example. Assume we want to add the field text, contents and content text for the master data element Personnel Subarea to line 3 of the header for this infotype. This new field should be positioned exactly below the personnel area fields.
To meet this requirement, we need to add three new entries in the infotype header definition screen. The technical name for personnel subarea is BTRTL, thus we add the required entries as depicted below:
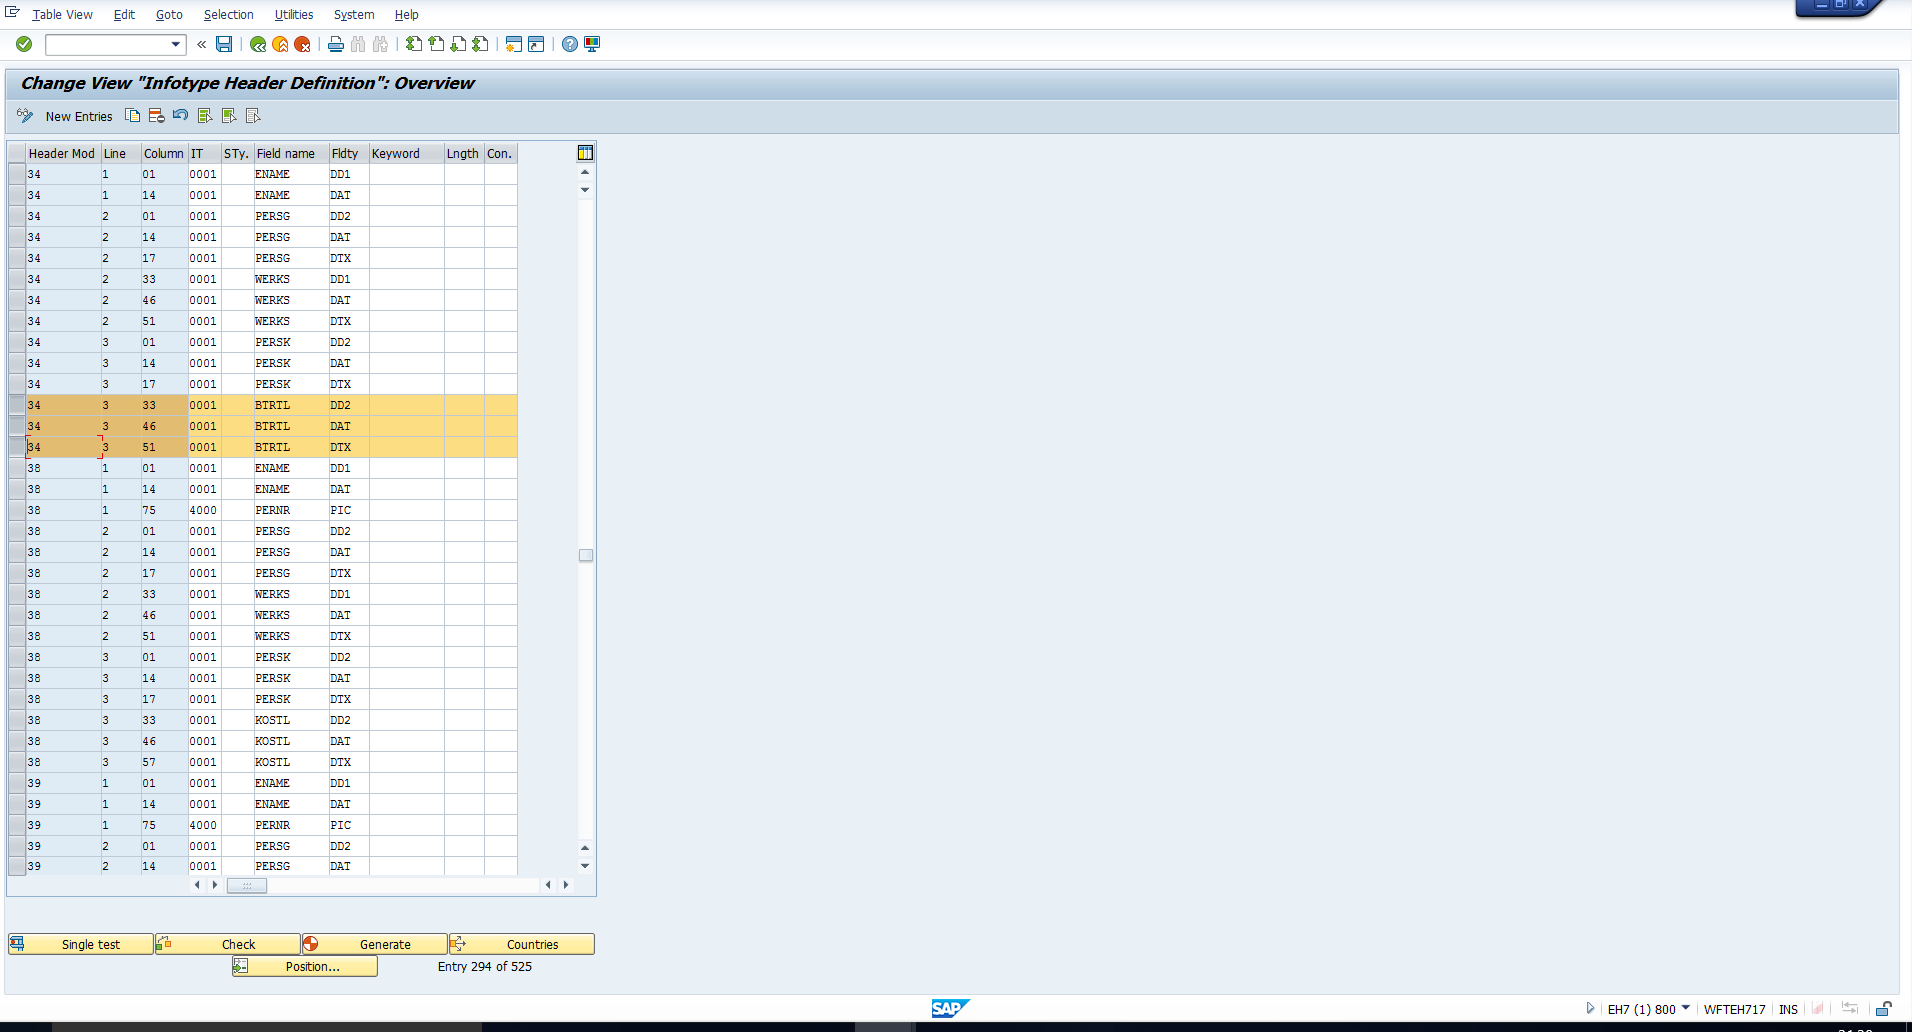
Don’t forget to save ![]() the new entries.
the new entries.
Let’s now re-execute the display HR master data transaction (PA20) and we can see data for personnel subarea as displayed below:
—
Did you like this tutorial? Have any questions or comments? We would love to hear your feedback in the comments section below. It’d be a big help for us, and hopefully it’s something we can address for you in improvement of our free SAP HR tutorials.
Navigation Links
Go to next lesson: SAP Time Constraints
Go to previous lesson: SAP Infotype Menus
Go to overview of the course: SAP HR Training
Thru this post, I cleared my Issue.
Thank you so much.
Hi,
When I create a customized infotype, do I need to maintain/add the new infotype in this table?
Thank you,
Sky
i want to show position of an employee on header screen. Can anybody help me doing this.
Hi, thank you very much. Your documentation ist very good, I could solve my problem.
Thanks.
it is really very helpful & precise document for any consultant for recall as well as fresher.