
 Welcome to the tutorial on how to load SAP BW flat file to DSO. Here, we are going to make use of the knowledge from the previous tutorial in SAP BW training course. We will use a live scenario of loading SAP BW flat file to DSO for an easier understanding for you. You will be guided with images and a detailed explanation of each step of the process. Upon completion of this tutorial and practice on your part, you will be able to load data from SAP BW flat file to DSO with confidence.
There are many DataStore Objects (DSO’s) that you can install from the BI Content. For instance, 0PUR_DS03 is a Purchase Order Schedule Lines DSO. In BI Content, you have the complete data flow that you can install to load data to a DSO from SAP ECC.
SAP BW allows you to define custom DSO’s based on any of the 3 types – Standard, Write-Optimized, and Direct Update DSO. If you have a completely new requirement to load data from SAP BW flat file to DSO, you will have to create a customized data flow and load data accordingly. Flat file is the simplest kind of database that stores records in a plain text file. This tutorial focuses on this kind of requirement.
Live Scenario
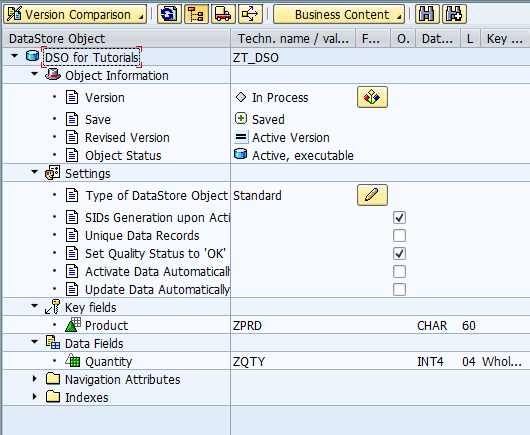
We are going to take this scenario to guide you through the process of loading SAP BW flat file to DSO. There is a requirement to load data to a Standard DSO ‘ZT_DSO’ from a flat file. The DSO has Product as a key field and Quantity as a data field. The DSO structure is given below:
The flat file structure is given below.
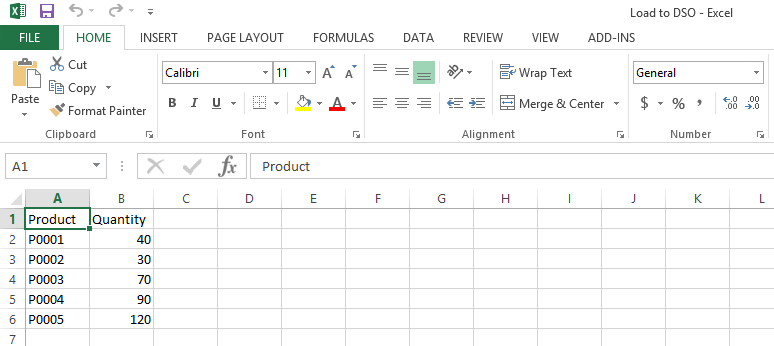
It has five records. We need to load these five records to the DSO ‘ZT_DSO.’
For the ease of understanding, we will go in detail into each of the following steps:
- Create Flat File Source System
- Create Transaction Data DataSource
- Create Transformation (Source: Transaction Data DataSource and Target: DSO)
- Create InfoPackage and Data Transfer Process (DTP) for loading data
- View the records in DSO
Create Flat File Source System
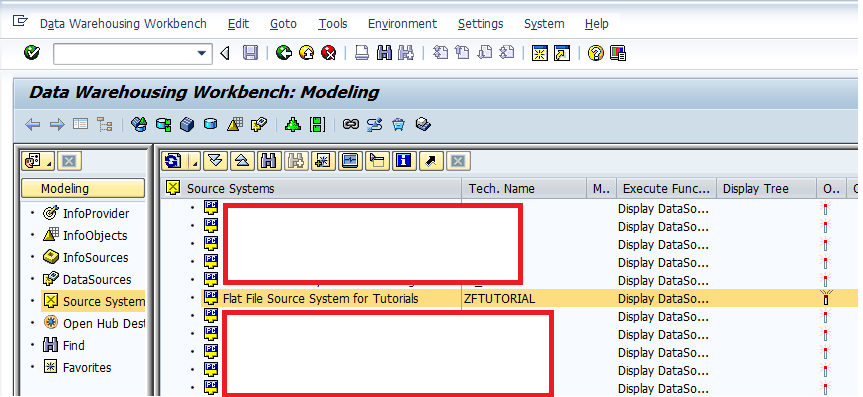
Let’s leverage the flat file source system (ZFTUTORIAL) created in our previous tutorial SAP BW Flat File Loading to InfoObject. If you want to create a new flat file source system, you can follow the same steps that were covered in SAP BW Flat File Loading to InfoObject tutorial.
Create Transaction Data DataSource
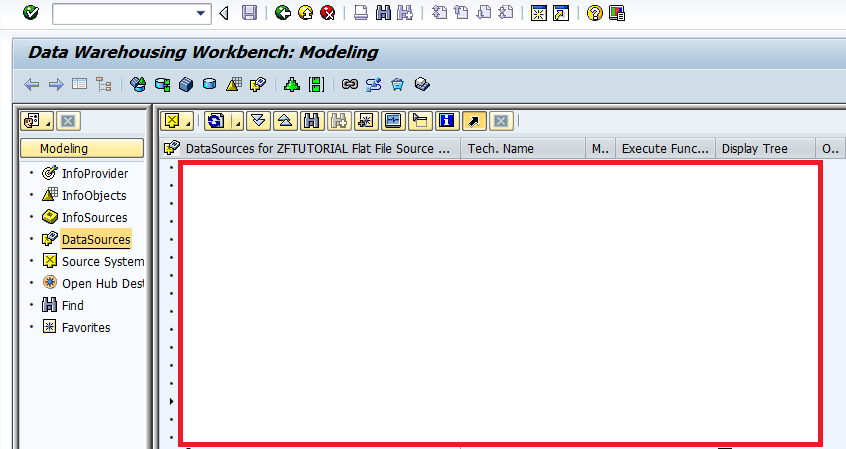
In ‘Data Warehousing Workbench: Modeling’ tab, click on ‘DataSources’ in the left pane. You’ll get to this place by using RSA1 transaction code.
Let’s create the transaction data DataSource by right clicking on the ‘ZAPP’ application component we created in our earlier tutorial SAP BW Flat File Loading to InfoObject.

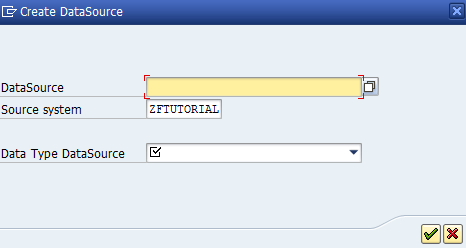
Clicking on ‘Create DataSource…’ will prompt you with the following sub-screen and you need to enter DataSource name and select ‘Data Type DataSource’.
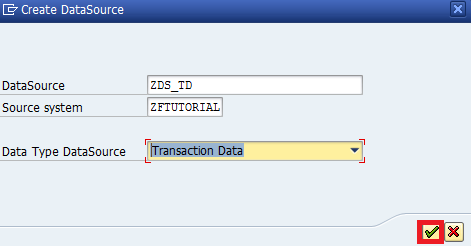
Let us type ‘ZDS_TD’ as the DataSource name and choose ‘Transaction Data’ as the ‘Data Type DataSource’. Finally, select ![]() to continue.
to continue.
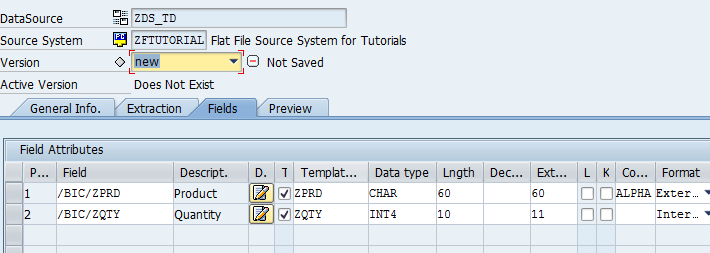
Now, make sure that you enter all fields (Product and Quantity) as shown below:
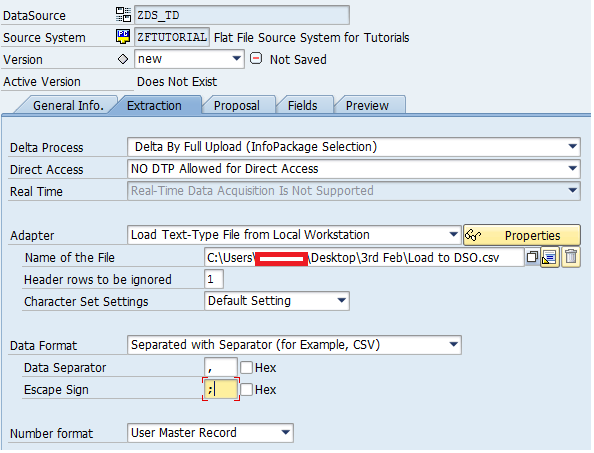
As mentioned in the earlier tutorial SAP BW Flat File Loading to InfoObject, choose Adapter, File Path, Header Rows to be ignored, and Data Format while keeping in mind the instructions specified for various file types.
Activate the ‘ZDS_TD’ DataSource by clicking on ![]() . The DataSource will appear in ‘’Active’ version.
. The DataSource will appear in ‘’Active’ version.

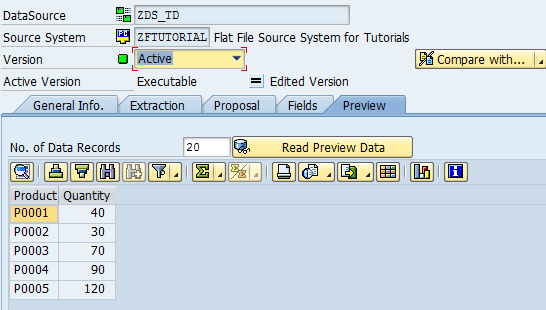
Finally, you can preview the data by clicking on the ‘Preview’ tab.
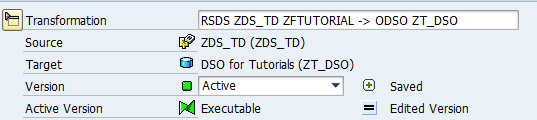
Create Transformation (Source: Transaction Data DataSource and Target: DSO)
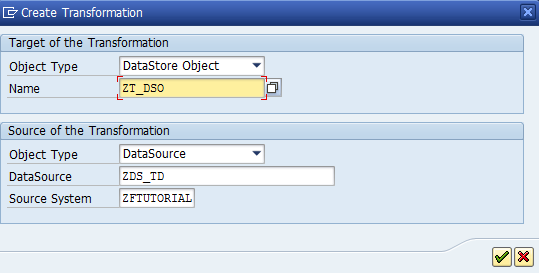
At this step of loading SAP BW flat file to DSO, map the source fields of the DataSource to the target fields of the DSO by creating transformation between them. To do that, you just need to right click on ‘ZDS_TD’ DataSource and choose ‘Create Transformation….’
Enter the details as follows and select ![]() to continue:
to continue:
You can see that the mappings are automatically created.
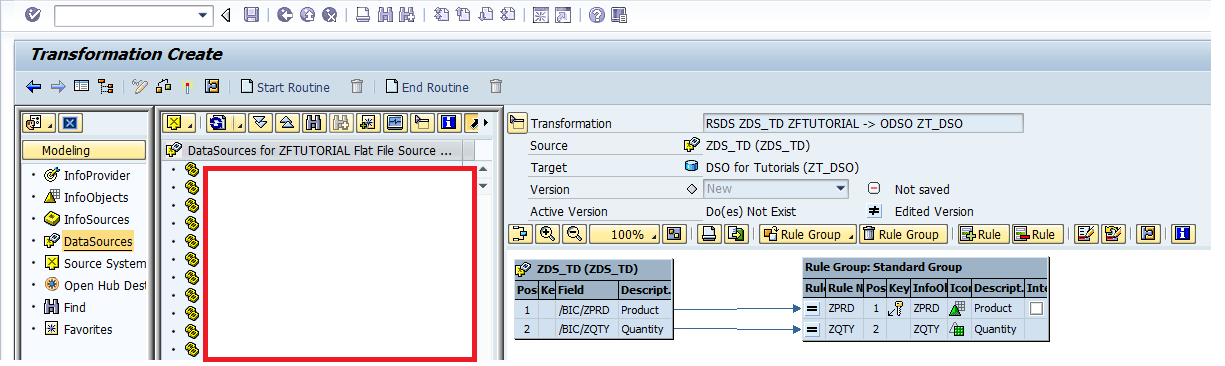
So, you just have to activate it by clicking on ![]() . The transformation appears in ‘Active’ version.
. The transformation appears in ‘Active’ version.
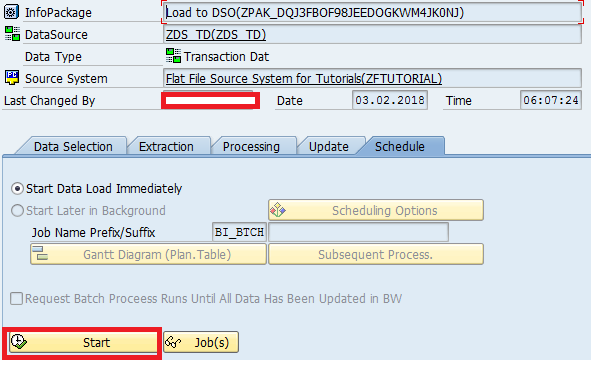
Create InfoPackage and Data Transfer Process (DTP) for loading data
You need to first create InfoPackage to push data to PSA and then DTP to push data to DSO. The process of creating InfoPackage and DTP will be the same as mentioned in SAP BW Flat File Loading to InfoObject tutorial.
The following InfoPackage has been created to load data to PSA:
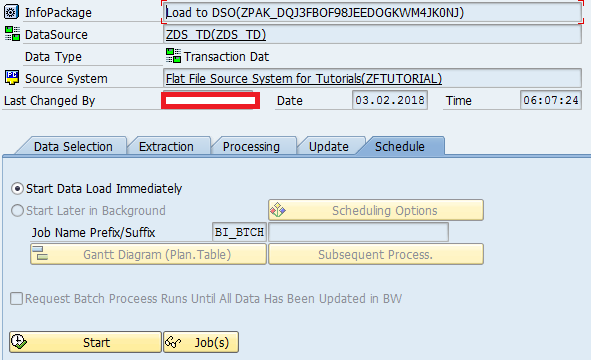
Execute the above InfoPackage by clicking on ![]()
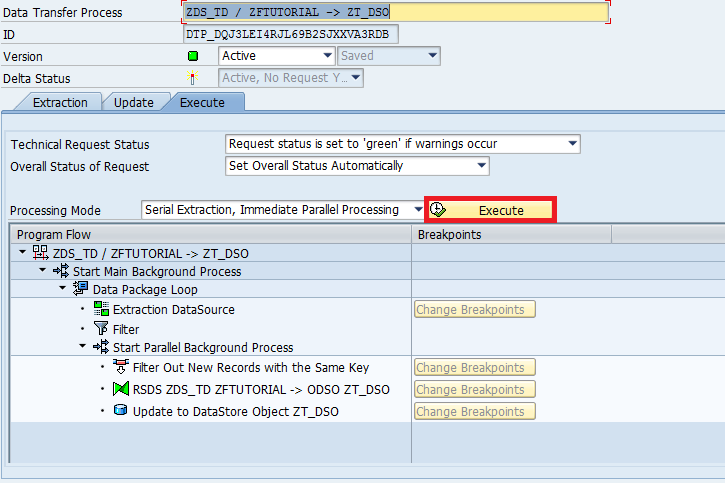
The following DTP has been created to load data to DSO:
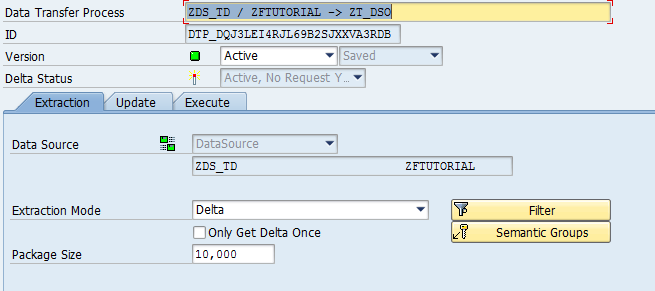
Execute the above DTP by clicking on ![]()
View Records in DSO
Now, let us validate whether the five records of the flat file got loaded to the DSO. To do that, just right click on DSO and click on ‘Manage’ as highlighted in the following screen:
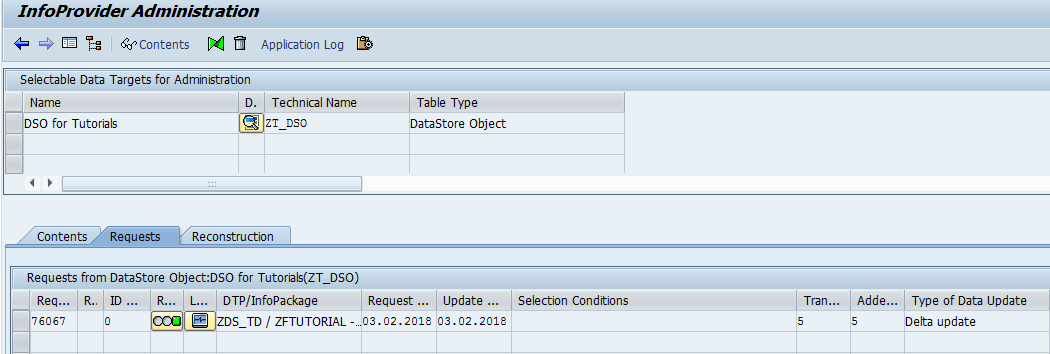
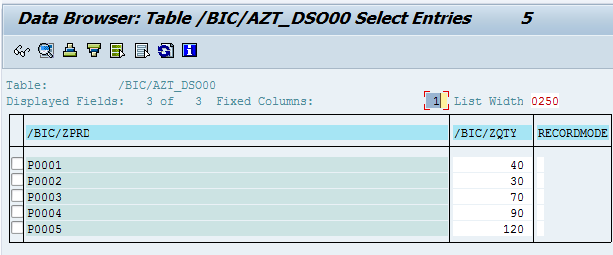
The request status is green; however, the data gets stored in the New Data table. The contents of the new data table are shown below:
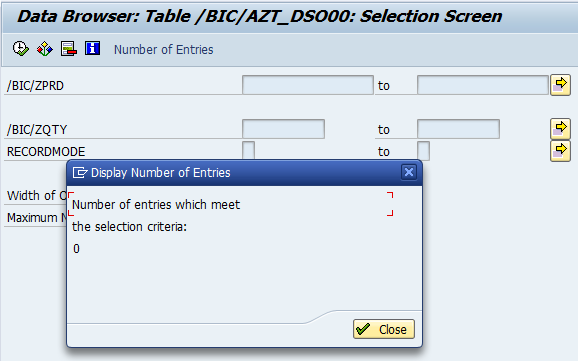
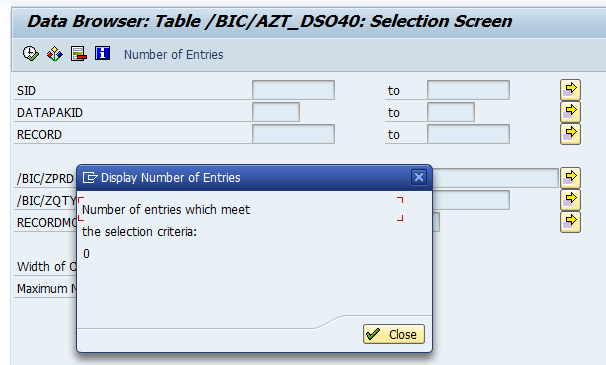
You can also check the contents of the Active Data table. As can be seen, there are no records in this table.
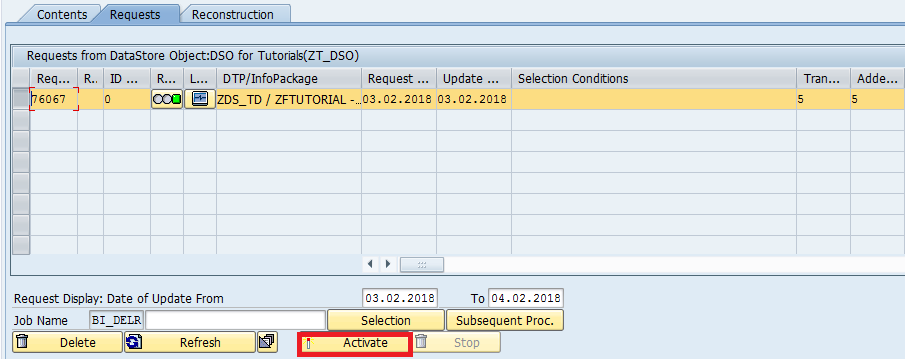
So, you need to activate the request to move the data to ‘Activate Data’ table. Just select the request highlighted in the following screen:

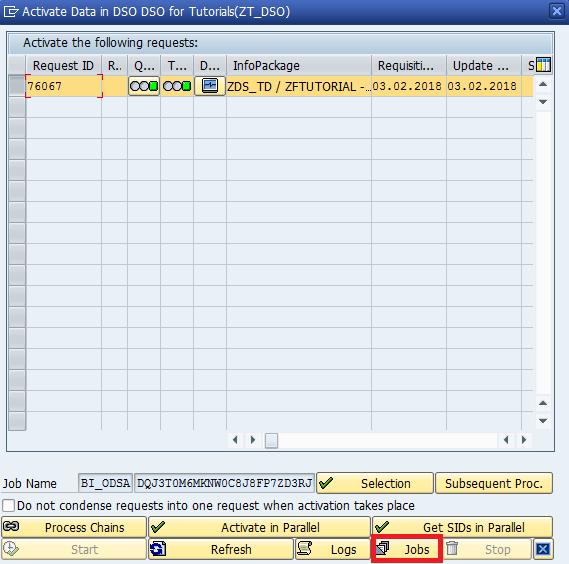
Now, click on ![]() to activate the data in DSO.
to activate the data in DSO.
Check the job status by clicking on ![]() highlighted in the screen below:
highlighted in the screen below:
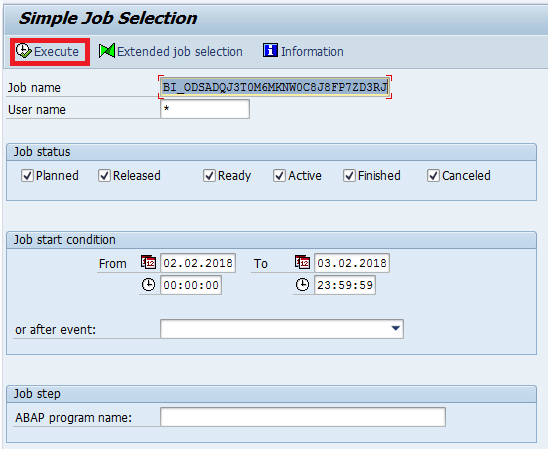
Now, click on ![]() highlighted in the below screen to view the status.
highlighted in the below screen to view the status.
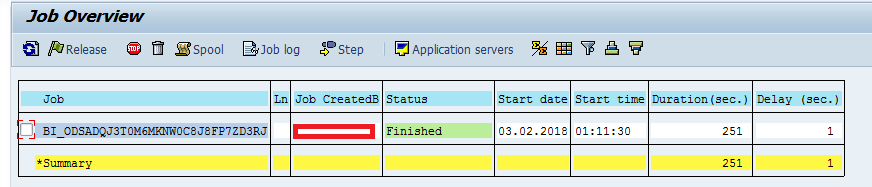
The job overview gets displayed. As can be seen, the job got finished.
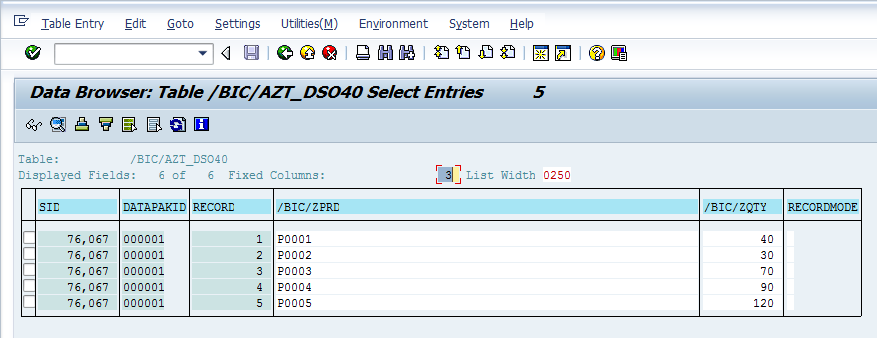
Let’s now check the contents of the new data table and activate the data table. The new data table contents can be seen as follows:
The active data table contents can be seen below:
As shown, there are no records in the new data table anymore. All records are pushed to the active data table.
Conclusion
Loading SAP BW flat file to DSO needs to be done with utmost care and attention. Every step in the process is equally important. For instance, if you just miss activating the data in Standard DSO, the data will not be available for reporting. Hence, make sure that you understand the ins and outs of the process. Moreover, this tutorial focuses on data loading to Standard DSO; try your hands on loading data to a Write-optimized DSO. The process will remain the same; however, there will be no need to activate the data in Write-optimized DSO, as this DSO will have just one table (Active Data table). The more you practice, the better you understand the issues that would arise in real time projects.
—
Did you like this tutorial? Have any questions or comments? We would love to hear your feedback in the comments section below. It’d be a big help for us, and hopefully it’s something we can address for you in improvement of our free SAP BW tutorials.
Navigation Links
Go to next lesson:
Go to previous lesson: SAP BW Flat File Loading to InfoObject
Go to overview of the course: SAP BW Training