
 Welcome to the tutorial on SAP Organization and Staffing interface in SAP Organizational Management. This tutorial is part of our free SAP HCM course. In the earlier tutorials, we have seen two methods of data maintenance in Organizational Management – Simple Maintenance and Infotype Maintenance. Here, we will cover the third interface using which you can create objects and relationships.
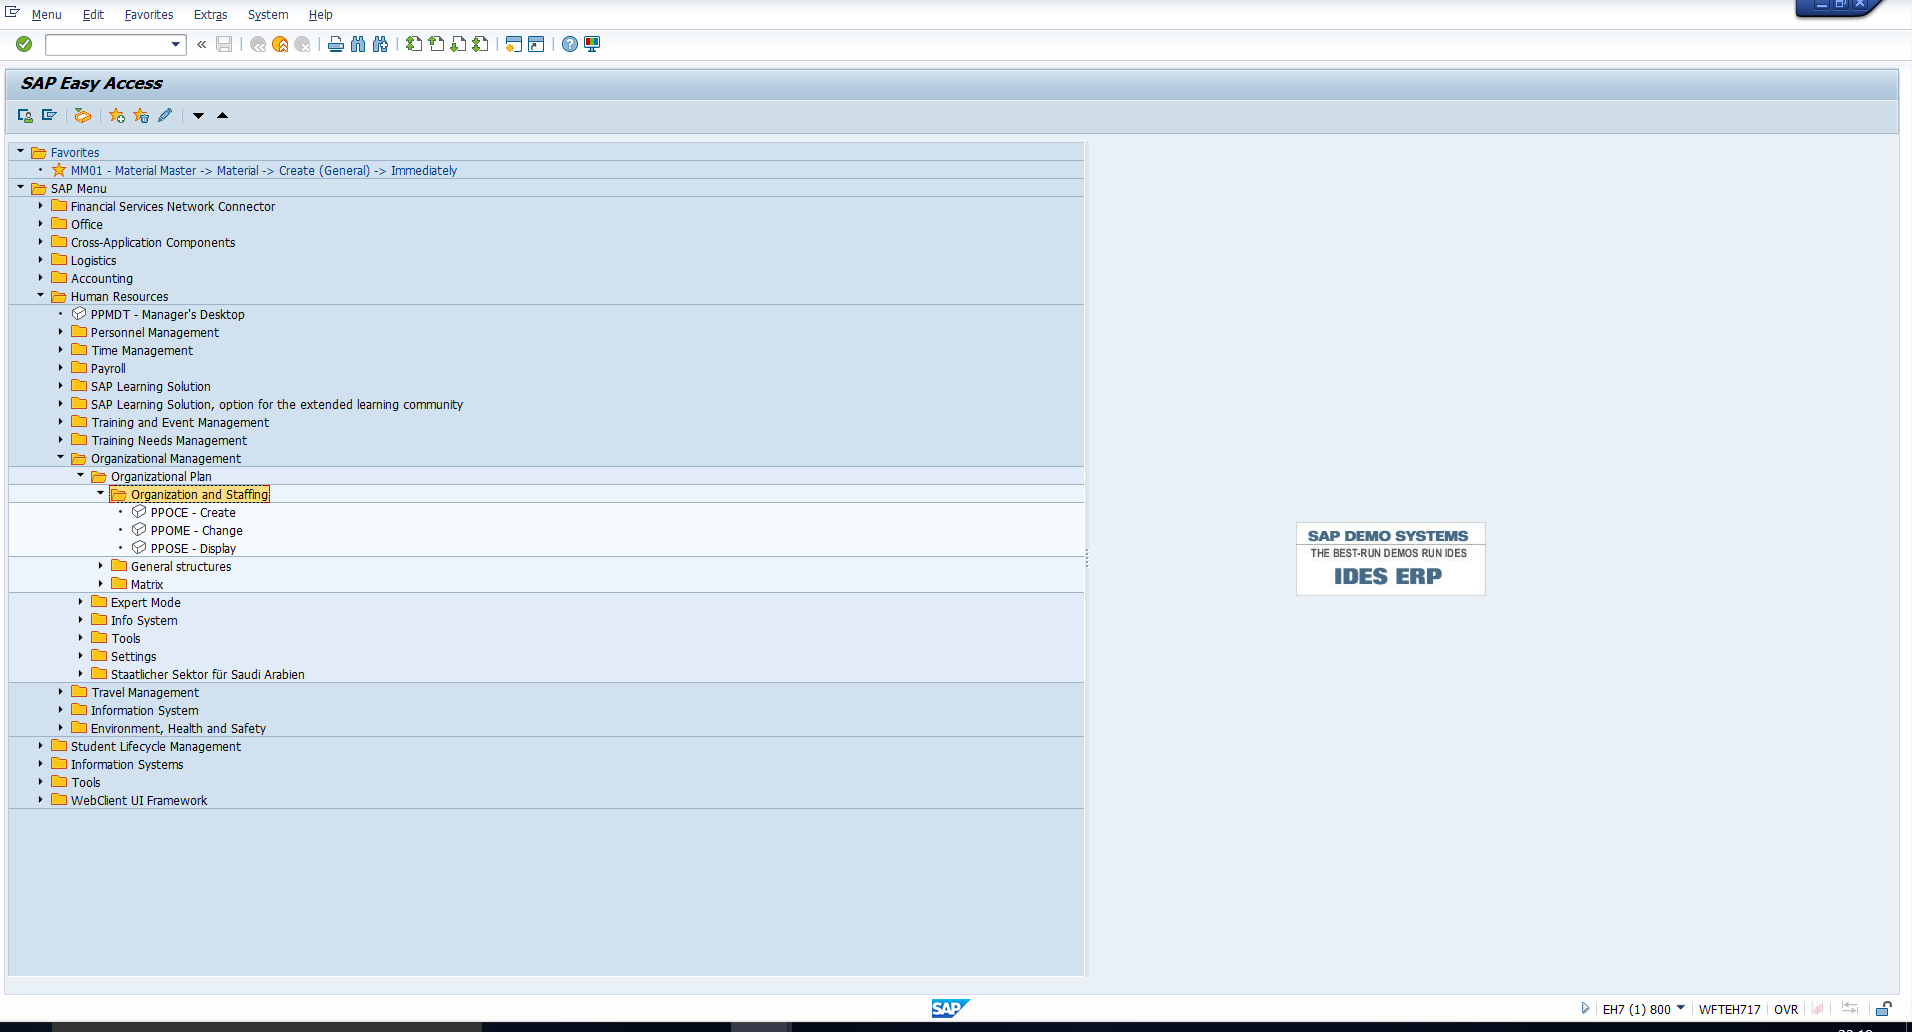
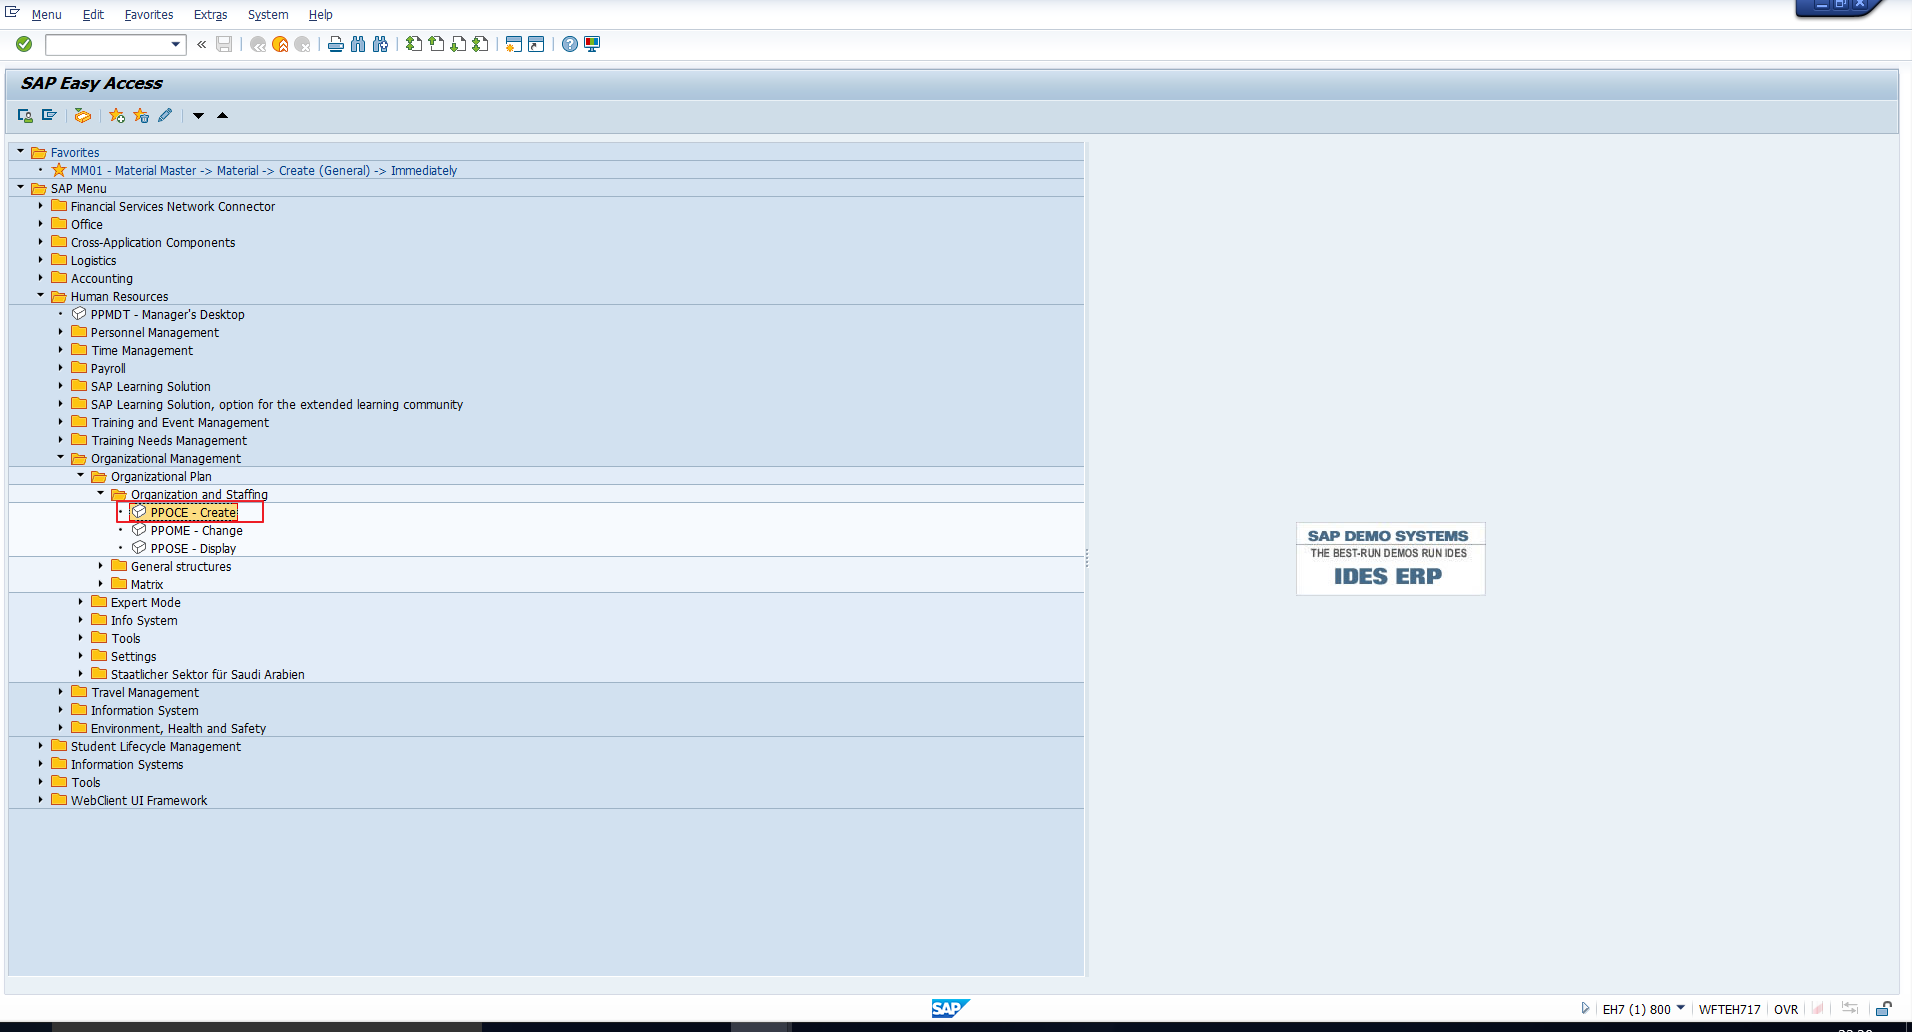
To access SAP Organization and Staffing, follow the below menu path in the SAP Easy Access menu:
Human Resources – Organizational management – Organizational plan – Organization and Staffing
This path has been depicted in Figure 1.
SAP Organization and Staffing Interface
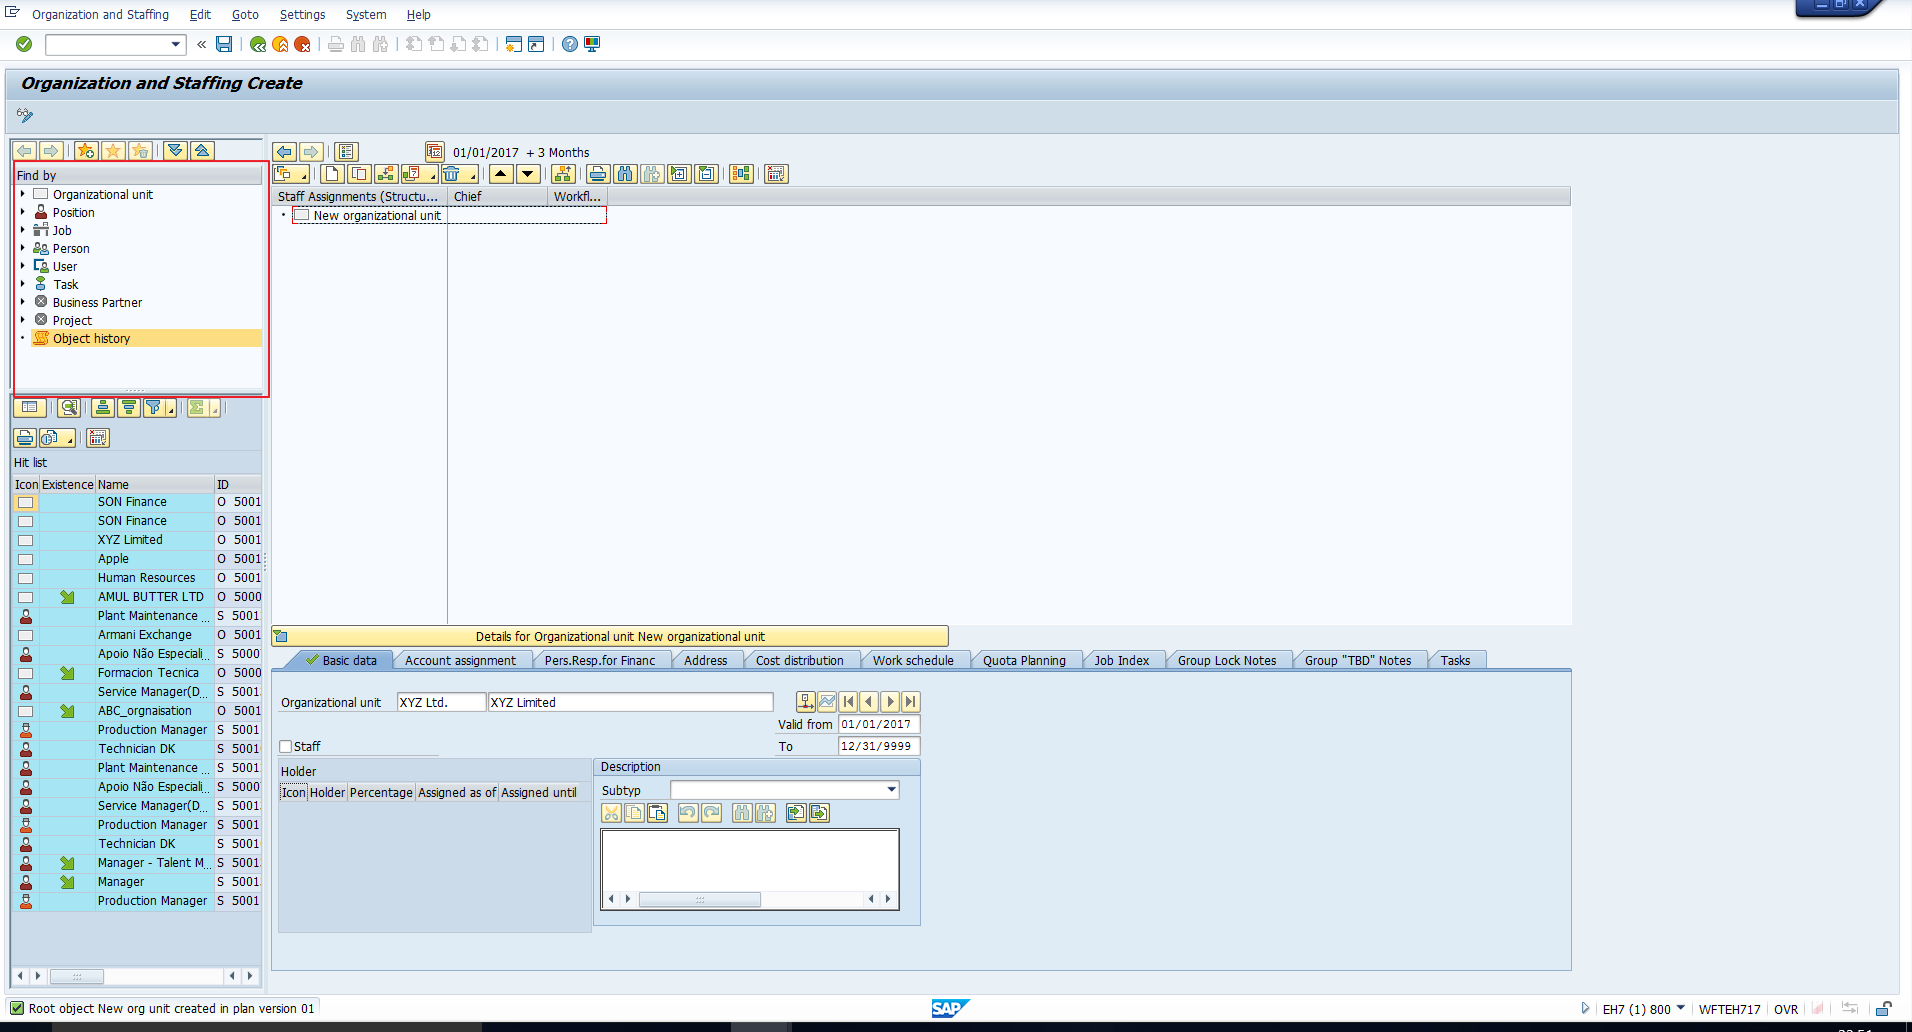
We will begin with the layout of SAP Organization and Staffing screen. This screen consists of four areas – the Search area, the Selection area, the Overview area and the Details area. The Search area and the Selection area, together, form the Object Manager.
Search area
This area of the screen has been highlighted in Figure 2. In this area, you can search for objects by first selecting the relevant Object type.
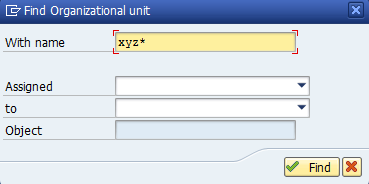
For example, click on Organizational Unit to search for an organizational unit. This takes you to the pop-up screen in Figure 3. Here you can enter the required details and then press the “Find” button.
Selection Area
The objects that result from the Search are then displayed in the Selection area, as depicted in Figure 4. You can go through the hit list and then double click on the object that you want to process further.
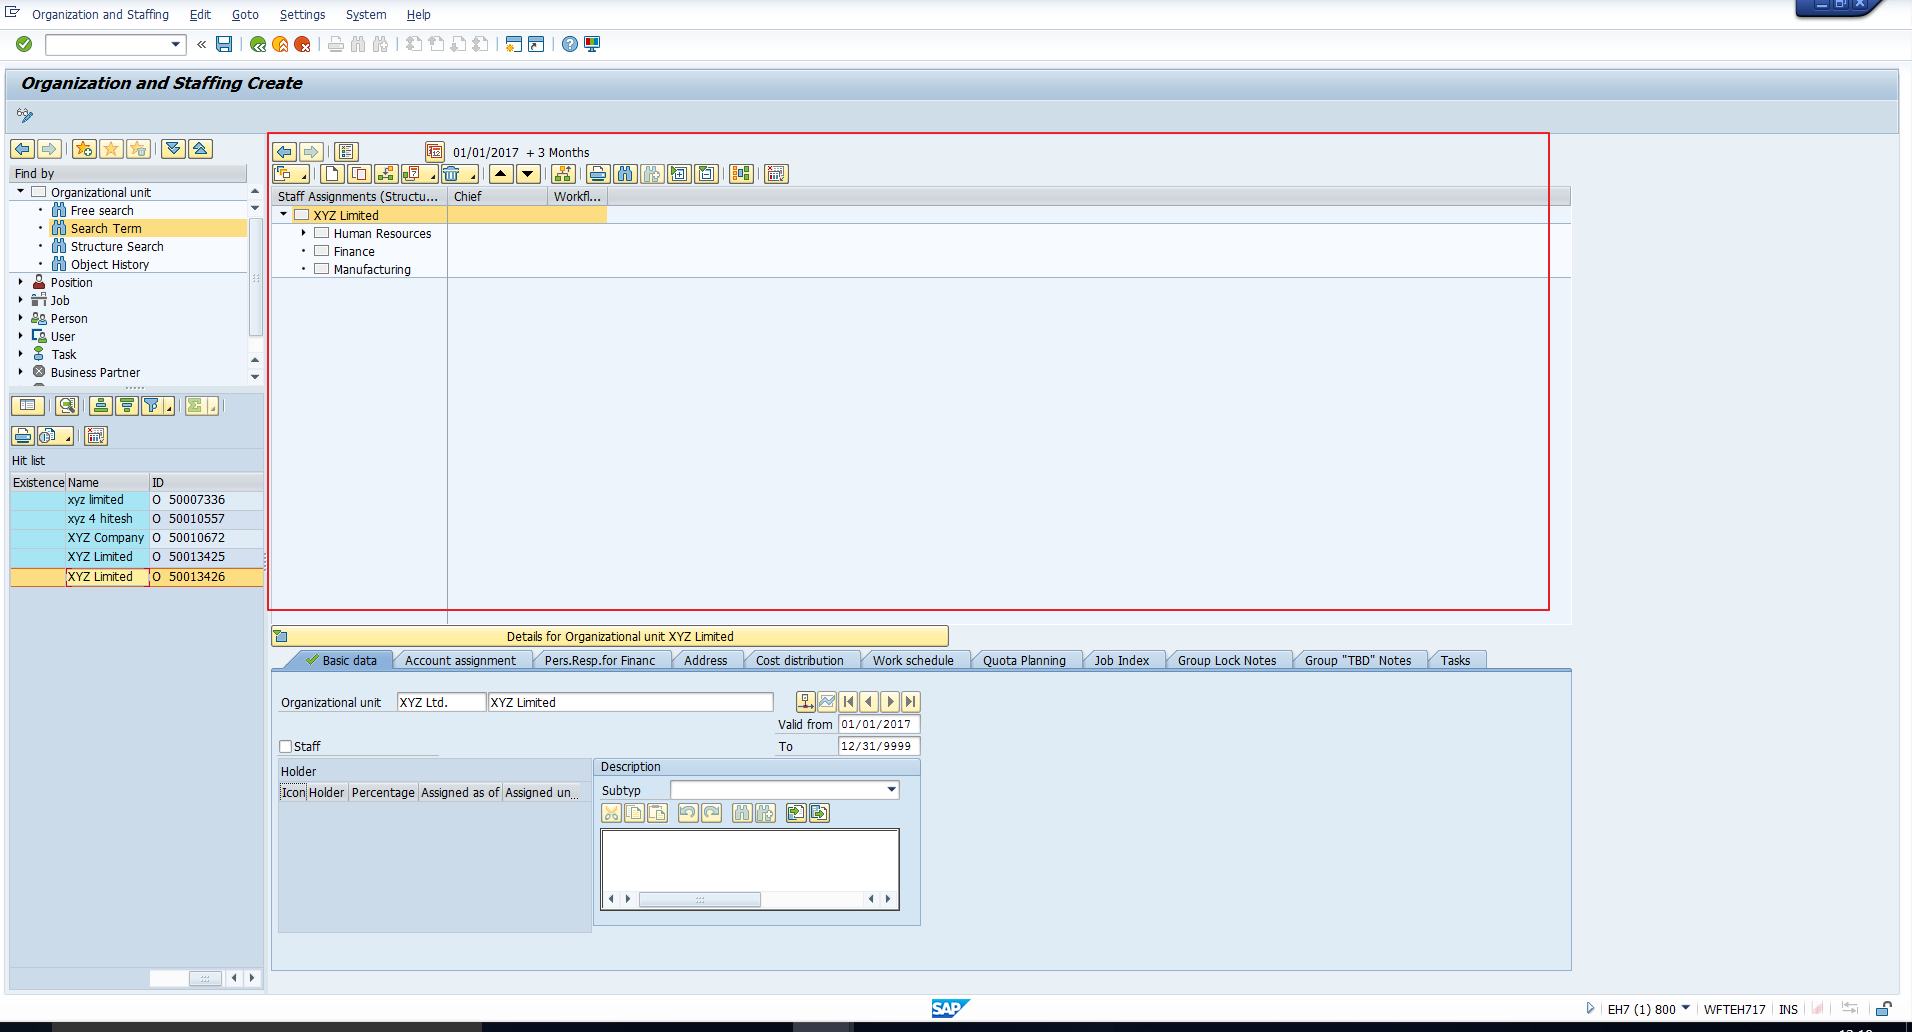
Overview Area
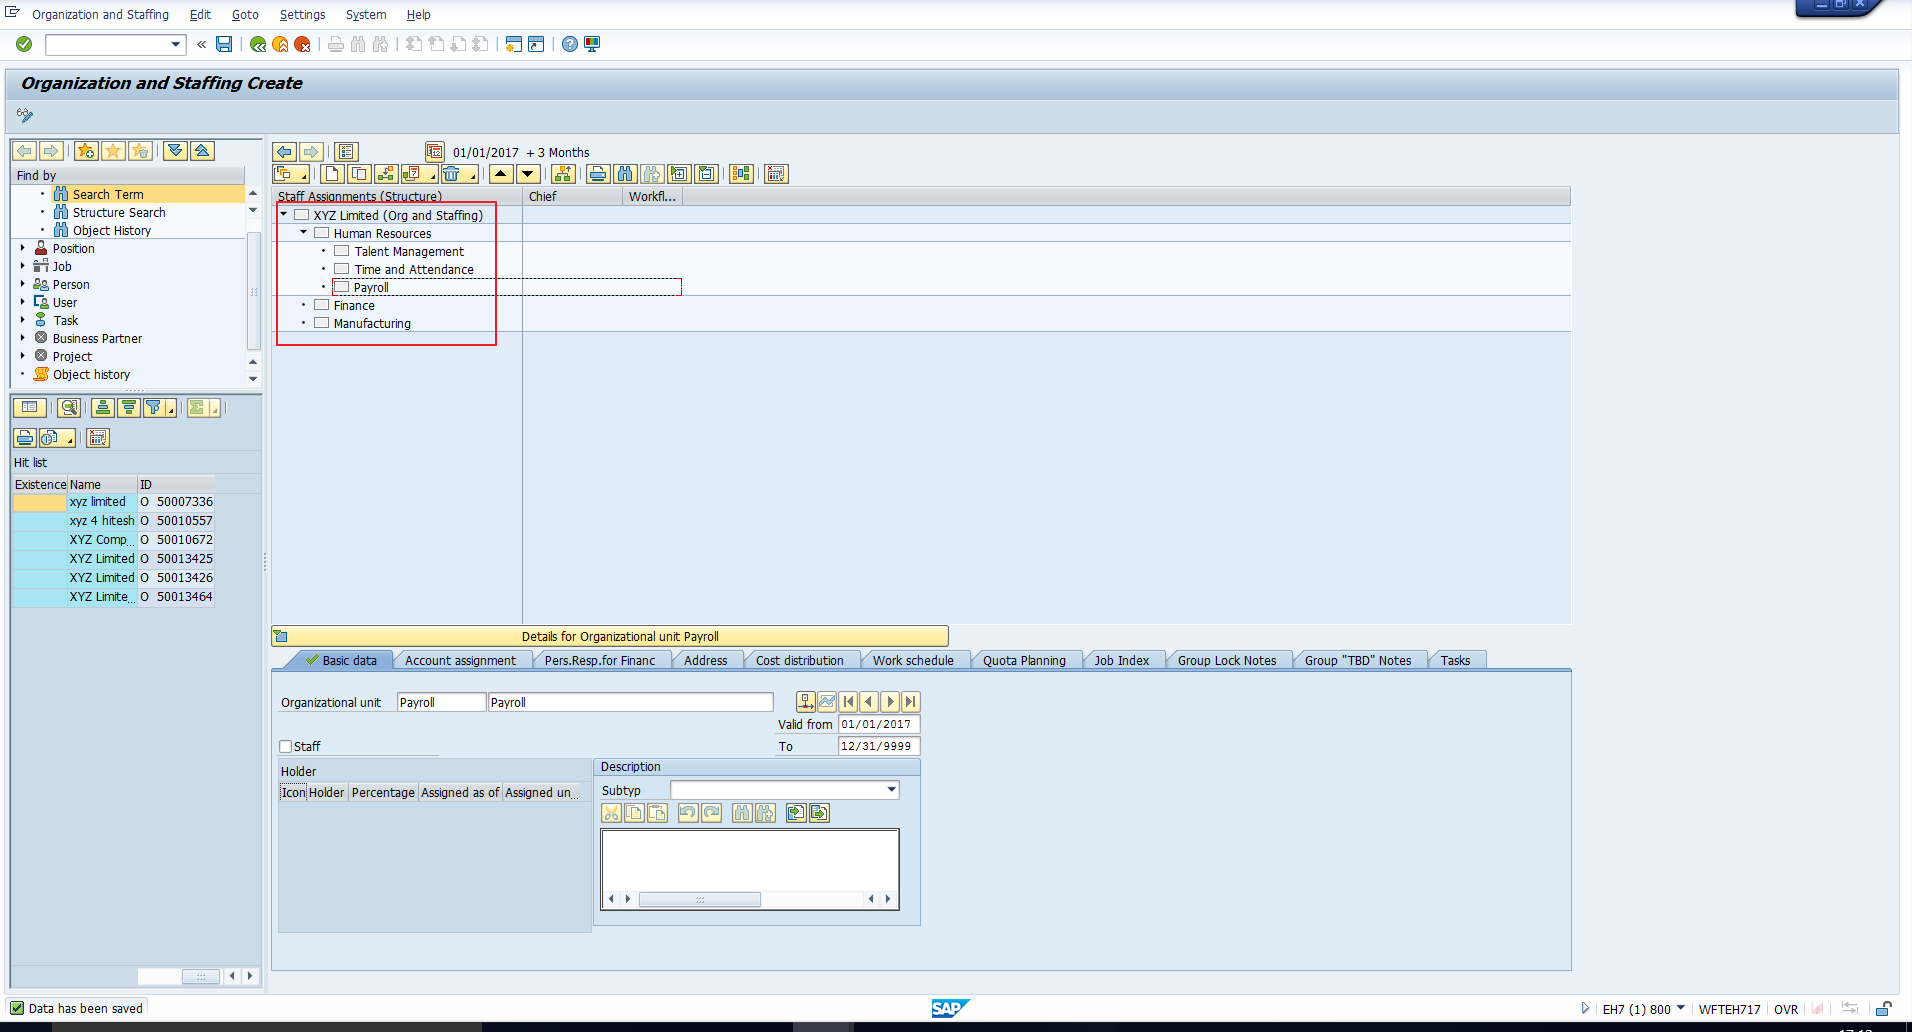
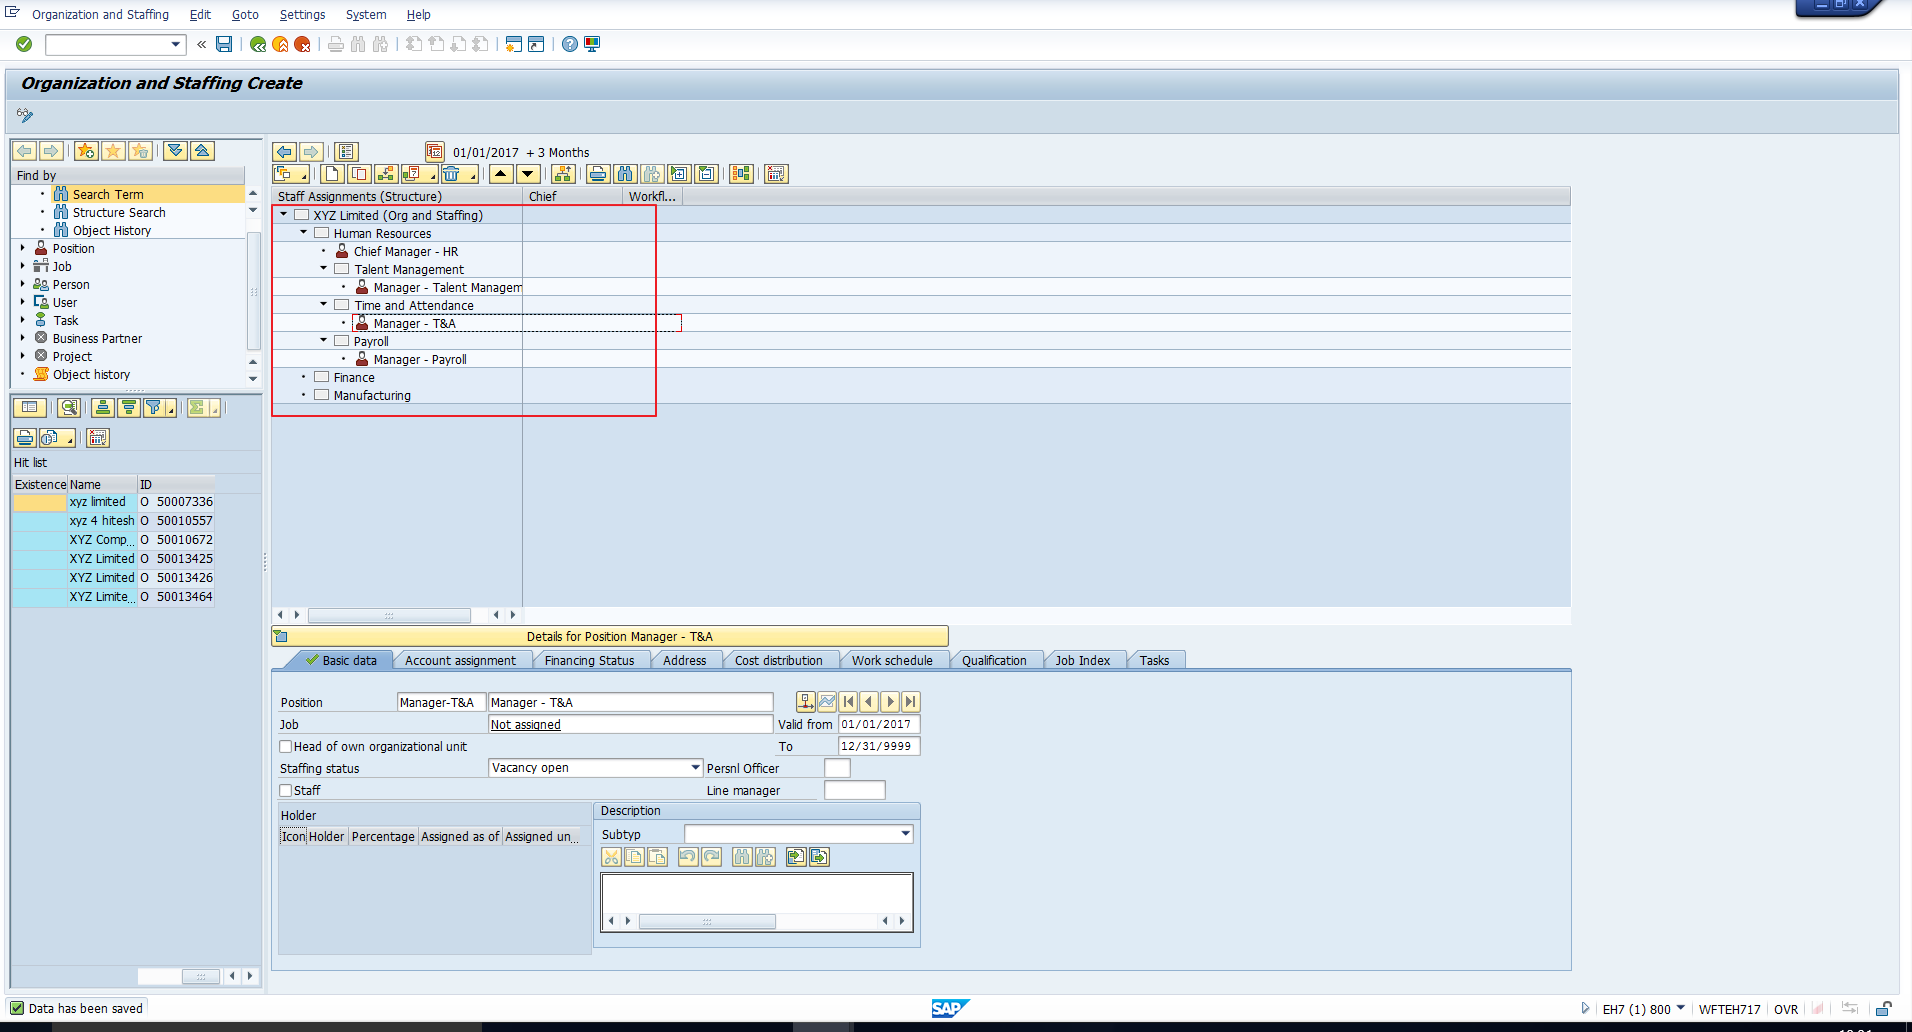
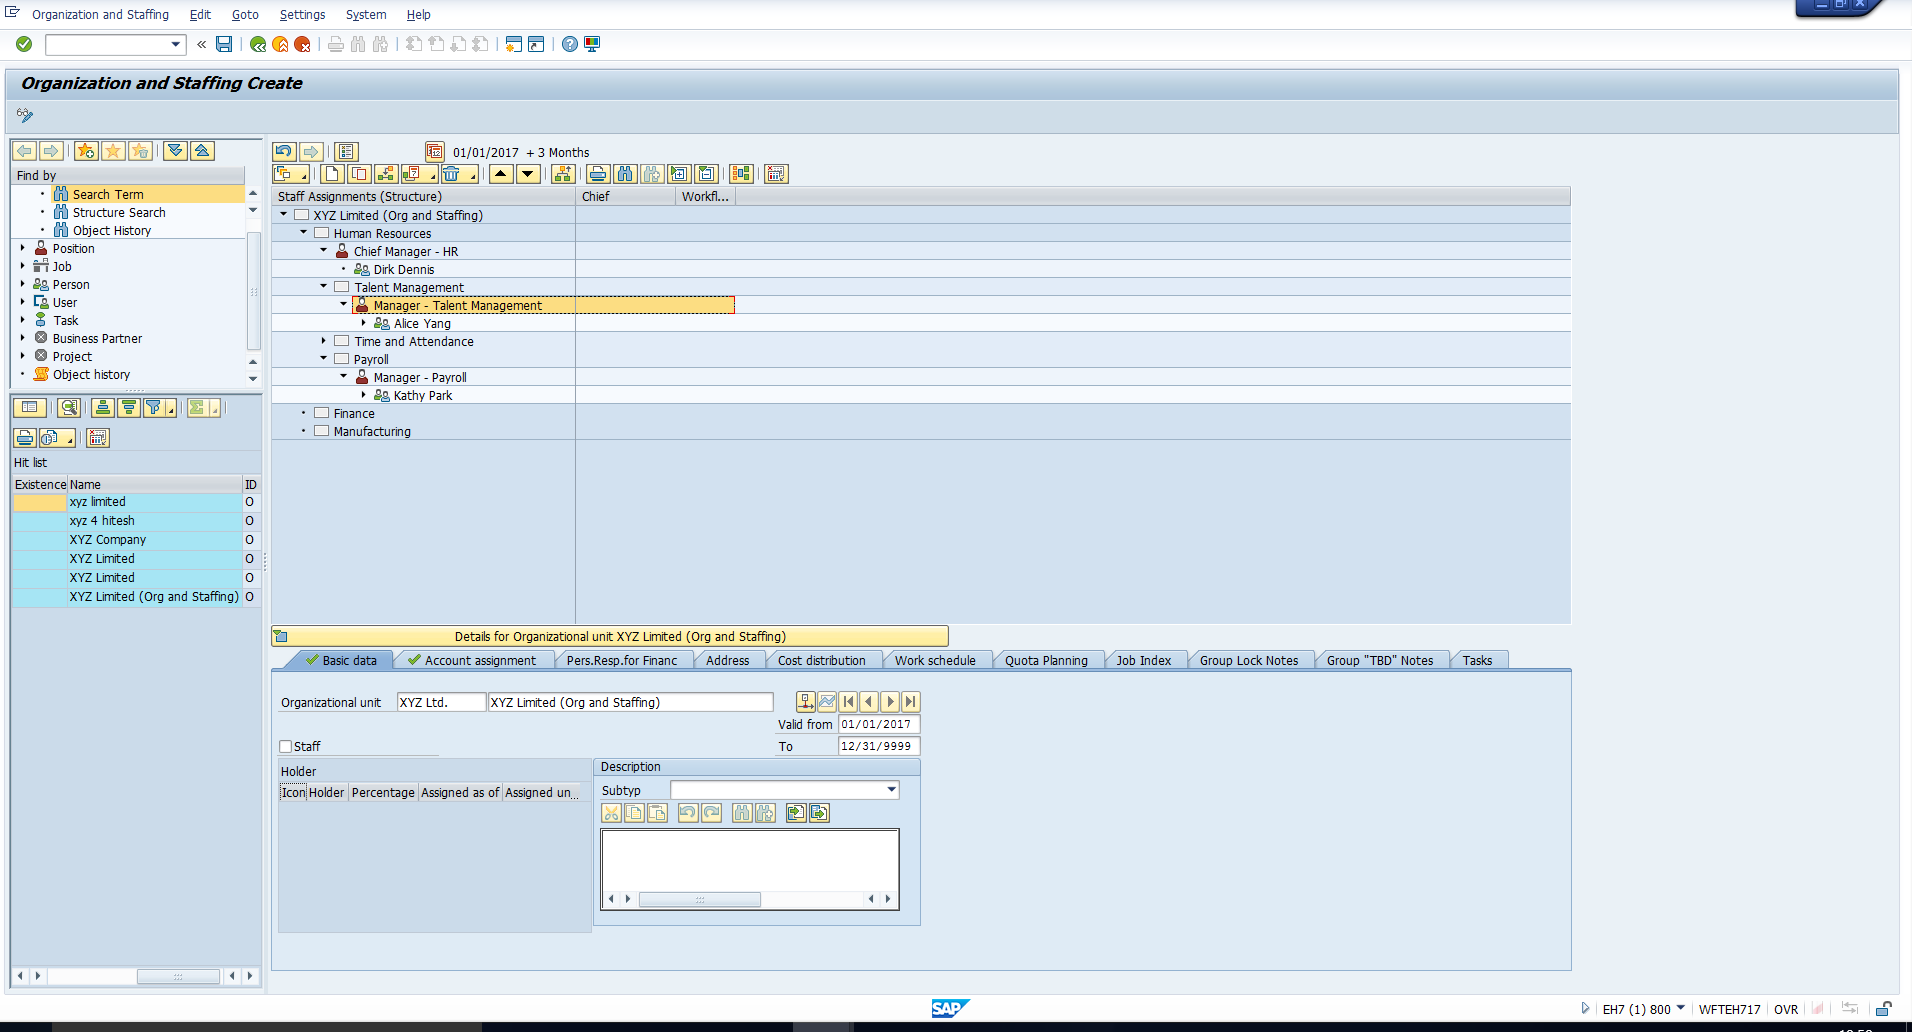
When you double click on an object in the Selection area, the object is then displayed in the Overview area as depicted in Figure 5. Here, we can see the organizational unit XYZ Limited that we had selected. You can also see the structure below the organizational unit.
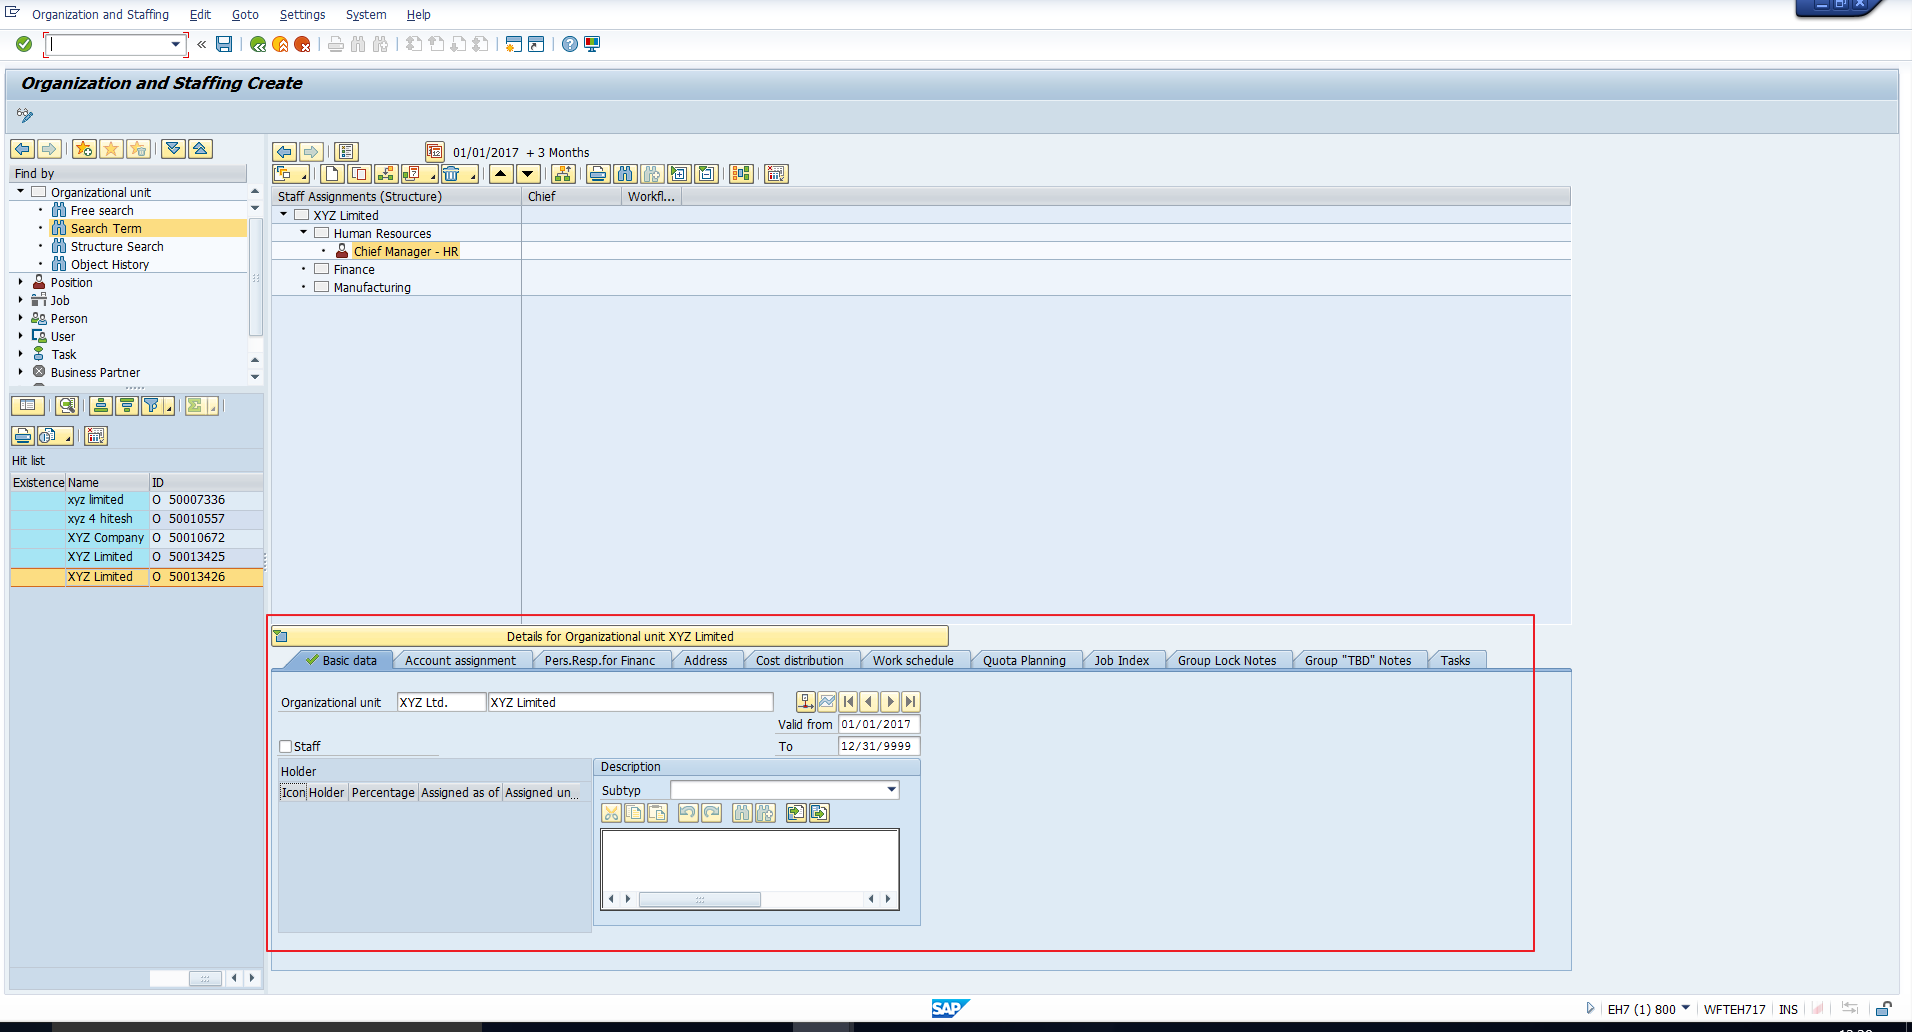
Details Area
The detailed characteristics of the object are displayed as tab pages in the Details area. You can see these tab pages in Figure 6. These tab pages can be customized. We will cover this configuration in a separate tutorial.
Creating an Organizational Structure
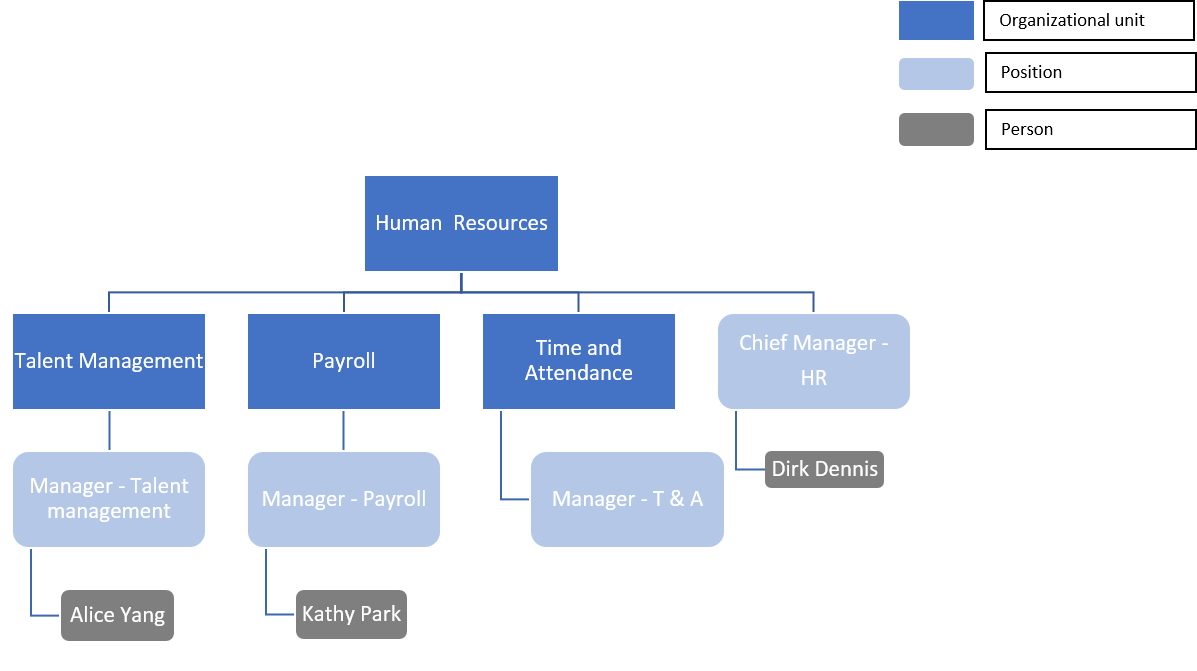
Now that we have gained a basic understanding of the interface, let us proceed to build an organizational structure using SAP Organization and Staffing. Let’s consider the same example as in the Simple Maintenance tutorial. Assume we want to build the organizational structure depicted in Figure 7.

We have seen how to create this structure using Simple Maintenance. Now let us see how we can build this structure using SAP Organization and Staffing.
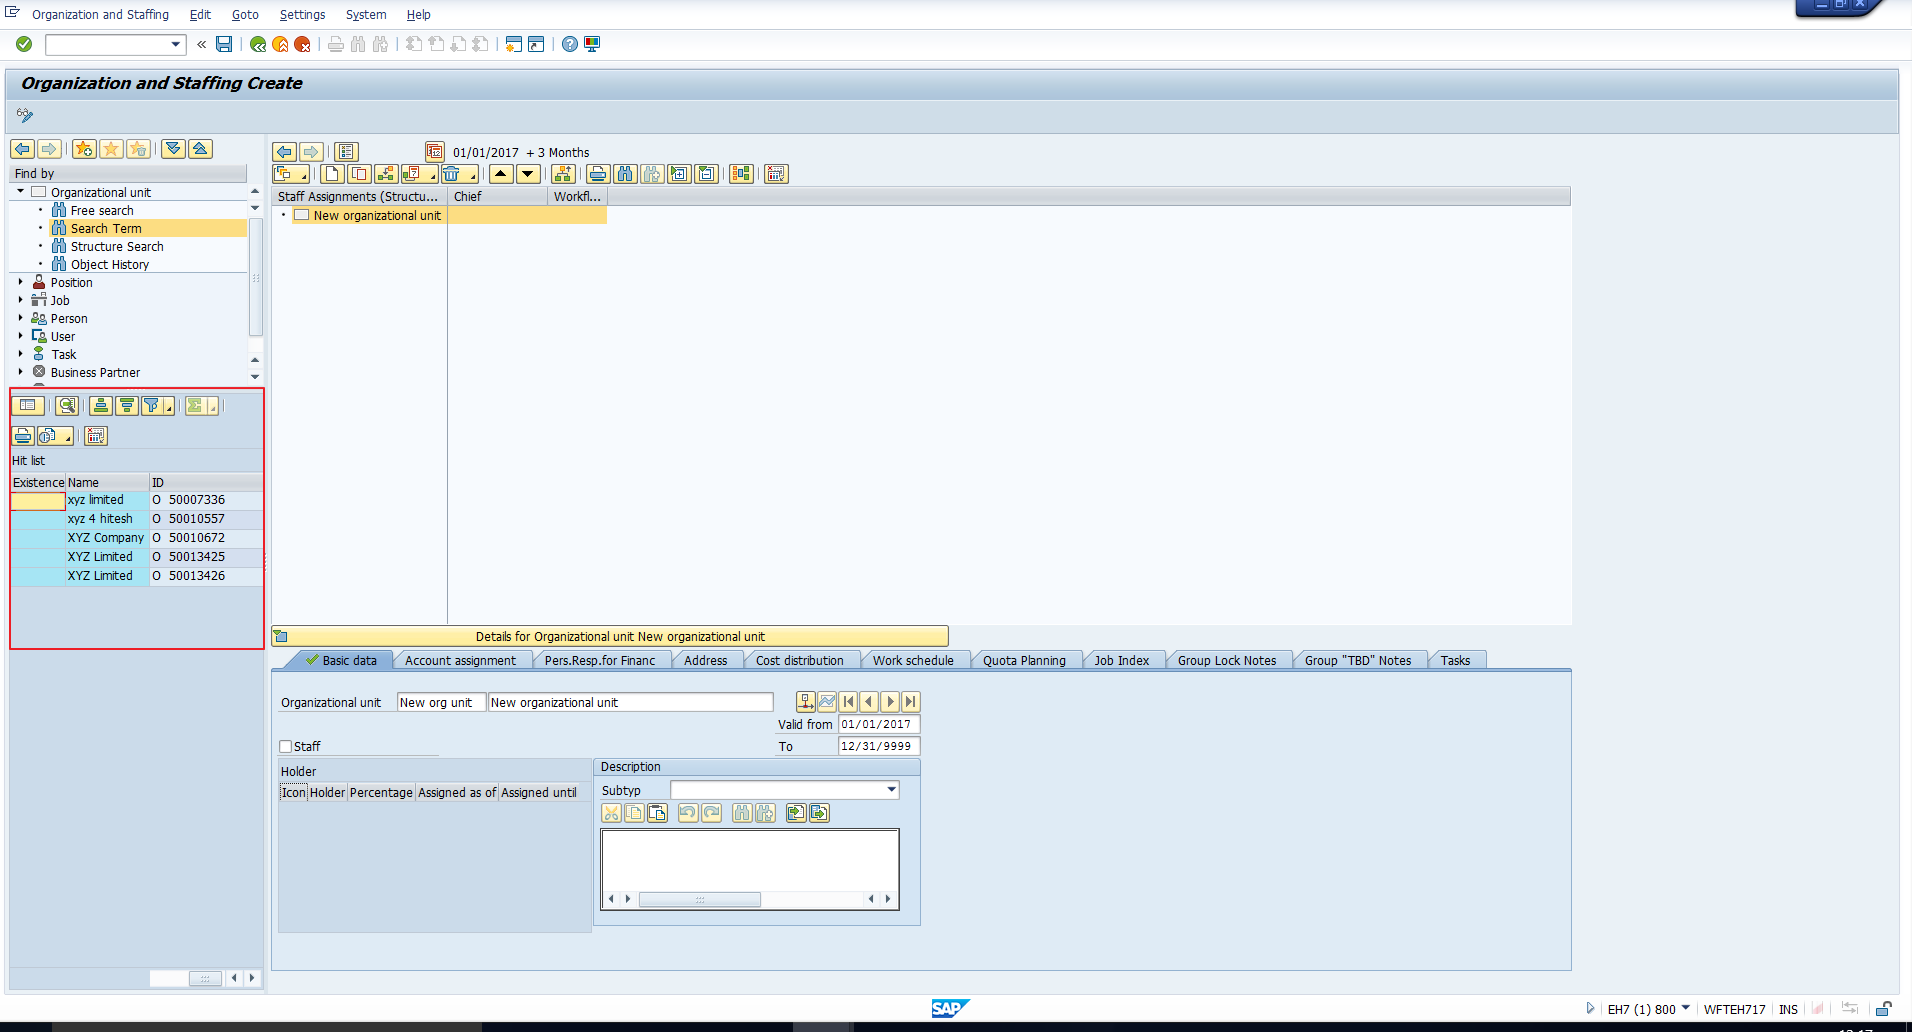
To create a new organizational structure using Organization and Staffing, double click on the Organization and Staffing “Create” transaction highlighted in Figure 8. Alternatively, you can directly enter the transaction code PPOCE.
This takes you to the pop-up screen depicted in Figure 9.
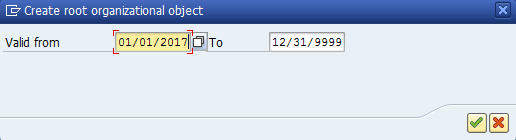
Here you should enter the required validity period for the root organizational unit. Then, hit Enter or Continue. This takes you to the screen in Figure 10.
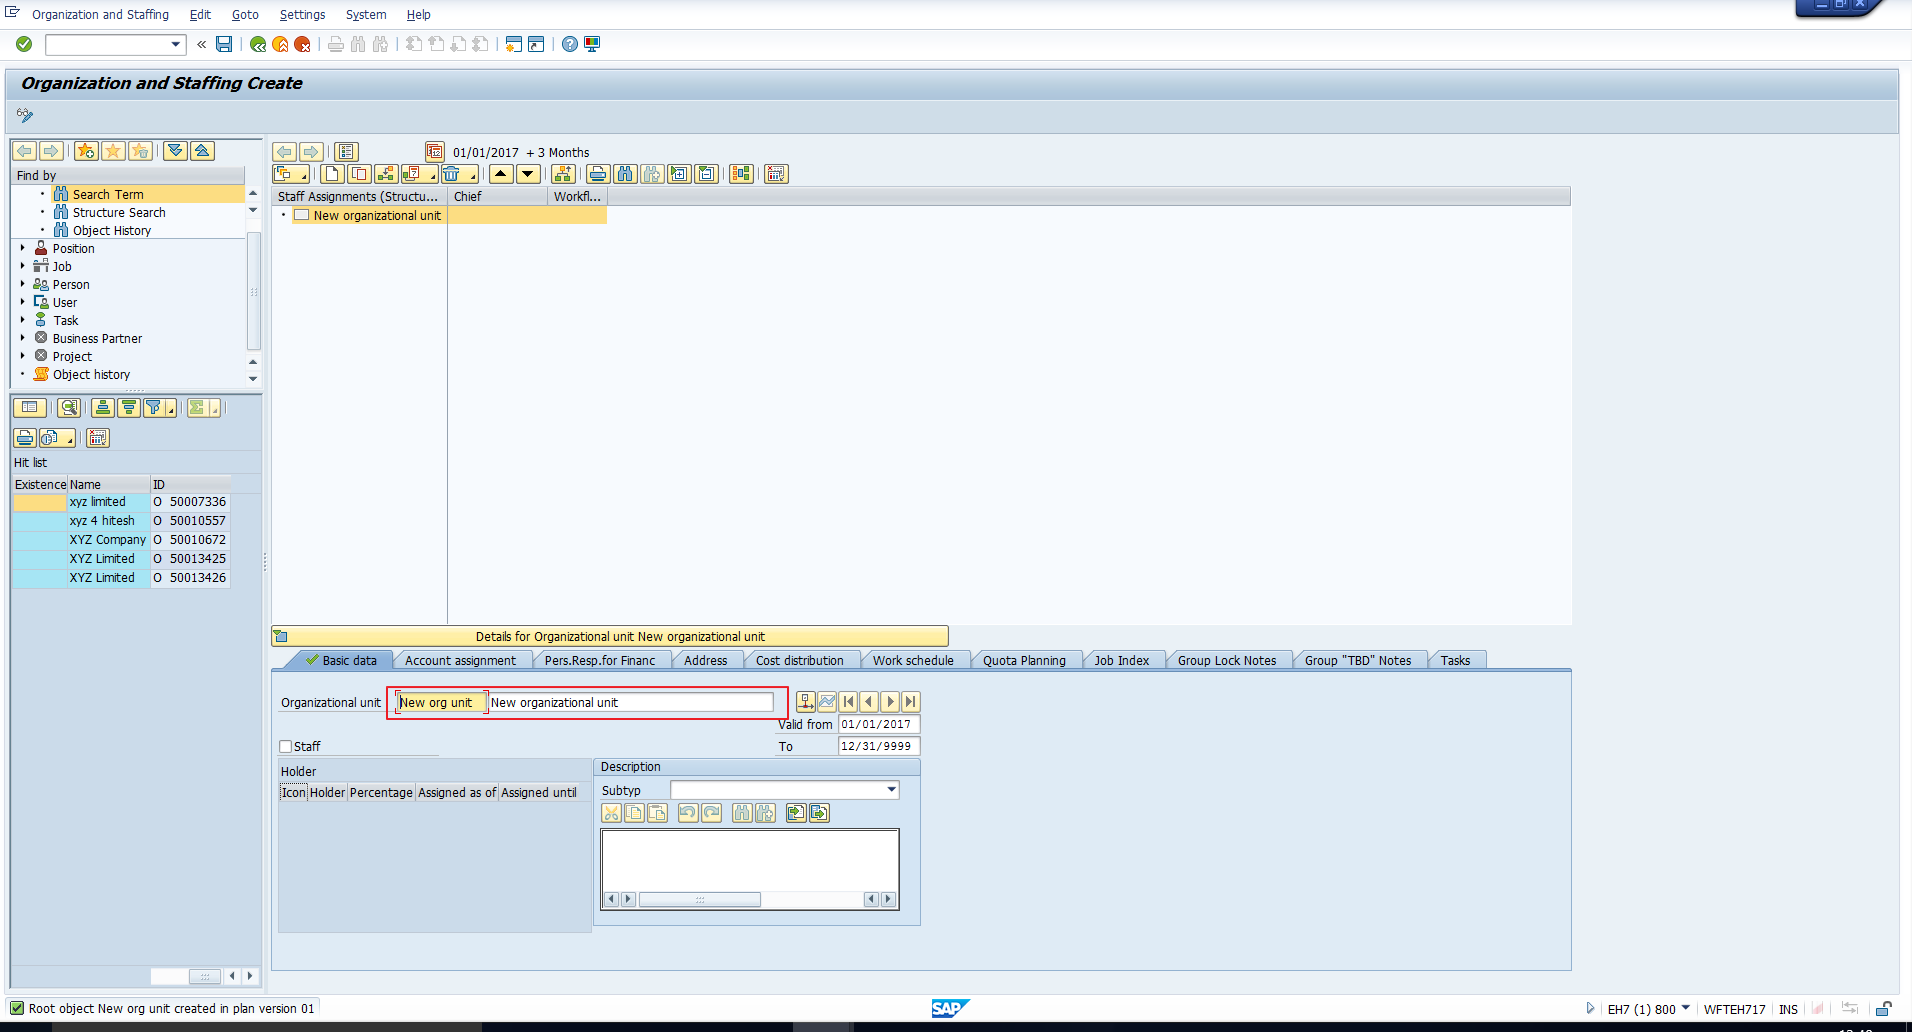
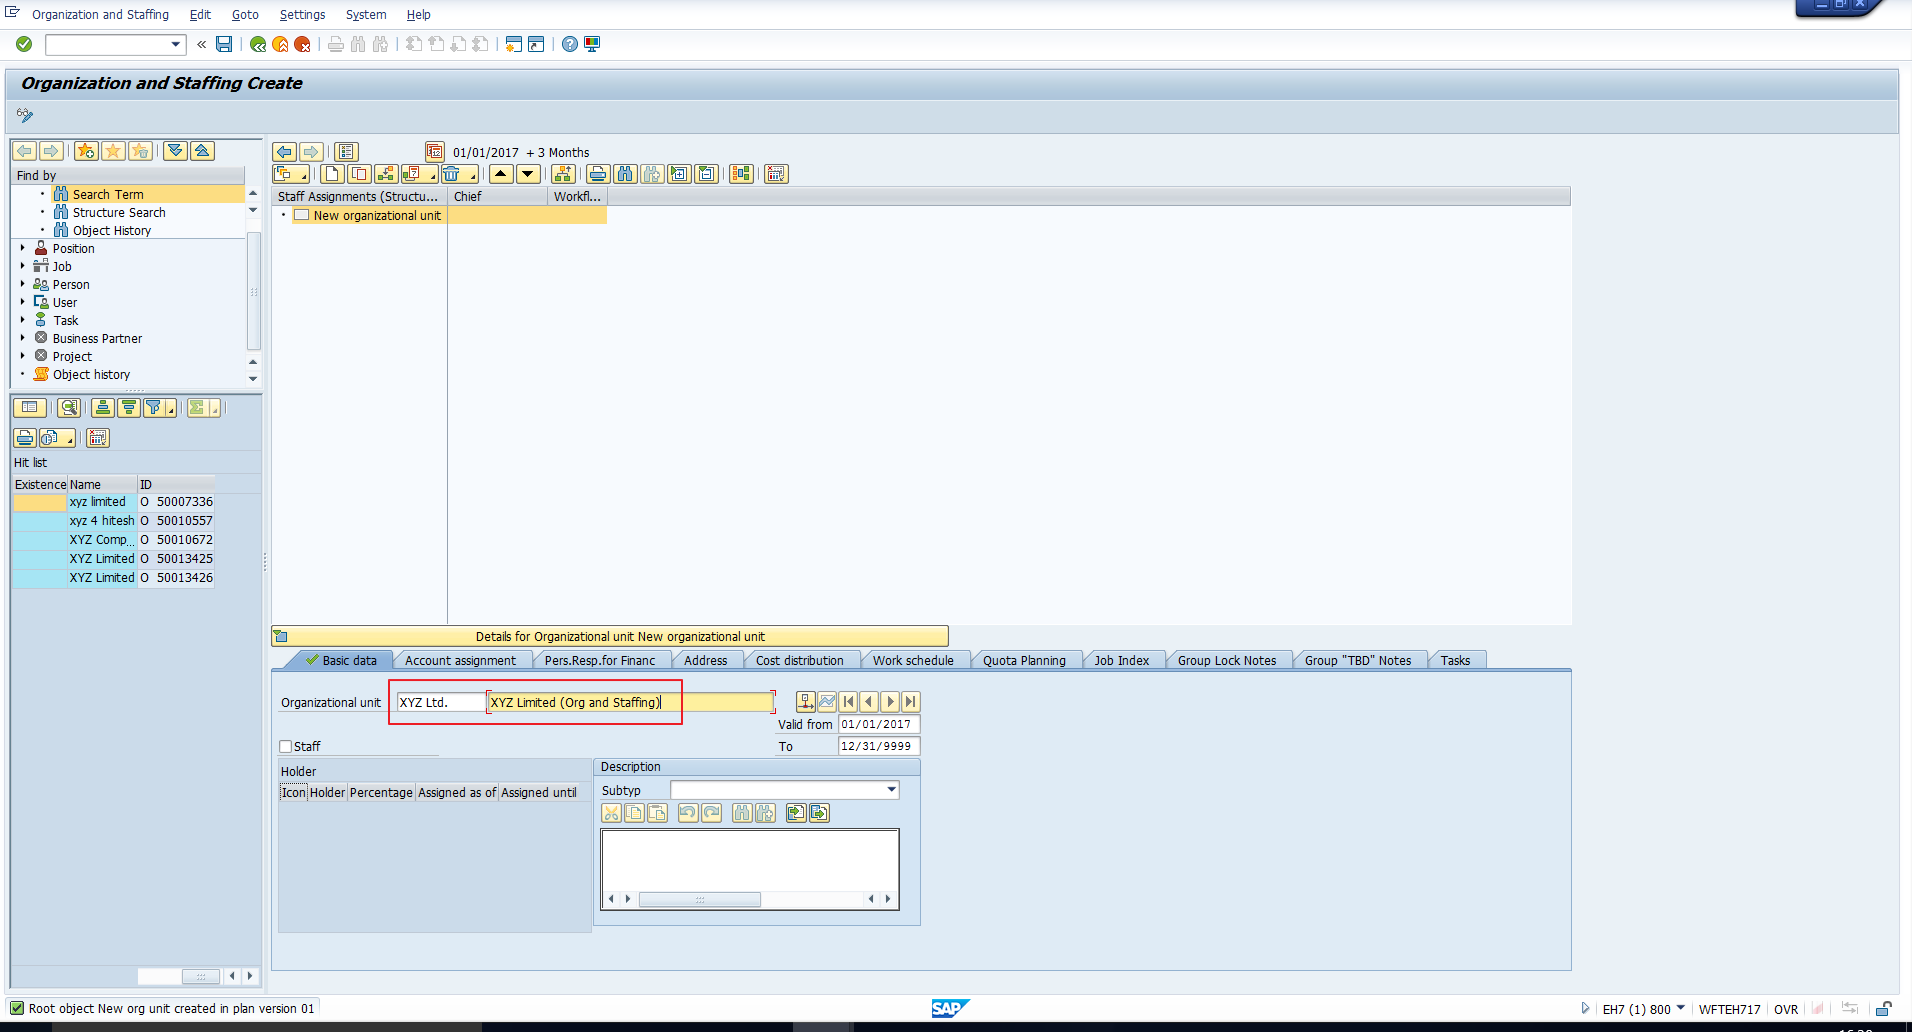
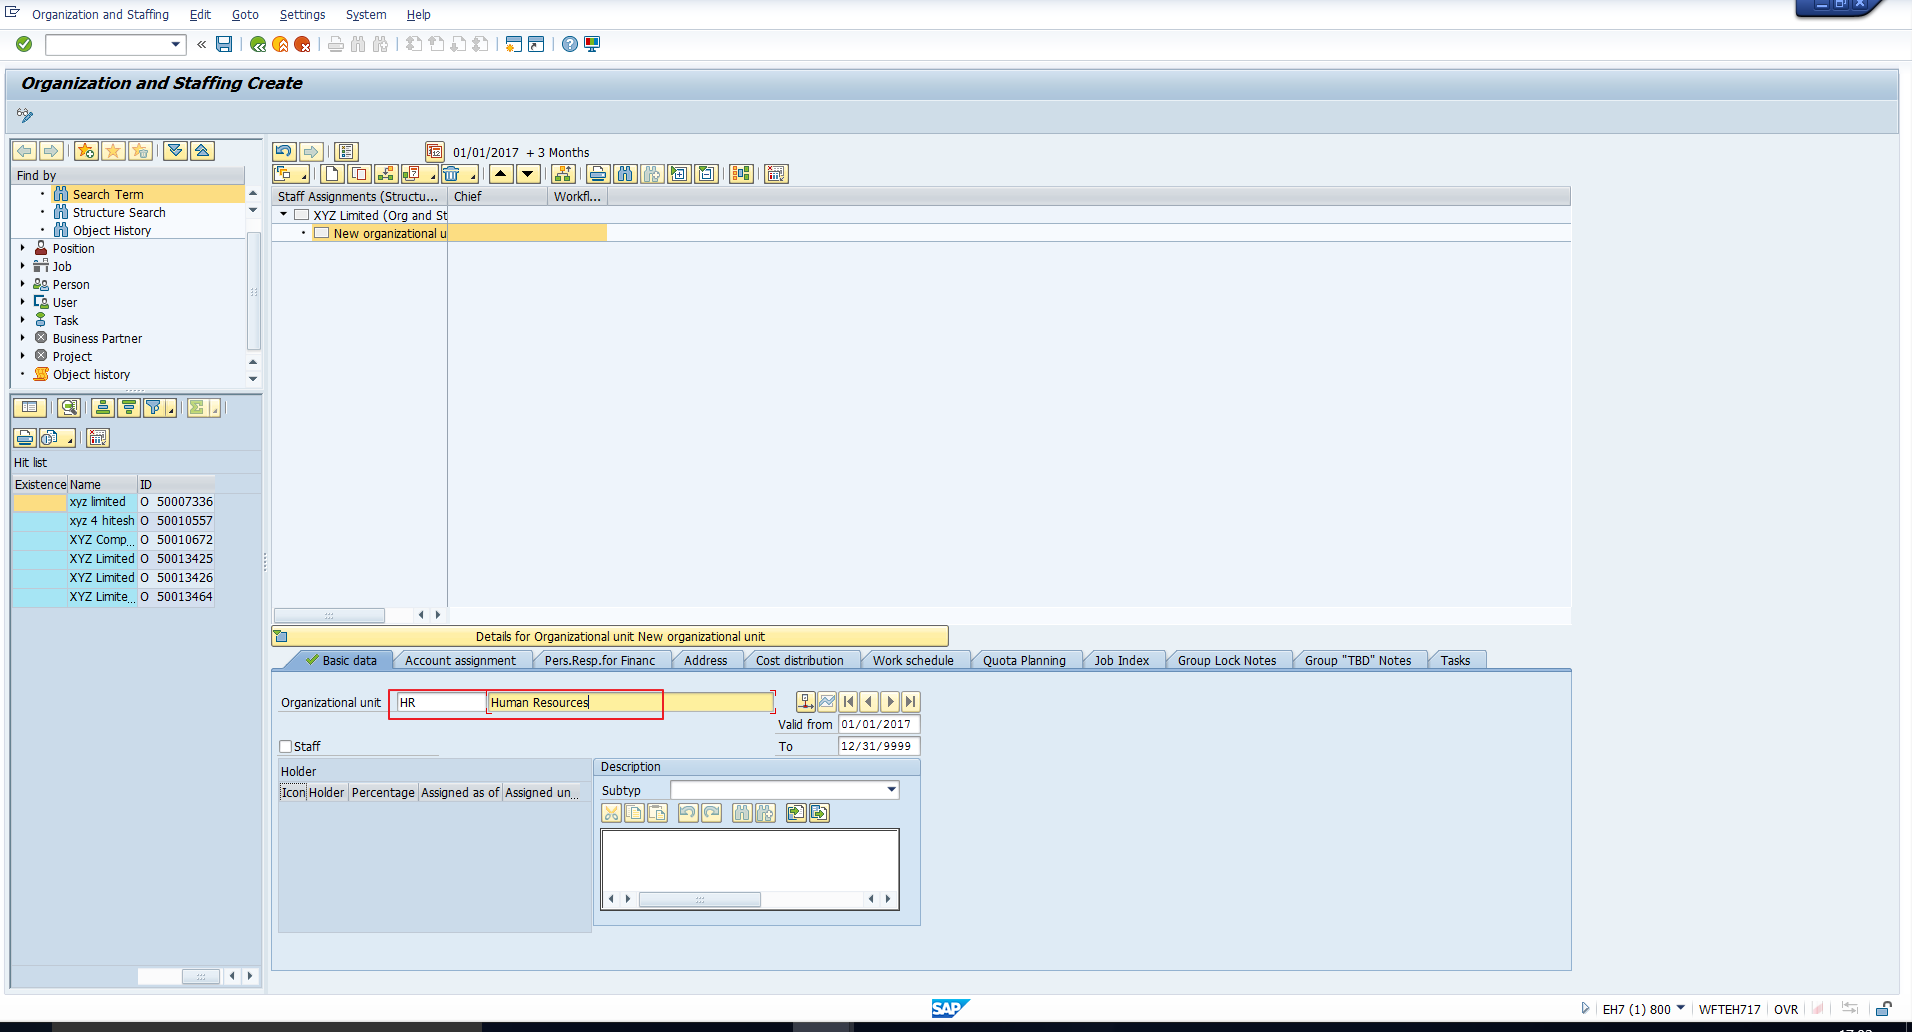
In the above screenshot, we have highlighted the fields in which you must enter the abbreviation and name of the organizational unit. You can look at Figure 11 where we have illustrated this.
You can fill in data in the other tab pages as well, if you require to do so. For example, assume you want to assign a company code, personnel area and personnel subarea to this organizational unit. You can do this in the Account Assignment tab page, depicted in Figure 12. If you have browsed through the tutorial on Infotype Maintenance in Expert mode, you may recollect that this information is stored in the Accounts Assignment Infotype (Infotype 1008). This implies that you can opt to maintain this information using that interface as well.
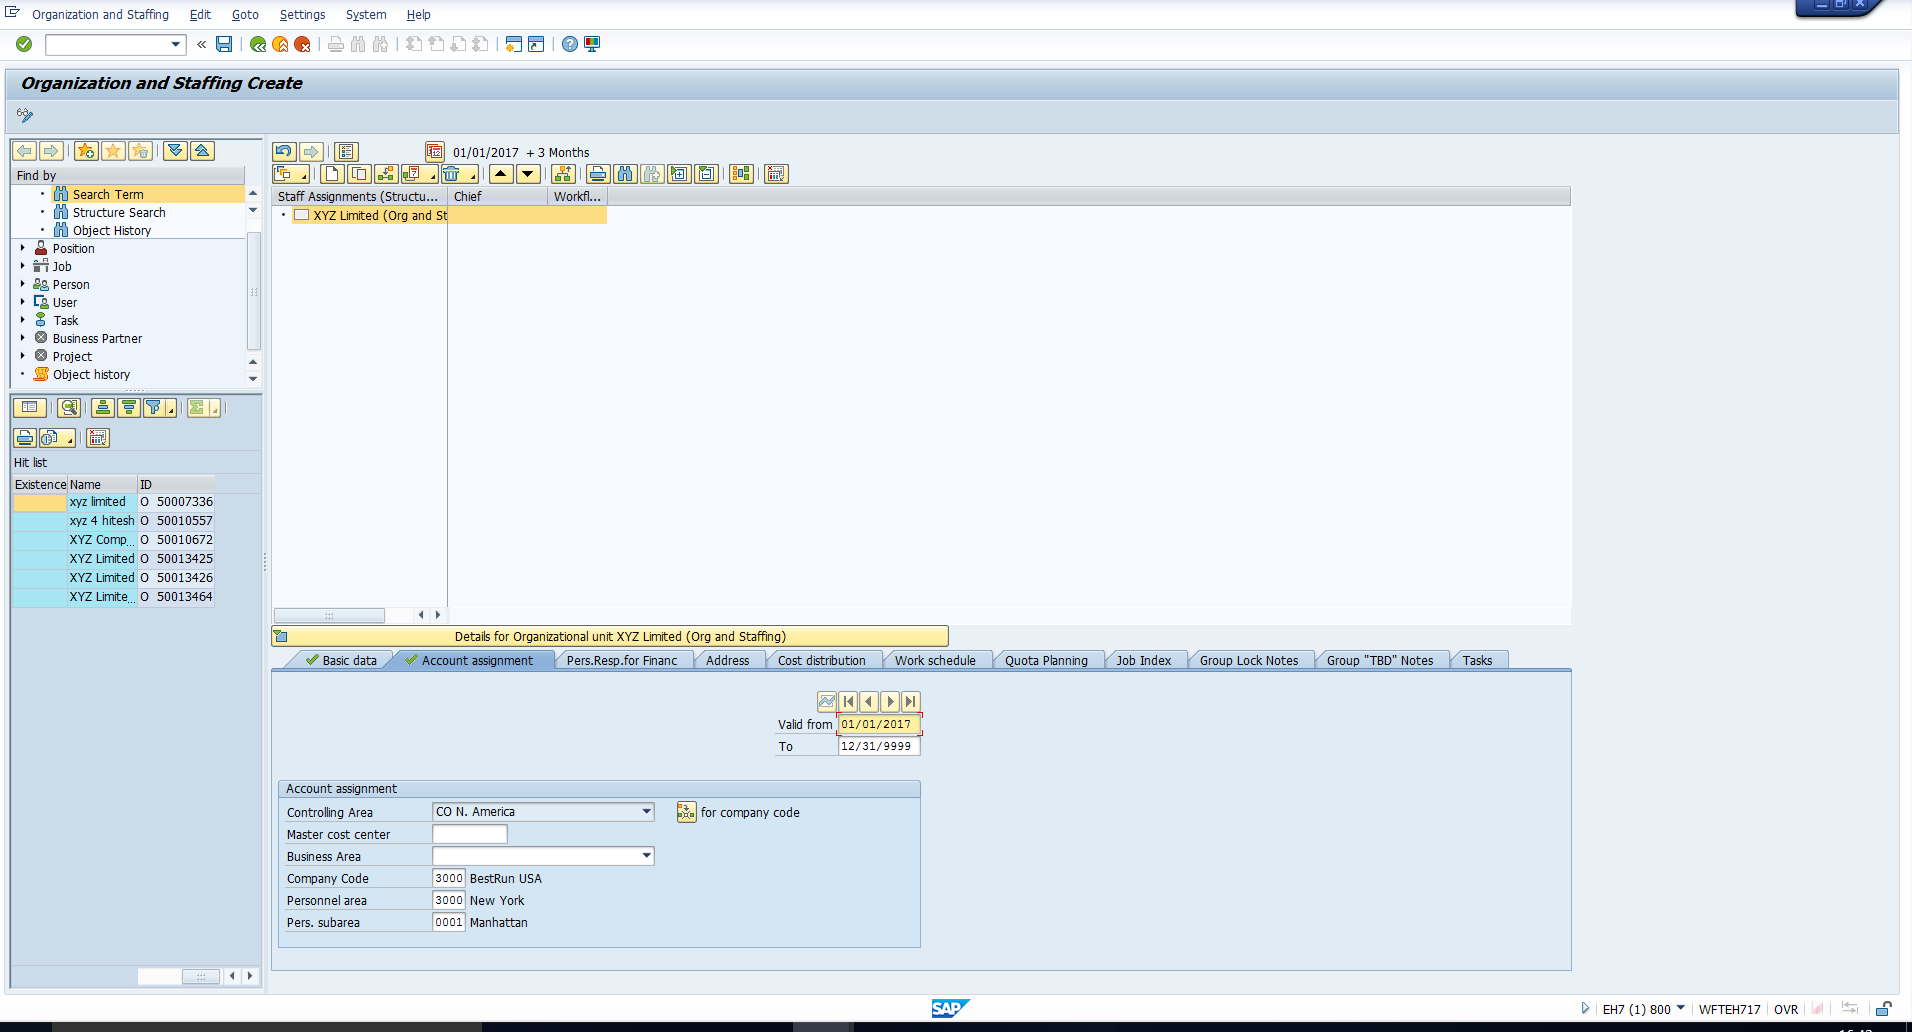
Once you enter the desired details, click on the Save icon to save the newly created organizational unit.
To create the subordinate organizational units, position the cursor on the root organizational unit and click on the Create icon. The screen in Figure 13 will be displayed. Here you should choose the appropriate relationship based on whether you want to create a subordinate organizational unit or position.
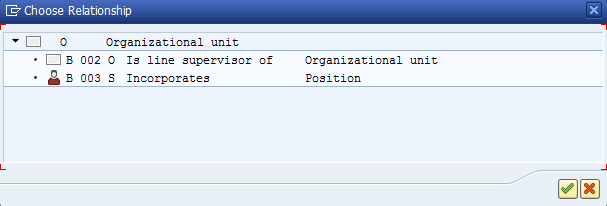
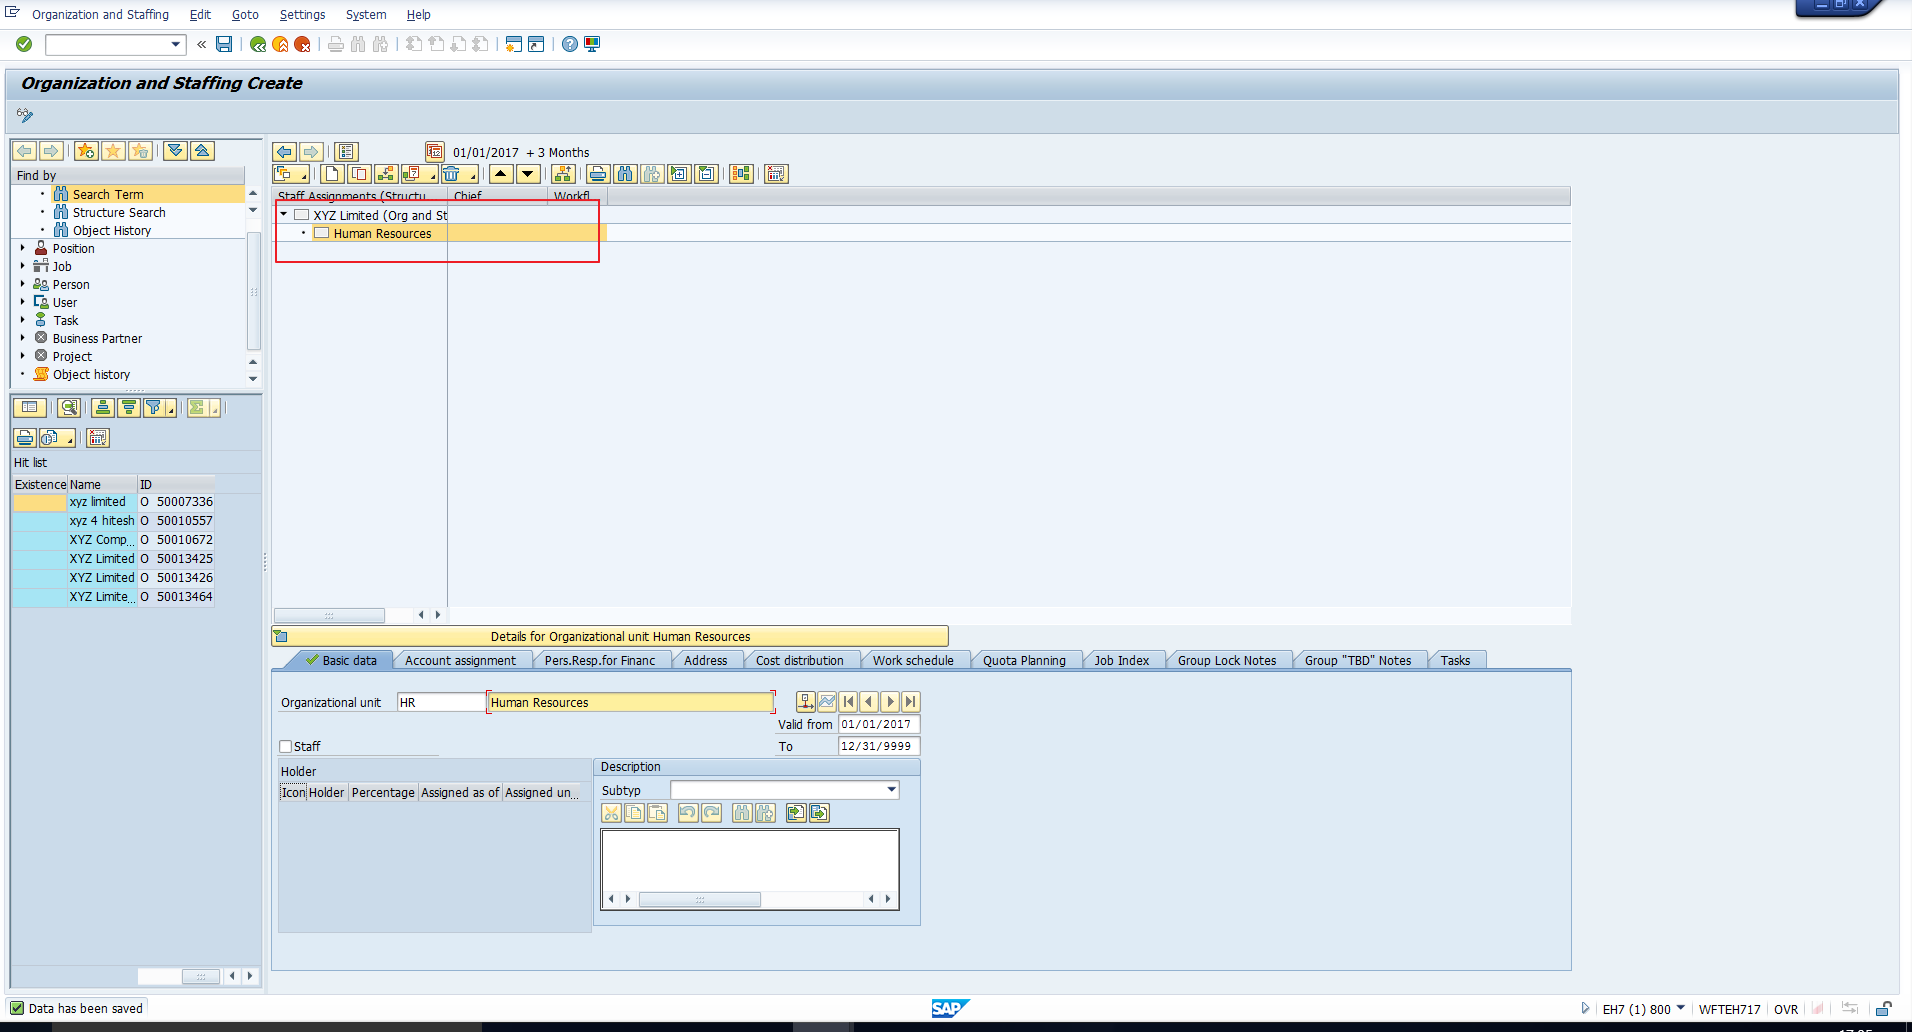
In this case, we want to create subordinate organizational units, hence select the first relationship. This will take you to the screen in Figure 14, where you should enter the required abbreviation, name and other details for the subordinate organizational unit.
Then, click the Save icon. In the Overview area, you will see the newly created organizational unit (HR) shown in Figure 15. Similarly, create the other two subordinate organizational units until you see the structure depicted in Figure 16.
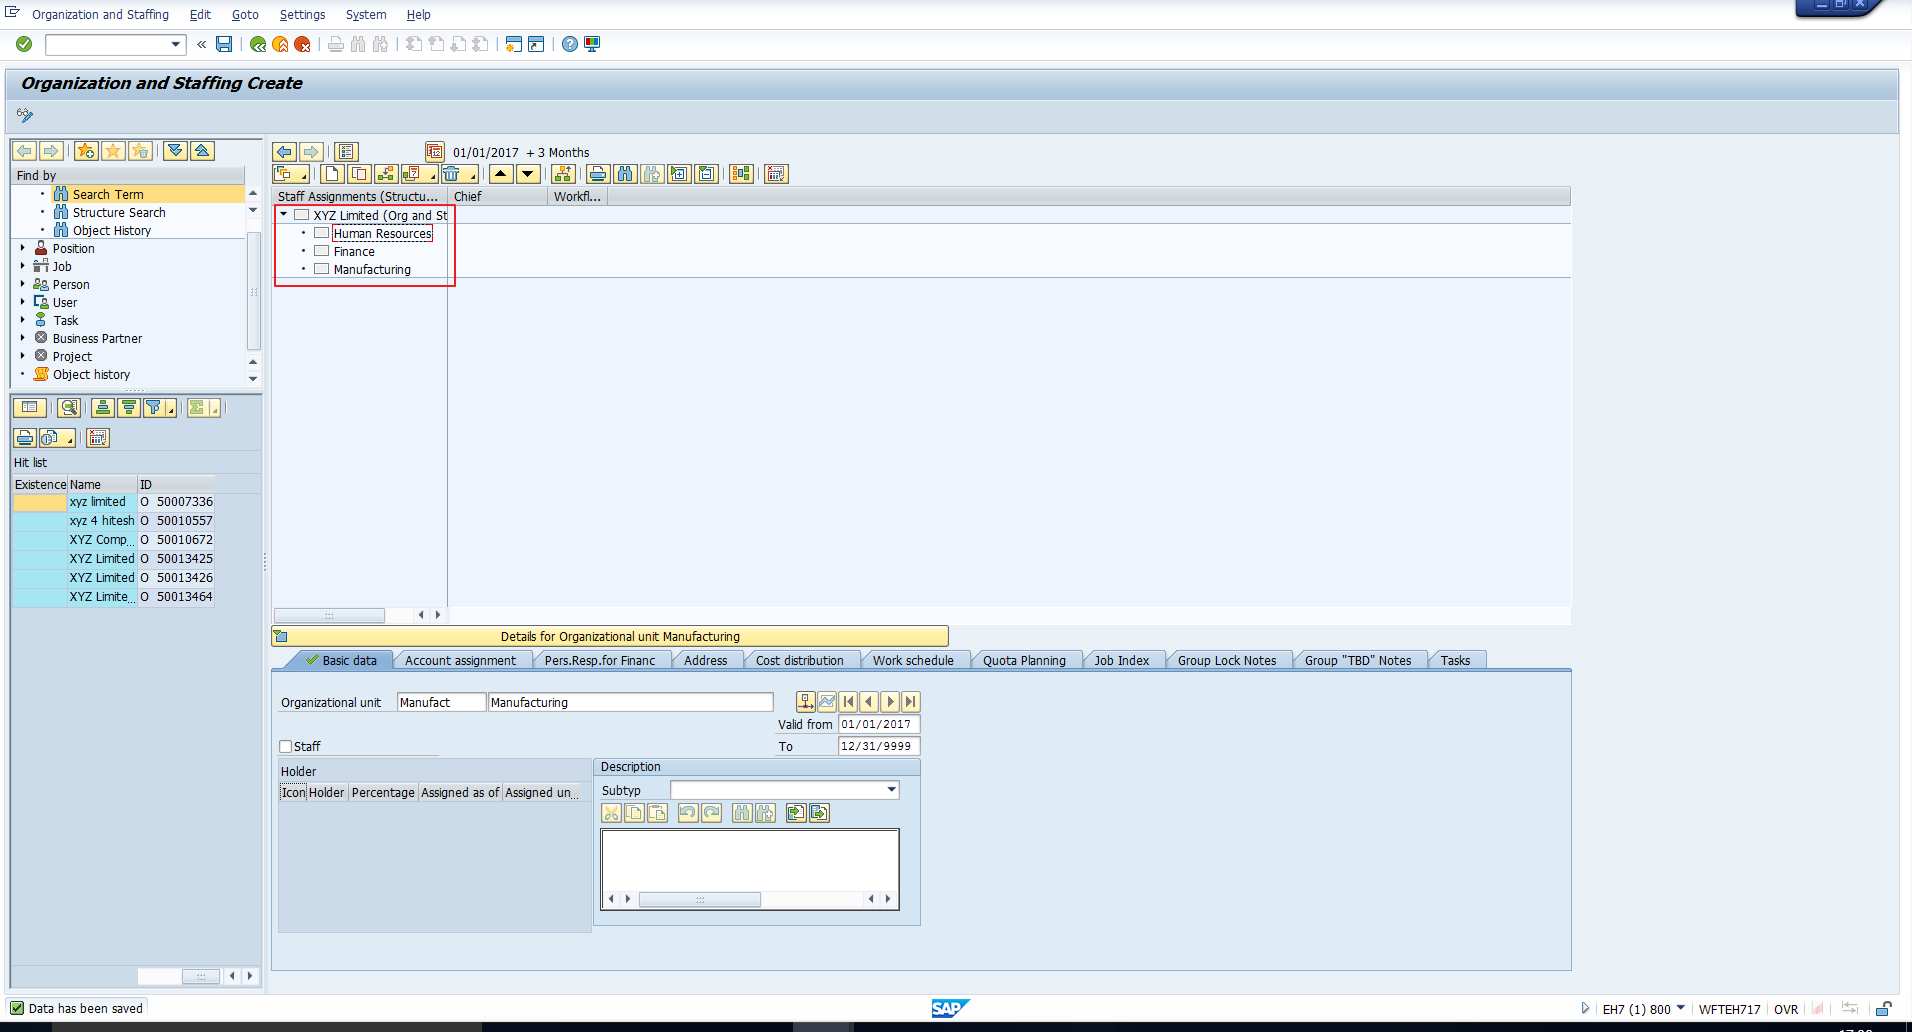
Next, position the cursor on the HR organizational unit to create the next level of the structure. Follow the same approach until you see the structure in Figure 17.
Setting Up Staff Assignments
Let us now try to map the staff assignments within the human resources organizational unit as shown in Figure 18.
To do this, we must first create positions under these organizational units. Position the cursor on the organizational unit under which the position should be created. Let us start by creating the “Chief Manager – HR” position under the Human Resources organizational unit. So, we should position the cursor on the Human Resources organizational unit and then click on the Create icon. Again, this takes us to the Choose Relationship screen depicted in Figure 13. Now select the second relationship. This will take you to the screen in Figure 19.
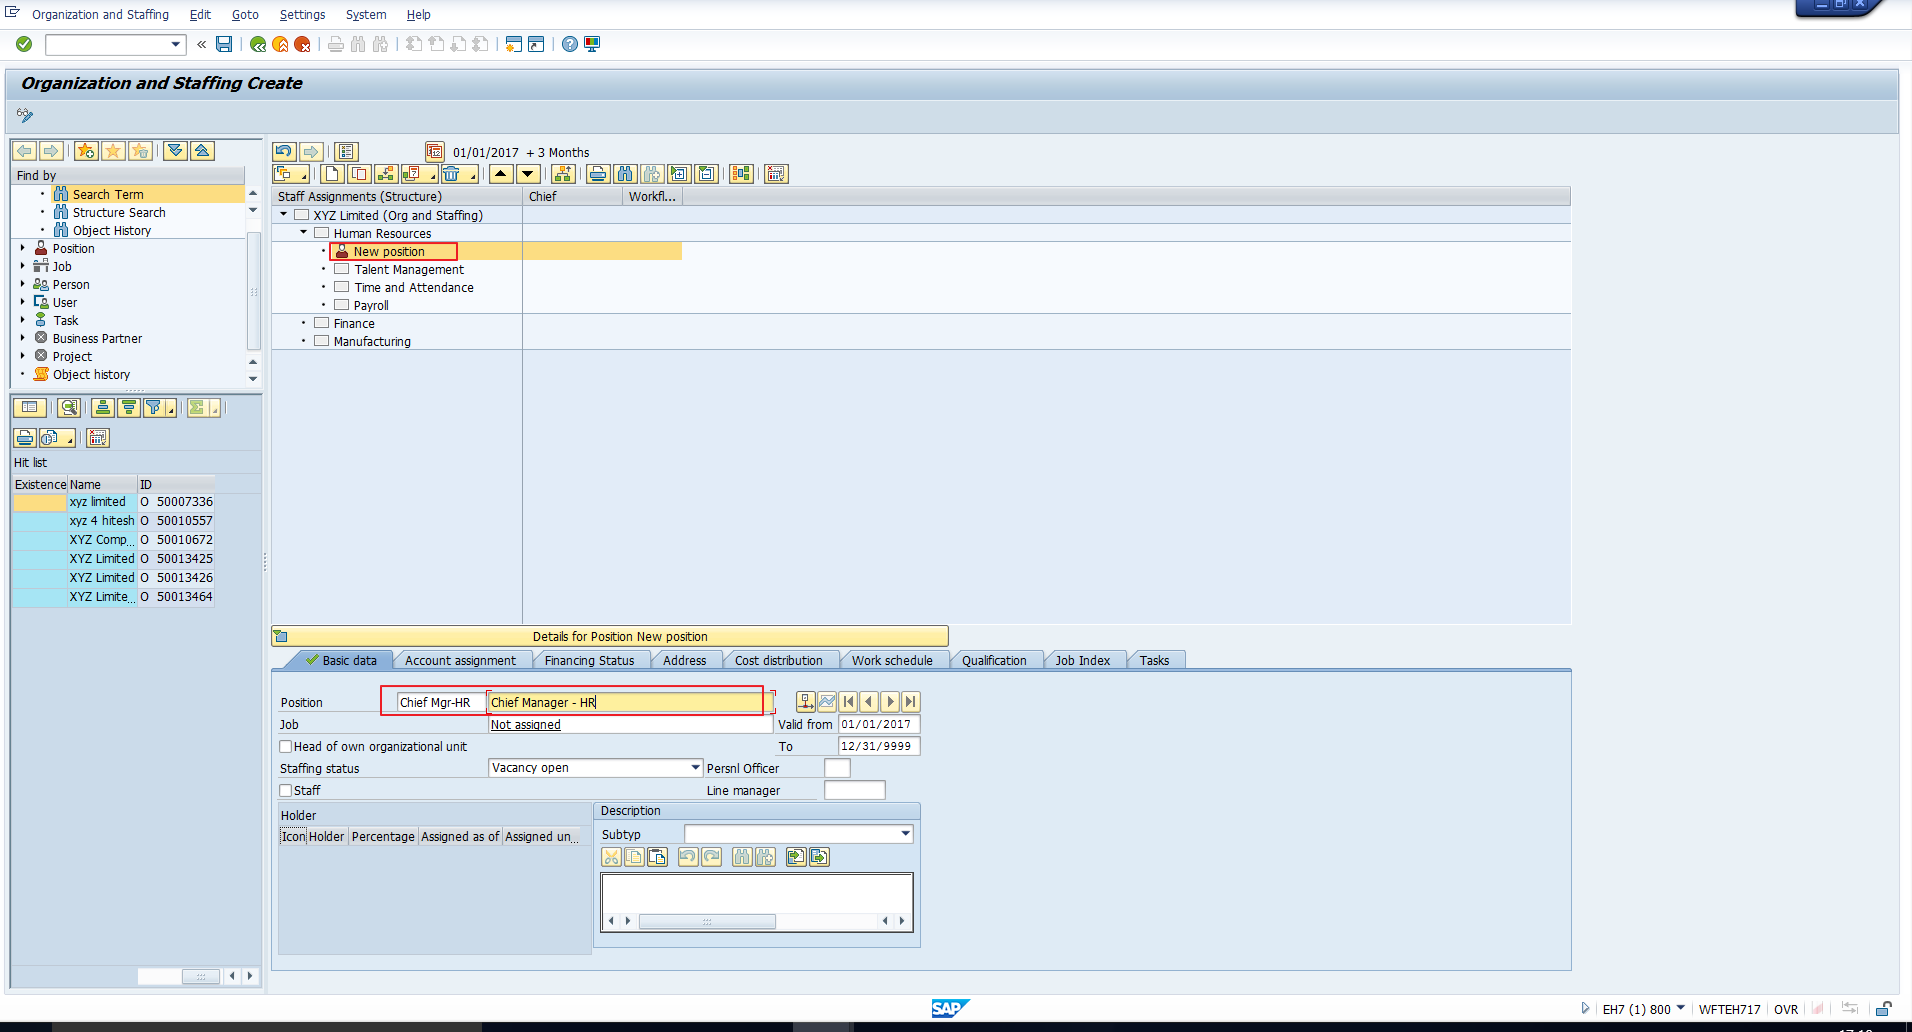
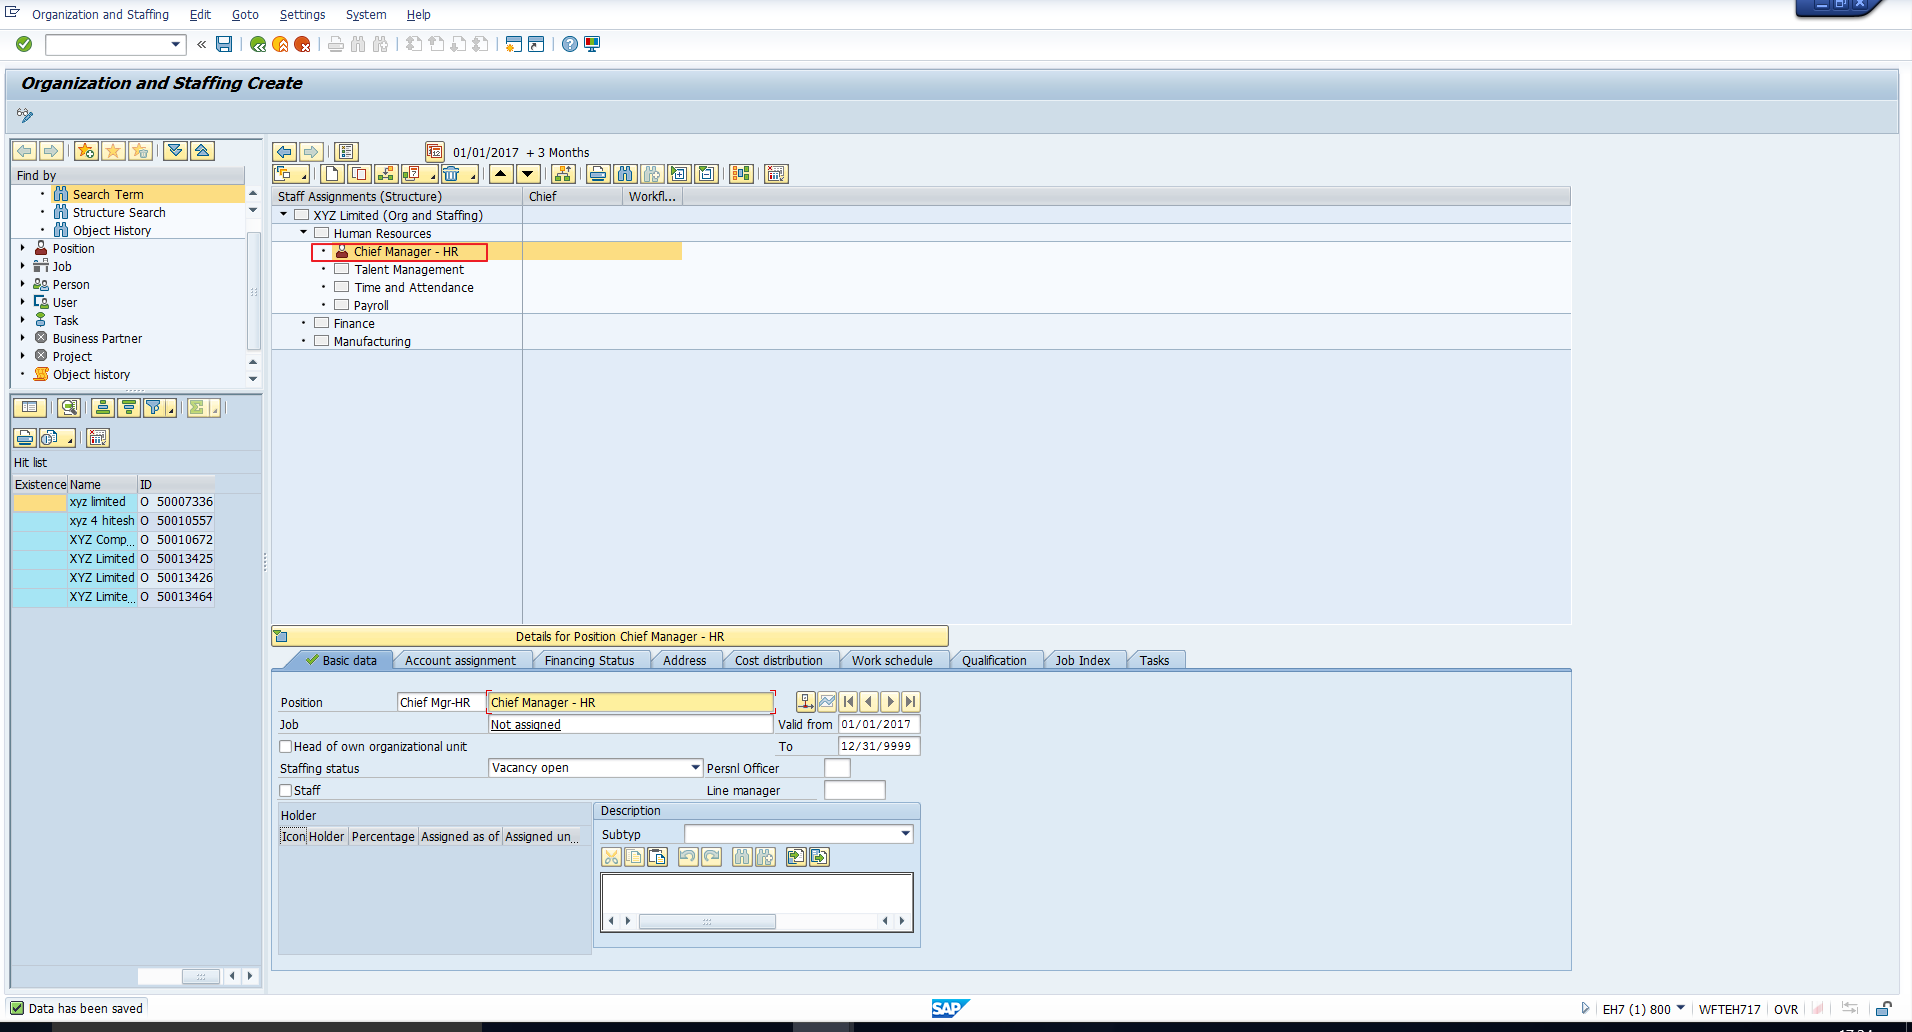
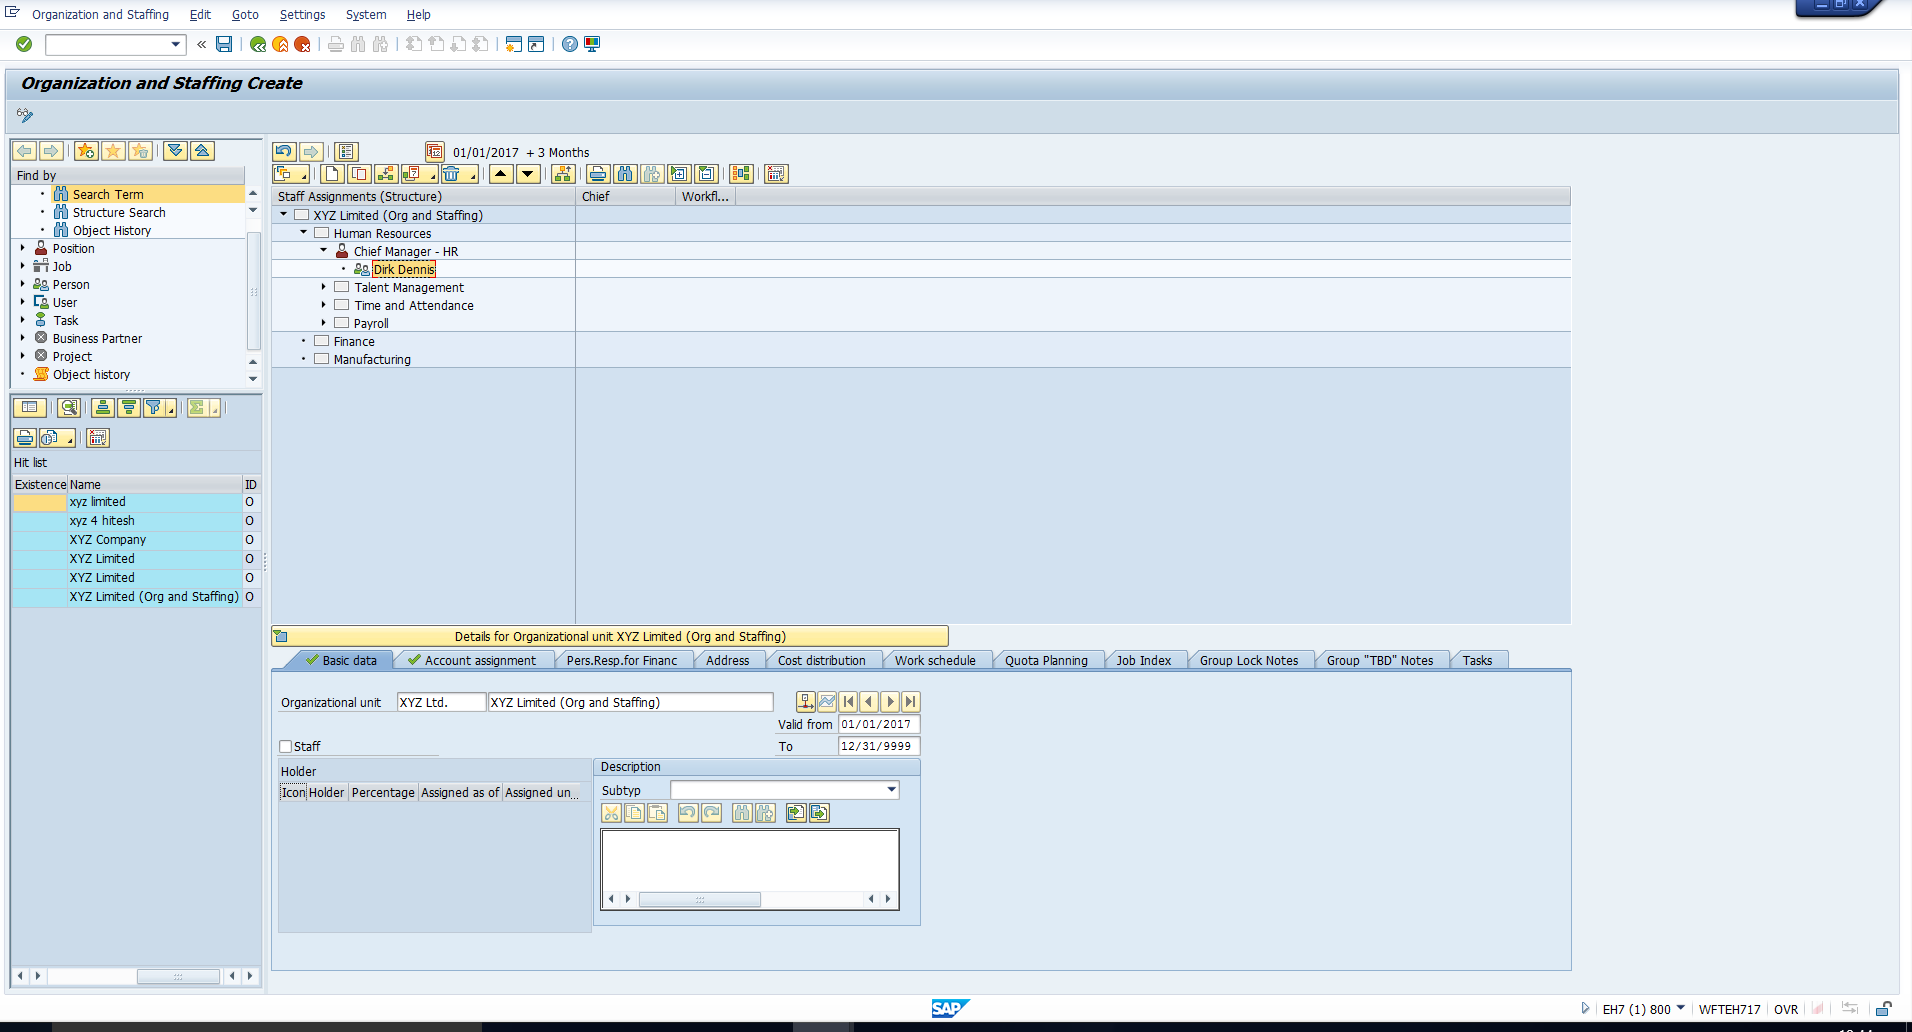
In the Overview area, you can see an object “New position” created under Human Resources. In the Detail area, enter the required abbreviation, name, and any other details you would like to enter. Click on the Save icon. When you do this, the position name gets reflected in the Overview area, as illustrated in Figure 20.
In the same way, create the other positions until you see the structure in Figure 21.
Next, we proceed to assign holders to the positions. It is advisable to assign positions to employees in Personnel Administration via personnel actions like Hiring, Transfer, Promotion. The position is assigned to the employee in the Organizational assignment infotype. However, this can also be done through this interface as explained below.
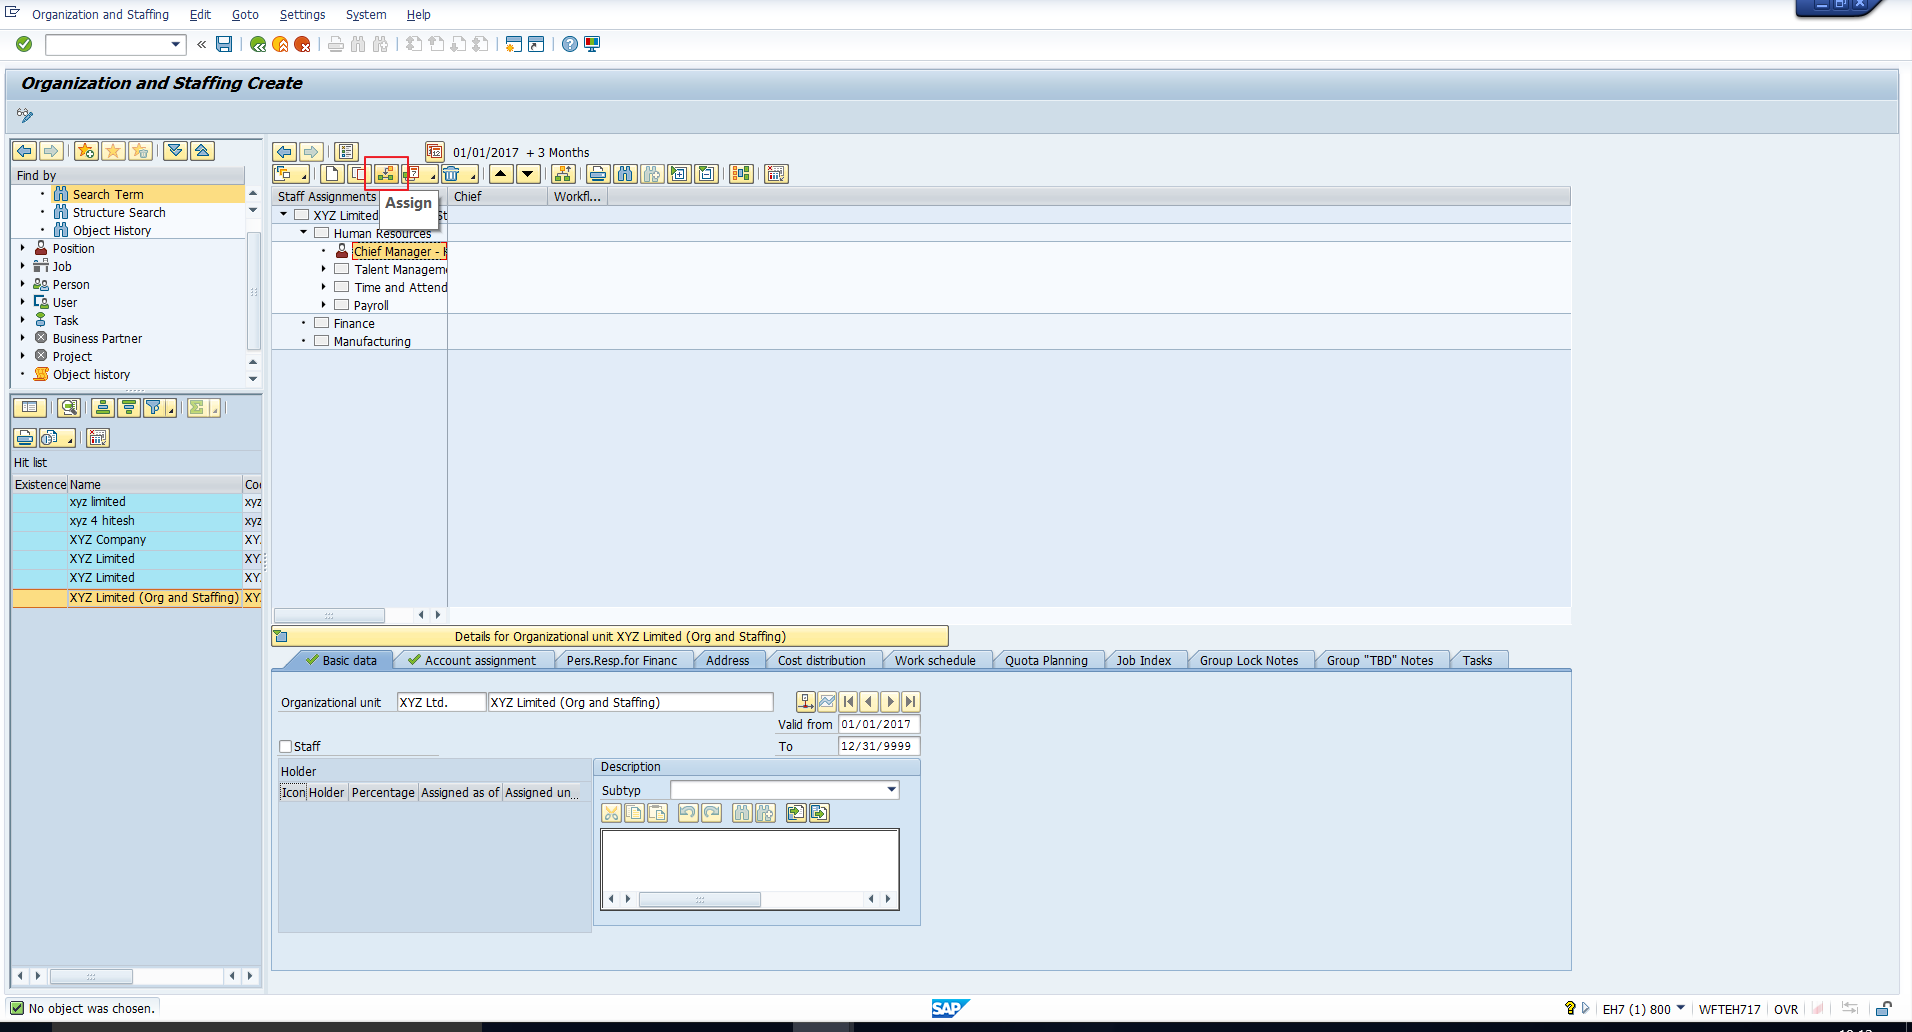
Click on the position to which you want to assign a holder. For example, let us position the cursor on the Chief Manager – HR position. Click on the Assign icon that has been highlighted in Figure 22.
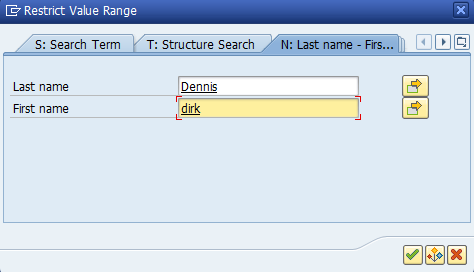
The pop-up depicted in Figure 23 appears. Here you can search for the employee who must be assigned to the position.
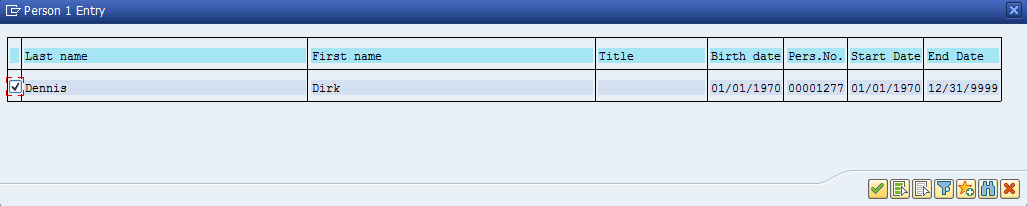
Select the employee from the search results displayed in Figure 24. Click on Enter.
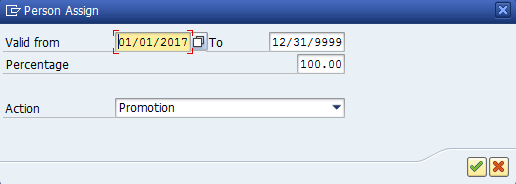
This takes you to the screen in Figure 25. You can assign the required validity dates as well as the reason for the action.
The employee is now assigned to the position, you can see this in Figure 26.
Similarly, assign the other holders to the respective positions until you arrive at the structure in Figure 27.
—
Did you like this tutorial? Have any questions or comments? We would love to hear your feedback in the comments section below. It’d be a big help for us, and hopefully it’s something we can address for you in improvement of our free SAP HR tutorials.
Navigation Links
Go to next lesson: SAP Organizational Management Actions
Go to previous lesson: SAP Infotype Maintenance in Expert Mode
Go to overview of the course: SAP HR Training
How to create chief for the position in organizational and staffing