
 Welcome to the tutorial on SAP Organizational Management Actions. If you have gone through the Personnel Administration tutorials, you are probably familiar with the concept of personnel actions. In Organizational Management as well, there is a similar provision where you can set up actions. To put it simply, an action consists of a sequence of infotypes which are used to record a specific system activity. For example, we have already seen several methods by which an organizational unit can be created. Another way of doing this is to use an action “Create Organizational unit”. This action will call a sequence of infotypes that must be maintained for the organizational unit to be successfully created.
In this tutorial, we will first explain, with an illustration, how actions are configured in SAP Organizational Management. We will then execute the same action and check the output.
Configuration of SAP Organizational Management Actions
To check the configuration of actions, use transaction code SPRO to access the IMG. Then, follow the path depicted in Figure 1.
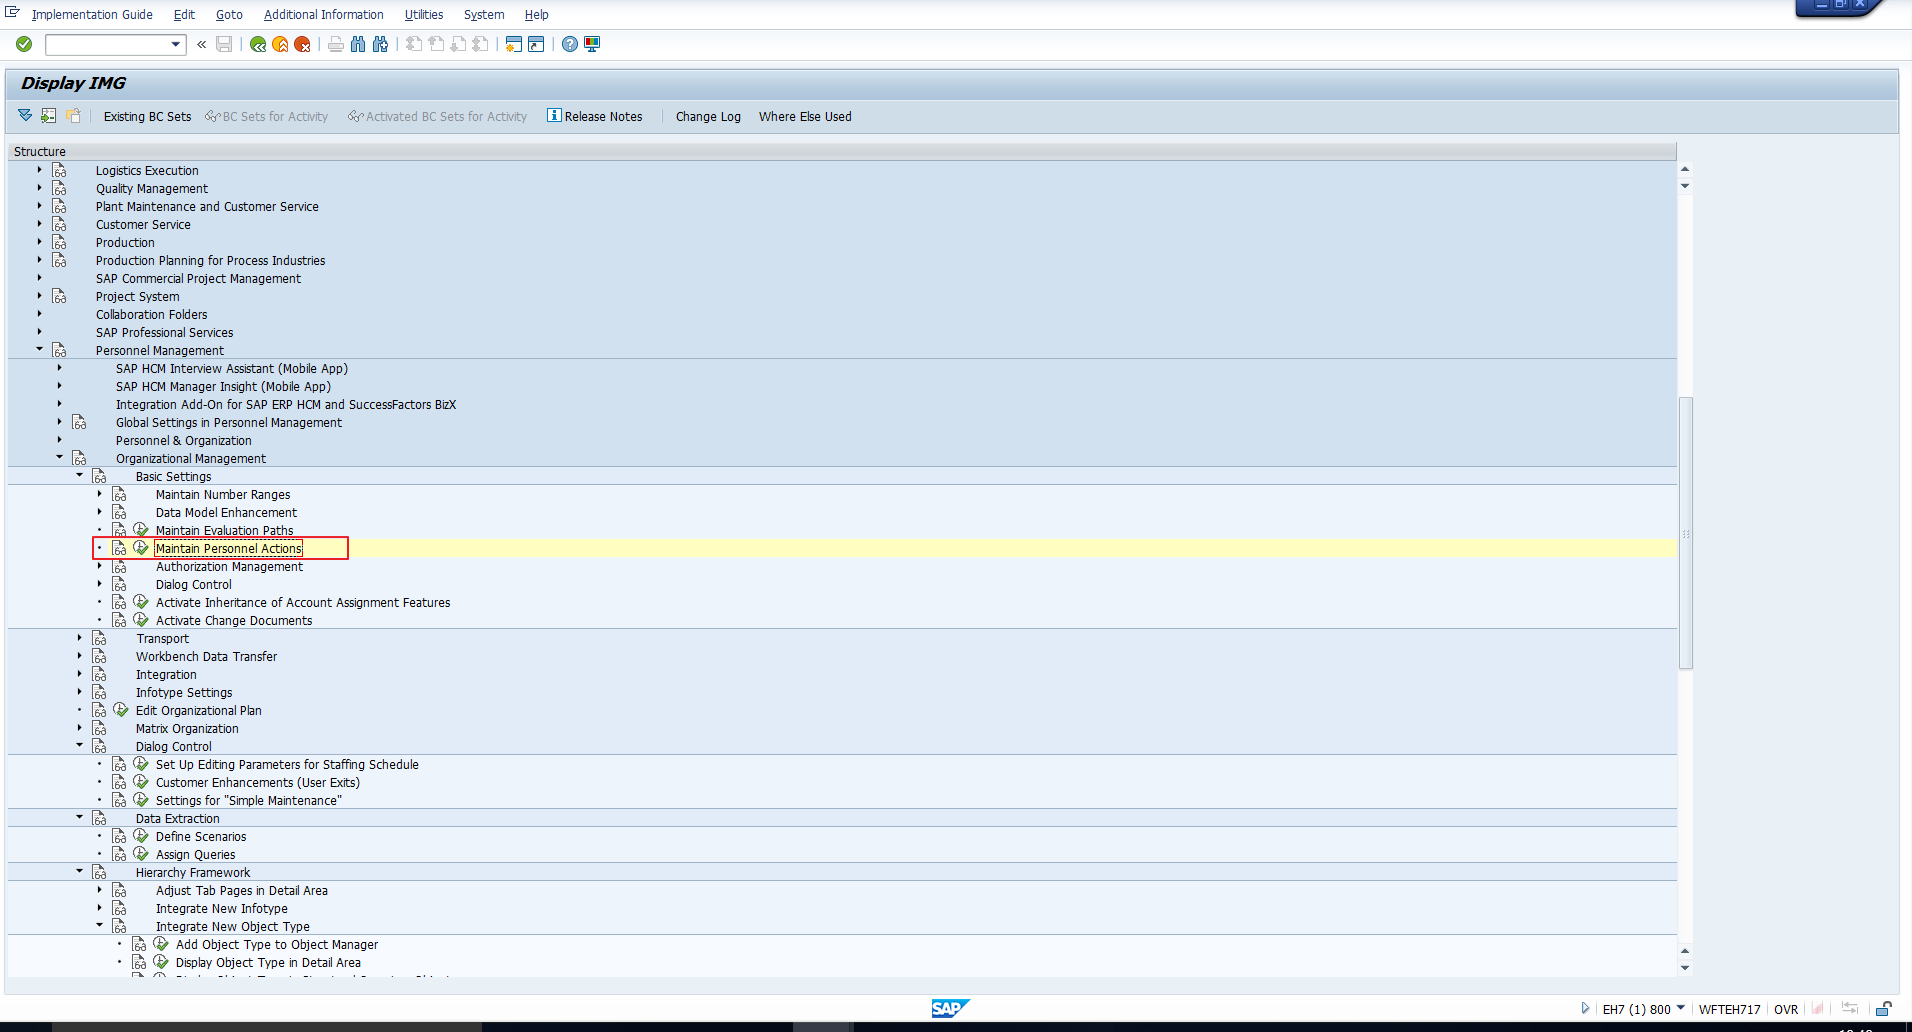
The path is:
Personnel Management – Organizational Management – Basic Settings – Maintain Personnel Actions
This transaction takes you to the screen shown in Figure 2.
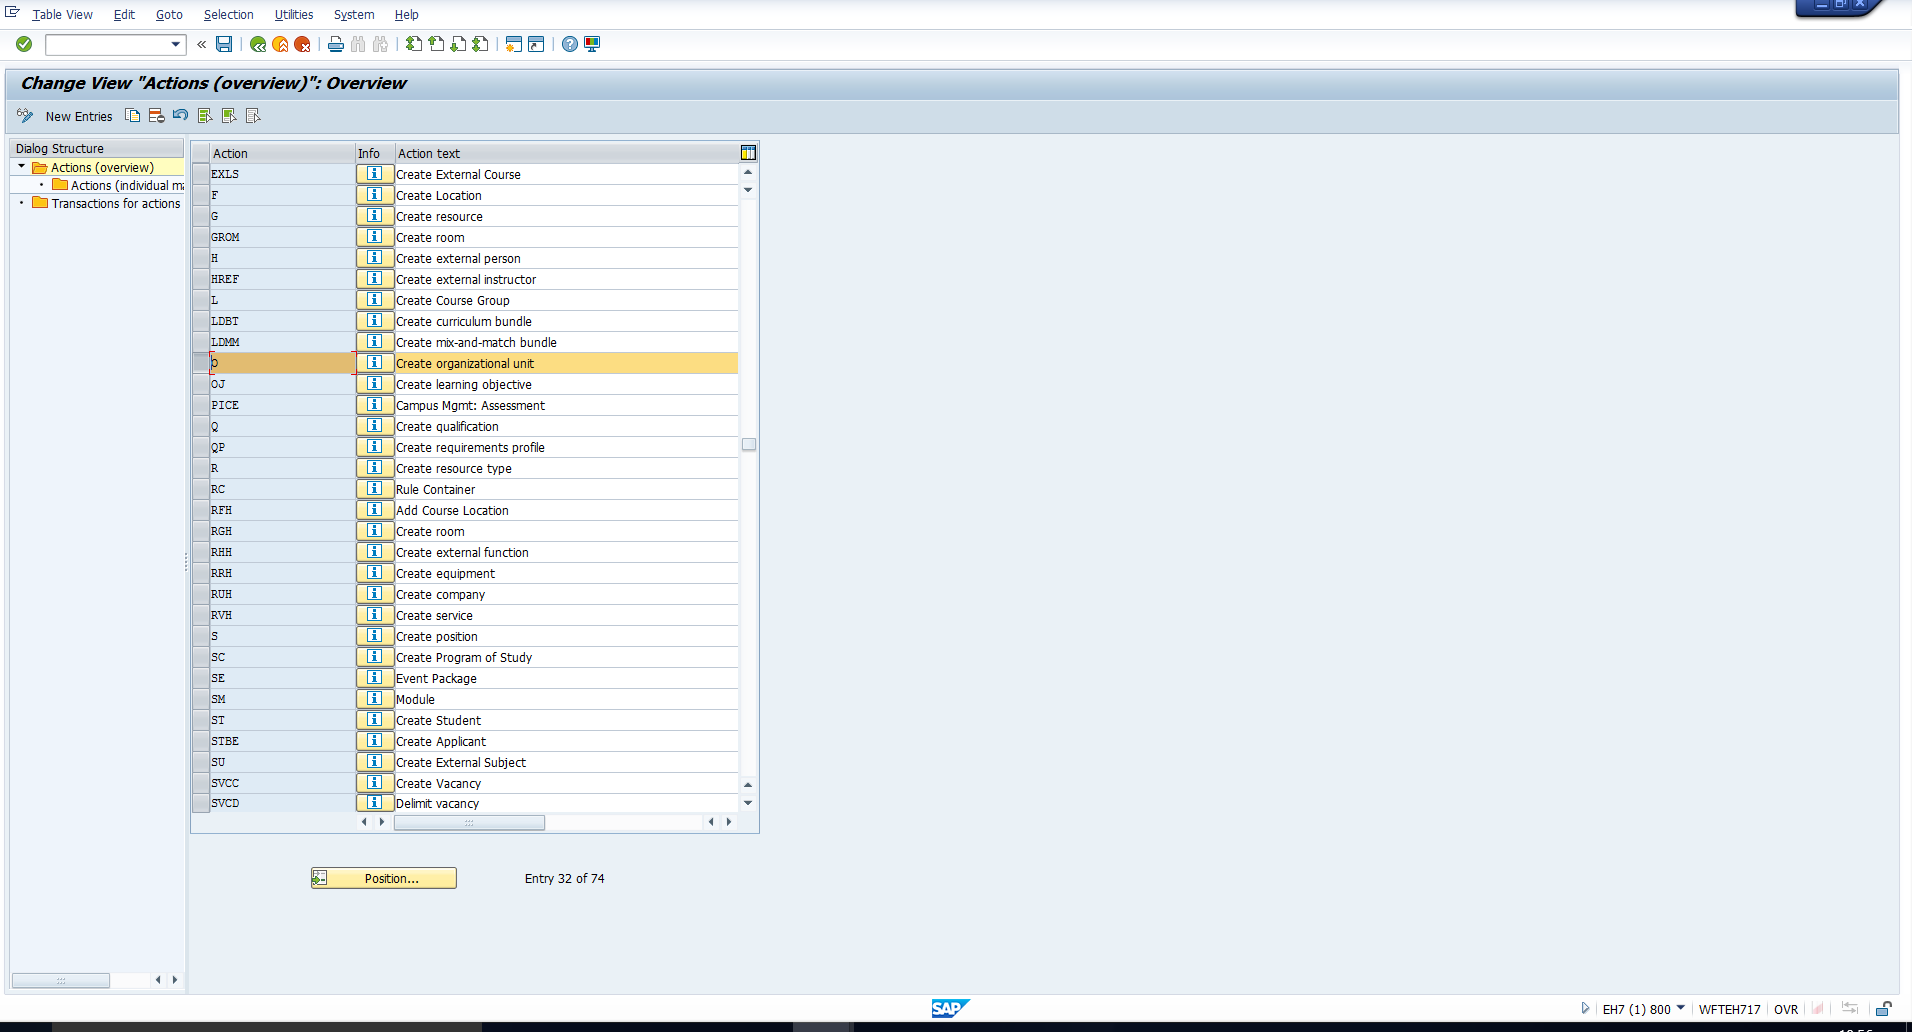
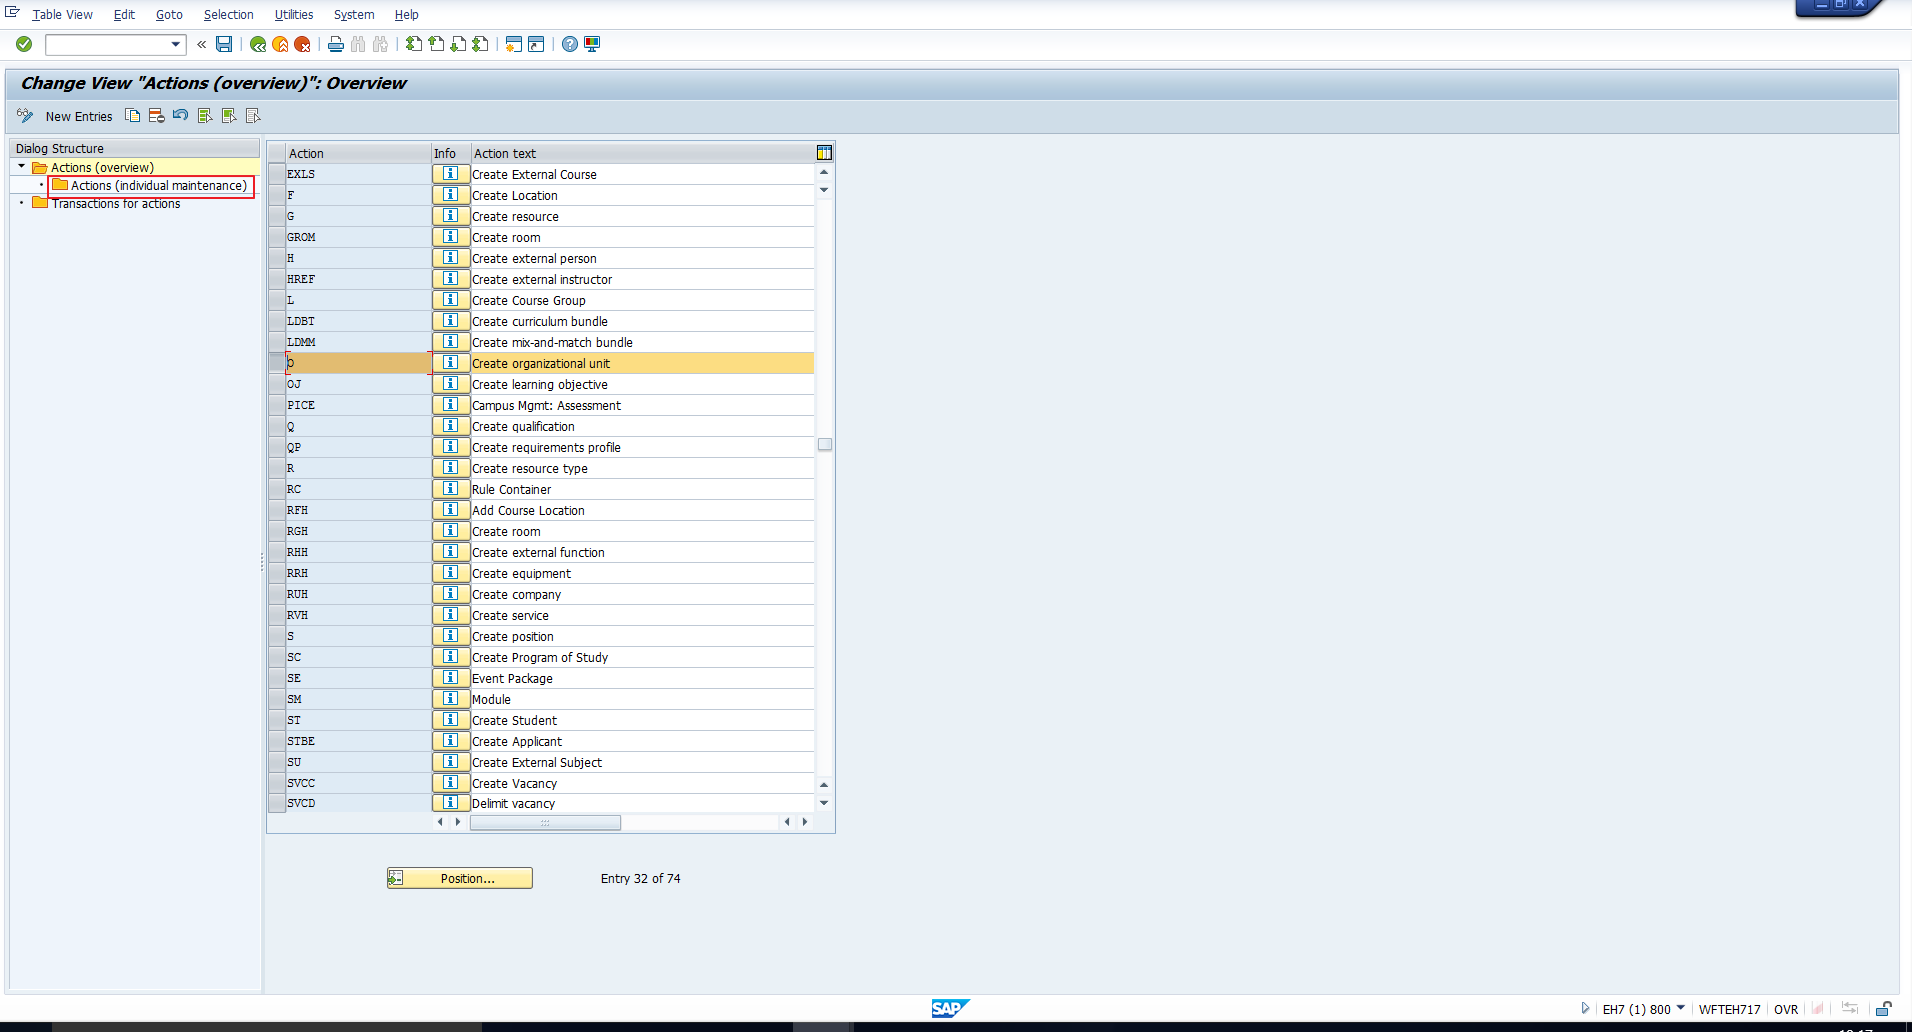
In this screen, we can see that there are pre-configured actions provided by SAP. The screen consists of the list of actions on the right side and a dialog structure of folders on the left. Every action is assigned a code and a text. To view the configuration of any action, select the action and then double click on the folder “Actions (Individual maintenance)” as illustrated in Figure 3.
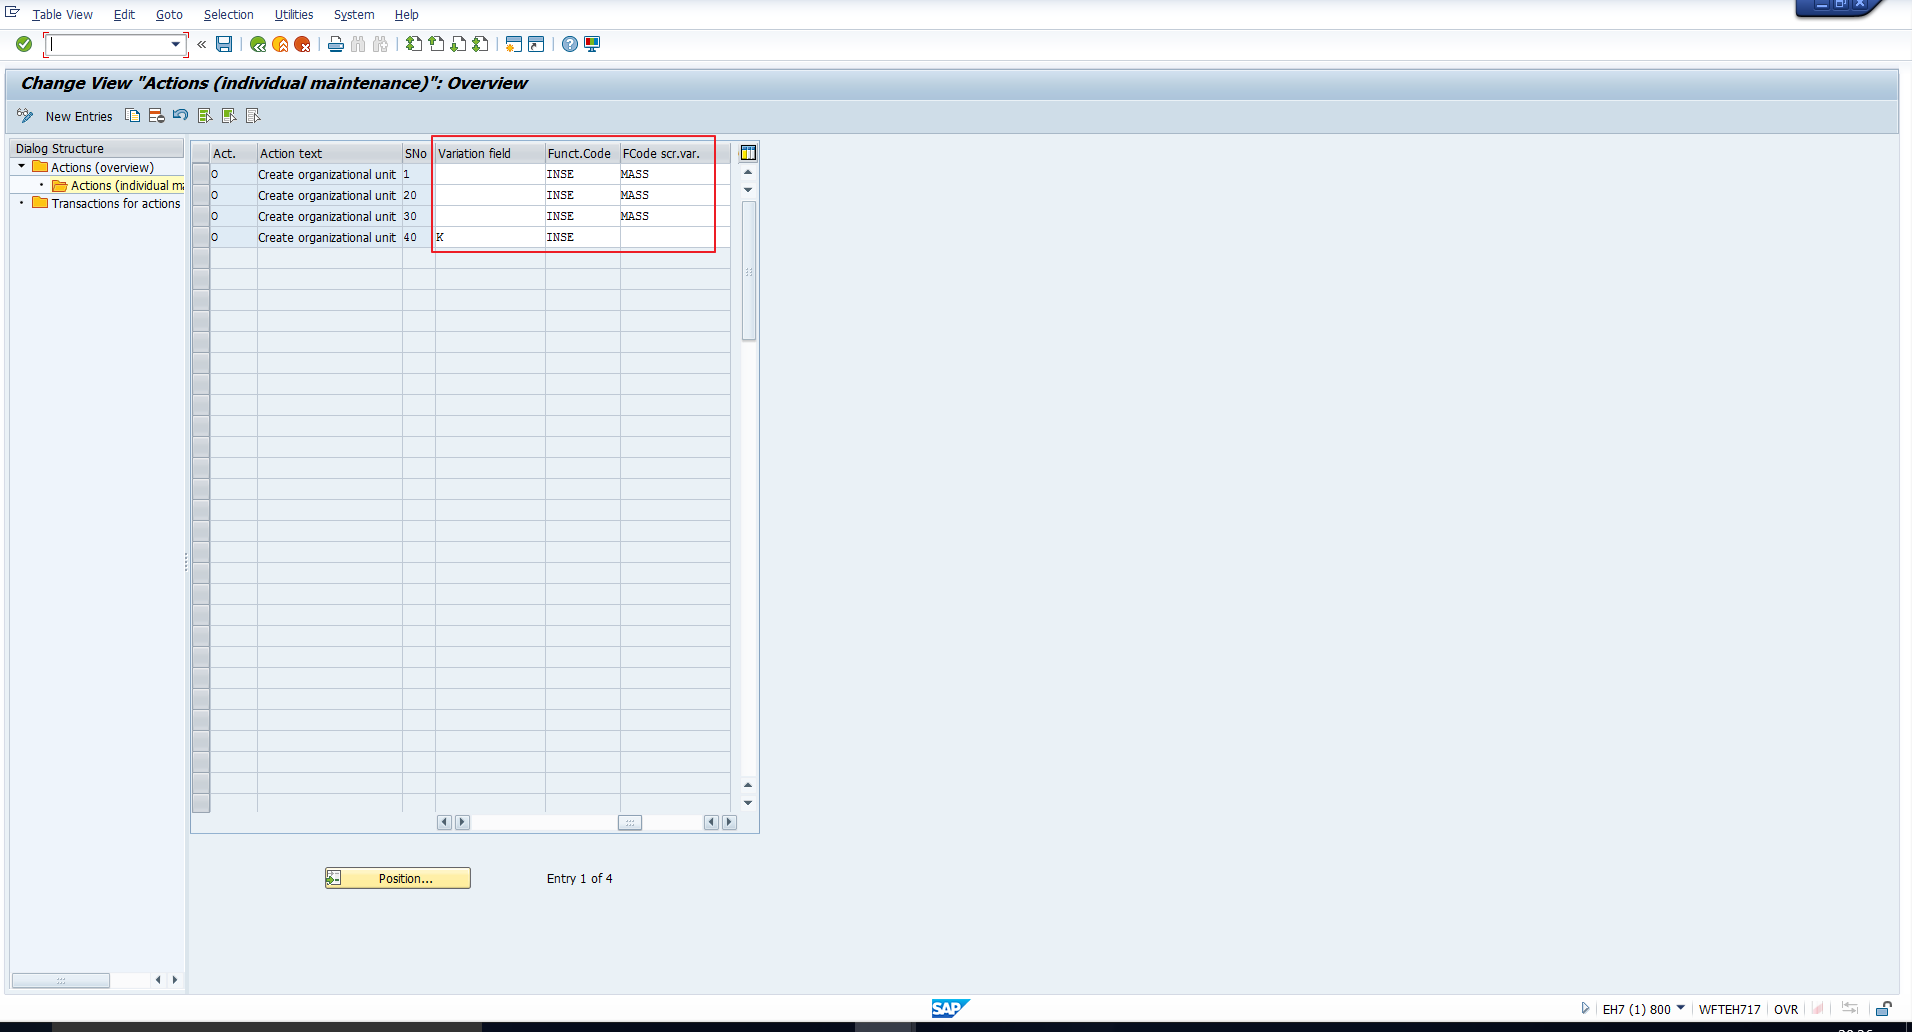
This takes you to the screen displayed in Figure 4 and Figure 5. We have taken two screenshots as all the columns do not fit in a single screen.
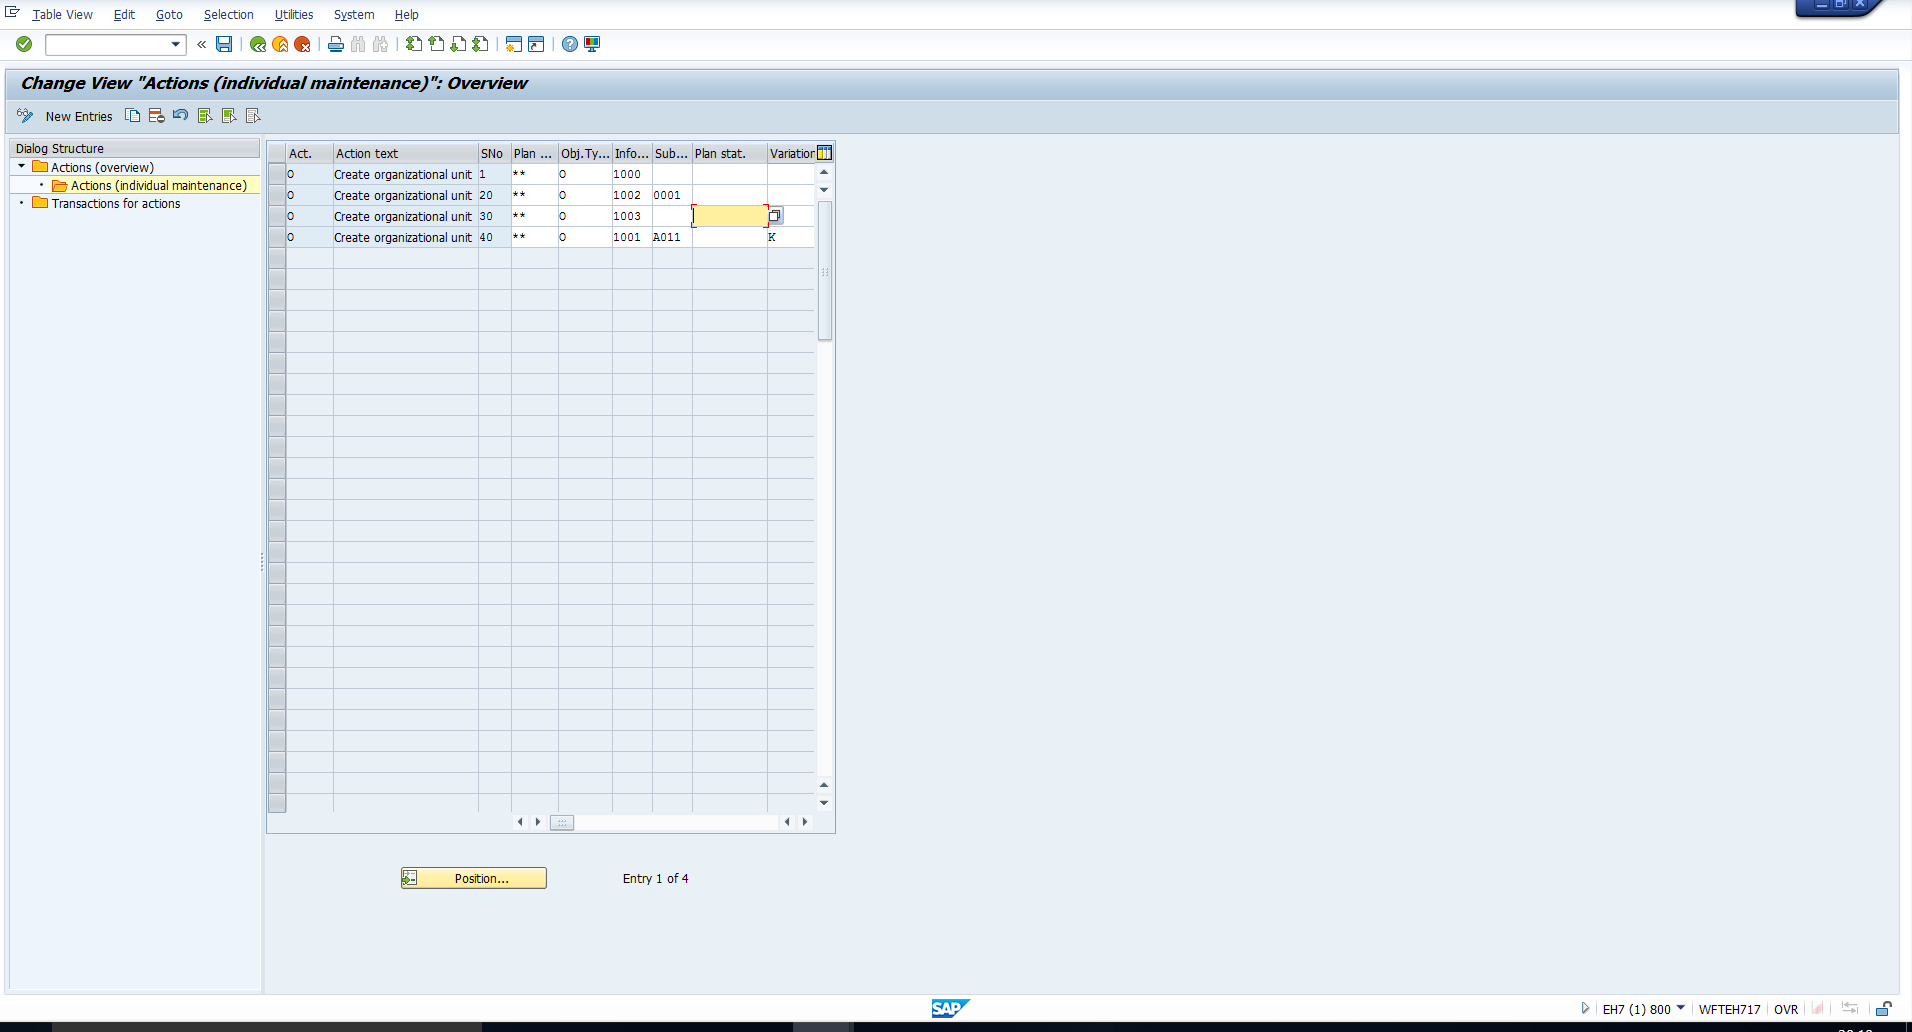
Let us understand the columns in the above images.
Action code – This is a one-character to four-character code that uniquely identifies an action.
Action text – This is a text used to describe the action.
Sequence number – This is a number (maximum 3 digits) that determines the processing sequence of the steps within an action.
Plan Version – This is a one or two character code which differentiates between scenarios in the organizational plan. The entry ‘**’ in this field implies all plan versions.
Object type – In this field, specify the type of object you want to work with. In our example, it is ‘O’ as the action is to create an organizational unit.
Infotype – In this field, specify the infotype which must be processed for that object type.
Subtype – In this field, specify the subtype of the infotype which should be processed. This is an optional field.
Planning Status – This is an optional field. You can use it to specify a certain infotype status. The following statuses, each defined by a one-digit code, are possible:
- Active
- Planned
- Submitted
- Approved
- Rejected
Variation Field – If the infotype being processed is the Relationships infotype (1001), then you can specify the related object type here. This is an optional field.
Function Code – This field is used to specify the name of the operation with which the infotype should be processed. There are several possible function codes that you can select from. Some of the common ones are:
- COP – Copy infotype
- INSE – Create infotype
- DEL – Delete infotype
- DISP – Display infotype
- CUTI – Delimit infotype
Function Code for Screen Variation – This field is applicable only if you have entered the value ‘INSE’ (Create infotype) in the previous field. In this case, you can enter either of the below values:
- MASS – To disallow fast data entry when creating this infotype
- DUTY – To enforce mandatory creation of this infotype
Now that we have gone through the columns, we can interpret that the “Create Organizational unit” action comprises the below steps:
- Create a record of the Infotype 1000 (Object) for an organizational unit (object type “O”).
- Create a record of the Infotype 1002 (Description), subtype 0001(Department Description) for an organizational unit (object type “O”).
- Create a record of the Infotype 1003(Department/Staff) for an organizational unit (object type “O”).
- Create a record of the Infotype 1001 (Relationships), Subtype A011(Master cost center) for an organizational unit (object type “O”) with the related object type cost center (object type ‘K’).
In the following section, we will execute this action to verify the above steps.
Execution of SAP Organizational Management Actions
To execute an action in Organizational Management, follow the below menu path:
Human Resources – Organizational Management – Tools – Object – PP03-Actions
This path has been depicted in Figure 6.

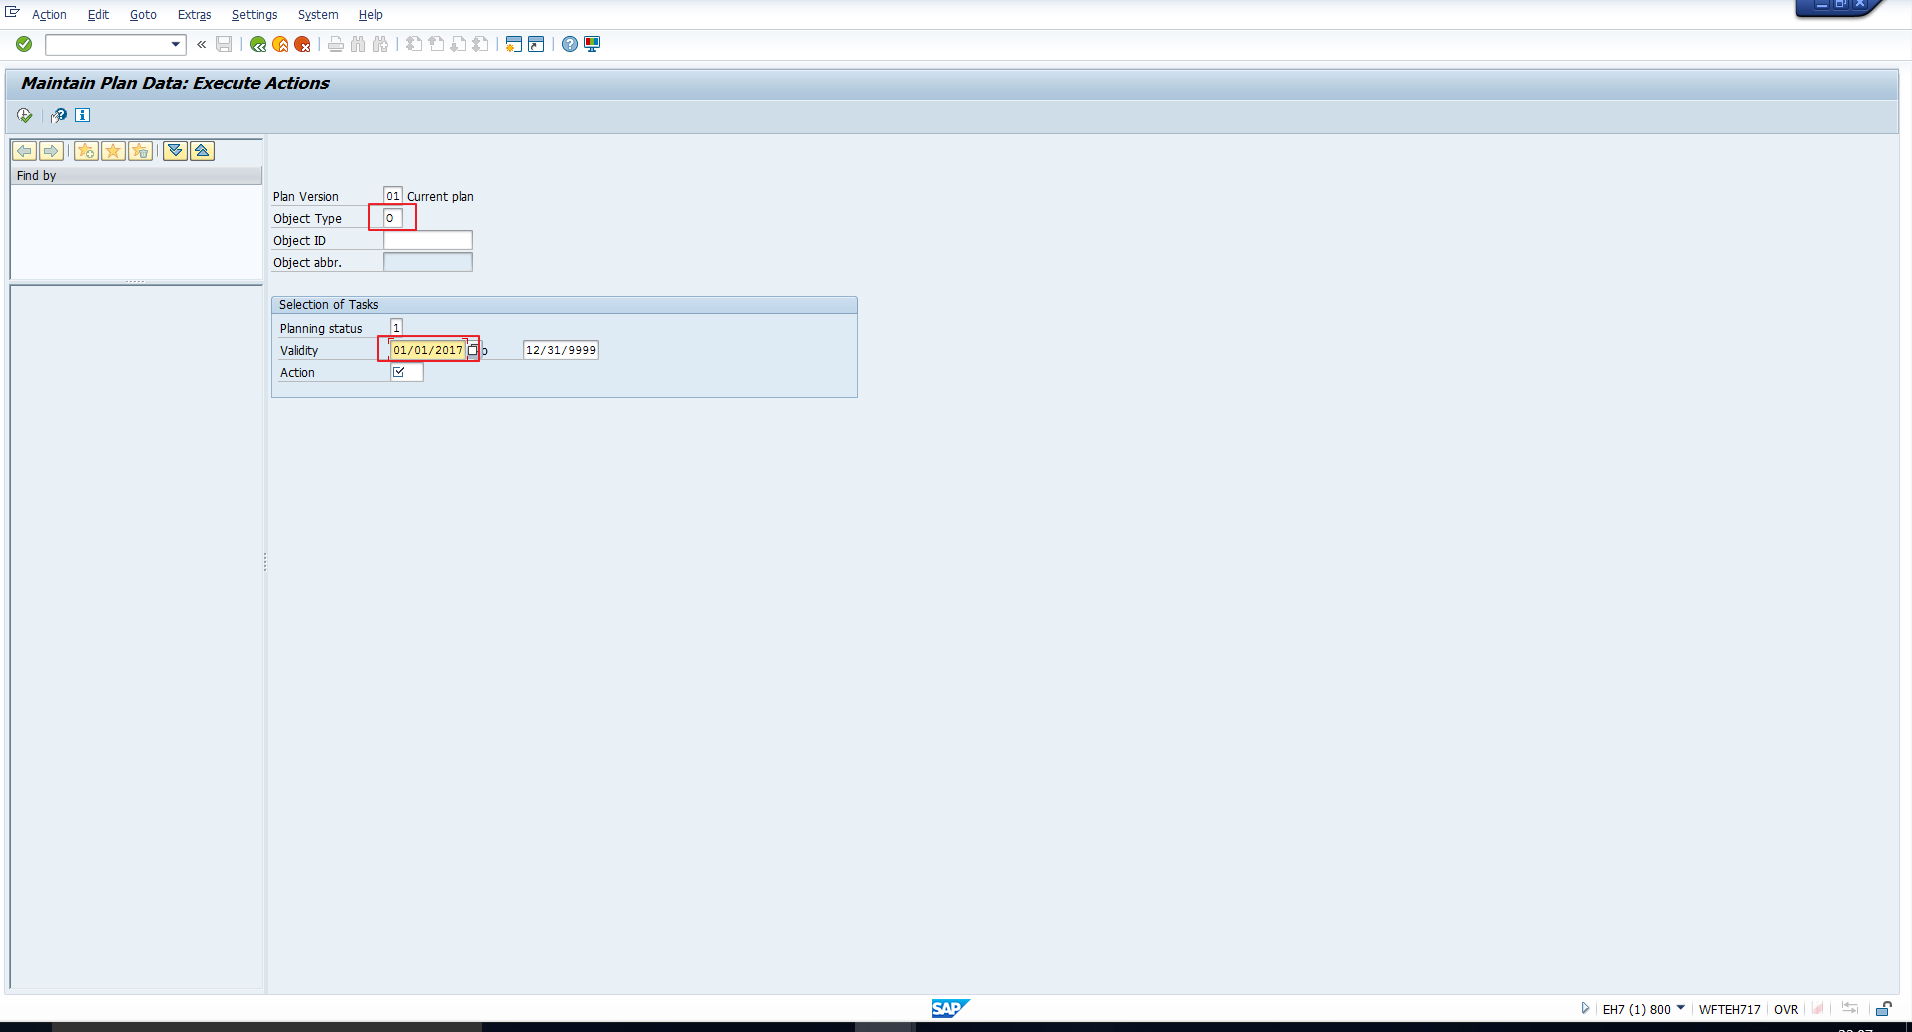
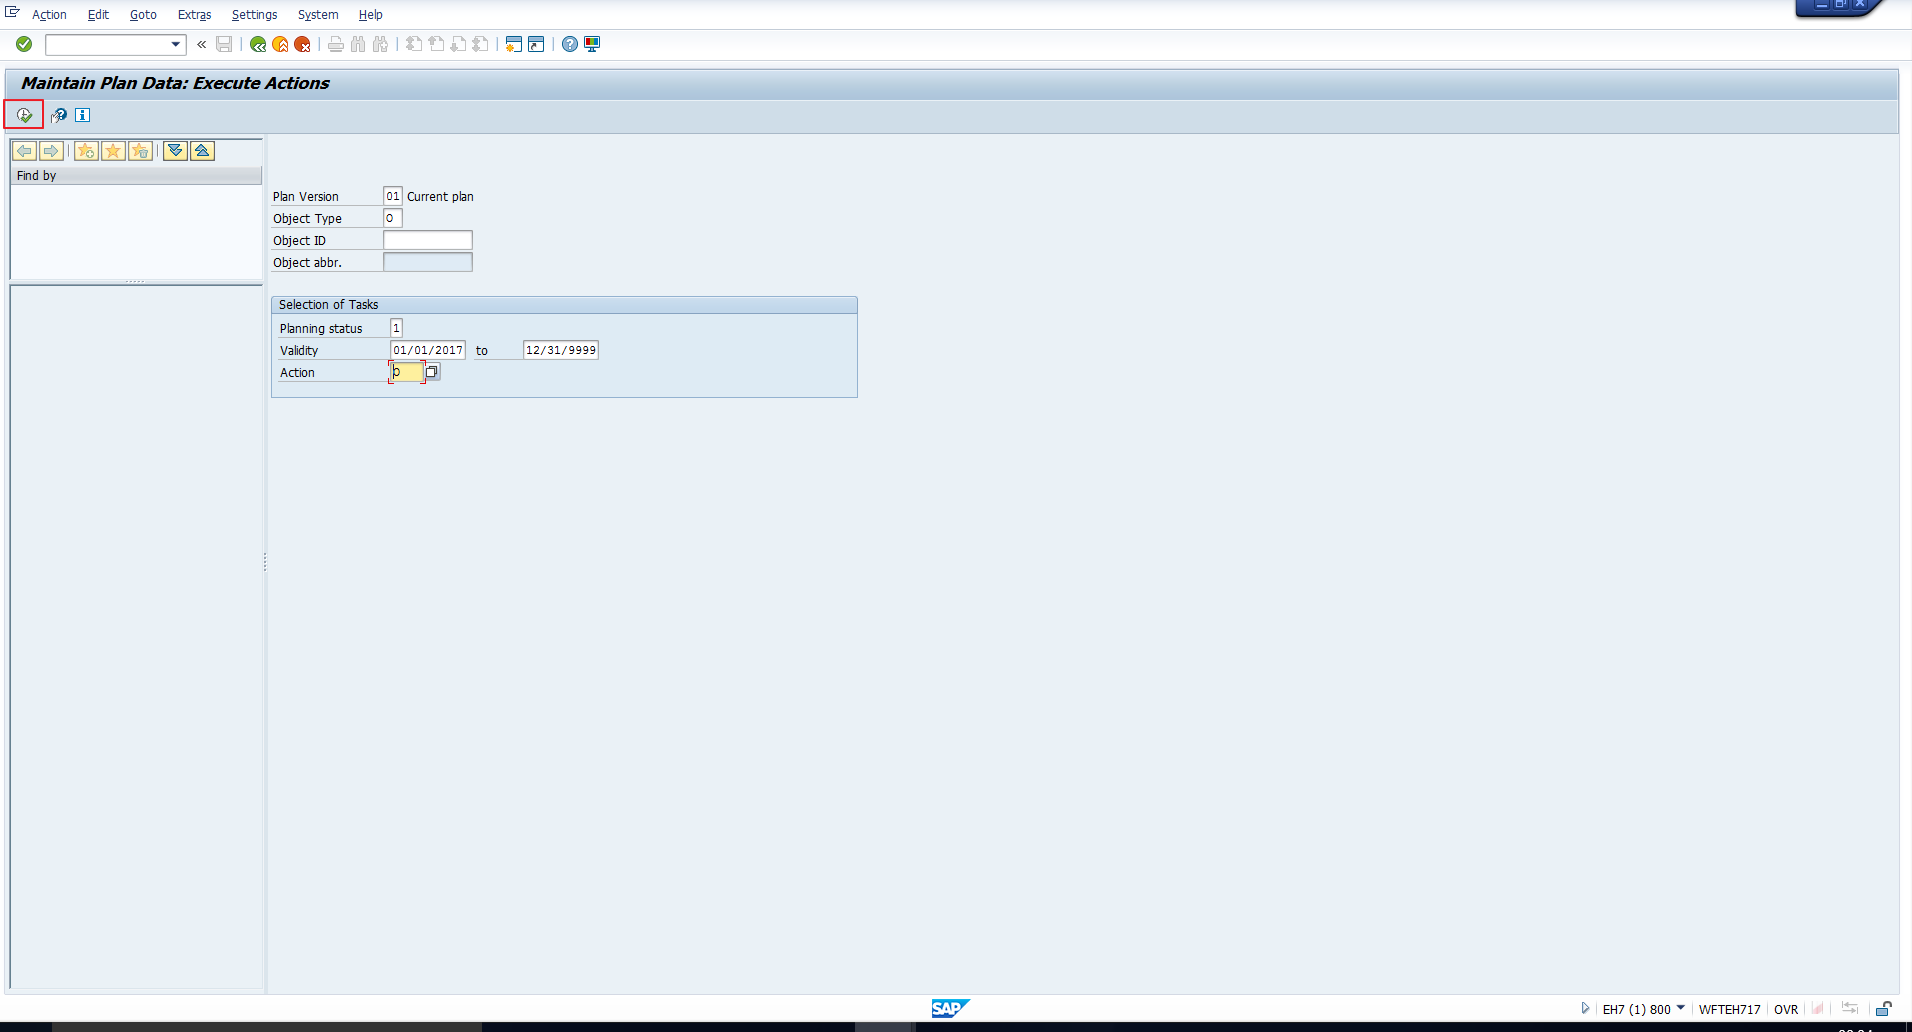
Alternatively, you can directly execute the transaction code PP03, which takes you to the screen depicted in Figure 7. This is the entry screen using which you can execute any action for any object type.

Let us execute the “Create organizational unit” action. In this screen, enter the object type “O” (Organizational unit) and the required validity start date, as depicted in Figure 8.
Next, check the possible entries for the Action field by clicking the icon to the right of the field. This icon has been highlighted in Figure 9.

You can see the list of available entries in Figure 10.
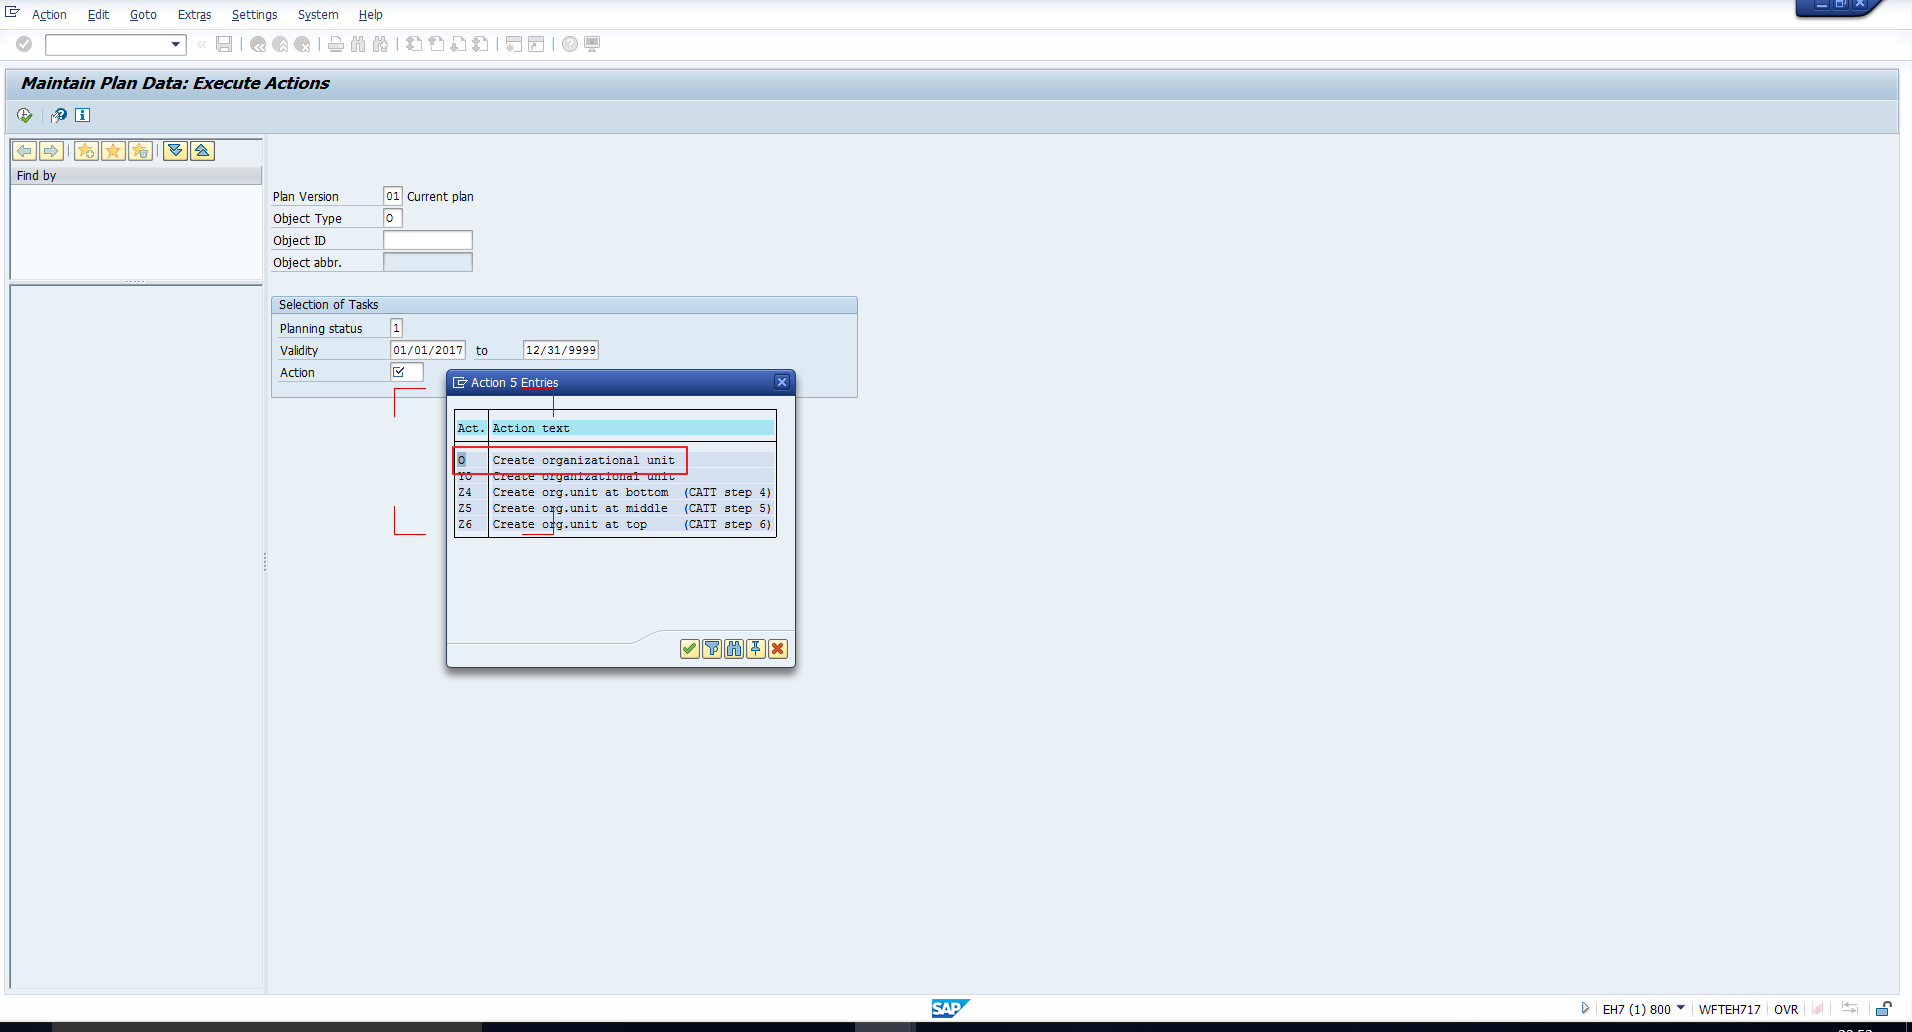
Note that the list of SAP Organizational Management actions displayed here depends upon the selected object type. Since we selected organizational unit, we can see all the actions that have been configured with O (Organizational unit) in the Object type column in customizing. You may refer to Figure 4 where this column is visible.
Select the Action that has been highlighted in Figure 10. This is the action for which we analyzed the configuration settings in the previous section. Then click on the Execute icon as highlighted in Figure 11.
The “Create Object” screen follows, as shown in Figure 12. If you revisit our interpretation of the configuration in the previous section, this is in accordance with Step 1.
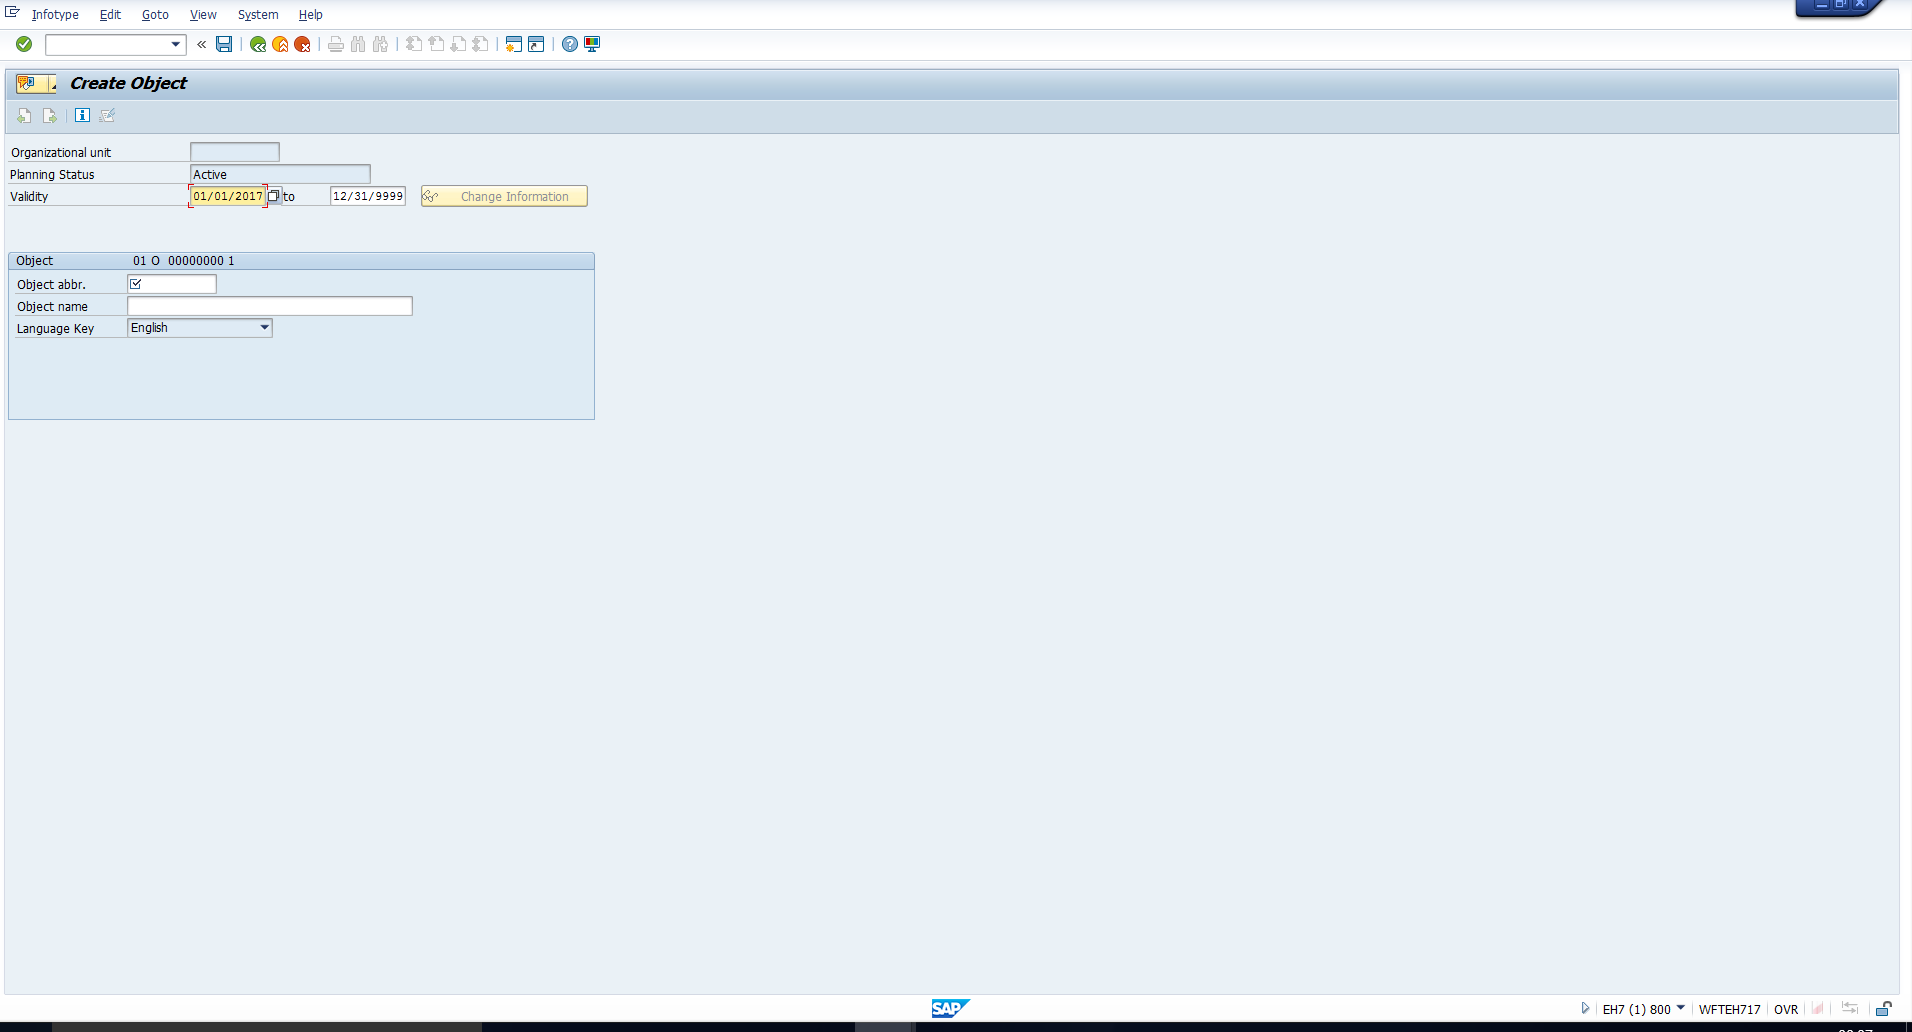
The above screen is basically, the Object infotype (Infotype 1000). Here we should enter the desired abbreviation and name of the organizational unit to be created. This is illustrated in Figure 13.
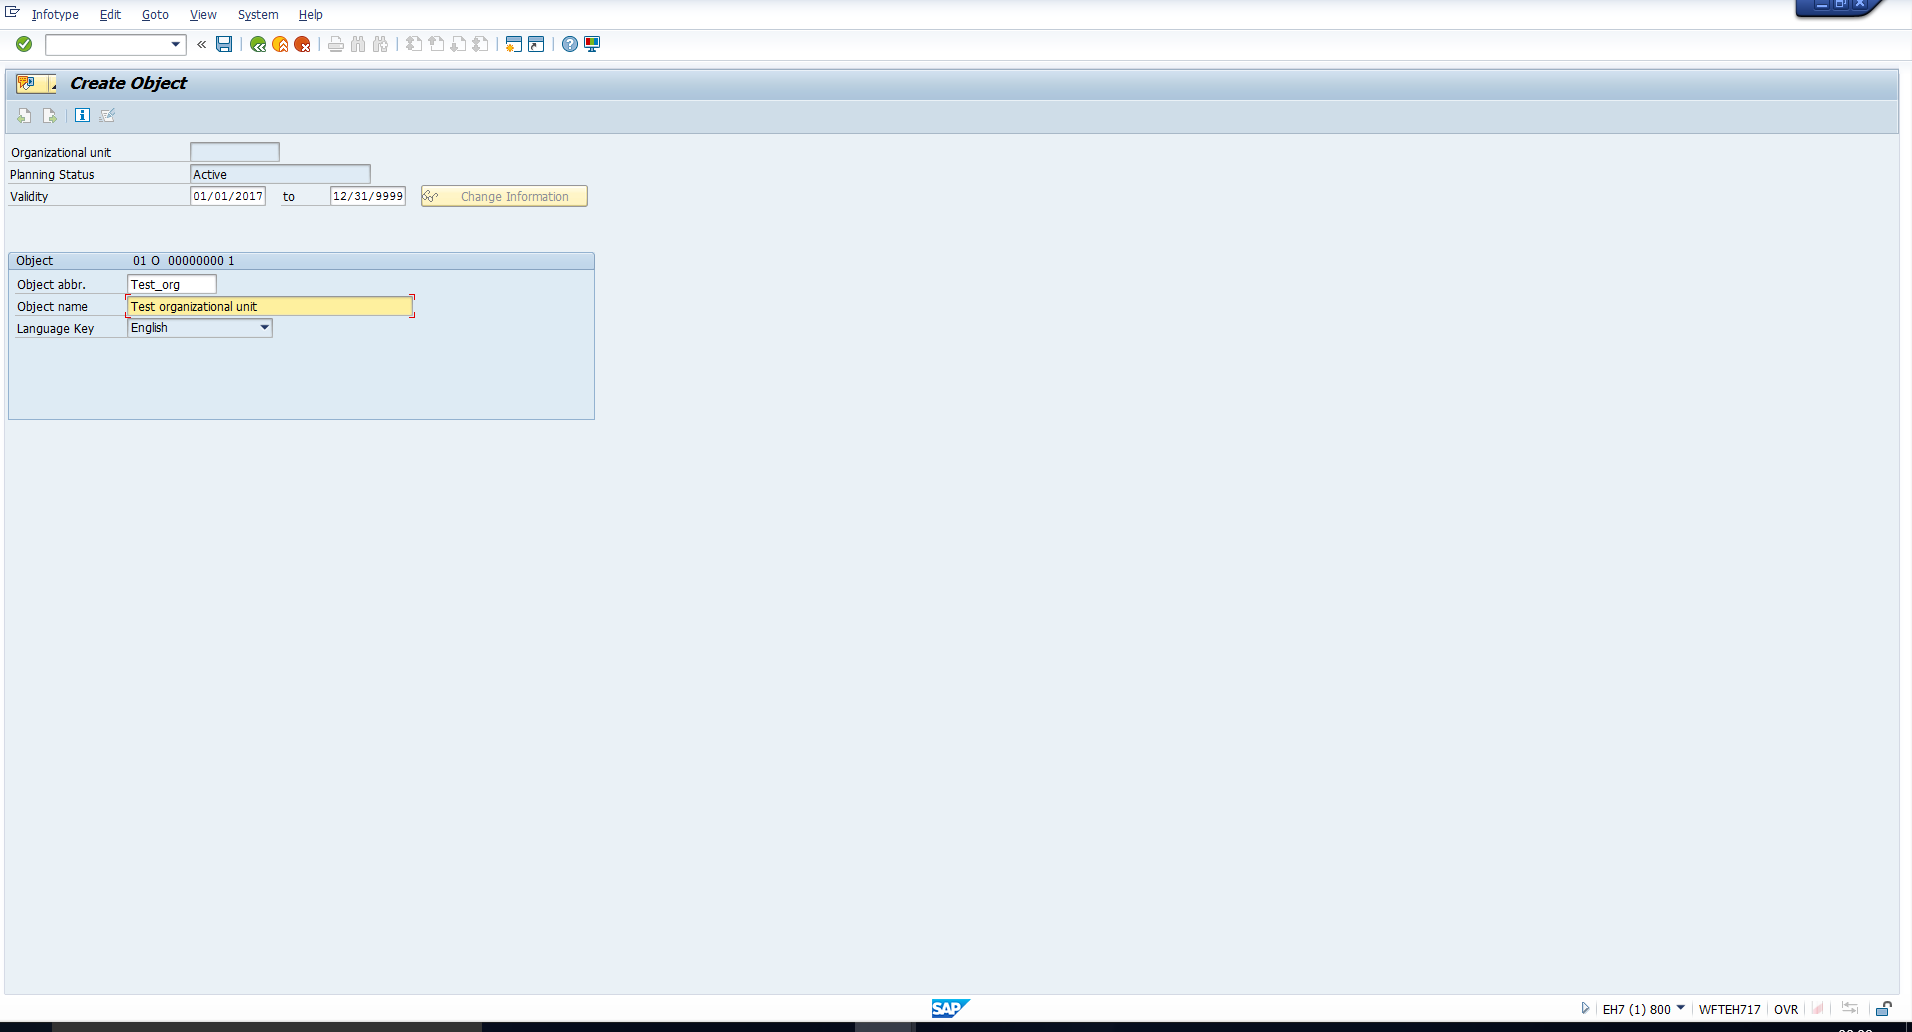
Then, save the data. This will take you to the screen depicted in Figure 14. Here, notice that the object ID is displayed. This has been highlighted in the image. This ID gets generated on saving the object infotype.
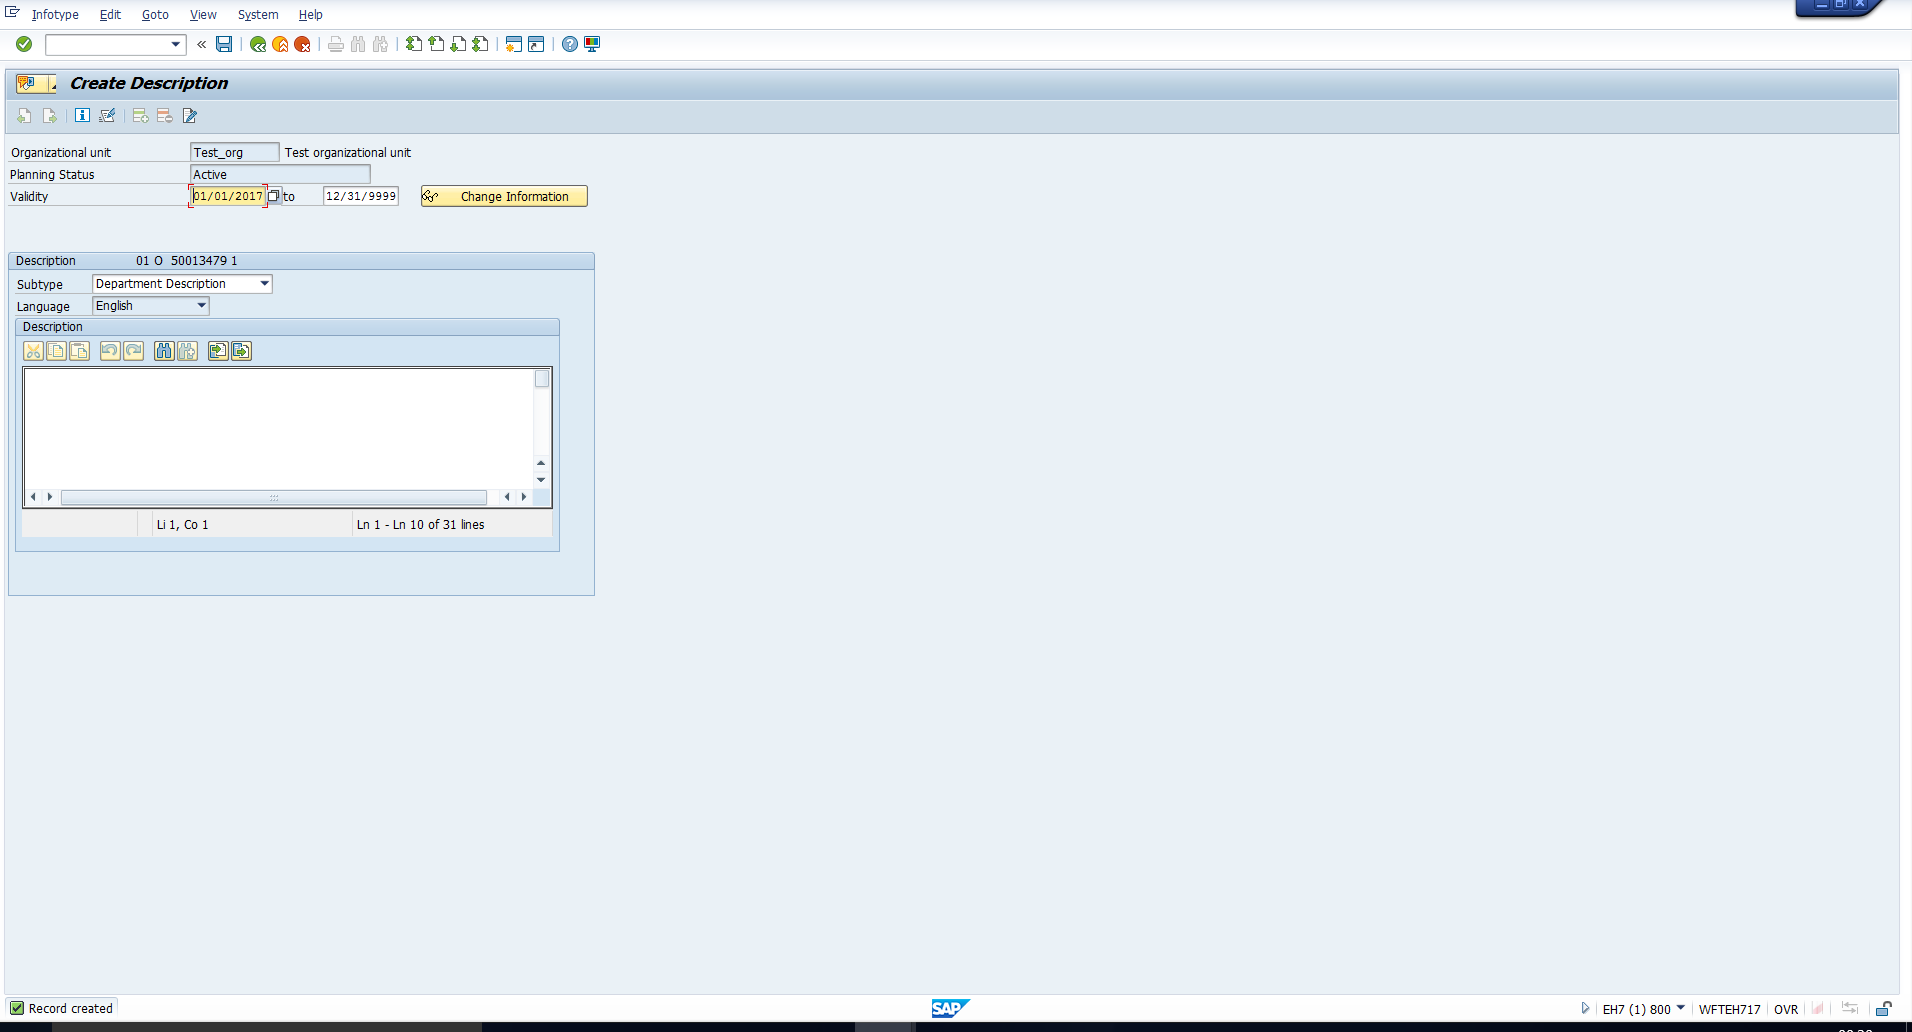
The screen in figure 14 is basically the Description infotype (Infotype 1002), Department Description subtype, which is step 2 of our interpretation of the action. Enter the desired description here and save the infotype.
The next screen is that of the Department/Staff infotype depicted in Figure 15. This is as per Step 3 of our interpretation of the action.
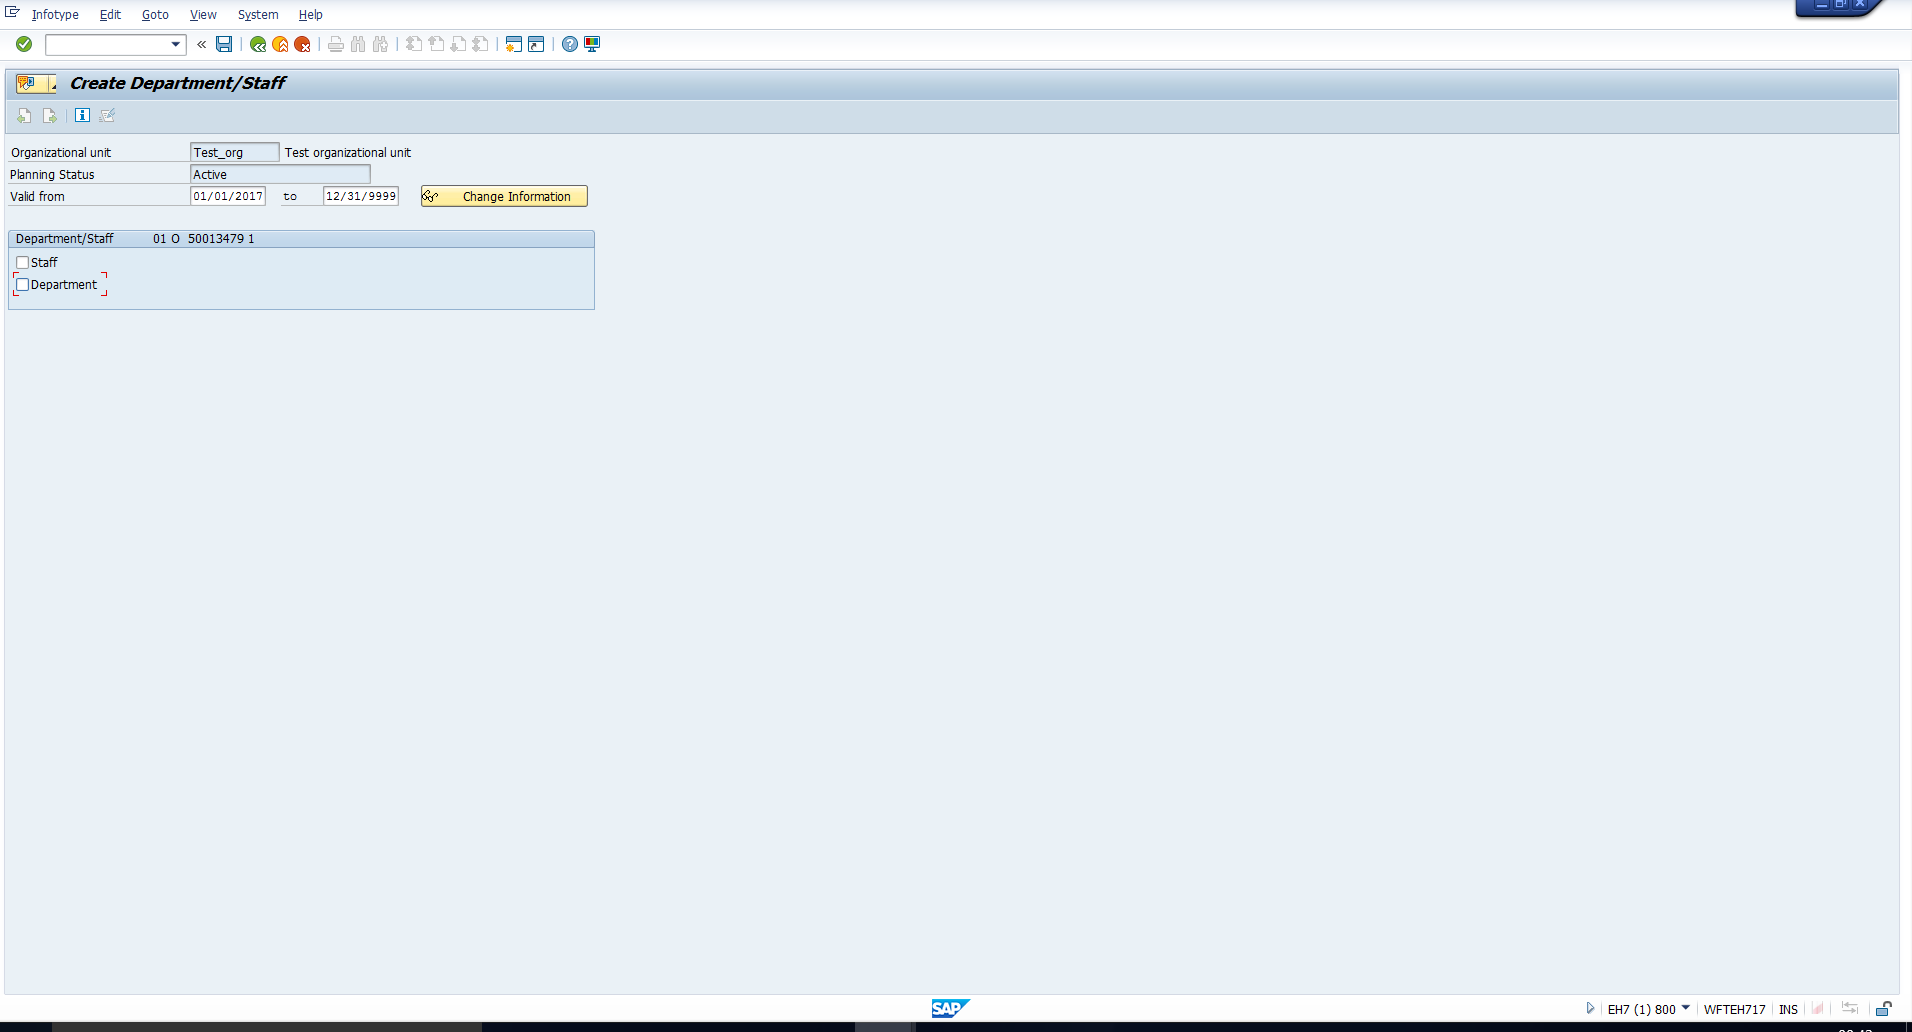
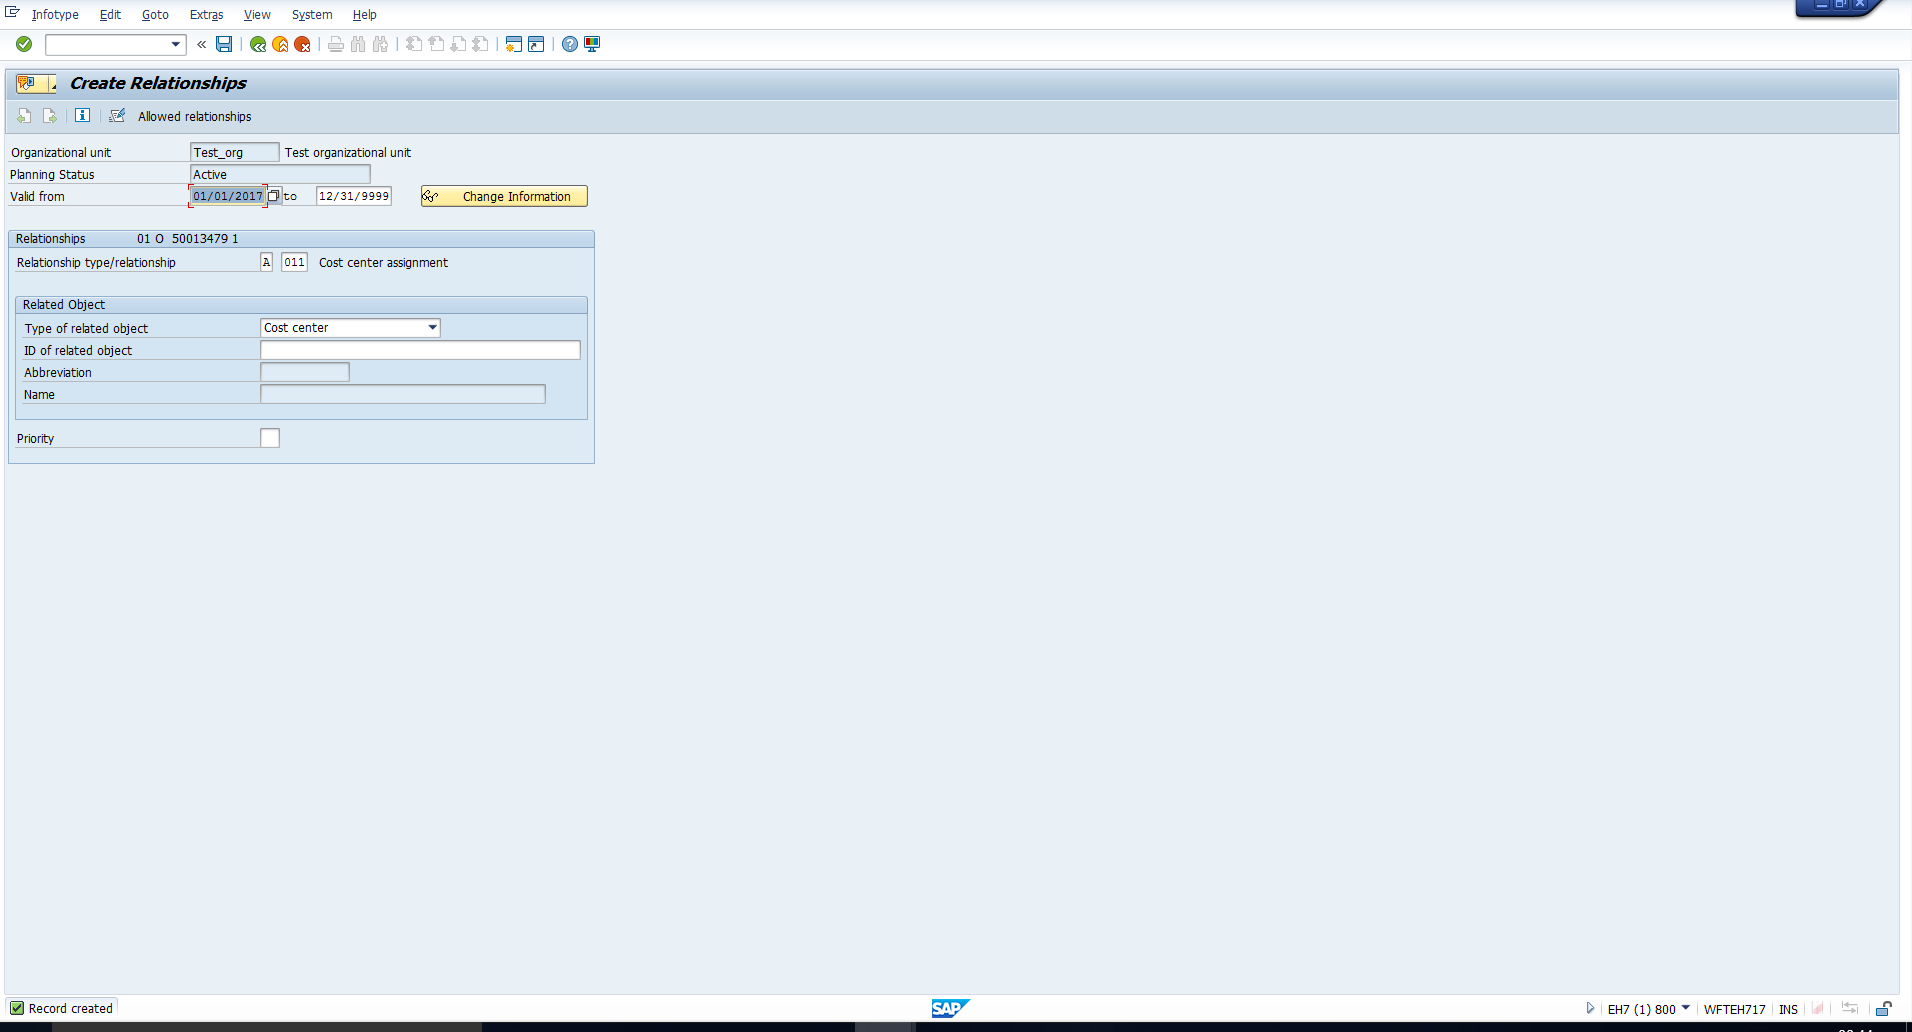
Make the necessary changes and save the data. This will take you to the screen in Figure 16. This is the Relationships infotype, subtype 011 (Cost center assignment), with cost center as the related object type. This is in accordance with Step 4 of the action, listed out earlier.
—
Did you like this tutorial? Have any questions or comments? We would love to hear your feedback in the comments section below. It’d be a big help for us, and hopefully it’s something we can address for you in improvement of our free SAP HR tutorials.
Navigation Links
Go to next lesson: SAP Organizational Management Reports
Go to previous lesson: SAP Organization and Staffing
Go to overview of the course: SAP HR Training