
 Welcome to the tutorial on the SAP PPOME transaction configuration. In the earlier tutorials on Organization and Staffing in SAP, we talked about the interface, its usage, and how to handle basic configuration of the Details area of the interface. Here we will take you through the incorporation of a new structure in the Overview area of PPOME transaction.
We will begin by reiterating what we mentioned in the Organization and Staffing tutorial.
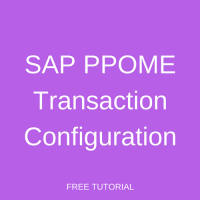
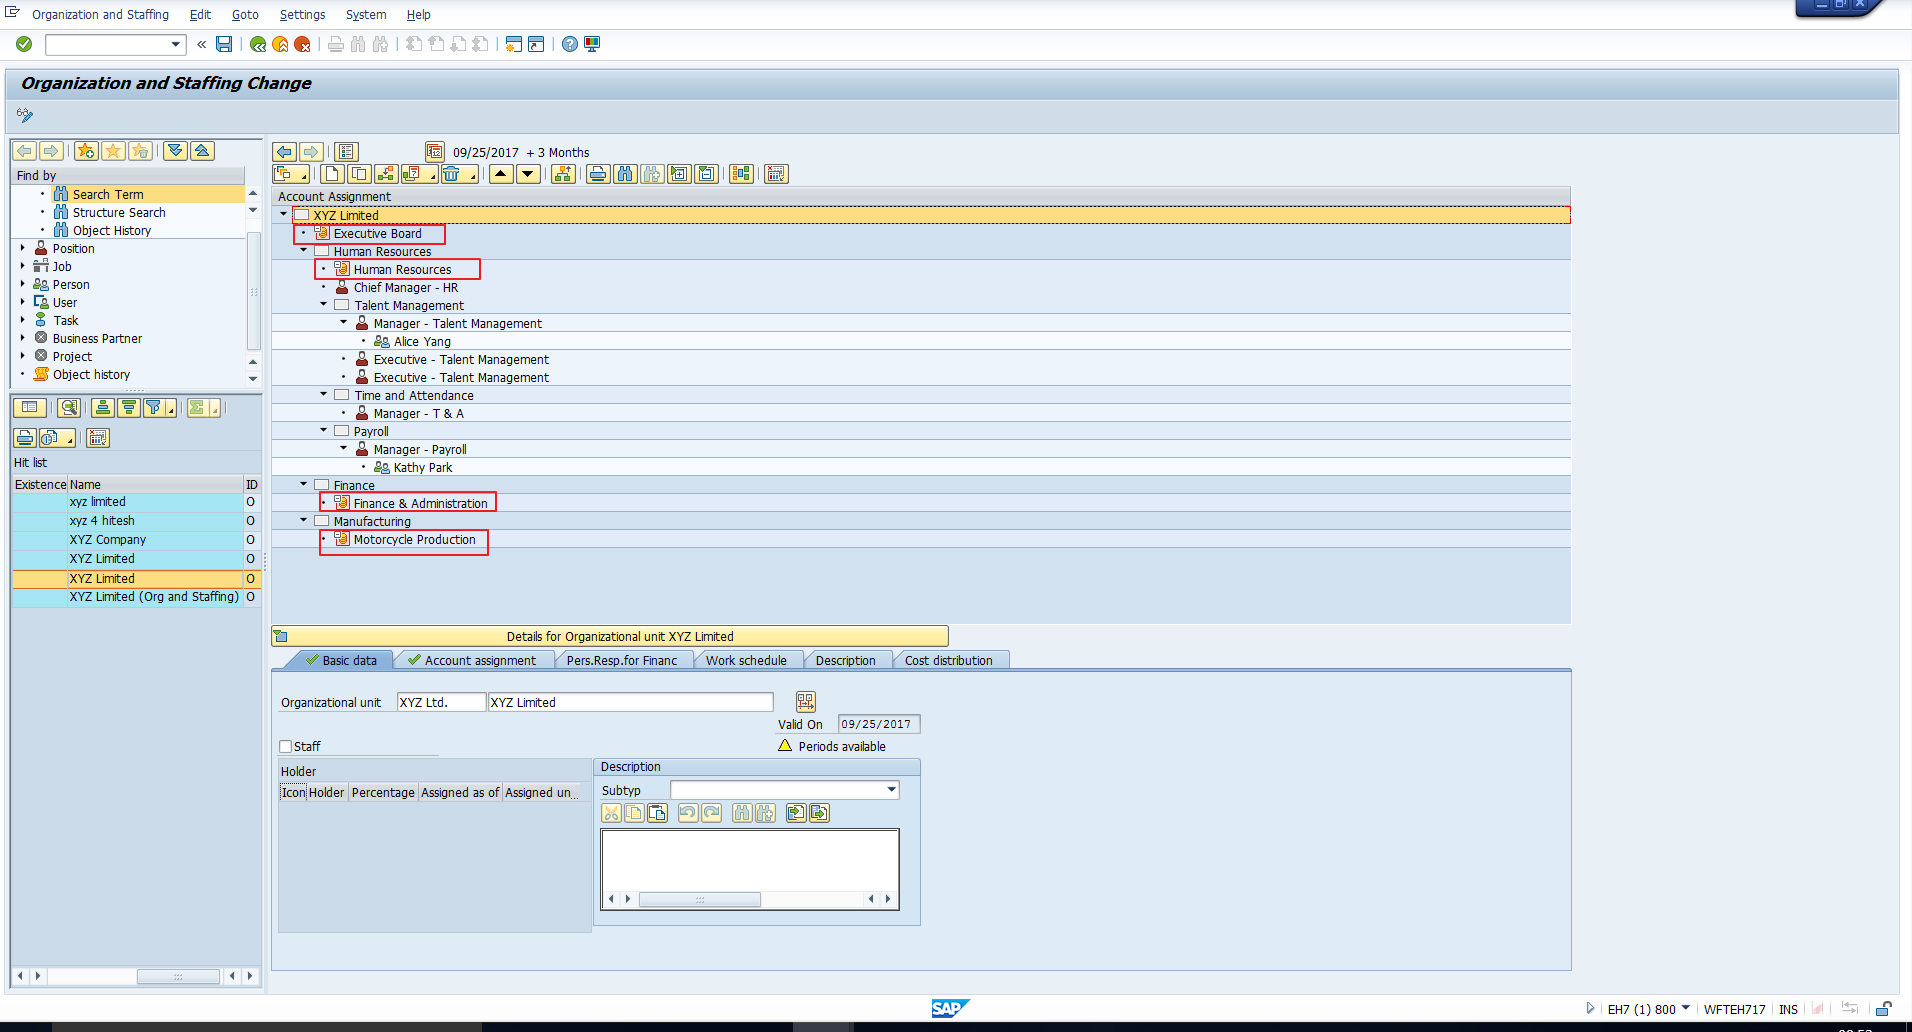
When you double click on an object in the Selection area, the object is then displayed in the Overview area as depicted in Figure 1. Here we can see the organizational unit XYZ Limited that we had selected. You can also see the structure below the organizational unit. It is precisely the configuration of the choice of this structure that will be covered in this tutorial.
Note that the structure you see depends on the object type you select. For example, when you select an Organizational unit, the Staff Assignments structure is displayed by default. This structure has been highlighted in Figure 1.
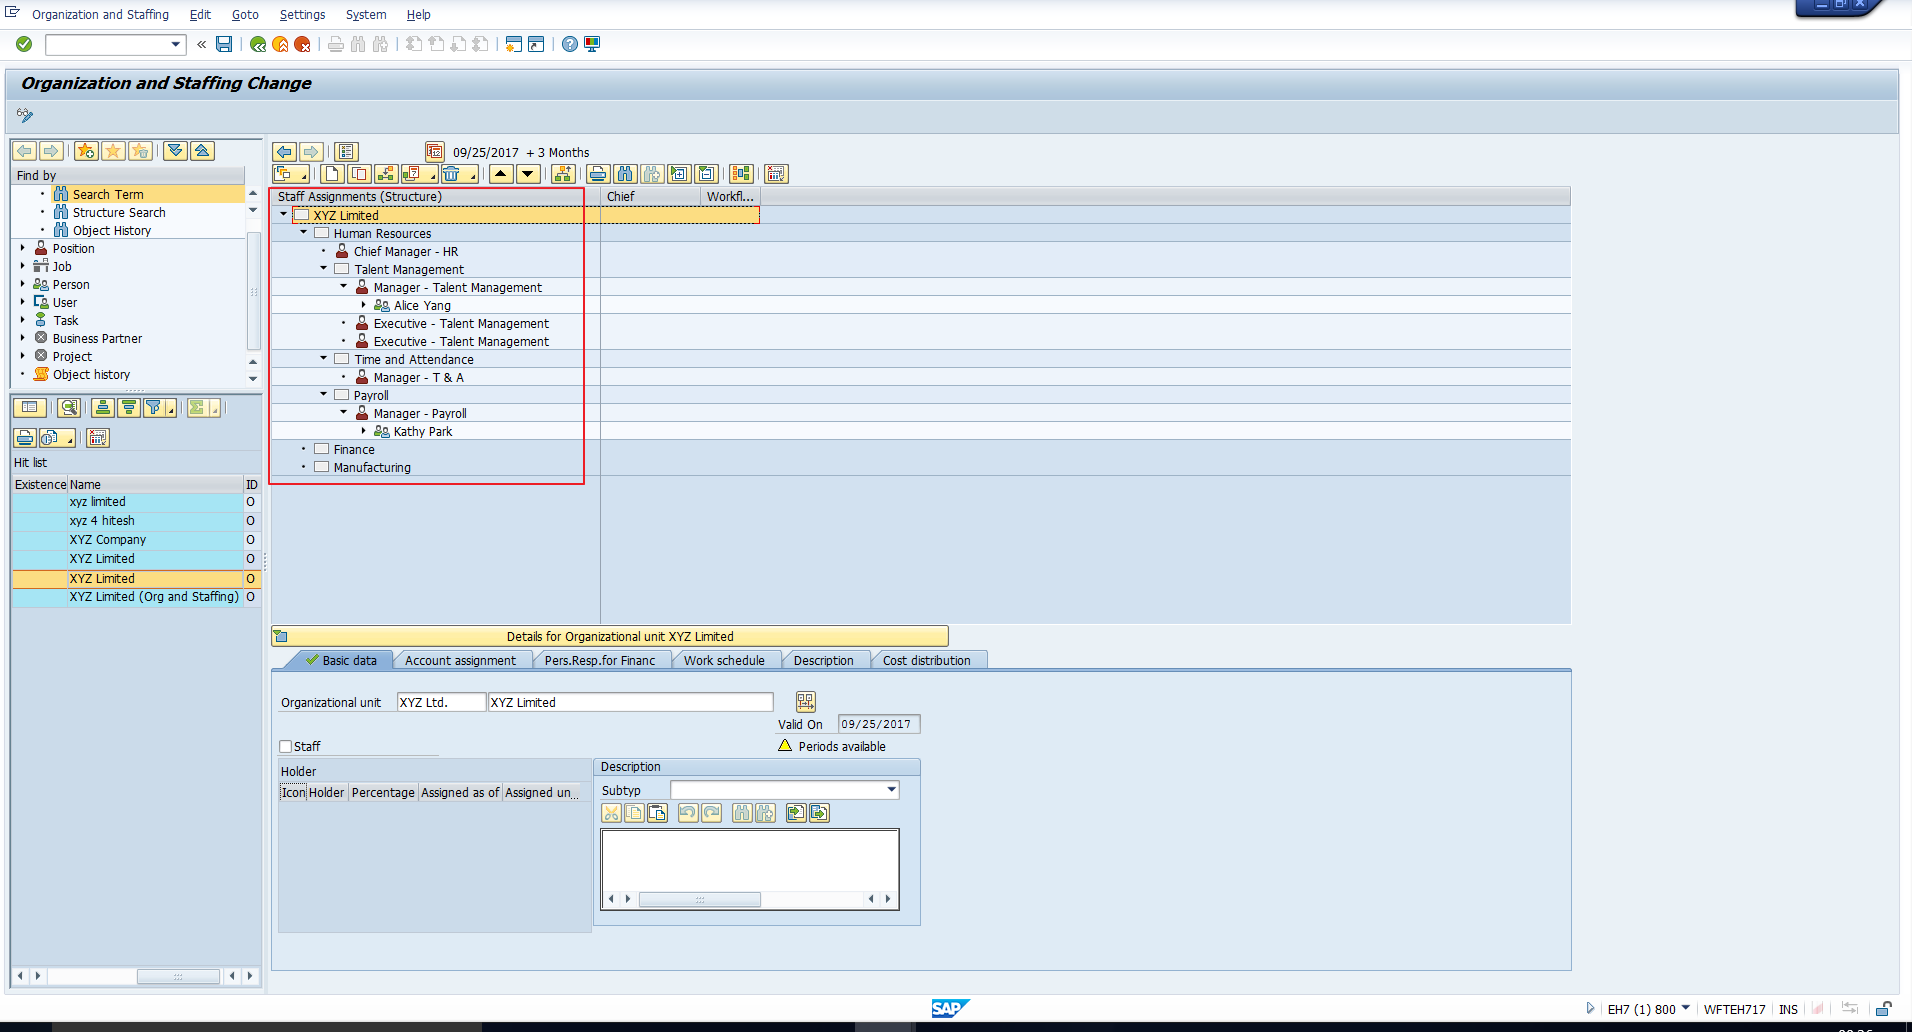
It is possible to switch to a different structure instead of Staff Assignments. Again, the list of possible structures that can be called depends on the object type you select. To check all the viewable structures, place the cursor on the object, then click on the Goto icon that has been highlighted in Figure 2. This will show you the list of possible structures that you can view for that object type. For an organizational unit, the list has been captured in Figure 3.
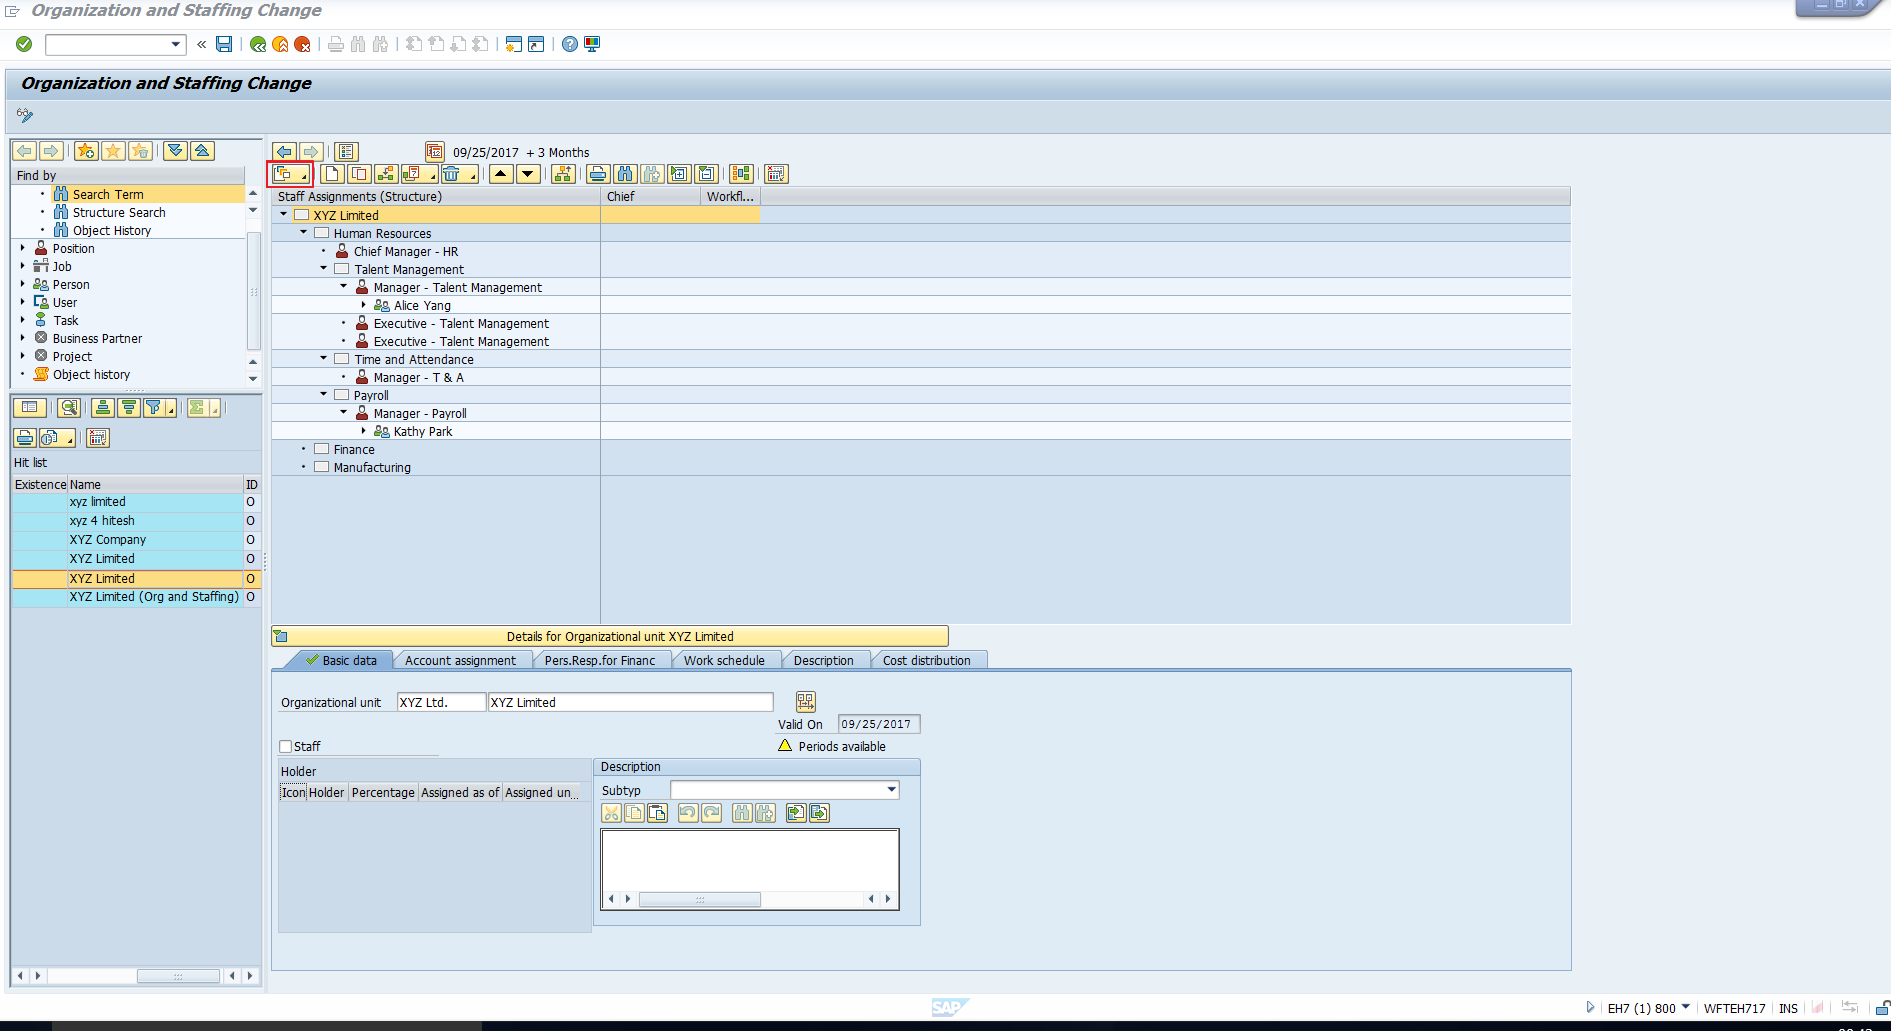
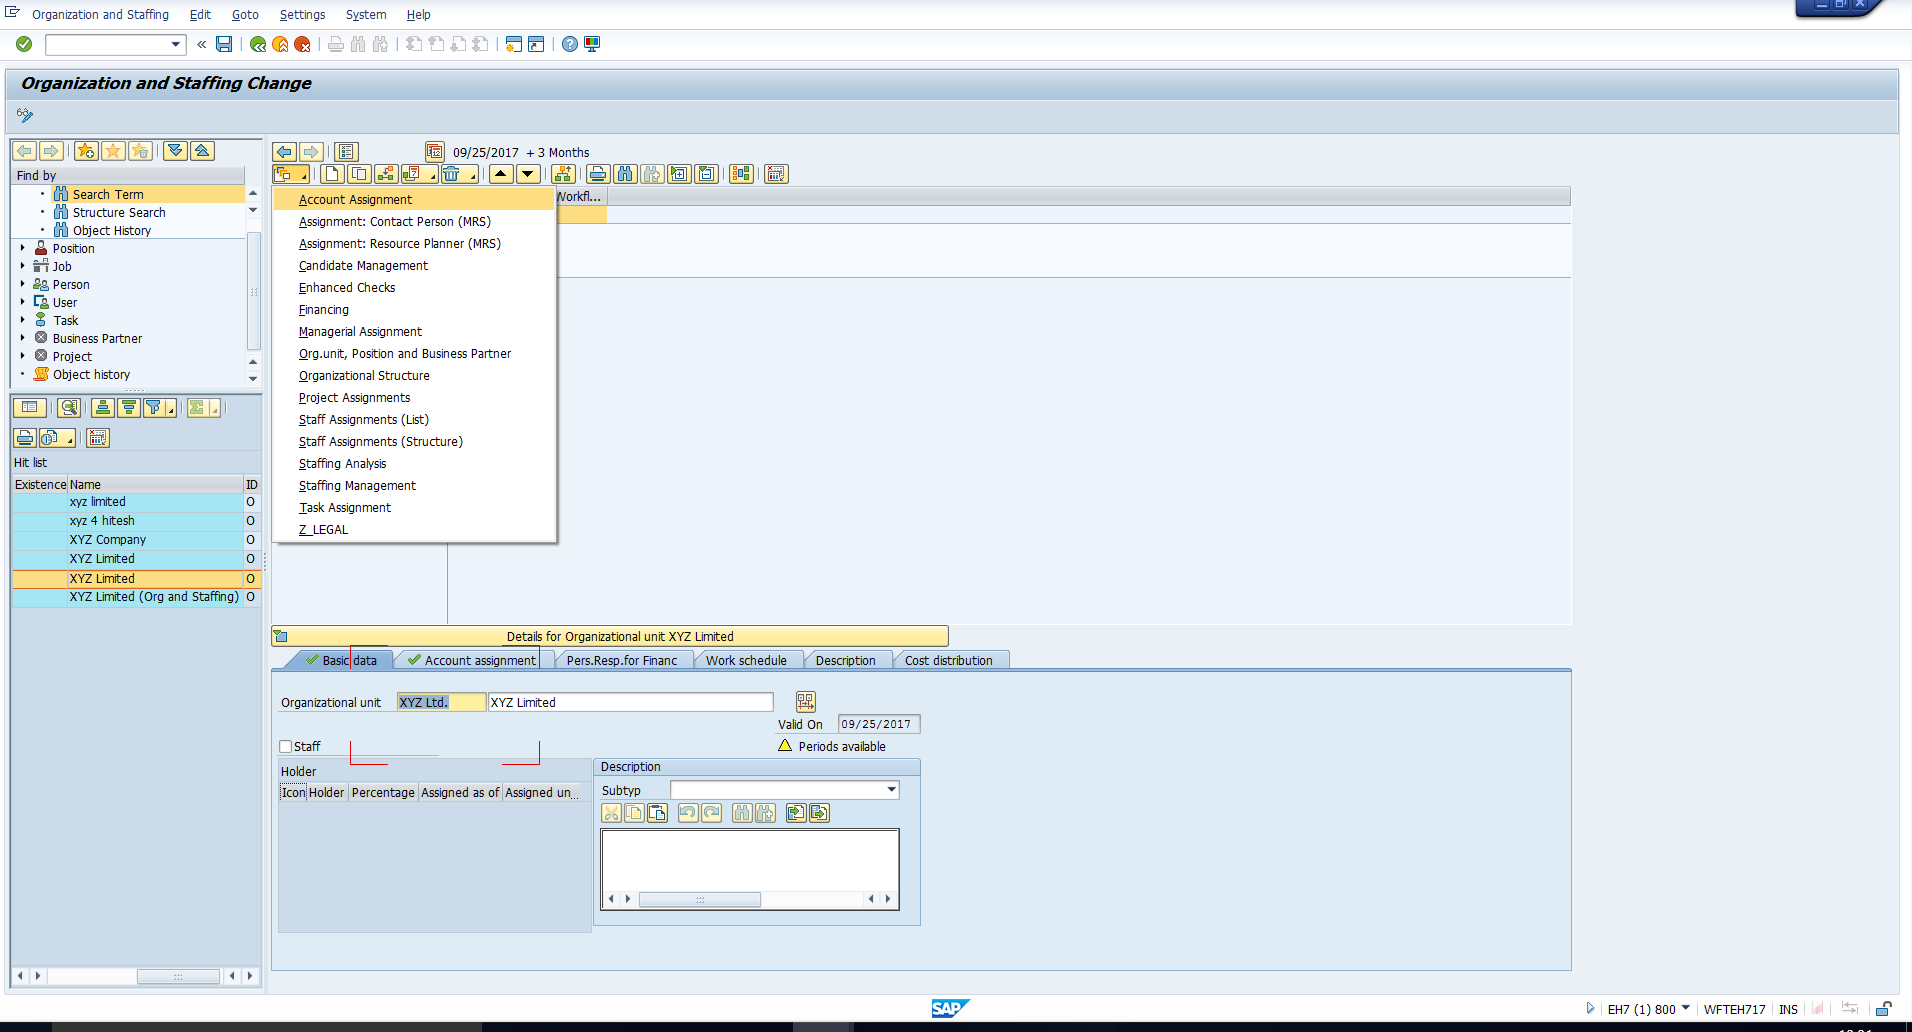
For example, if you want to view the cost centres assigned within the structure, you can click on the ‘Account Assignment’ option that has been highlighted in the screenshot above. You can see the resulting structure in Figure 4. The cost centres (highlighted in the image) linked to the organizational units are visible in this structure.
Similarly, you can view each of the structures listed out in Figure 3. Every structure basically corresponds to an Evaluation path. As we explained in the SAP Evaluation Paths tutorial, an evaluation path defines the objects and the relationships among objects that must be selected to generate a structure.
An obvious question here is, what if you need to view a structure that has not been listed? For example, assume the HR user wants to view an organizational unit, all subordinate organizational units and all employees assigned to each of these organizational units. We will explain how this can be achieved in the next section.
Incorporation of a New Structure
You can incorporate a new Structure to the list of options in Figure 3 by following the below configuration steps in the Implementation guide.
Creating an Evaluation path
You must first determine if there is an existing Evaluation path that can generate the required structure. If yes, you should omit this step. If there isn’t, then you should create a new Evaluation path. Please go through the tutorial on SAP Evaluation Paths to understand how to create a new evaluation path.
For our requirement, we can utilize the evaluation path ZTEST that we created in the SAP Evaluation Paths tutorial.
Define a New Service
Follow the IMG path shown in Figure 5.
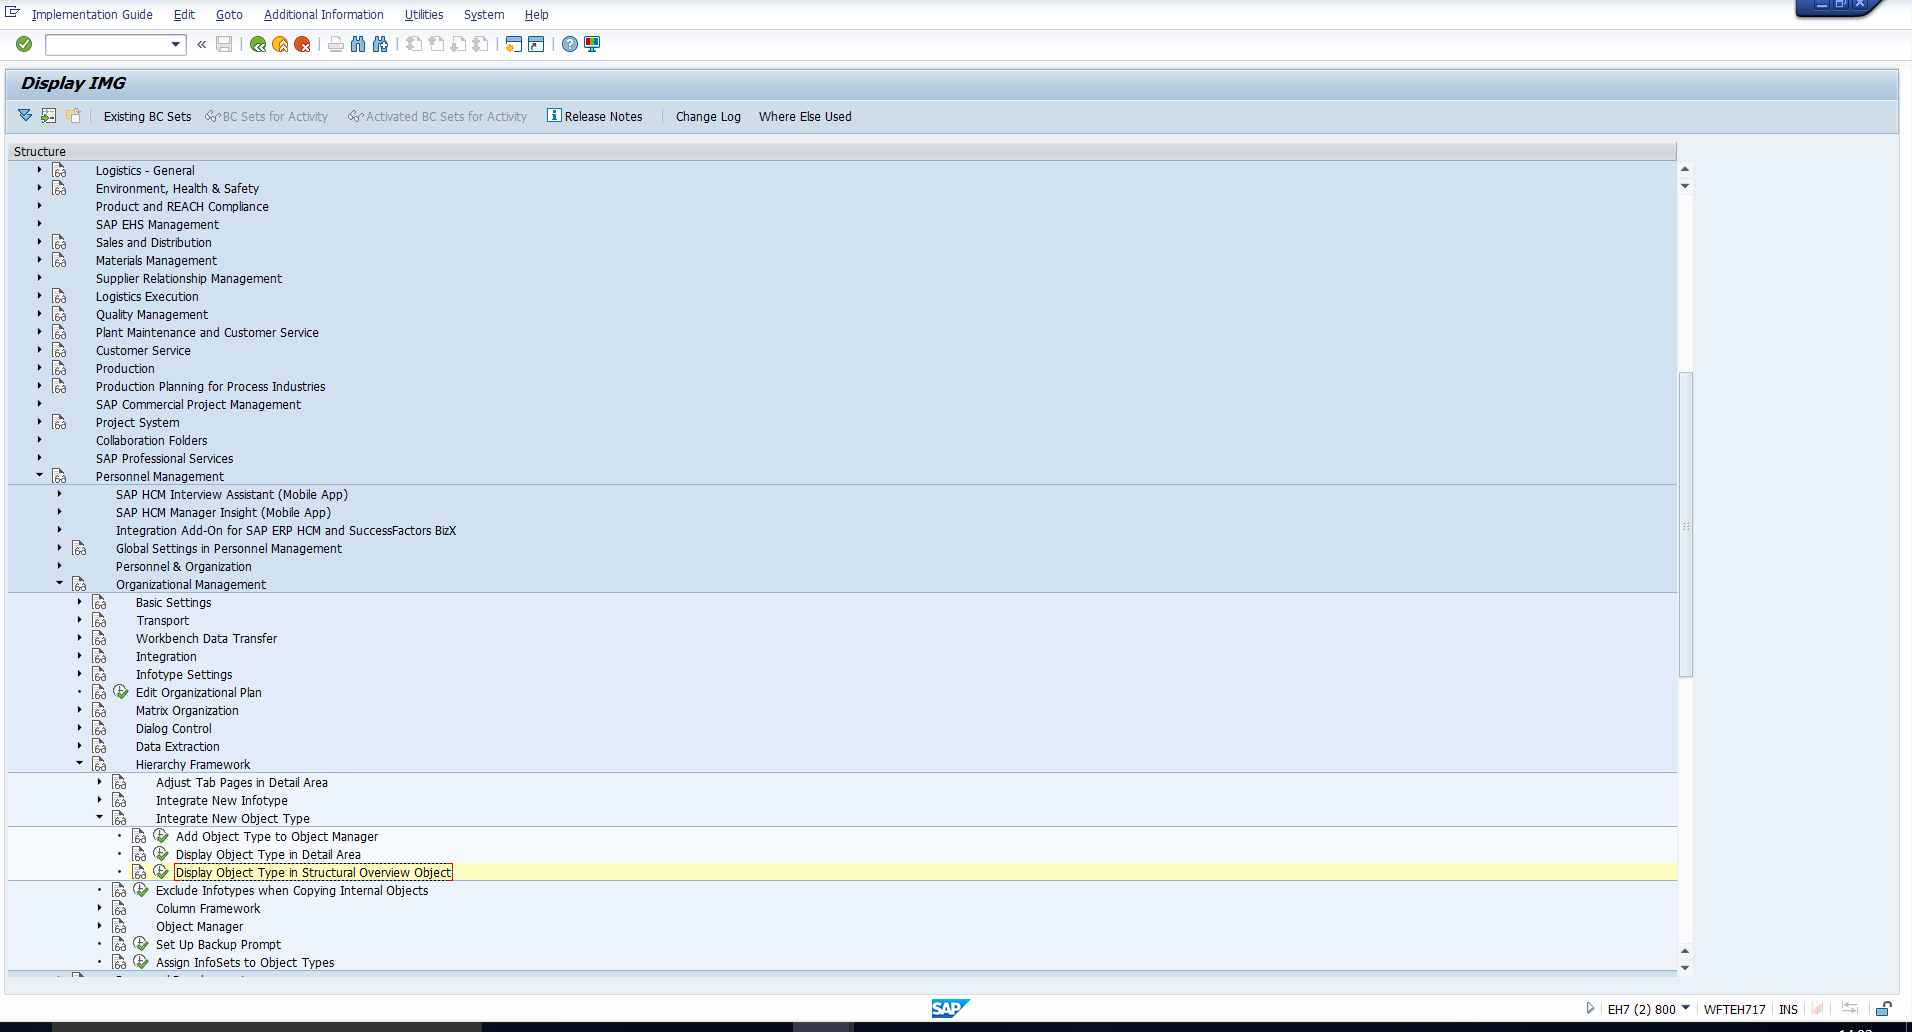
Executing this takes you to the activity list in Figure 6. Double click on the first activity.
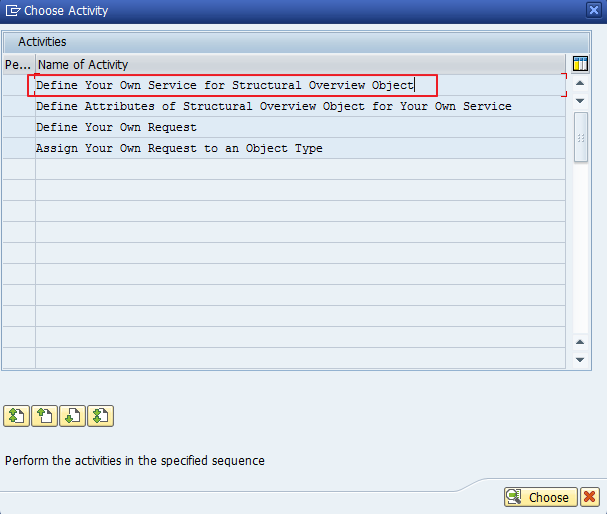
You will then see the Scenario Definition Overview as depicted in Figure 7. To define a new service, double click on the Definition Service folder that has been highlighted in Figure 7.
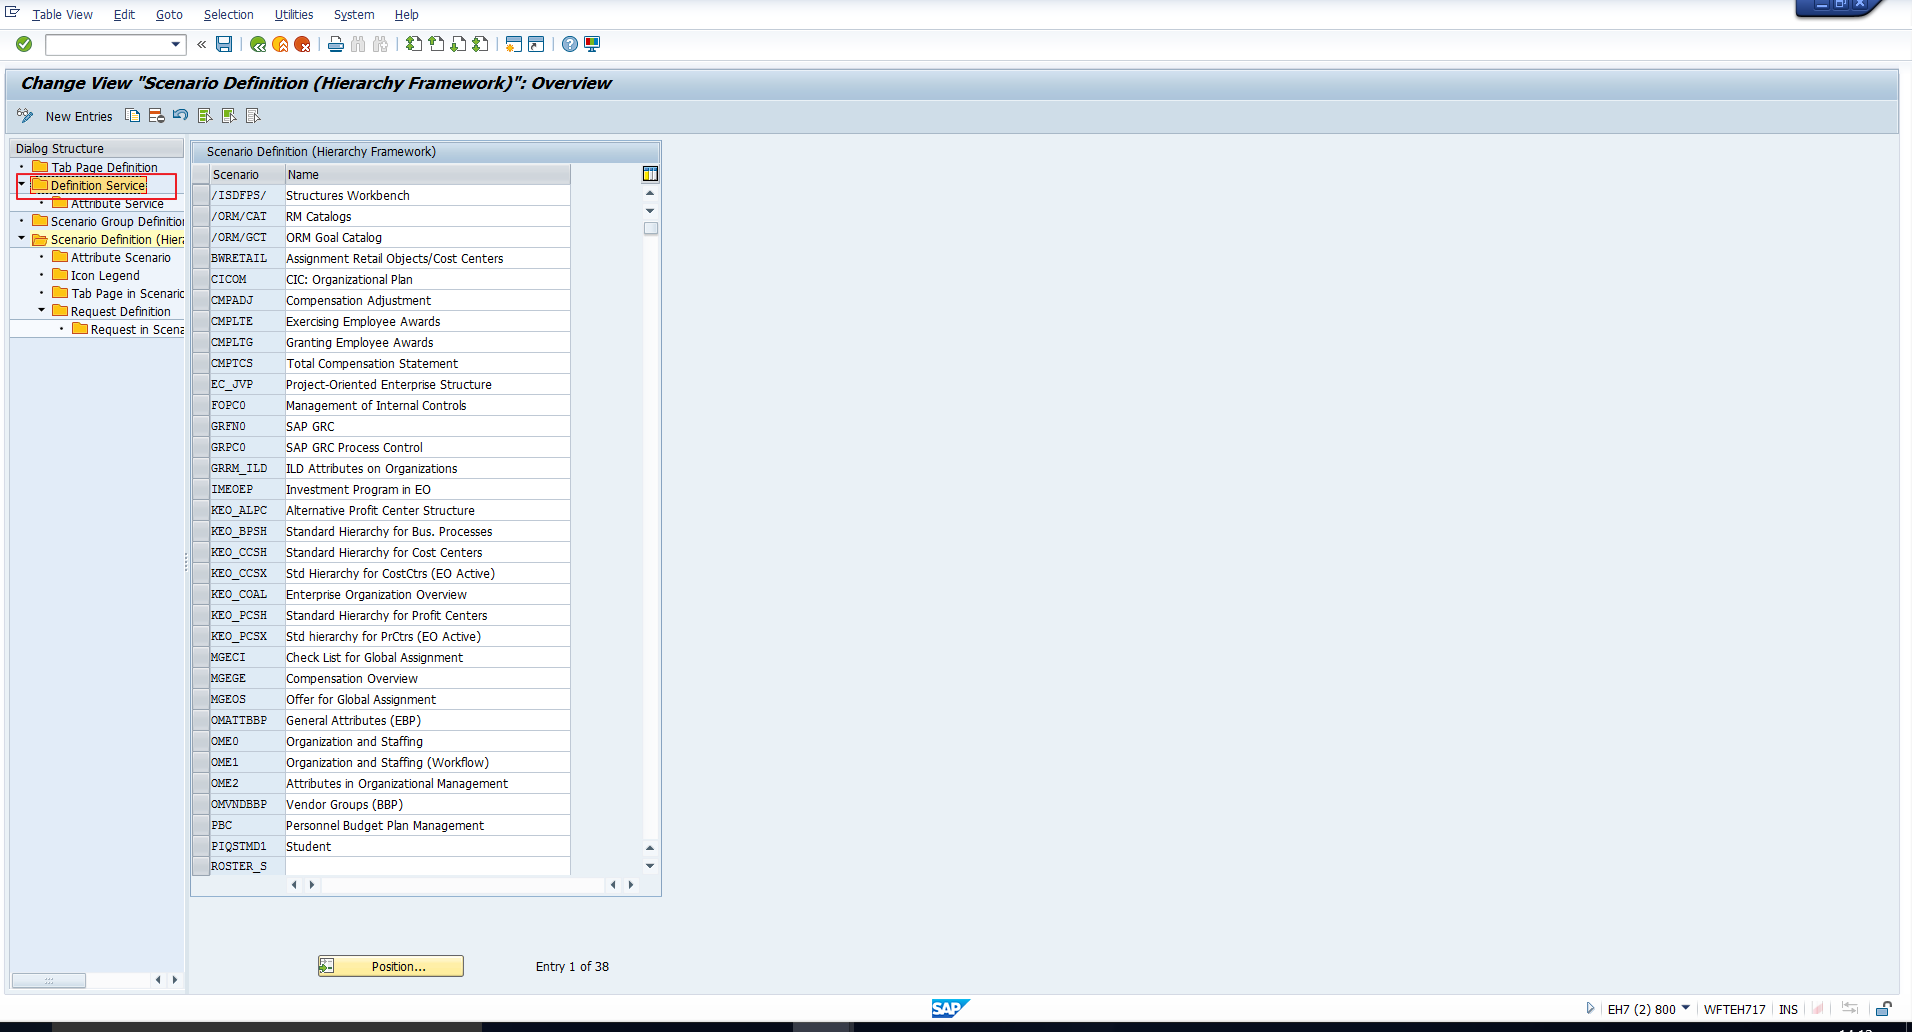
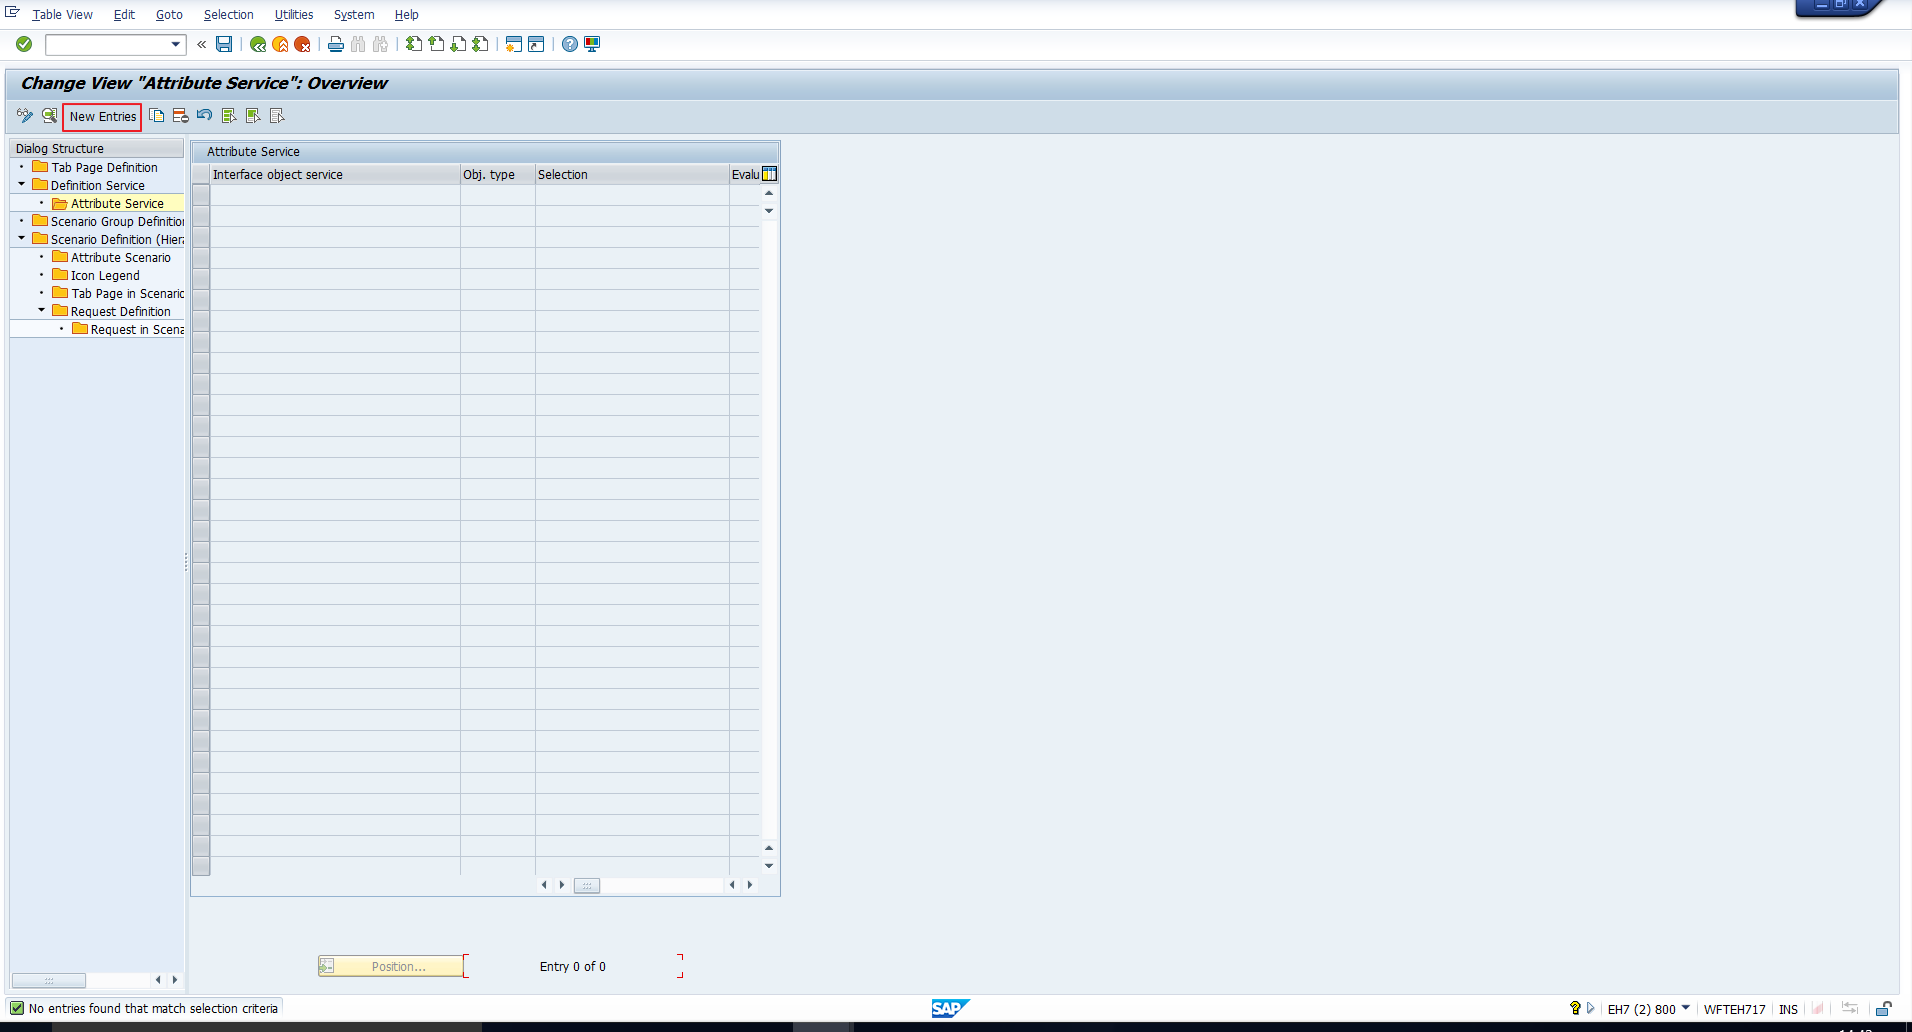
In the next screen, click on the ‘New entries’ button that has been highlighted in Figure 8.

This will take you to the screen in Figure 9. Enter a name for the service and enter the Object key ‘GOWD’. Then click on the Save icon. Then select the newly created entry and double click on ‘Attribute Service’ that has been highlighted in the image.

You will now reach the screen depicted in Figure 10, in which you should click on the highlighted ‘New entries’ button.
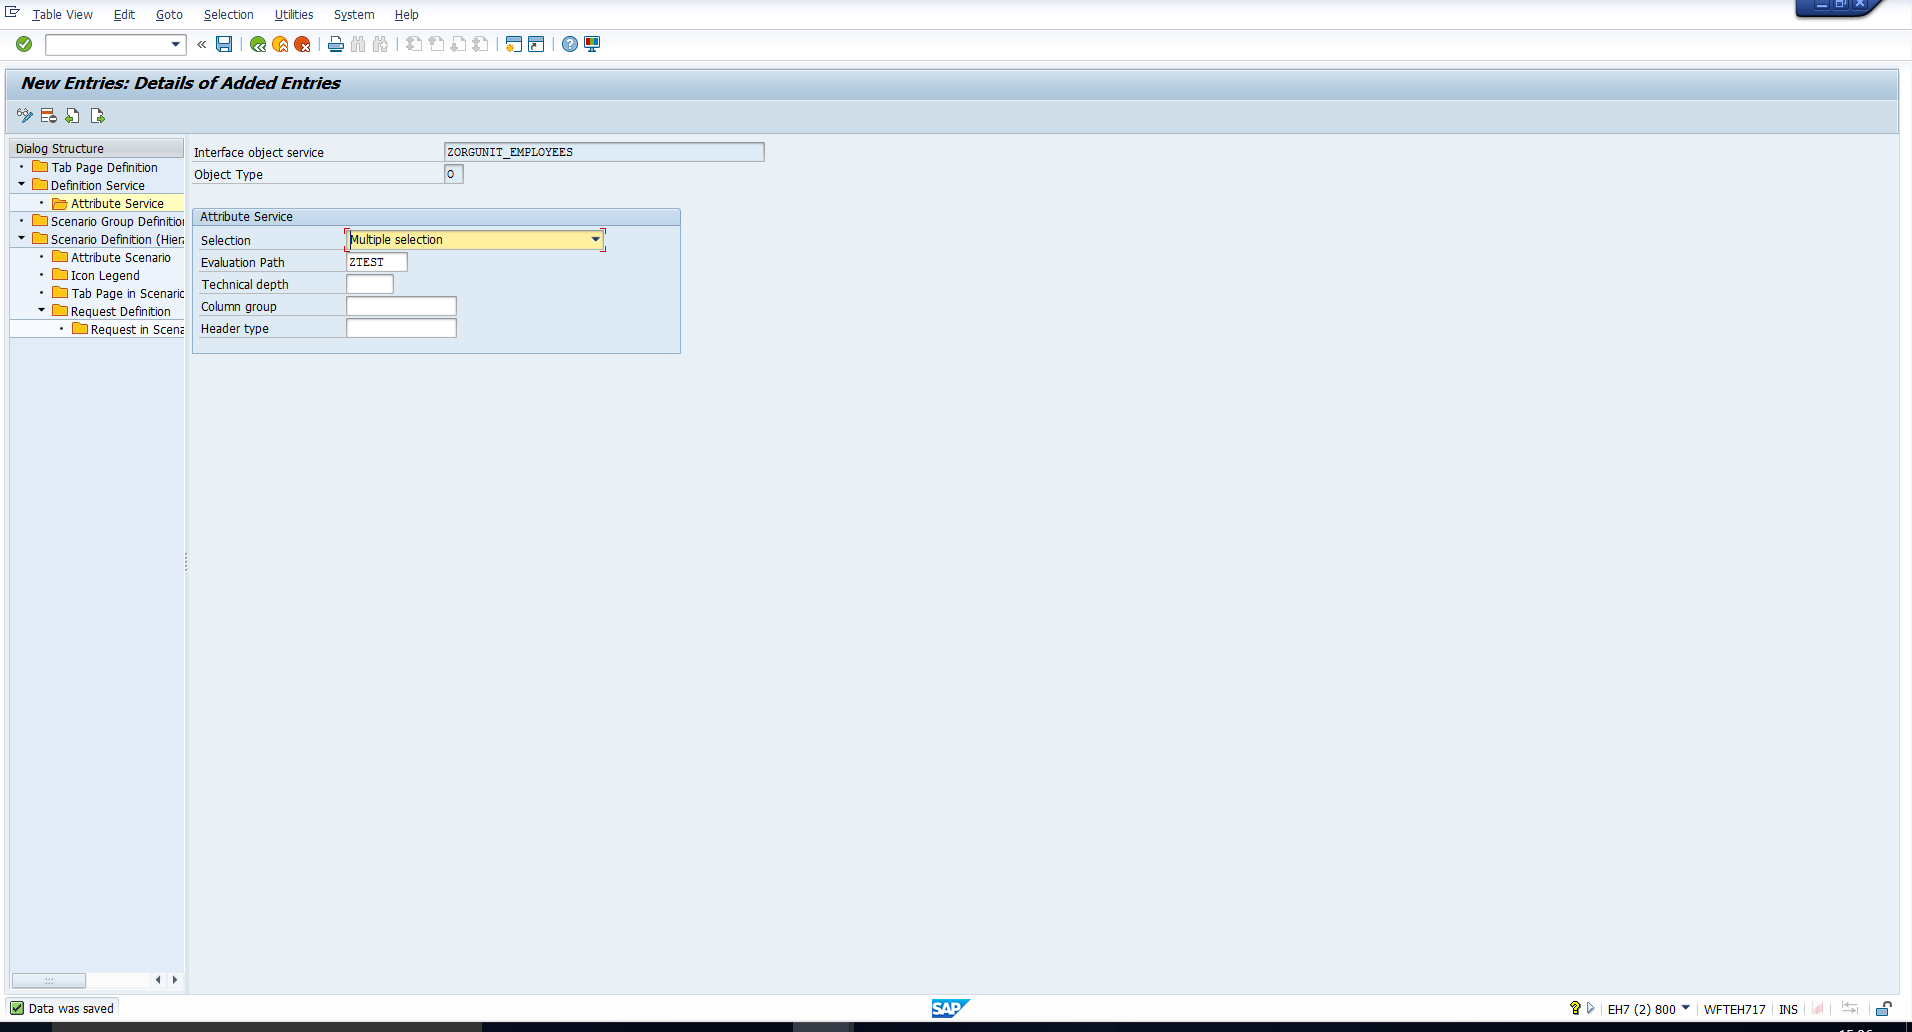
Then enter the details as shown in Figure 11. Note that we have linked the newly created evaluation path ZTEST to this service. This has been done for object type ‘O’, that is, Organizational unit. You can create a new entry for every object type for which this is required.
Define a New Request
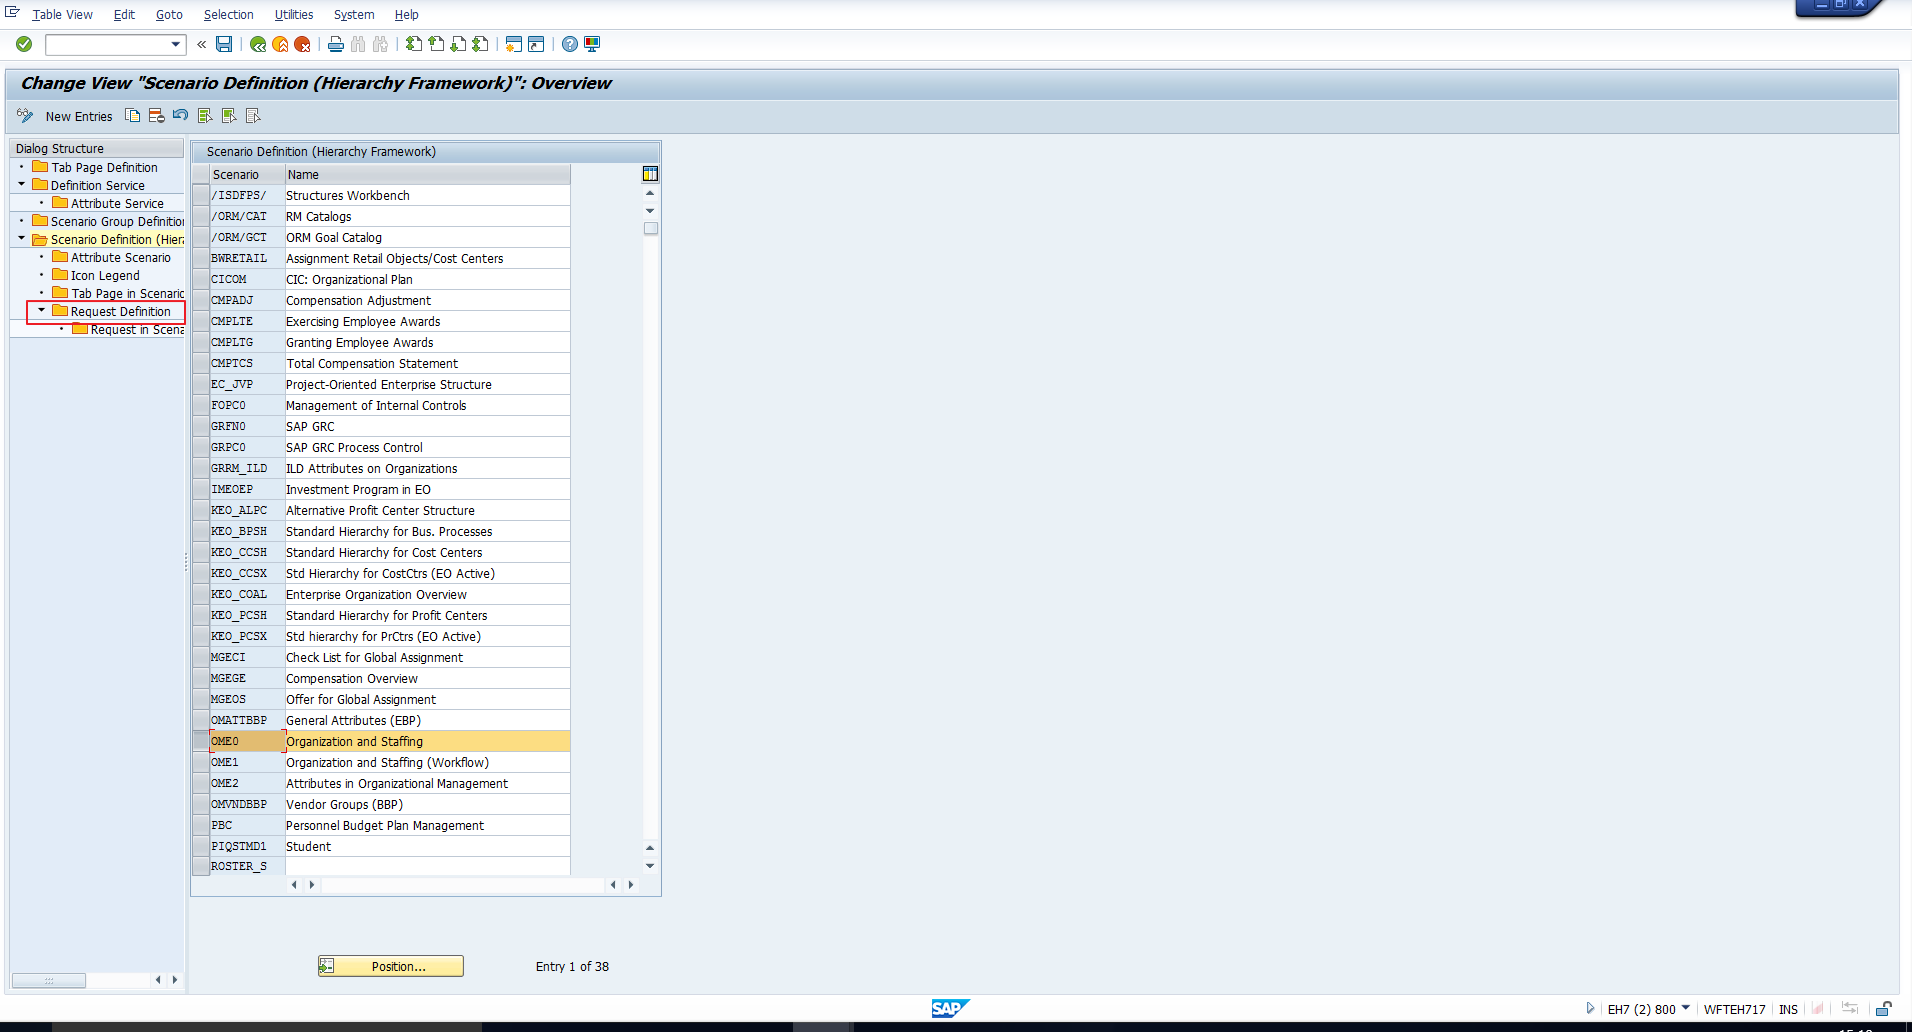
Next, double click on the Scenario Definition folder in the Dialog structure. Select the OME0 scenario as this is the standard SAP scenario for Organization and Staffing as illustrated in Figure 12. Then double click on the Request Definition folder in the Dialog structure. You can see this highlighted in the image.
You can then see the list of existing Requests as in Figure 13.
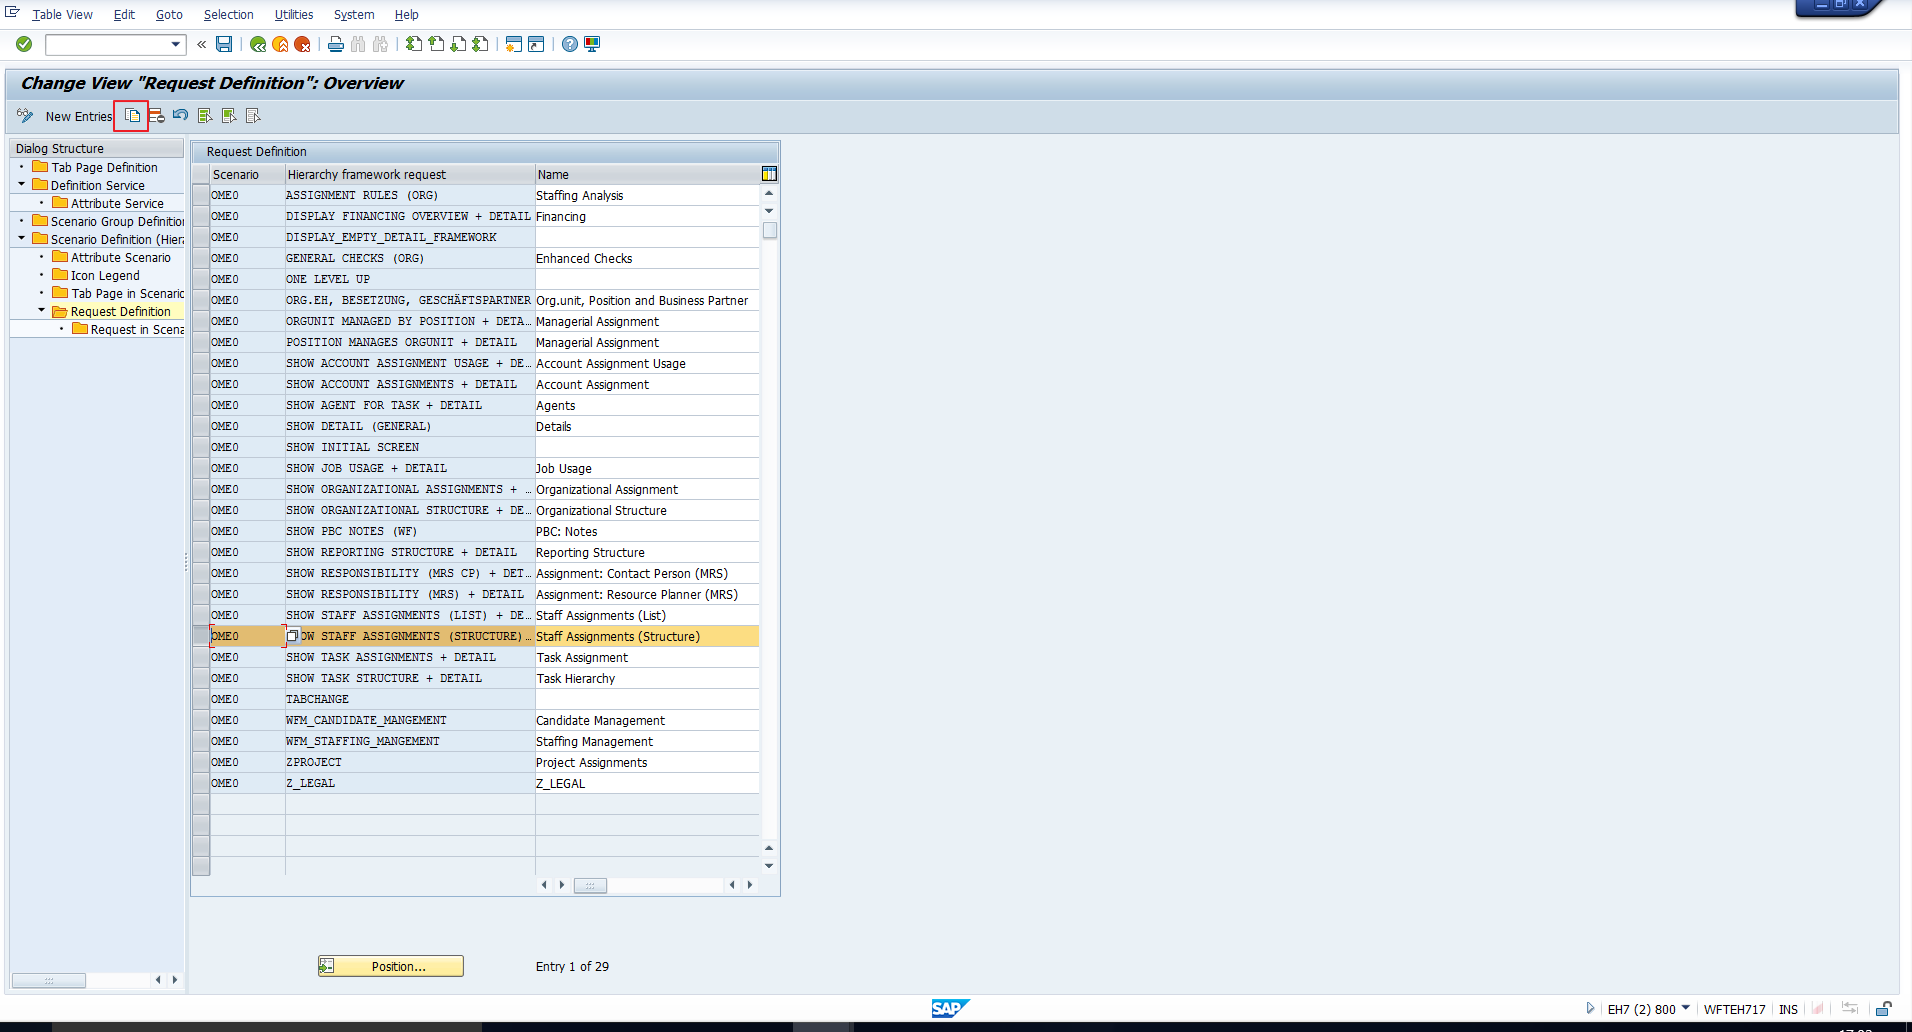
If you look closely, you will recognize some of the entries in the ‘Name’ column from the list of structures in Figure 3. This implies that each structure in the list is basically a Hierarchy framework request. Hence, to incorporate a new entry in that list, we should create a new request in this table.
You can do this quickly by copying the existing Staff Assignments (Structure) entry and making changes to the new entry as necessary. Select the required row as illustrated in Figure 13, and click on the Copy icon (highlighted in the same screenshot).
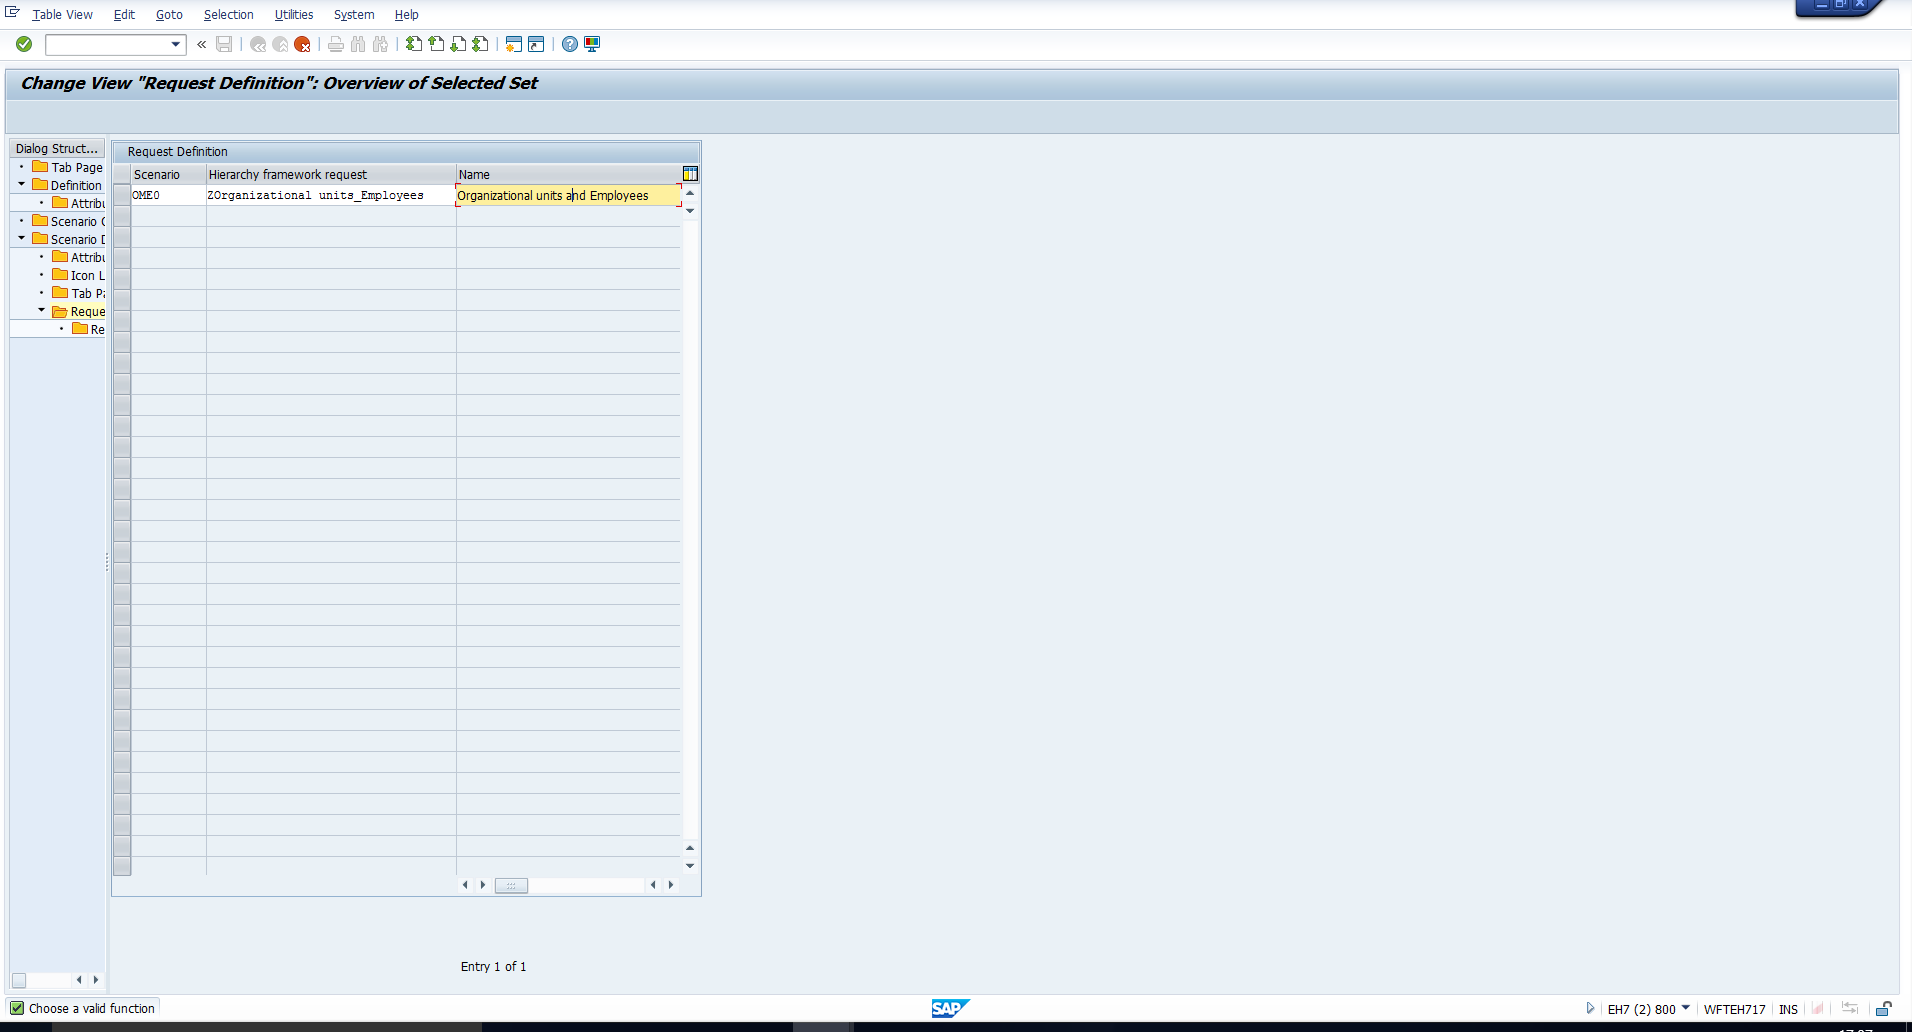
Assign suitable values in the columns Hierarchy Framework request and Name, as demonstrated in Figure 14. Scroll to the right until you see the column ‘Service for 1st interface object’. Here, you must enter the name of the service we created in the above step. As we created the service ZORGUNIT_EMPLOYEES, enter this value in this column, as depicted in Figure 15.
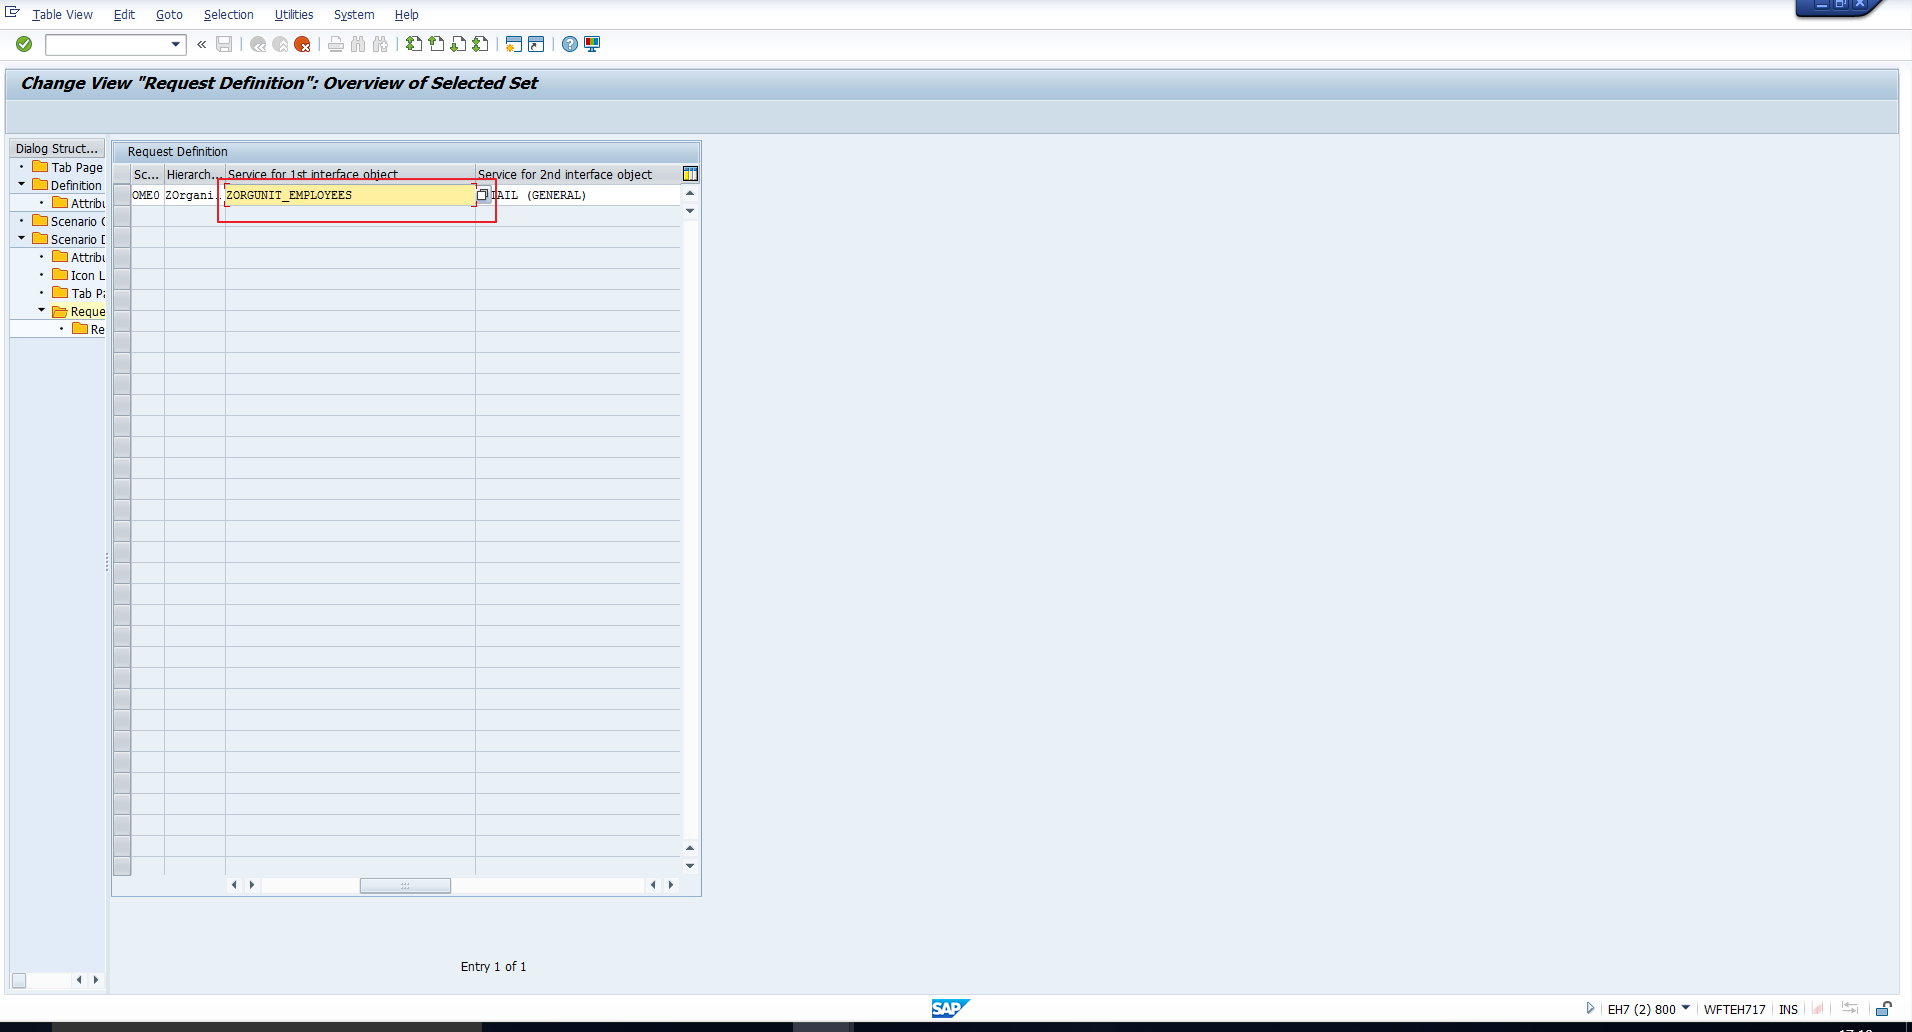
This is the link between the Hierarchy framework request we are creating and the service (and consequently, the evaluation path) we created earlier. This allows the system to interpret that if this request is selected using the Goto icon in Organization and Staffing, the required Evaluation path (that selects the organizational structure and employees assigned) must be displayed.
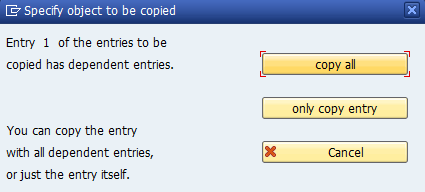
Then, hit the Enter key. The system throws the pop-up depicted in Figure 16, where you can select the option ‘Copy all’, which will also copy dependent entries.
To see which dependent entries have been copied, select the newly created entry and then double click on ‘Request in Scenario for each Object type’ shown in Figure 17.
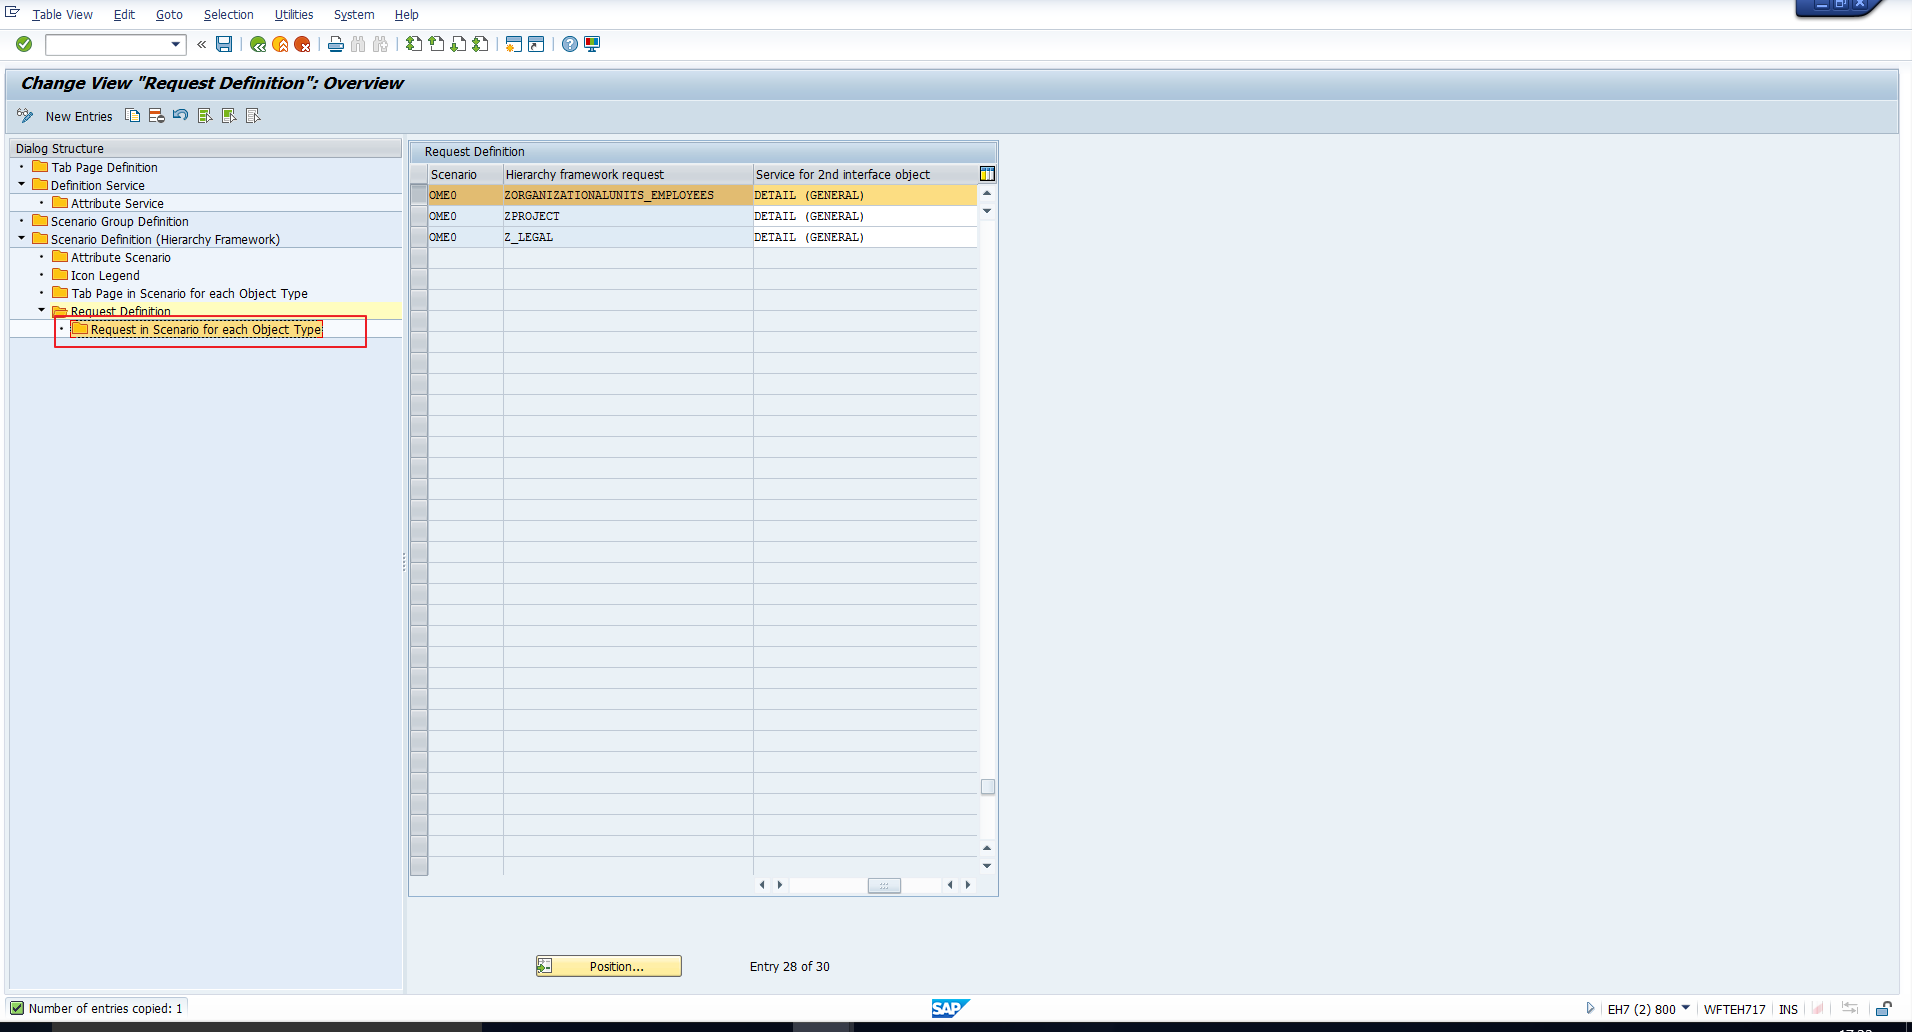
This takes you to the screen in Figure 18. Here you can see the entry for this request and object type ‘O’. This means that this request will be available for organizational units. We mentioned earlier in this tutorial that the list of viewable structures (for example, the list in Figure 3), depends on the selected object type. It is here that this is defined. So, if the new structure should be allowed for any other object type, you must add a new entry in this table for that object type. In short, there will be one entry per request per object type.
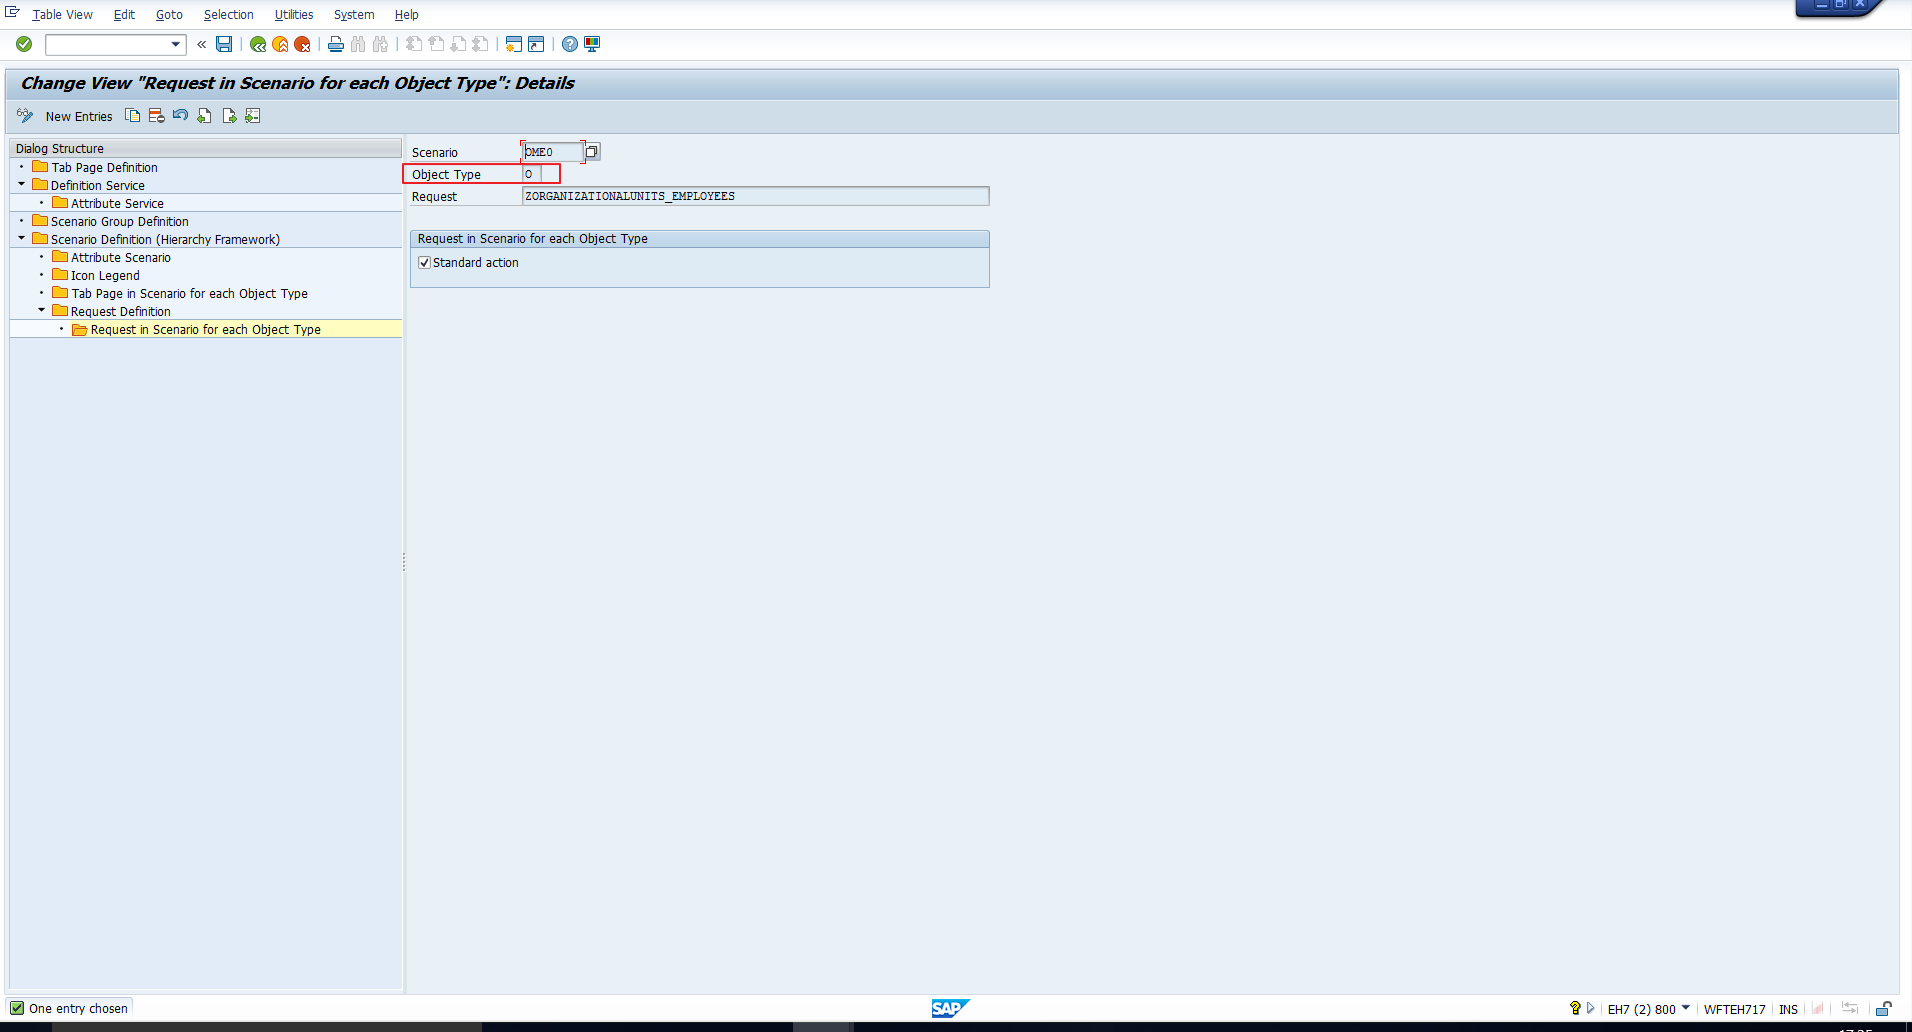
Then, save the data by clicking on the Save icon.
Testing the New Structure in PPOME
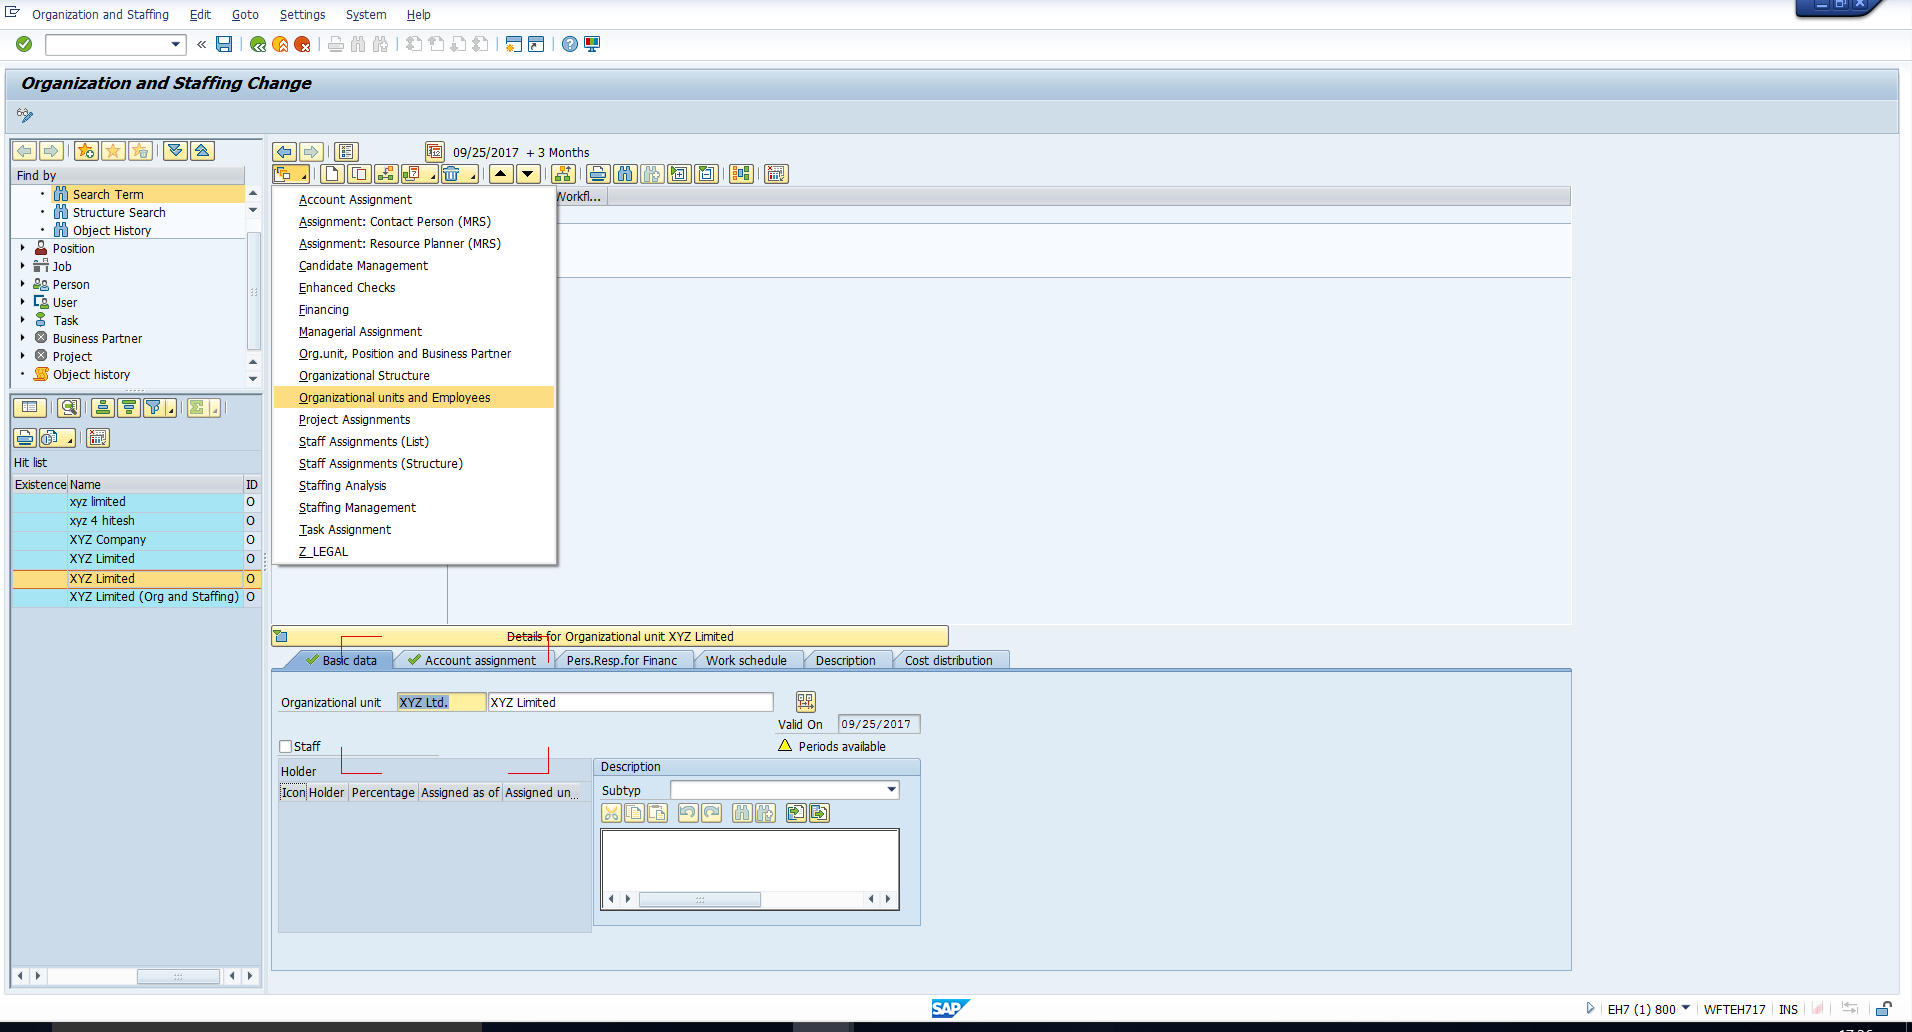
Let’s go back to the Organization and Staffing interface (transaction PPOME) by executing the transaction code PPOME. When we select the Organizational unit and then click on the Goto icon, we can now see the newly created request ‘Organizational units and Employees’ as depicted in Figure 19.
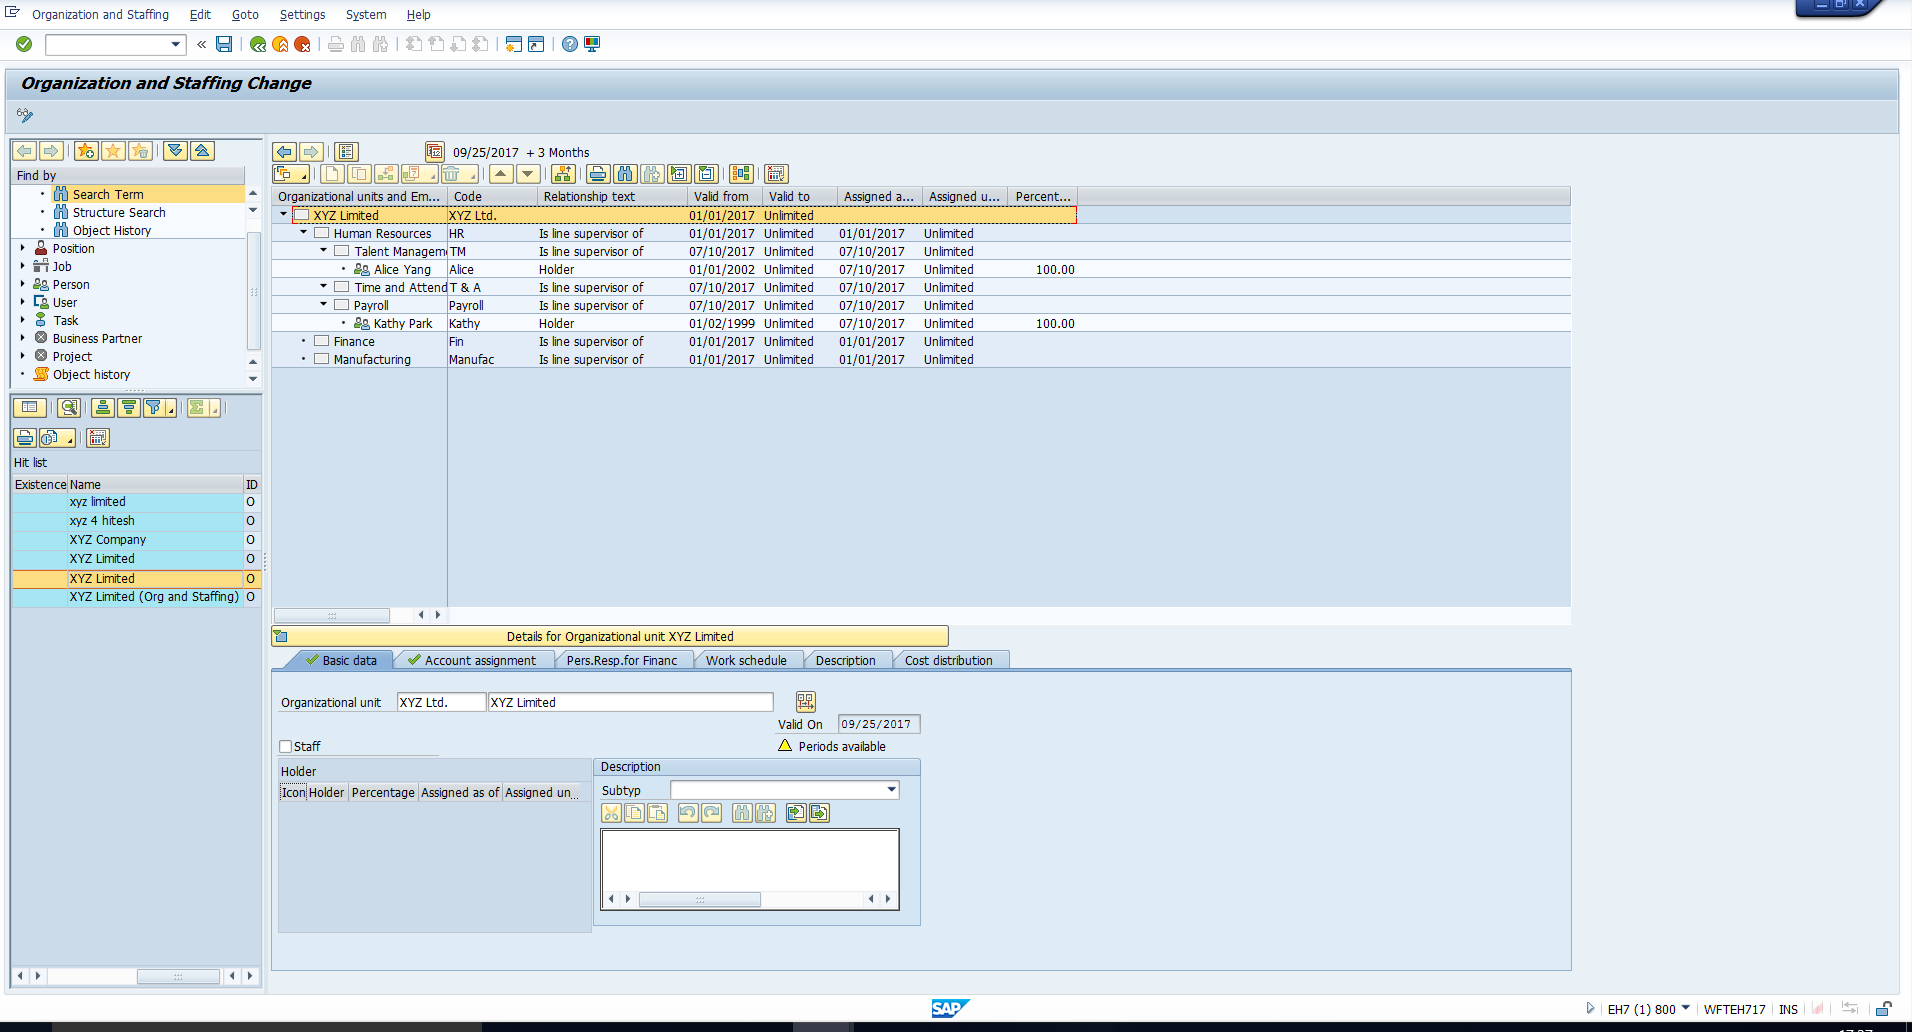
Click on this request to view the structure of Organizational units and employees. In Figure 20, you can see the new structure successfully displayed.
—
Did you like this tutorial? Have any questions or comments? We would love to hear your feedback in the comments section below. It’d be a big help for us, and hopefully it’s something we can address for you in improvement of our free SAP HR tutorials.
Navigation Links
Go to next lesson: SAP Time Management Overview
Go to previous lesson: SAP Evaluation Paths
Go to overview of the course: SAP HR Training