
 This tutorial is part of our SAP MM course and it provides information about SAP MRP profile. This tutorial will help you to learn what is SAP MRP profile, how to create SAP MRP profile, and how to create a material master record using SAP MRP profile.
SAP MRP Profile
For a material to be enabled for MRP (Materials Requirement Planning) run, it would need to be maintained with MRP views with required settings during material master creation or the material would need to be changed and the MRP views have to be extended. SAP material master has four MRP views in it, viz., MRP 1, MRP 2, MRP 3 and MRP 4 views.
MRP 1 view: This view contains fields that are relevant to general data, MRP procedure, and lot size data.
MRP 2 view: In this view, fields pertaining to procurement data, scheduling, and net requirements calculation are maintained.
MRP 3 view: Fields pertaining to forecast requirements, planning, availability check, and plant specific configuration are maintained in this MRP 3 view.
MRP 4 view: This view has fields that are required for BOM explosion/dependent requirements and repetitive manufacturing.
So, if one would like to create a material master and maintain the MRP parameters, then all the MRP views would need to be maintained as per the requirement. It is a time-consuming operation to go through every view and enter the required fields. This could also lead to manual entry errors.
This is where SAP MRP profile comes into picture. It is used to populate the MRP fields with required values. SAP MRP profile is defined as a key that contains a set of MRP view field values to be maintained during material master creation. It helps to minimize the repetitive task of maintaining the MRP fields. This profile has two types of values – fixed values and default values. Fixed values are those fields which would be greyed out and they cannot be changed in a material master. Default values are those values which could be changed or overwritten during material master creation while it gets saved.
SAP MRP Profile Transactions
Menu Path: Logistics -> Materials Management -> Material Master-> Profile -> MRP Profile
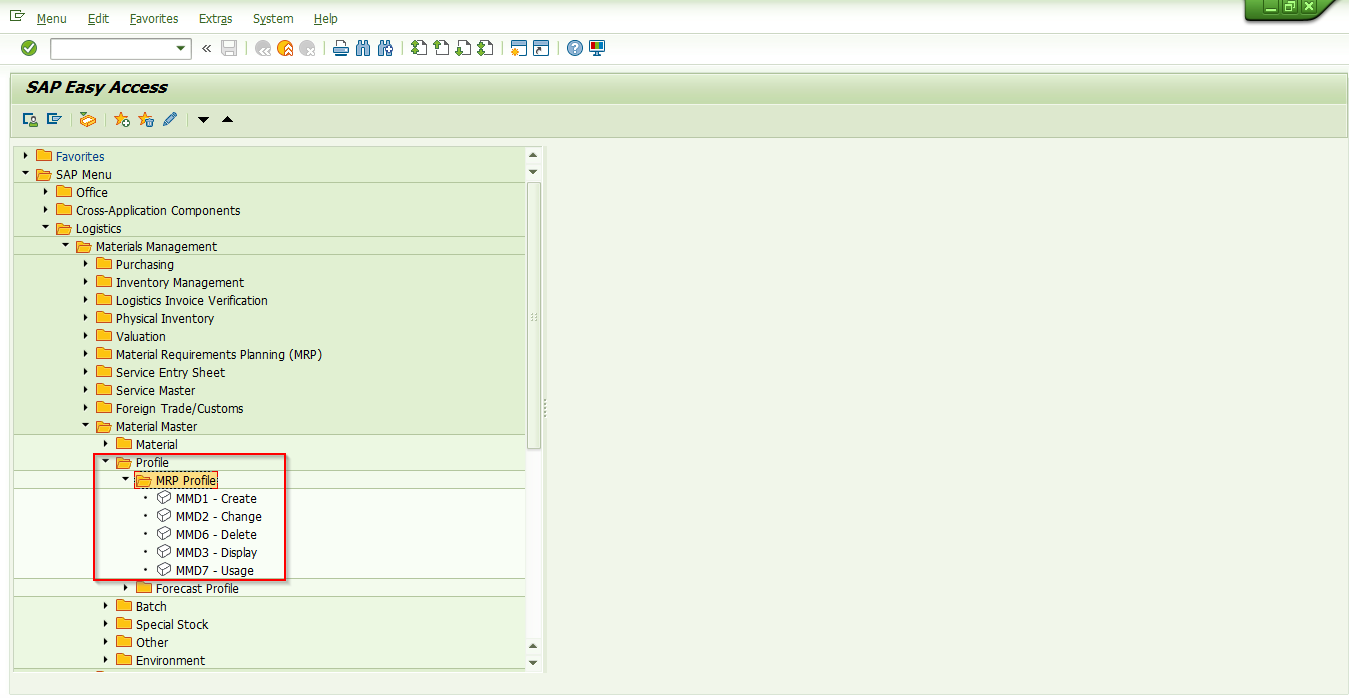
MMD1 – SAP MRP profile creation
MMD2 – To make changes to already created or existing SAP MRP profile
MMD6 – To delete an existing SAP MRP profile
MMD3 – To display SAP MRP profile and its values
MMD7 – To check the usage of SAP MRP profile – where it used (which plant, material number)
SAP MRP Profile Creation
The transaction code for SAP MRP profile creation is MMD1. Please see below for the initial screen of SAP MRP profile creation.
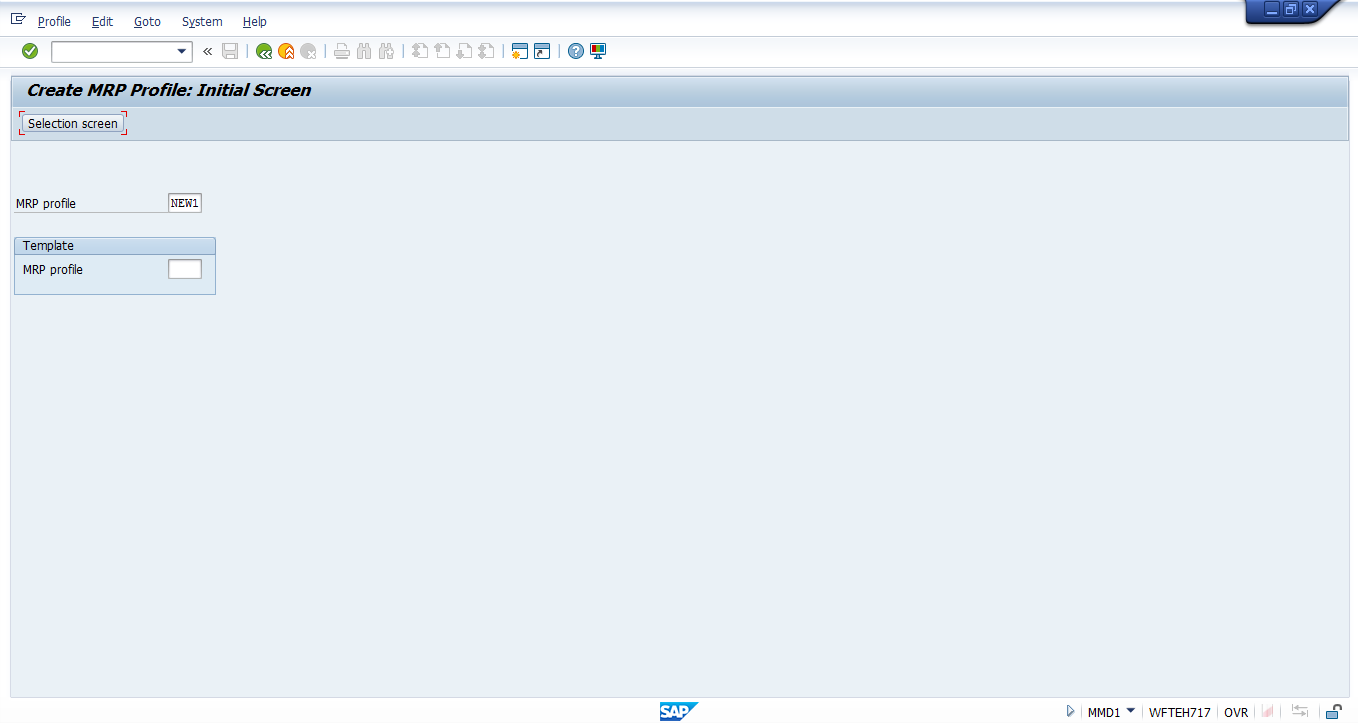
On the initial screen, there are two fields named as MRP profile. MRP Profile field with NEW1 value maintained is the new MRP profile that is to be created (see picture above). The other MRP profile under template tab is the reference MRP profile. The existing SAP MRP profile could be entered in template, so that it could be used as a reference to create a new MRP profile. In our example, let us create a new SAP MRP profile named as NEW1 rather than creating a new MRP profile from the template. Enter the new MRP profile, then click on “Selection screen” icon or hit Enter.
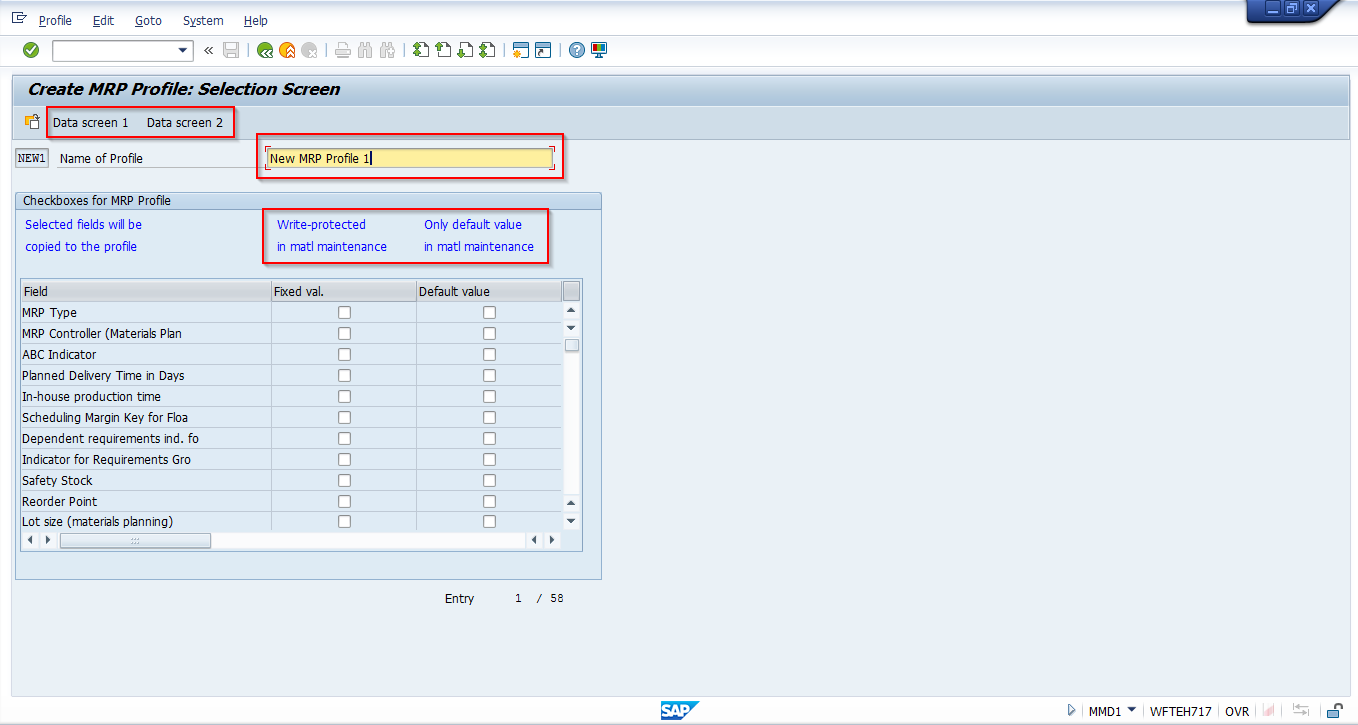
In the selection screen, the name for the MRP profile would need to be maintained. The fields for selection are available and the selected fields will be copied to the profile. There are two columns fixed values and default values, where the fixed value is write-protected which means it cannot be overwritten during material master creation. The default values are not write-protected and the MRP fields checked against default values could be overwritten during material master creation.
For our ease of understanding let us select one field per MRP view. For example
MRP 1 view – MRP type
MRP 2 view – Procurement type
MRP 3 view – Period indicator
MRP 4 view – Repetitive manufacturing indicator
After selecting the fields and marking them as fixed values or default values, click on “Data screen 1” or “Data screen 2” icons.
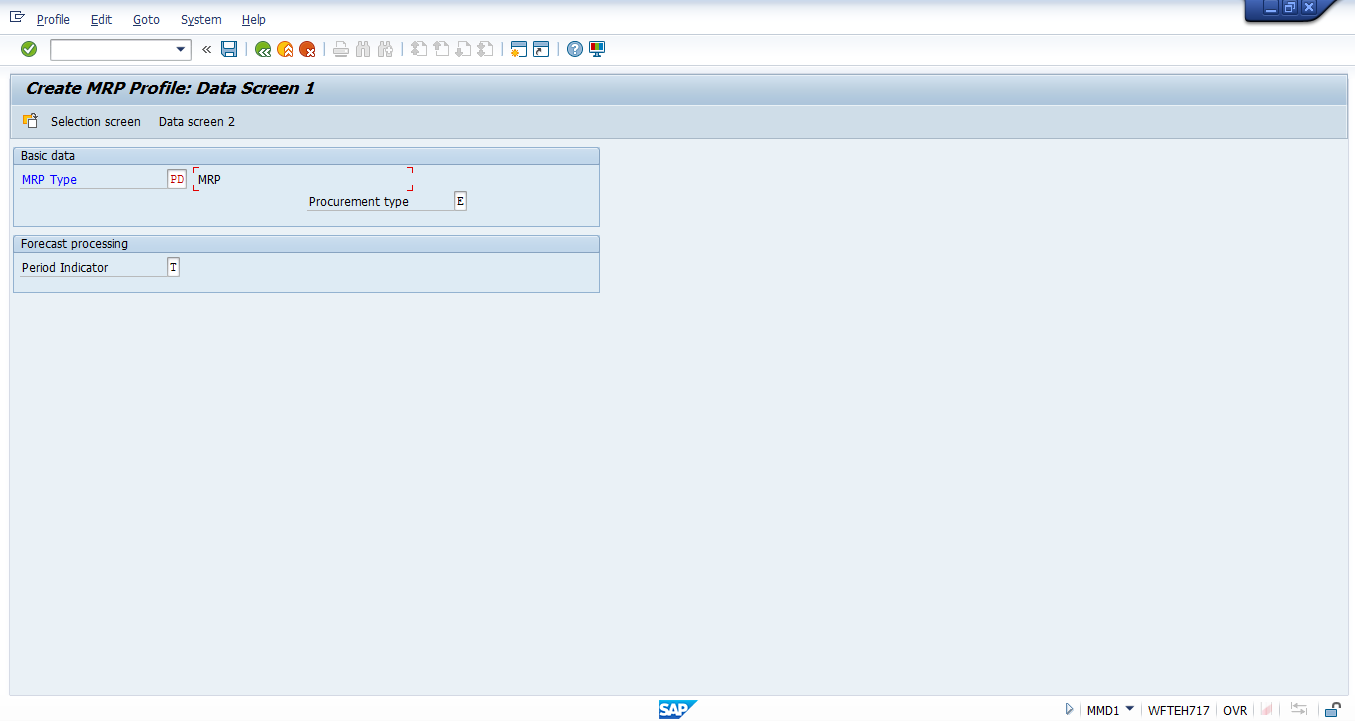
In this screen, there are three fields and these fields are populated here as we have selected them in the selection screen. Now, the data screen 1 consists of all basic data. If there is any additional data that is to be maintained and those fields had been selected in the selection screen, it would appear on data screen 2.
Now, take a look at the fields on data screen 1. MRP type field is in blue color. The other fields like procurement type and period indicator are in black color. This indicates that the fields in blue color are fixed values which cannot be overwritten during material master creation. The fields in black color are marked as default values on the selection screen which means that they could be overwritten during material master creation. The fields in data screen 1 are populated with the required values. Now, click on “Data screen 2” icon.
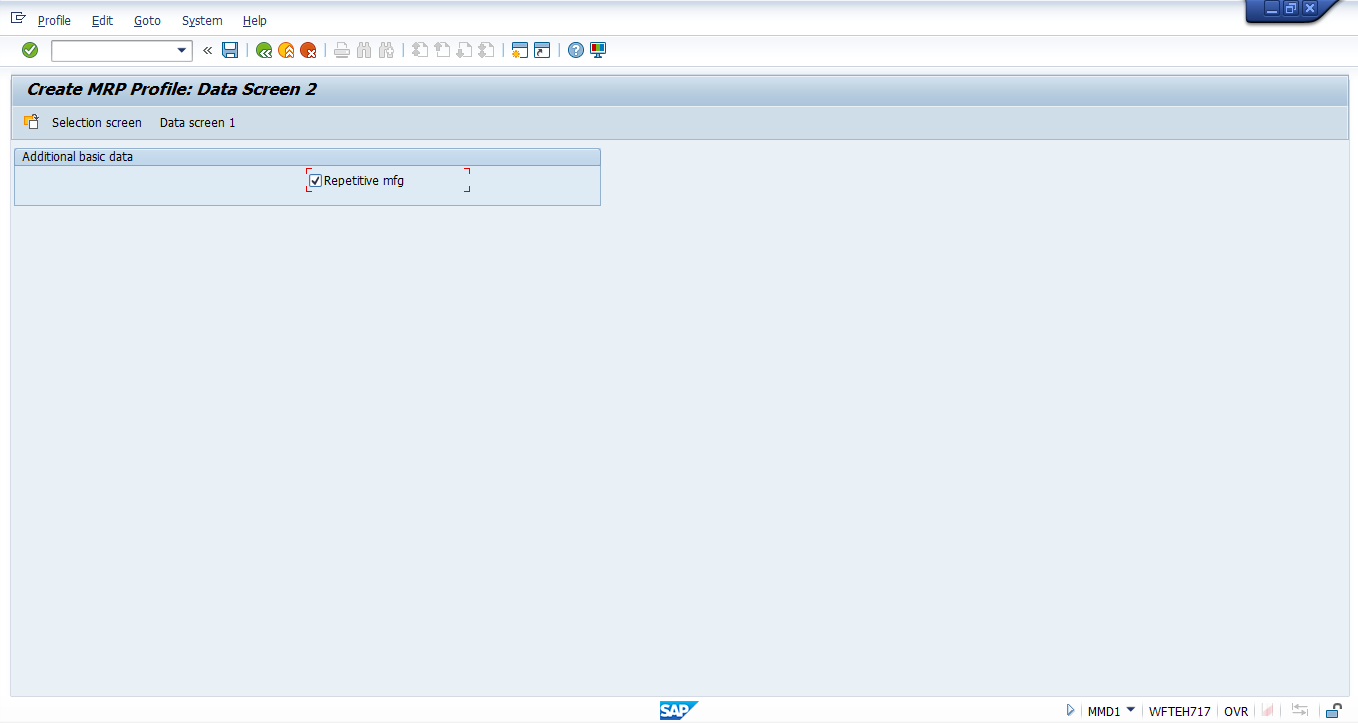
The repetitive manufacturing indicator has been selected on the selection screen and marked as a default value. Hence, it appears in black color. Select the repetitive manufacturing indicator, and then click on the save icon to create SAP MRP profile.
Now let us create a material master with reference to SAP MRP profile NEW1 that we have just created. Go to the transaction code MM01.
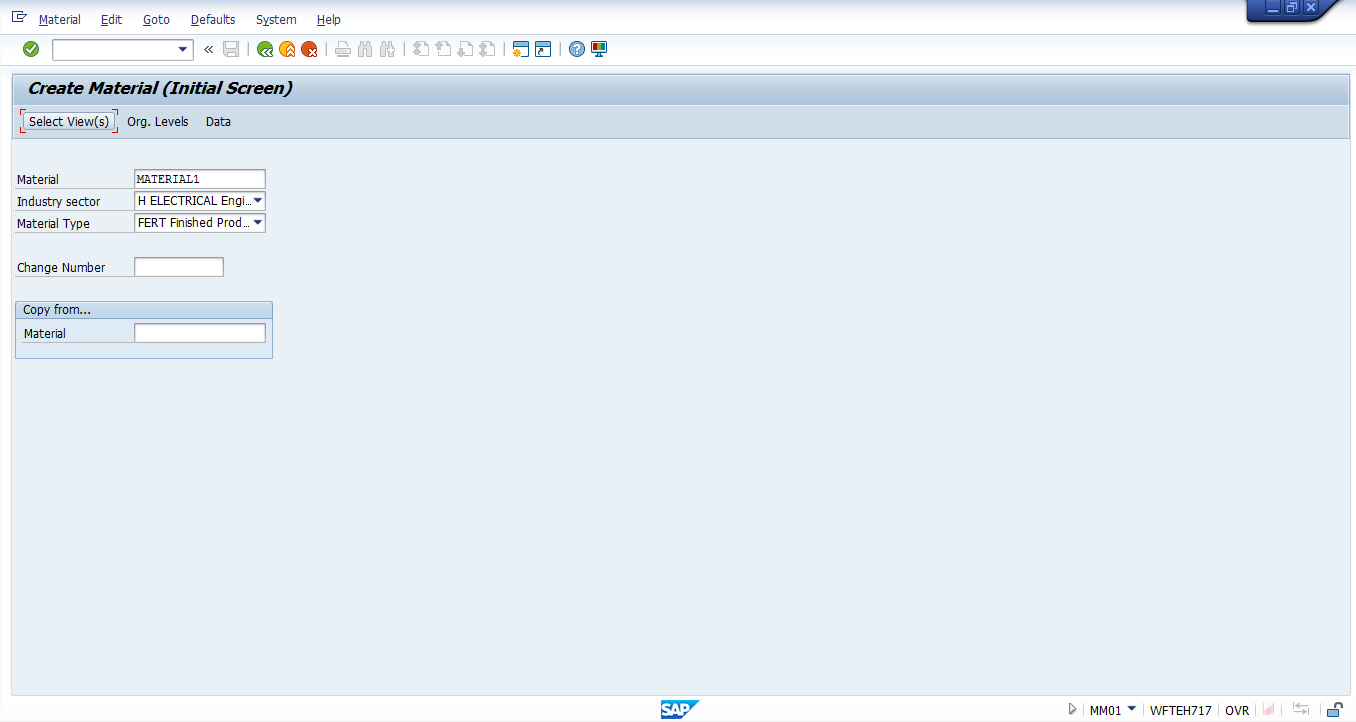
Enter the new material to be created, its industry sector and material type, and then click on “Select Views” to select the views of the material master that will be created.
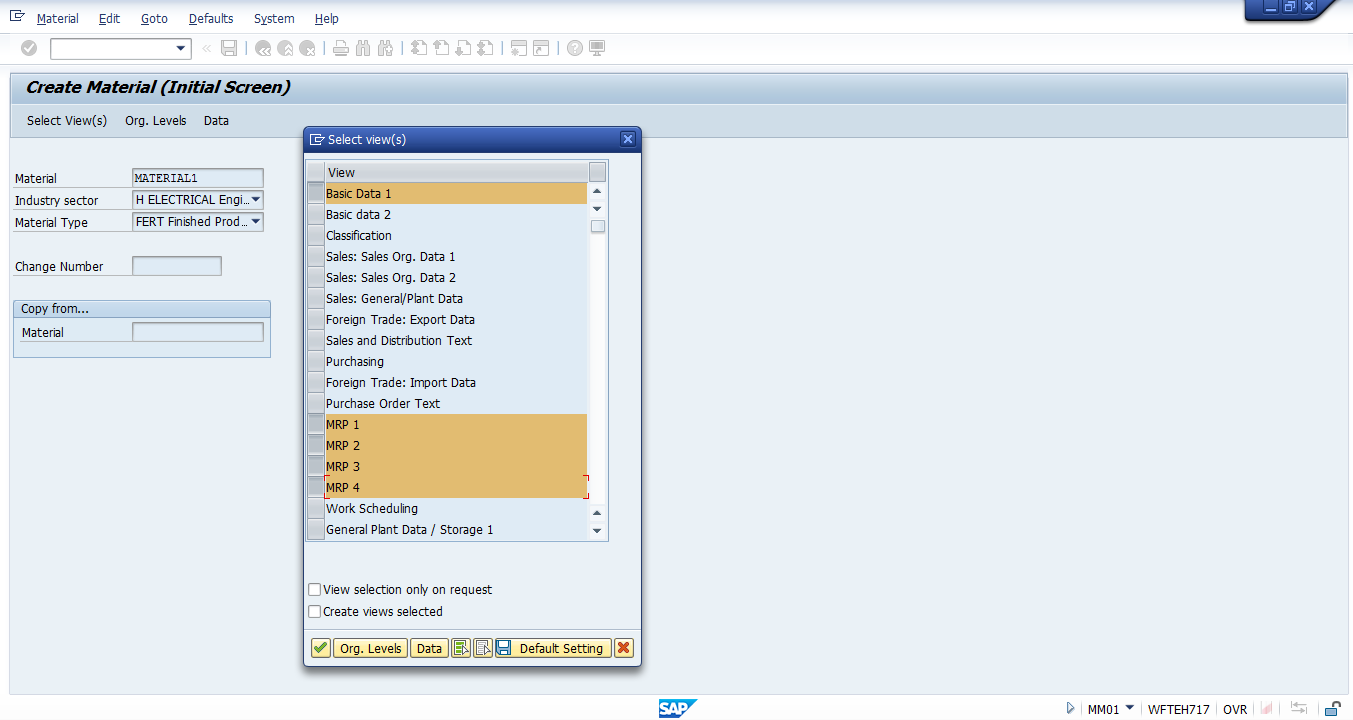
The views selected for our material master creation are Basic data1 and MRP 1-4. Then press Enter.
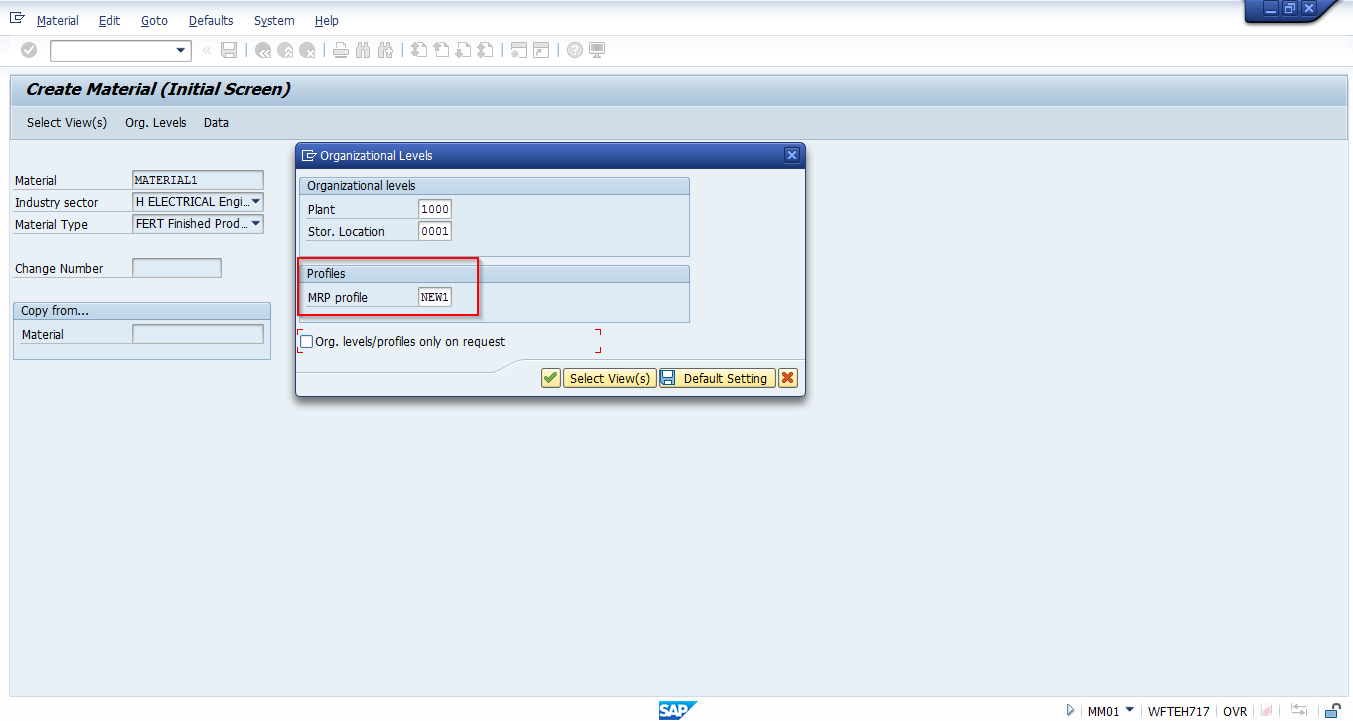
Enter the value for plant, storage location and for SAP MRP profile – the newly created MRP profile NEW1, and then press enter.
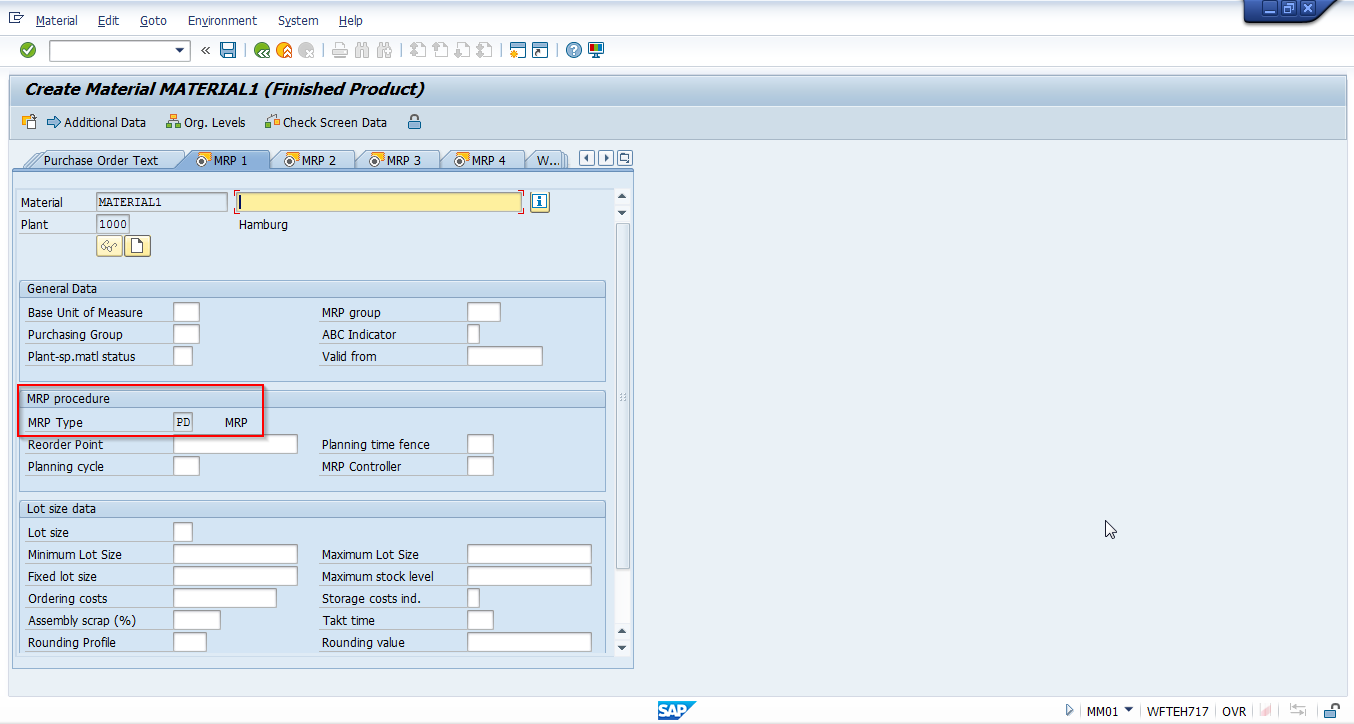
The figure with MRP 1 view shows that the value maintained in MRP profile – NEW 1 is automatically populated and, as it was maintained as a fixed value, it is greyed out in MM01, i.e. it cannot be overwritten.
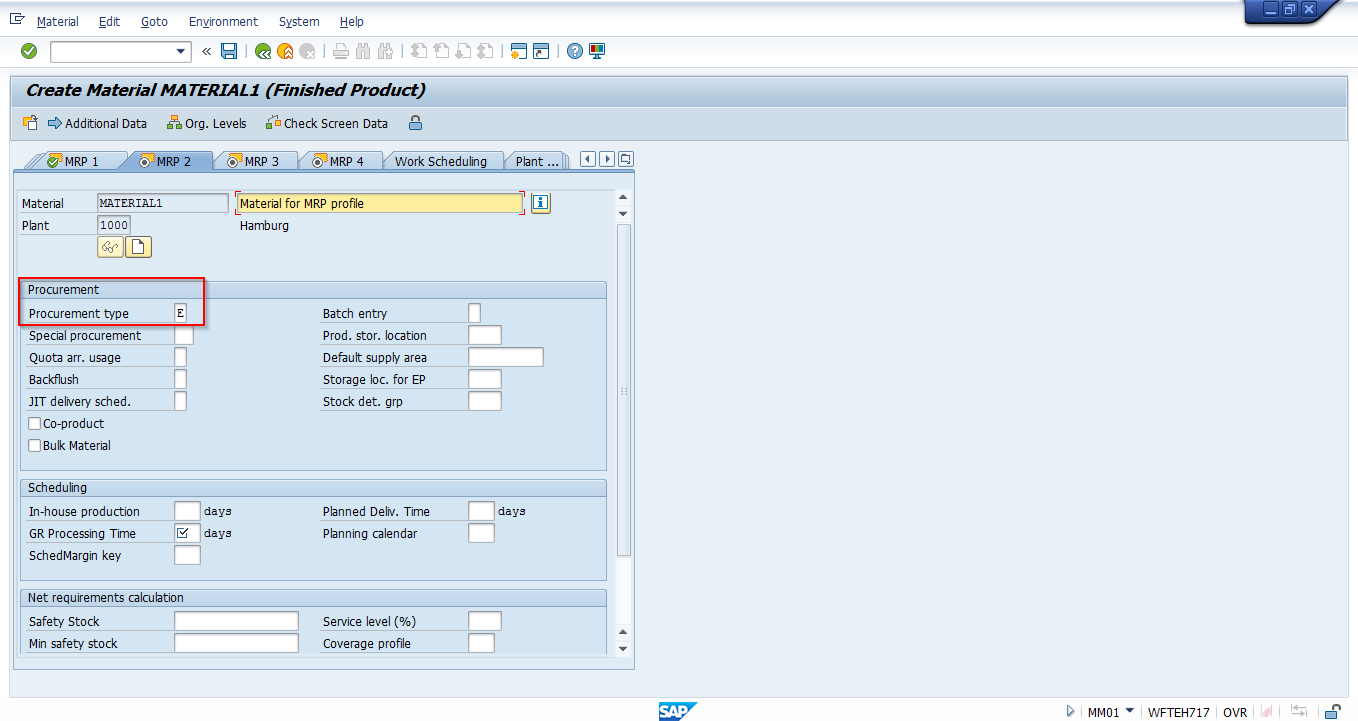
The procurement type maintained as E in NEW1 is populated in MRP2 view and it can be overwritten in MM01 because it is a default value field.
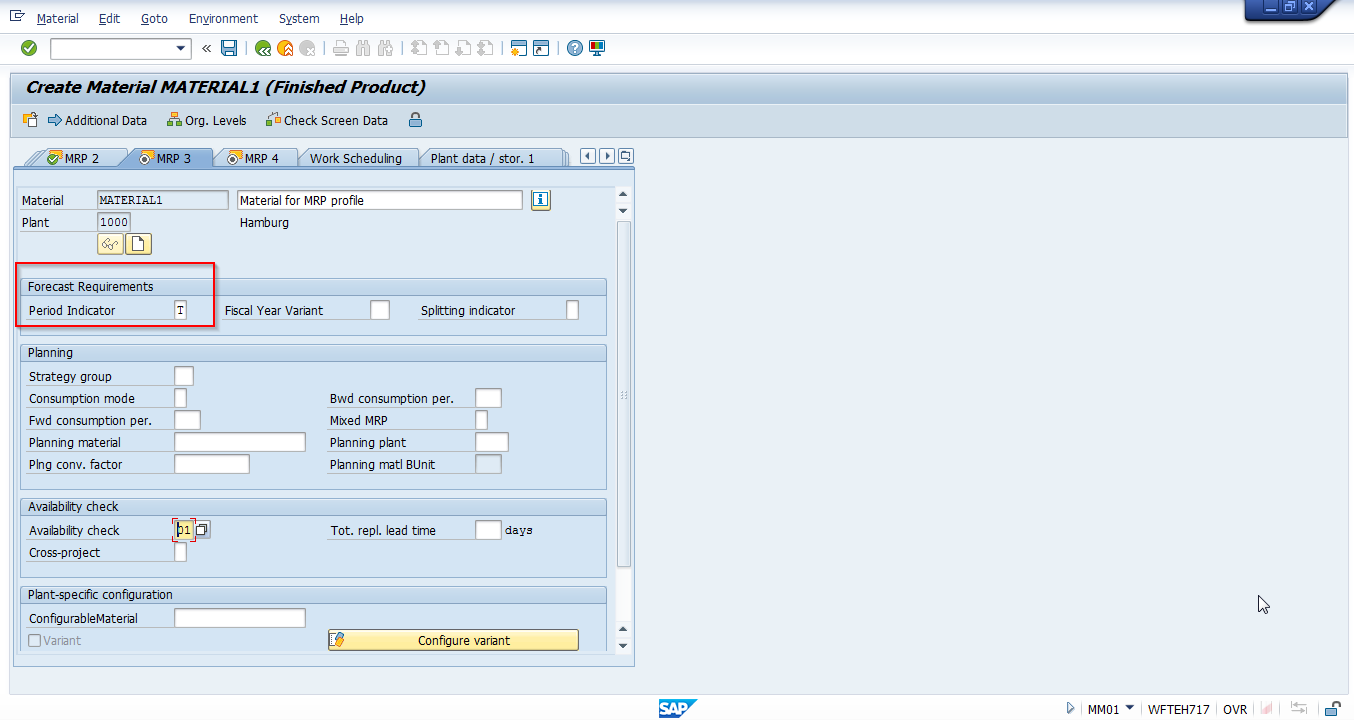
The period indicator field maintained as T is populated in MRP 3 view as a default value which can be overwritten.
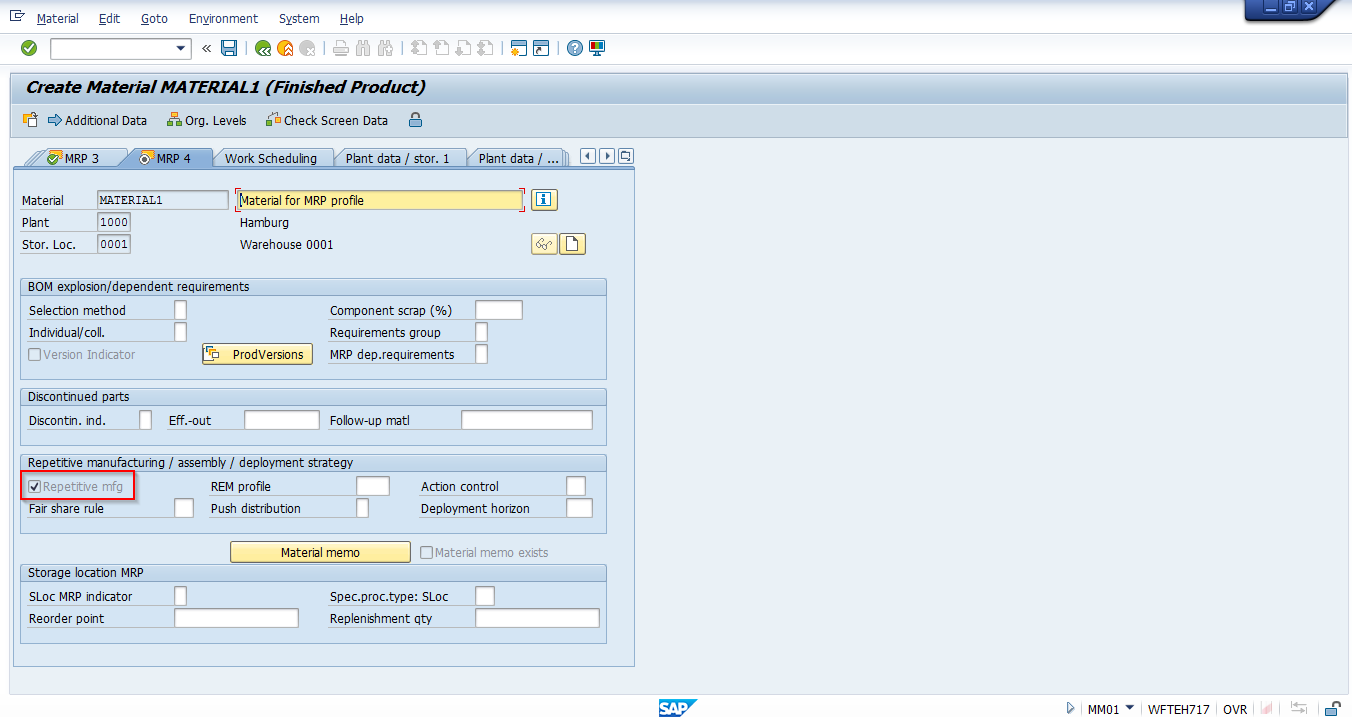
The repetitive manufacturing indicator which was checked is replicated in MRP 4 view. Now, click on save to create the material master MATERIAL1 with a reference to SAP MRP profile – NEW1.
—
Did you like this SAP MM tutorial? Have any questions or comments? We would love to hear your feedback in the comments section below. It’d be a big help for us, and hopefully it’s something we can address for you in improvement of our free SAP MM tutorials.
Navigation Links
Go to next lesson: SAP Material Status
Go to previous lesson: SAP MRP Types
Go to overview of the course: SAP MM Training
Excellent explantion
Suggest u to make a sap google app.
very intresting;
but when it is suggest to use mrp profile?
can I still use mm17 for mass changes?
thank you;
As mentioned in this tutorial, MRP profile simplifies master data maintenance. You can change MRP profile with the transaction MM17 as well.
Nicely and succinctly explained!