
 Welcome to the tutorial about SAP Payment Run Step by Step Demonstration. This tutorial is part of SAP FI training. In this tutorial, we are going to have a step by step demonstration of SAP payment run process. Payment run process is an accounts payables process that is used to handle payments to vendors. The process is called automatic payment program.
To access the automatic payment program screen, you need to enter transaction code F110 or follow the menu path as shown below.
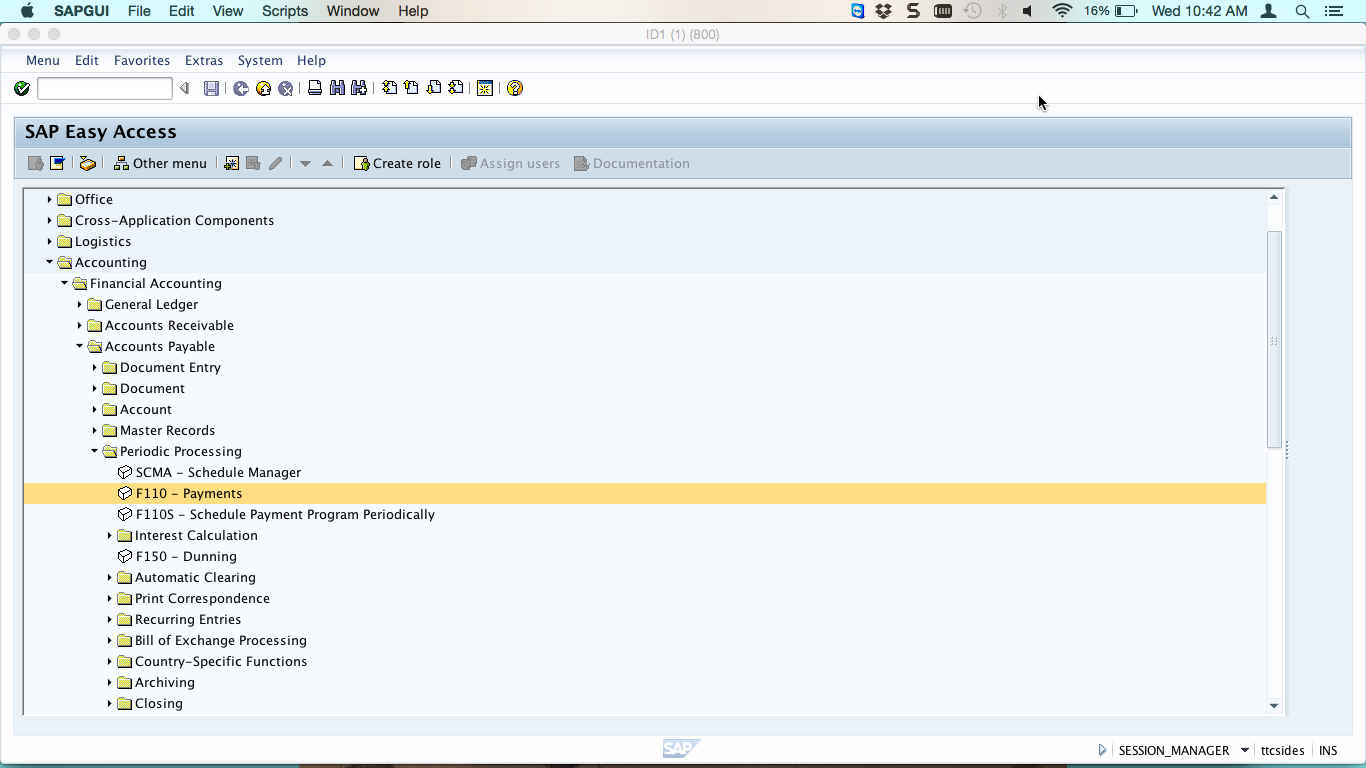
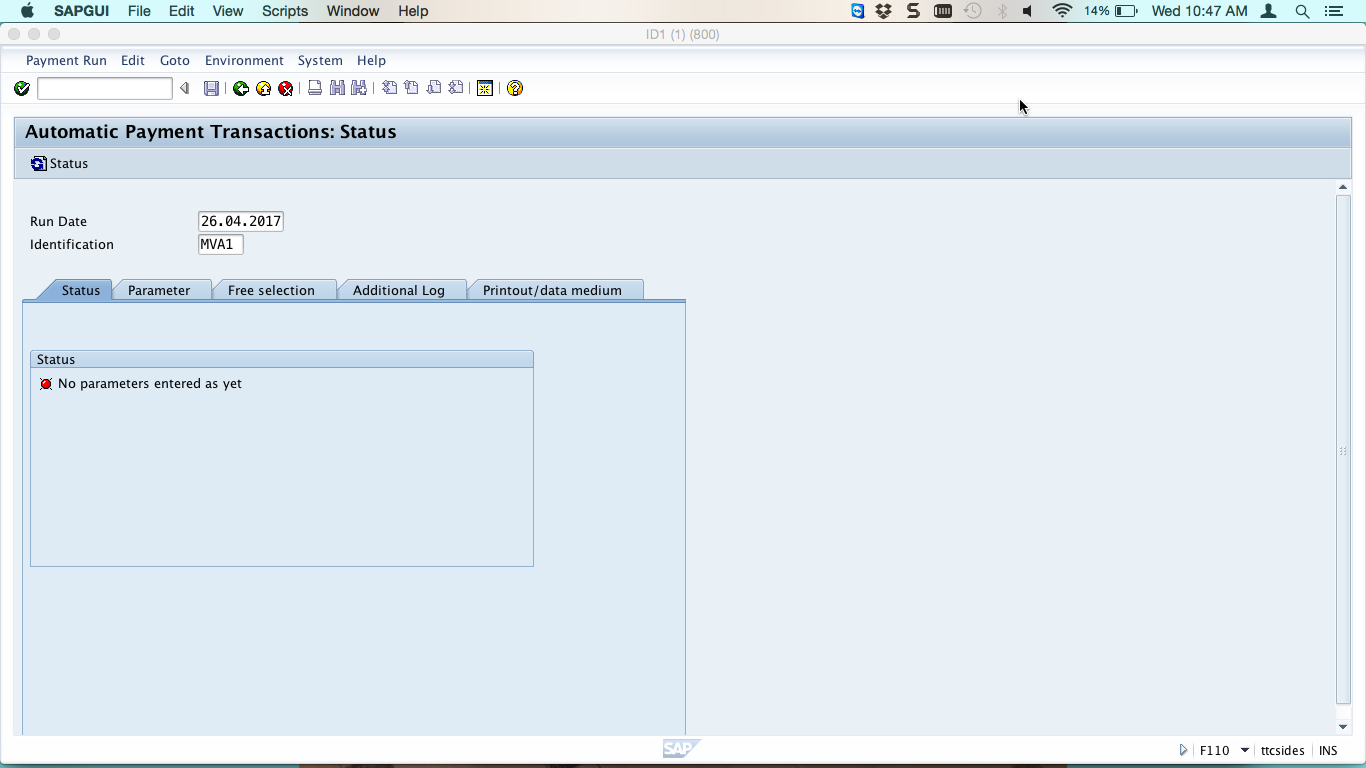
Double click on F110 to open the first screen for payment program. On the first screen, you need to enter run date and identification. In the identification field, give a four-characters alphanumeric code that will be used to identify the payment program. A combination of the run date and identification is used to identify the program in SAP system.
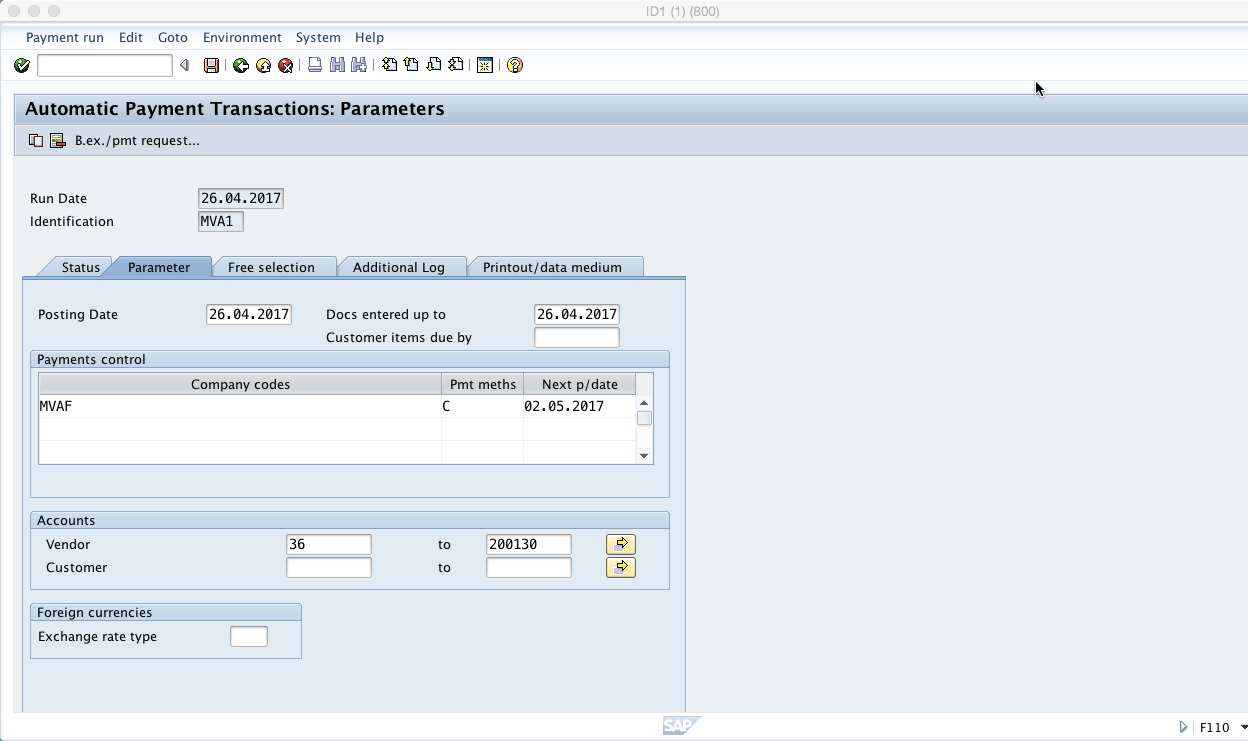
Click on Parameter tab to add parameters. Here you should specify the posting date and the docs entered up to date. The posting date is the date that will be used for posting documents and the docs entered up to date is the date that will be used as a cutover date when picking line items for payment. You also should specify the sending company code, the payment method and next payment date. On this screen, you should also specify the range of vendors that we want to select items for payment from.
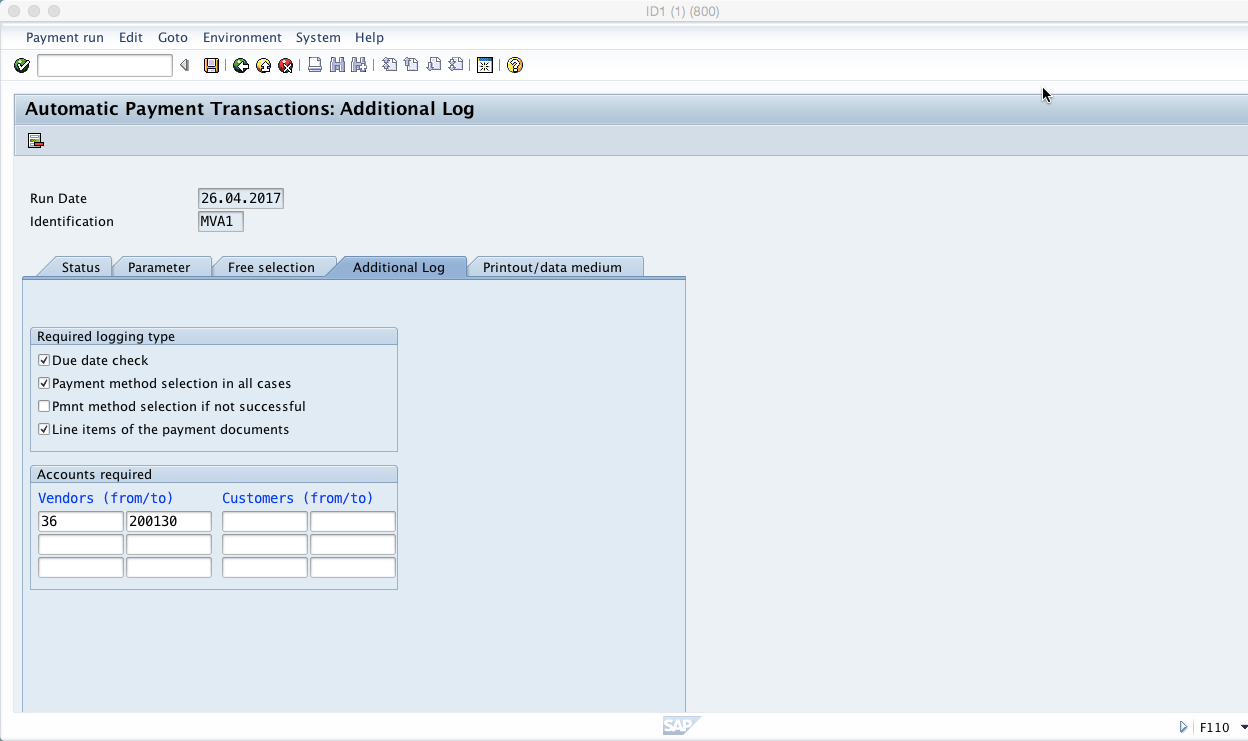
Free selection tab is used to select additional filter parameters like business area. This tab is optional and not usually used. Skip that tab and click on Additional Log tab. Then, tick all the checkboxes except for the third one and put the range for vendors that you are paying. These selections are used when running a payment proposal.
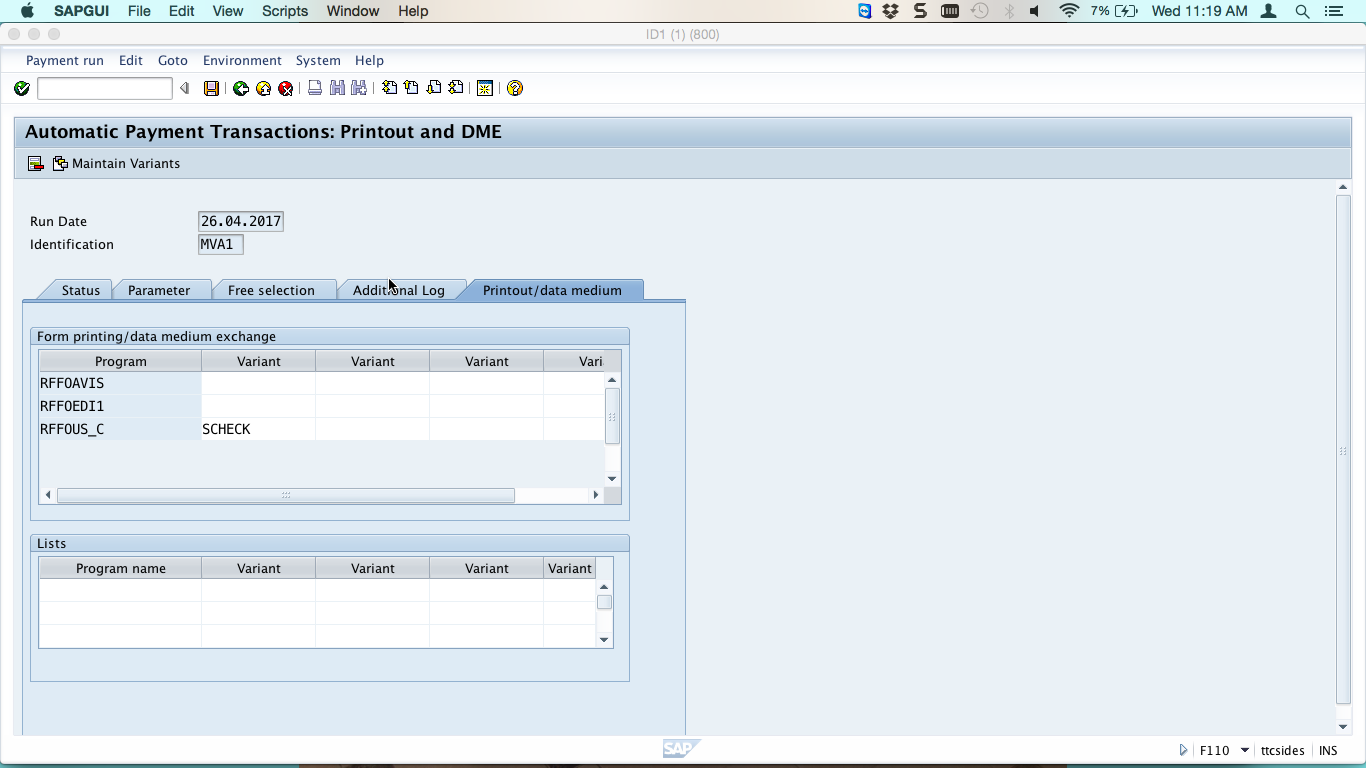
Click on the tab for Printout/data medium and choose SCHECK variant against RFFOUS_C program. SCHECK is a pre-configured variant that will be used for printing the checks. In other words, it is the format of the checks to be printed.
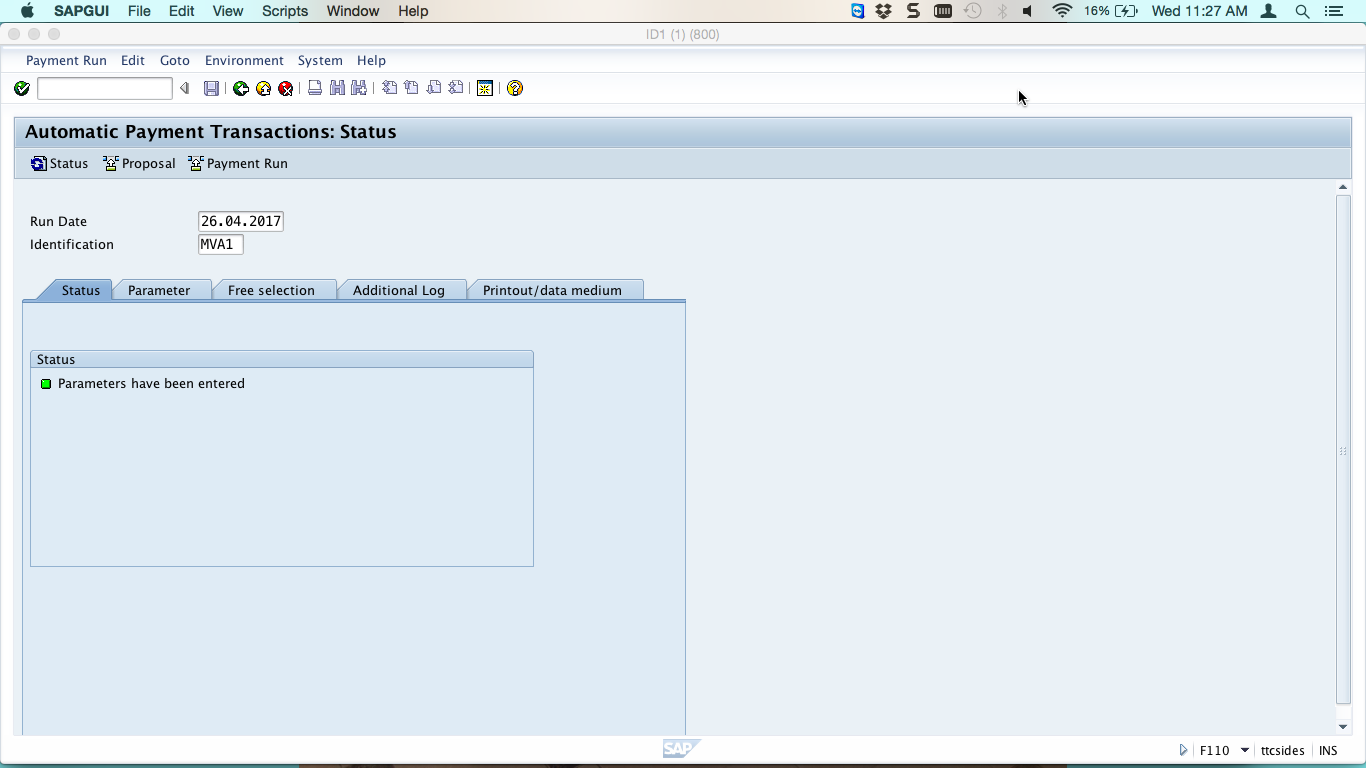
Save and click on Status tab and if you see a green square followed by the text “Parameters have been entered”, it means you have just completed the first step of the payment program.
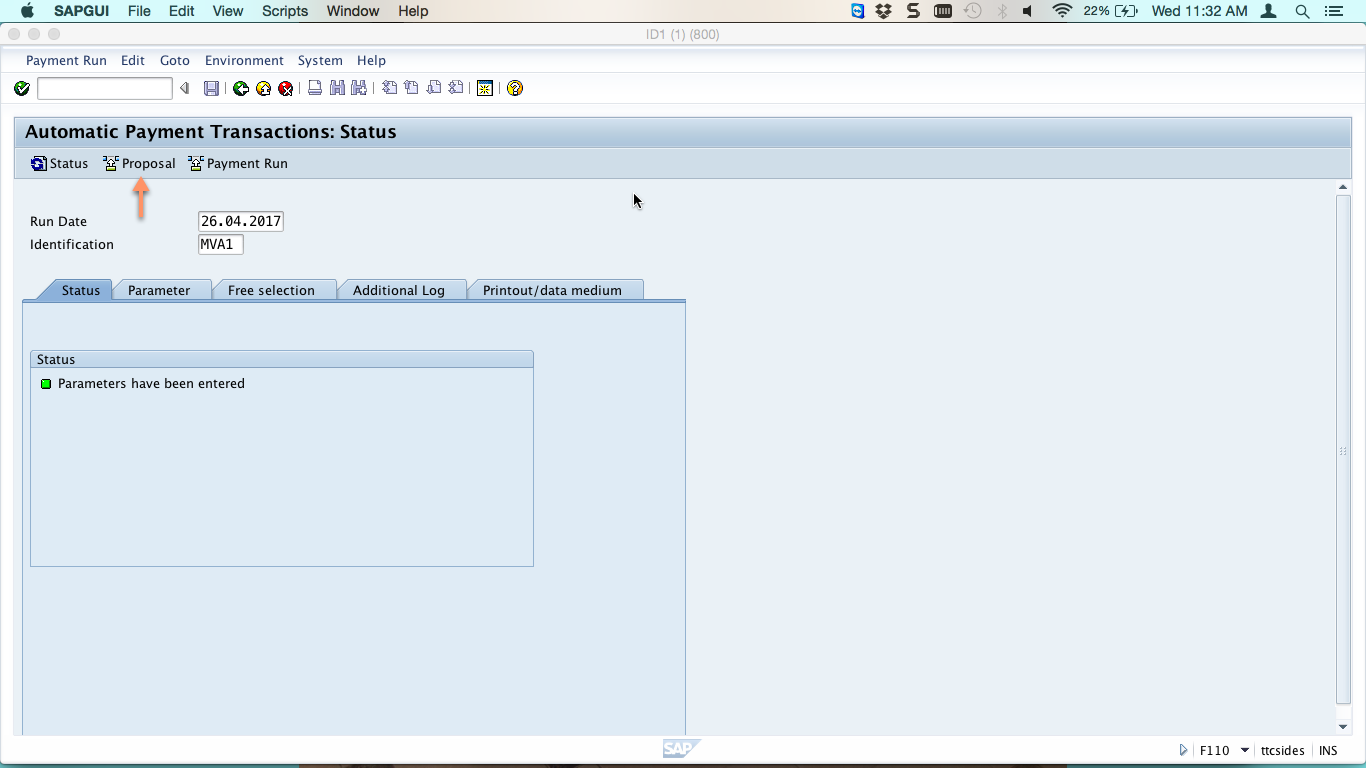
To start a proposal run, click on Proposal icon as shown below.
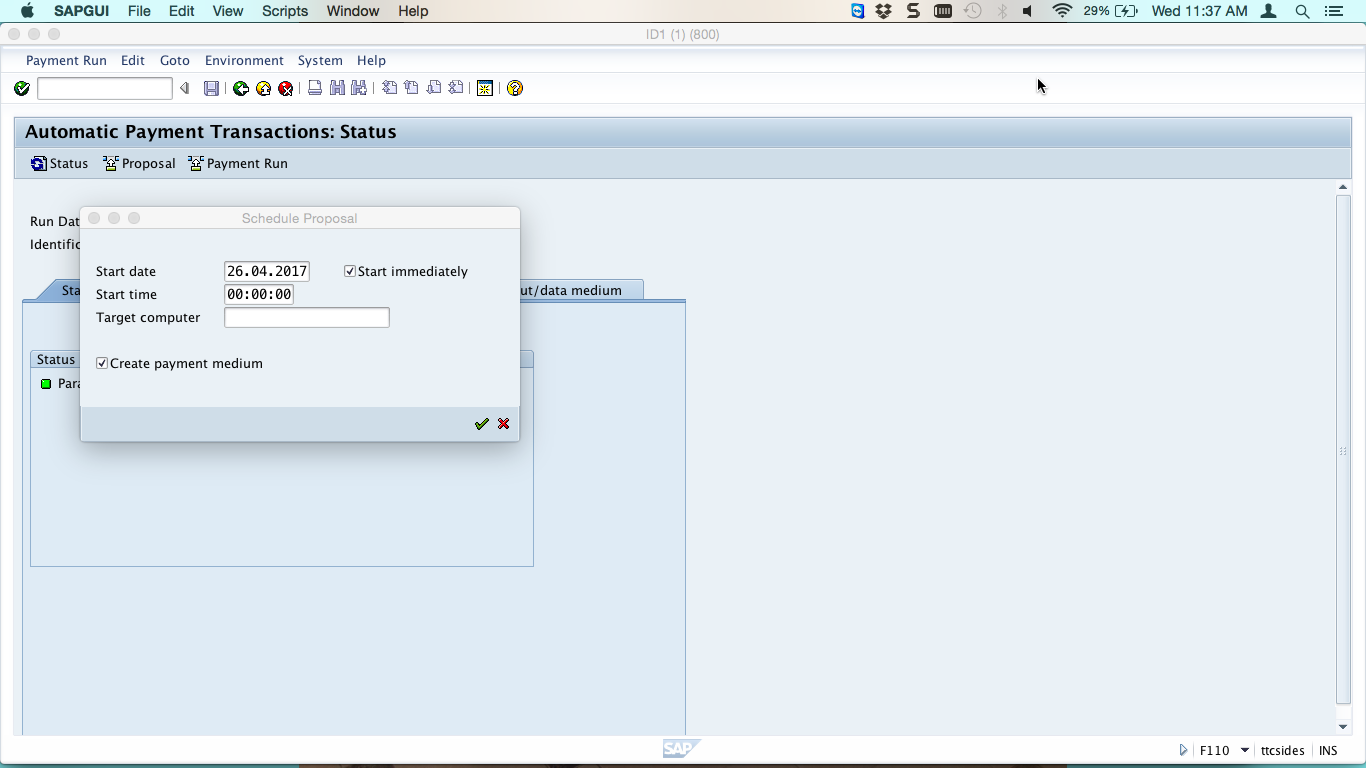
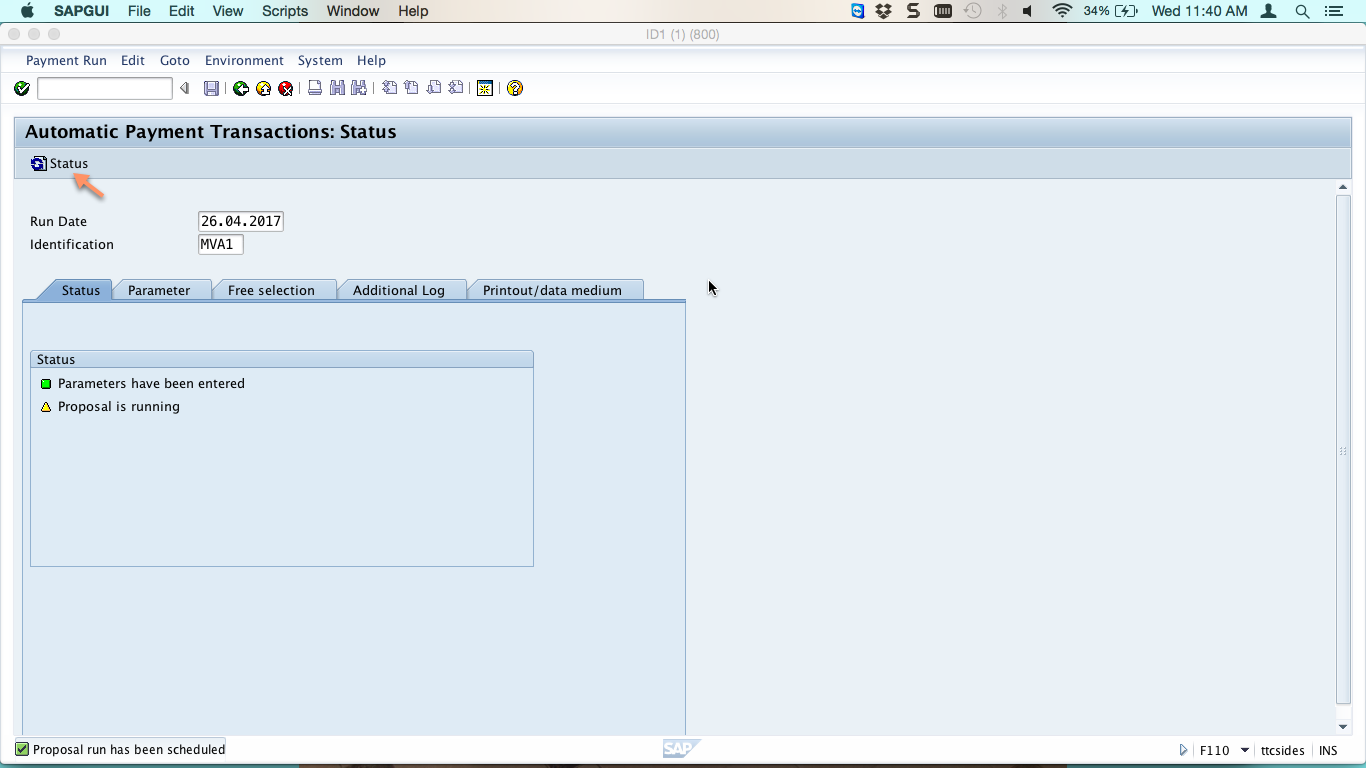
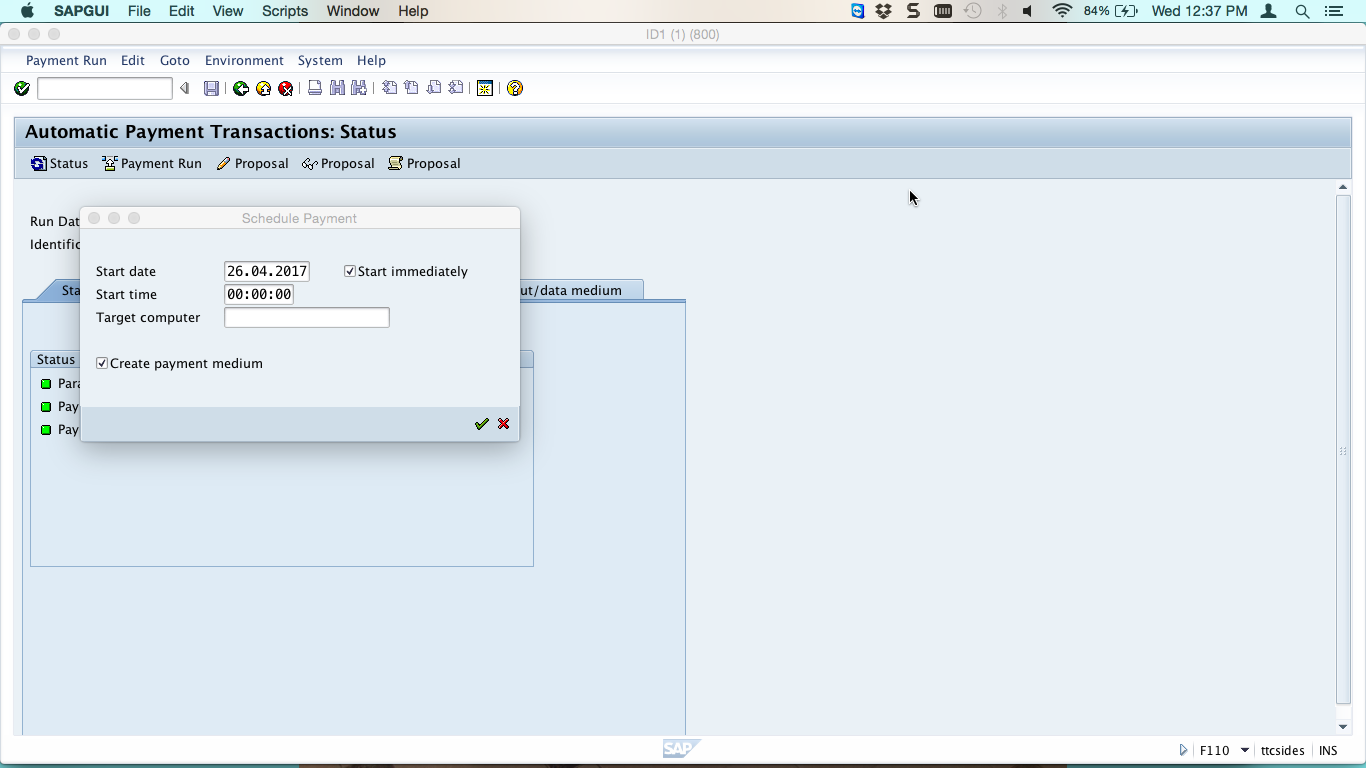
When you click on Proposal the system is going to ask whether you want to create it immediately or you want to schedule it for a time in the future. For this demo, we are going to run it immediately. You should tick the checkbox for creation of payment medium.
On the Status tab, you will see an added amber status saying that a proposal is running.
To change that amber status to green you should click on the status icon as shown in the above screenshot and wait for the status to turn green.
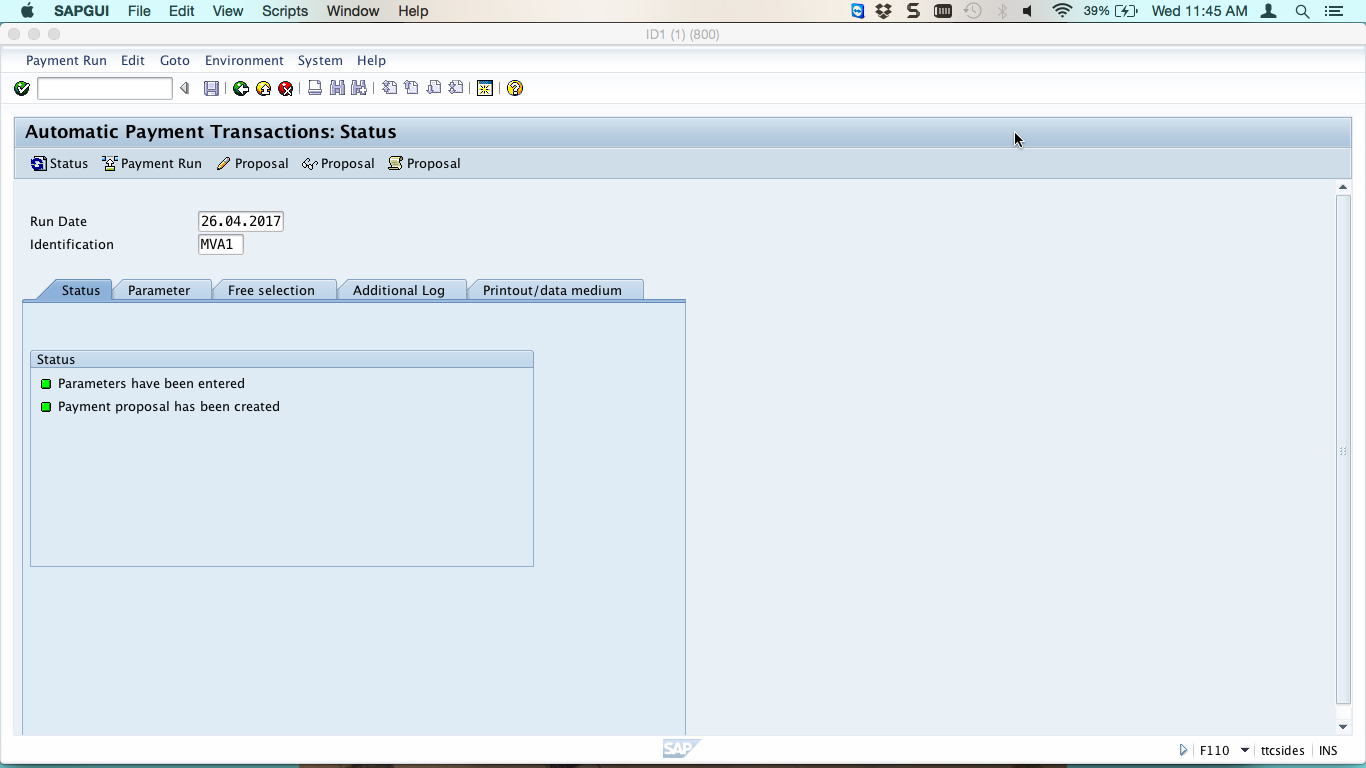
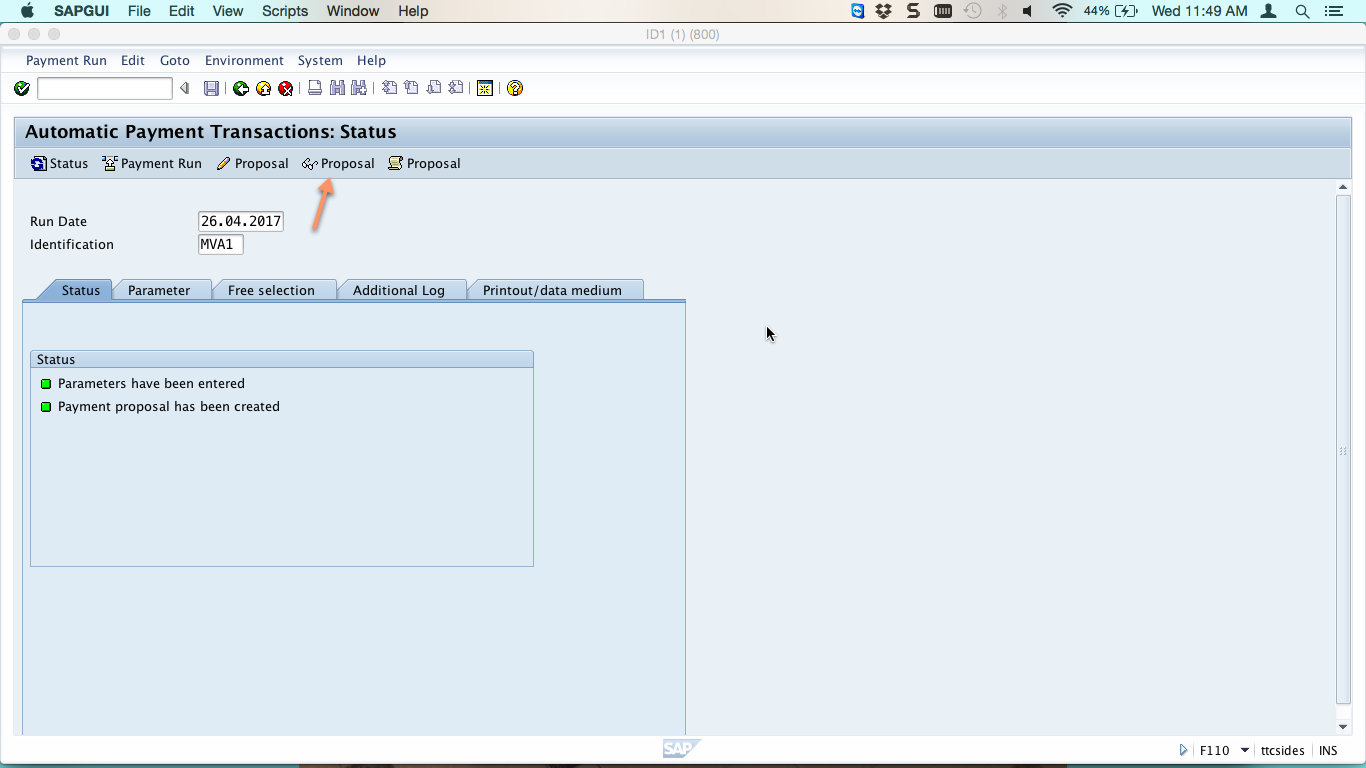
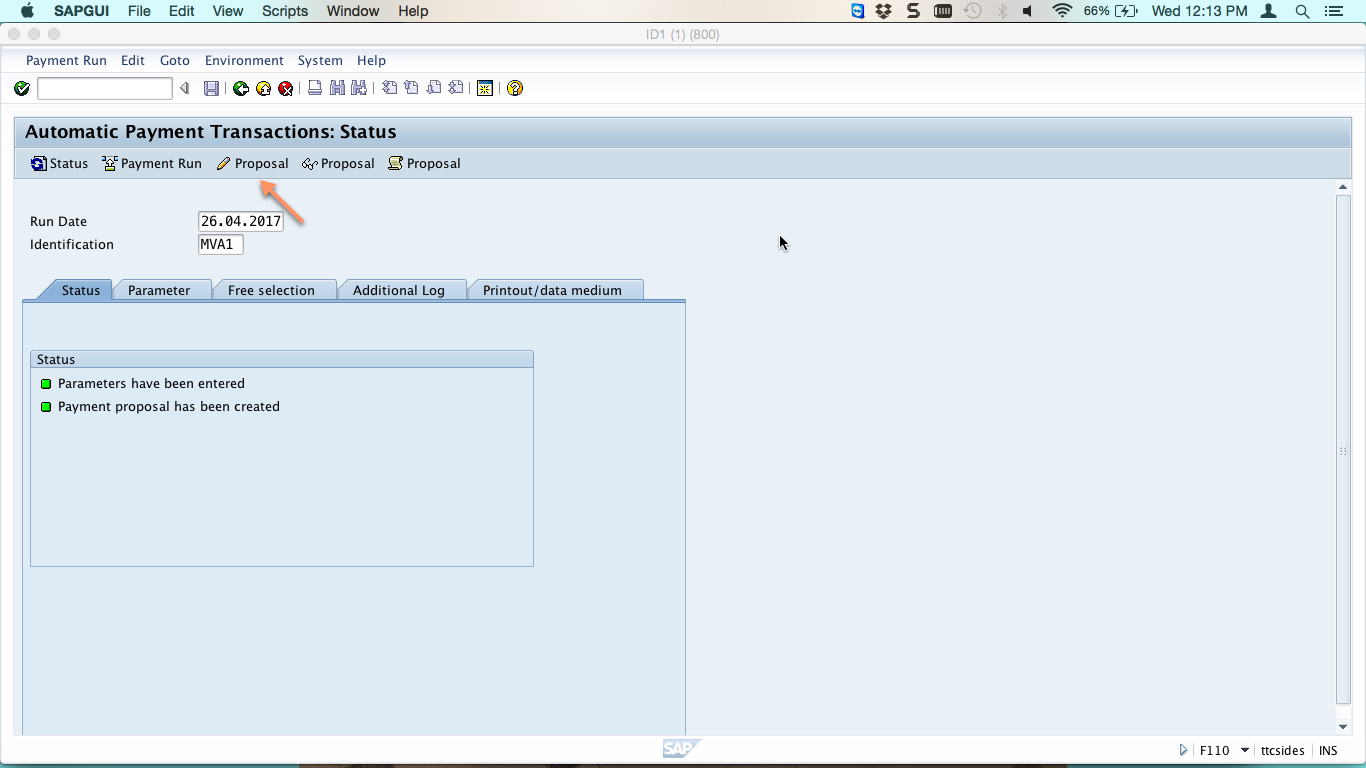
Now, you have successfully completed the second step of the payment program. If you want to view the proposal that has been created, you should click on the display proposal icon as shown below.
The system will list all the vendors that have been included in the payment proposal. The system has blocked payment for vendors with red indicators (for some reason) and those vendors with green indicator have all their items ready for payment. In our case, two vendors have been picked and they all have red indicators.
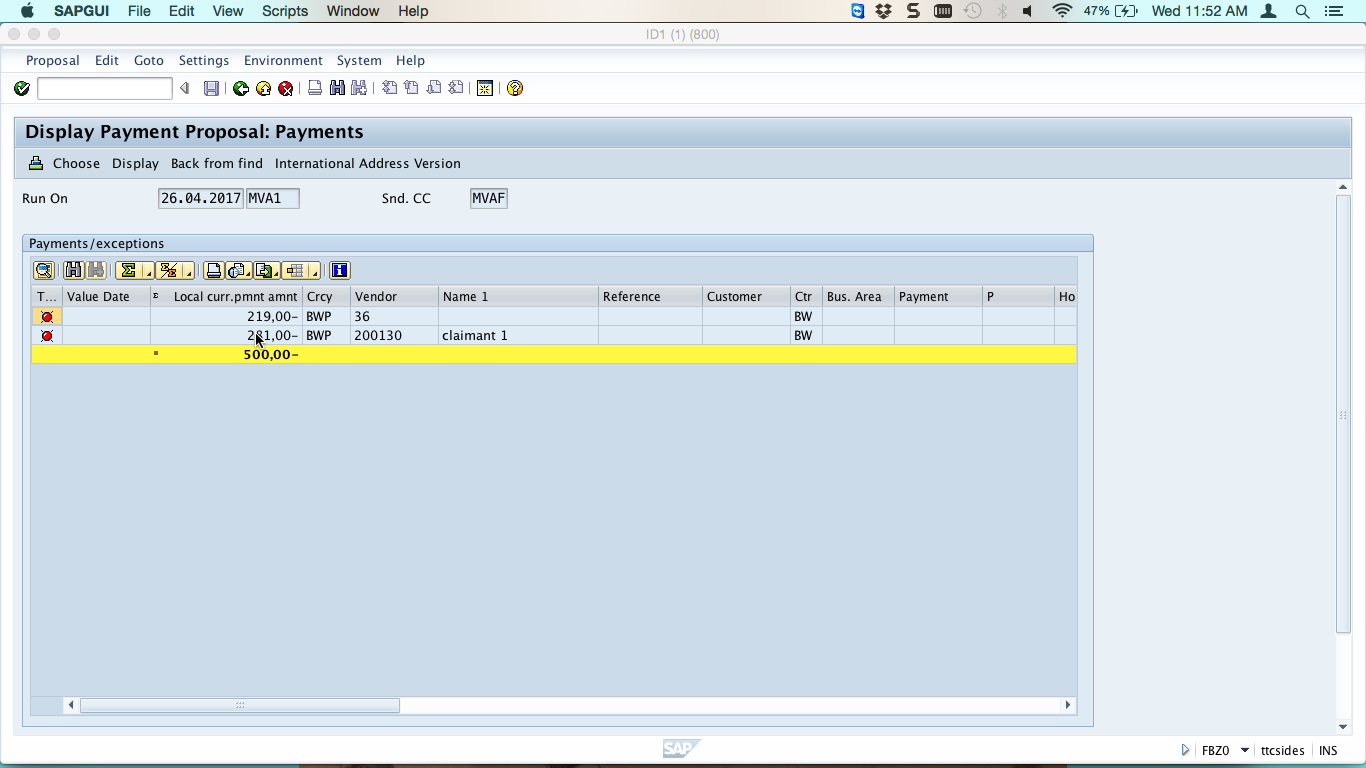
To see all the line items picked for a vendor double click on the vendor number.
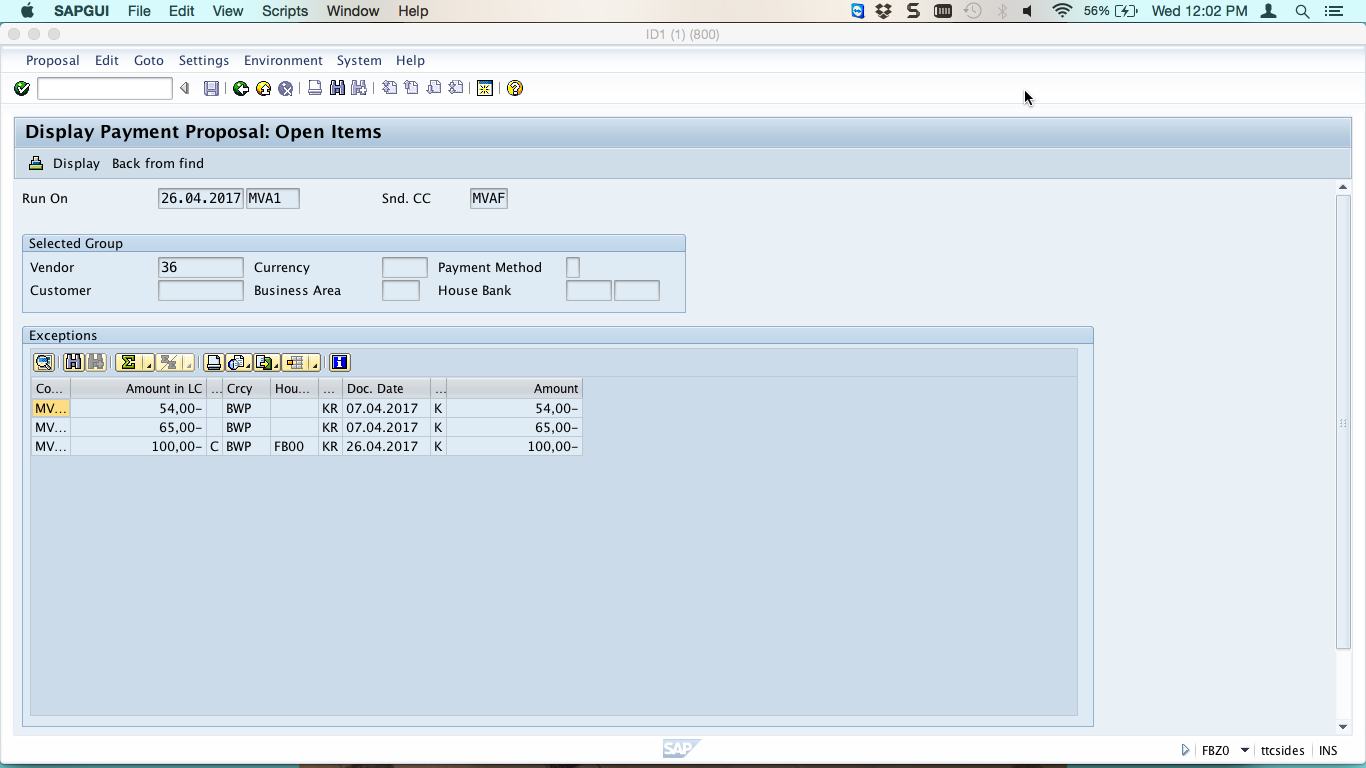
To see why an item is in red, double click on the item. The system shows the actual reason why an item is not going to be paid.
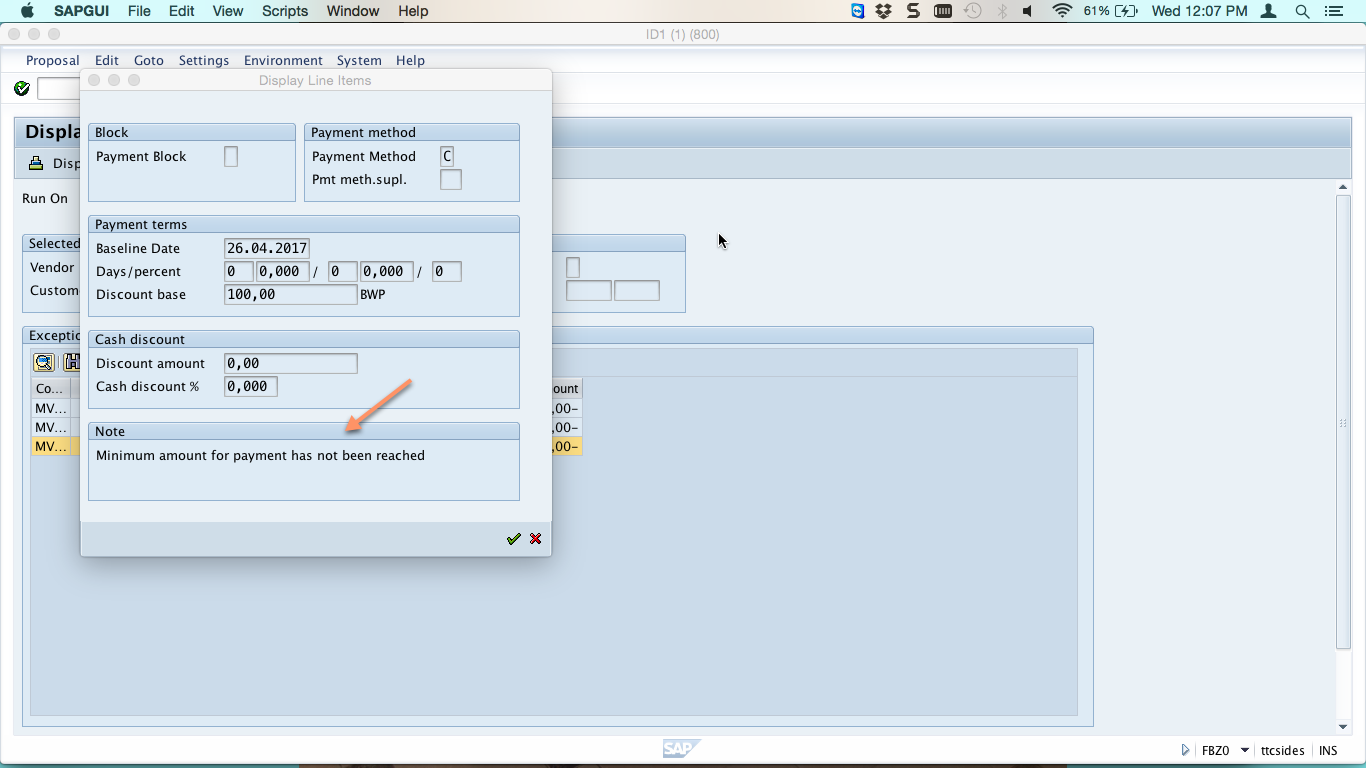
In this case, the item is not going to be paid because it is below the minimum amount for outgoing payments. If you want to edit the proposal list, you must navigate back to the initial screen and click edit proposal icon as shown below.
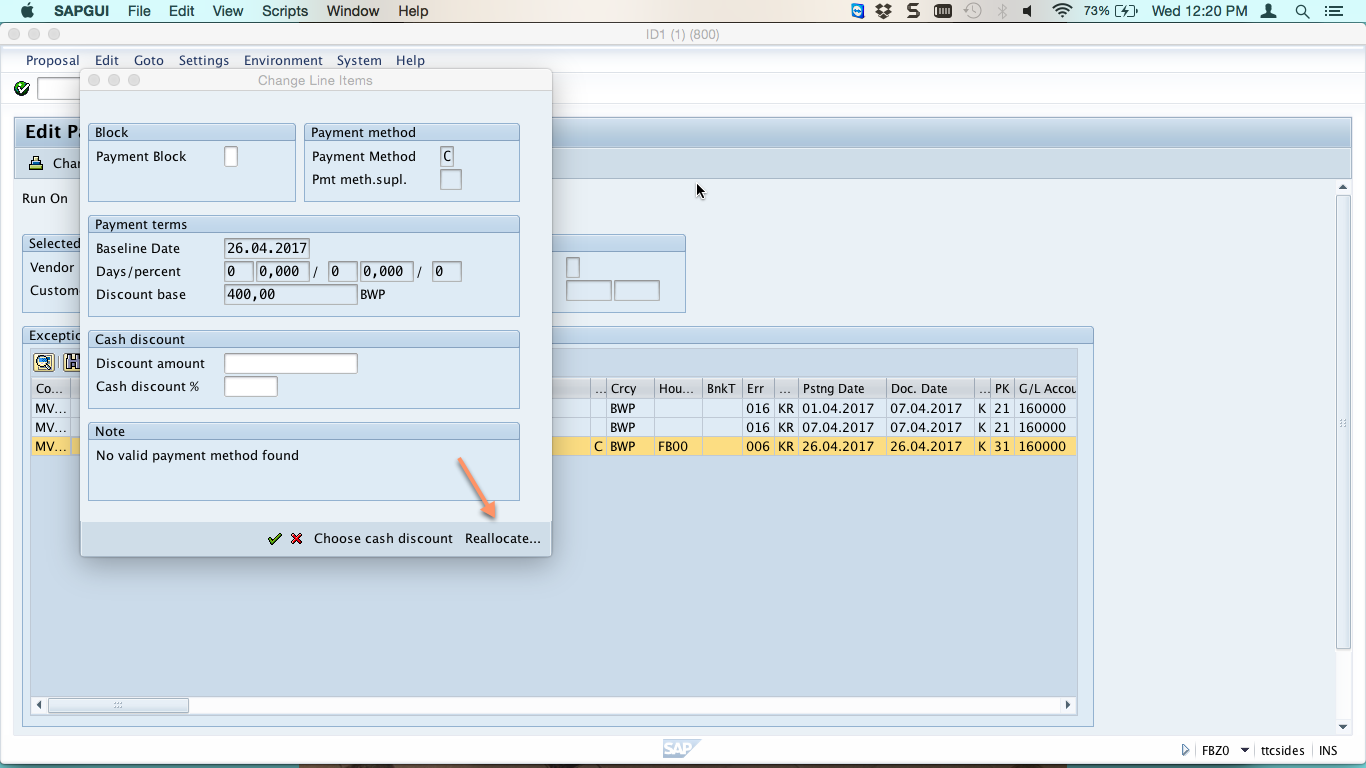
Click on edit proposal and then double click on the vendor you want to edit. Next, double click on the line item you want to edit. The system will show you the reason why that item is on the exception list.
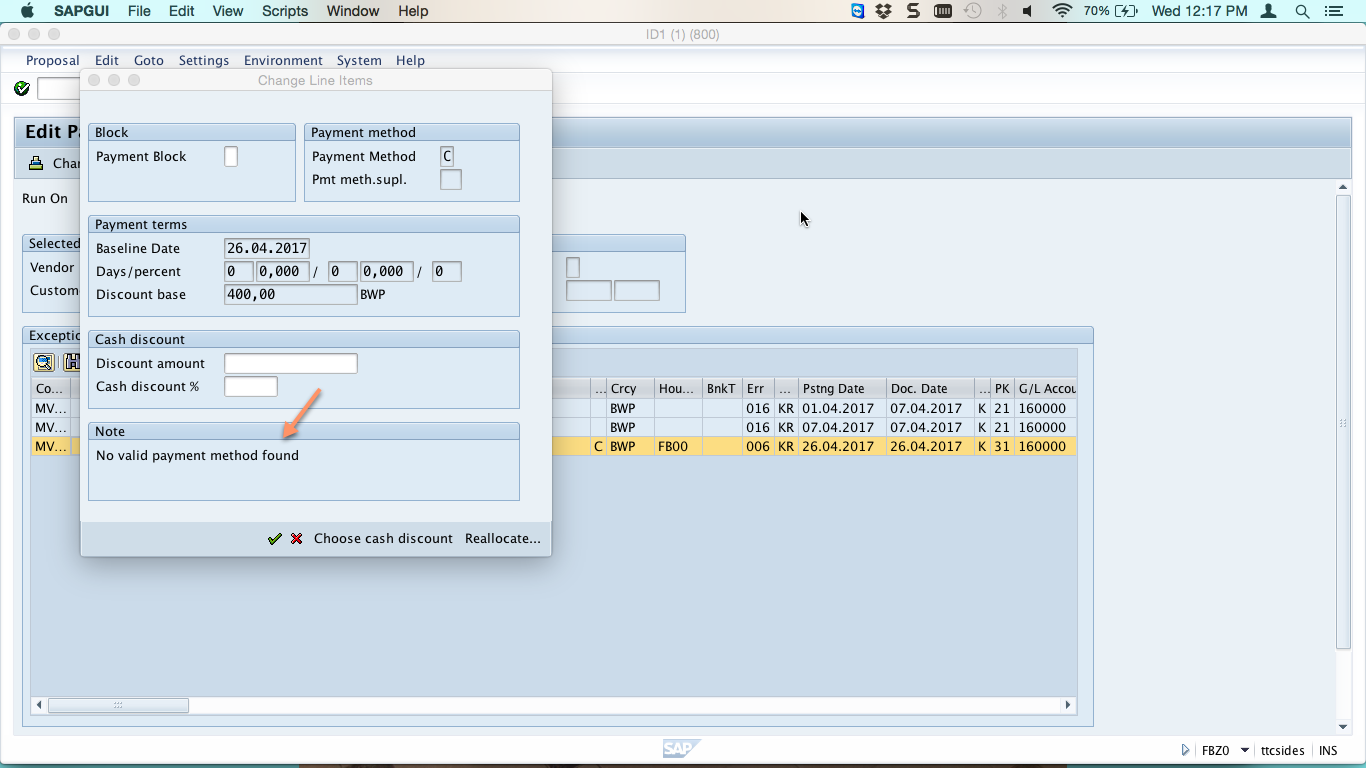
In this case, the line item is not going to be paid because there is no valid payment method found. To change the payment method, click on Reallocate button as shown below.
This will give you a possibility to change the payment method that was set during document entry.
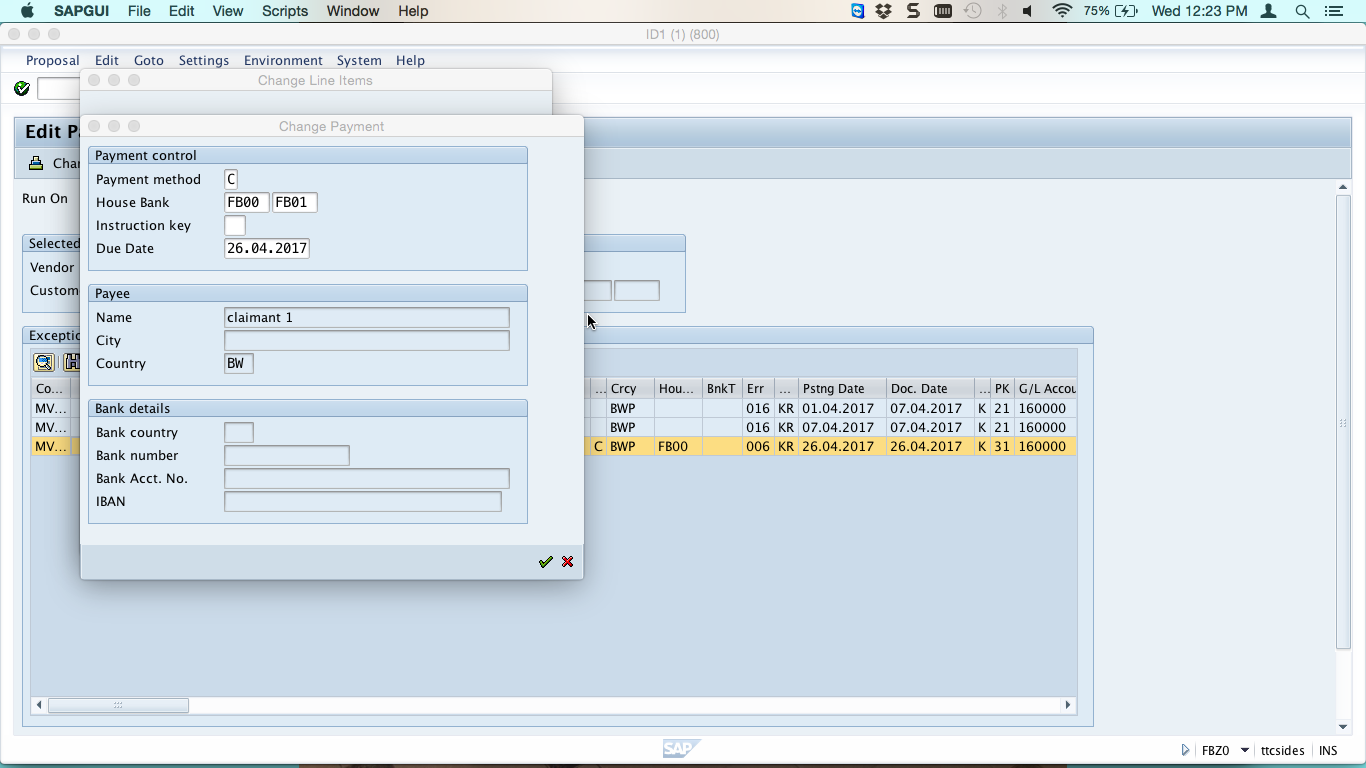
After correcting the house banks and payment method you should press Enter button, save your entries and press Back button.

Now, the edited line item is green and ready for payment. Go back to the initial page to check the status.
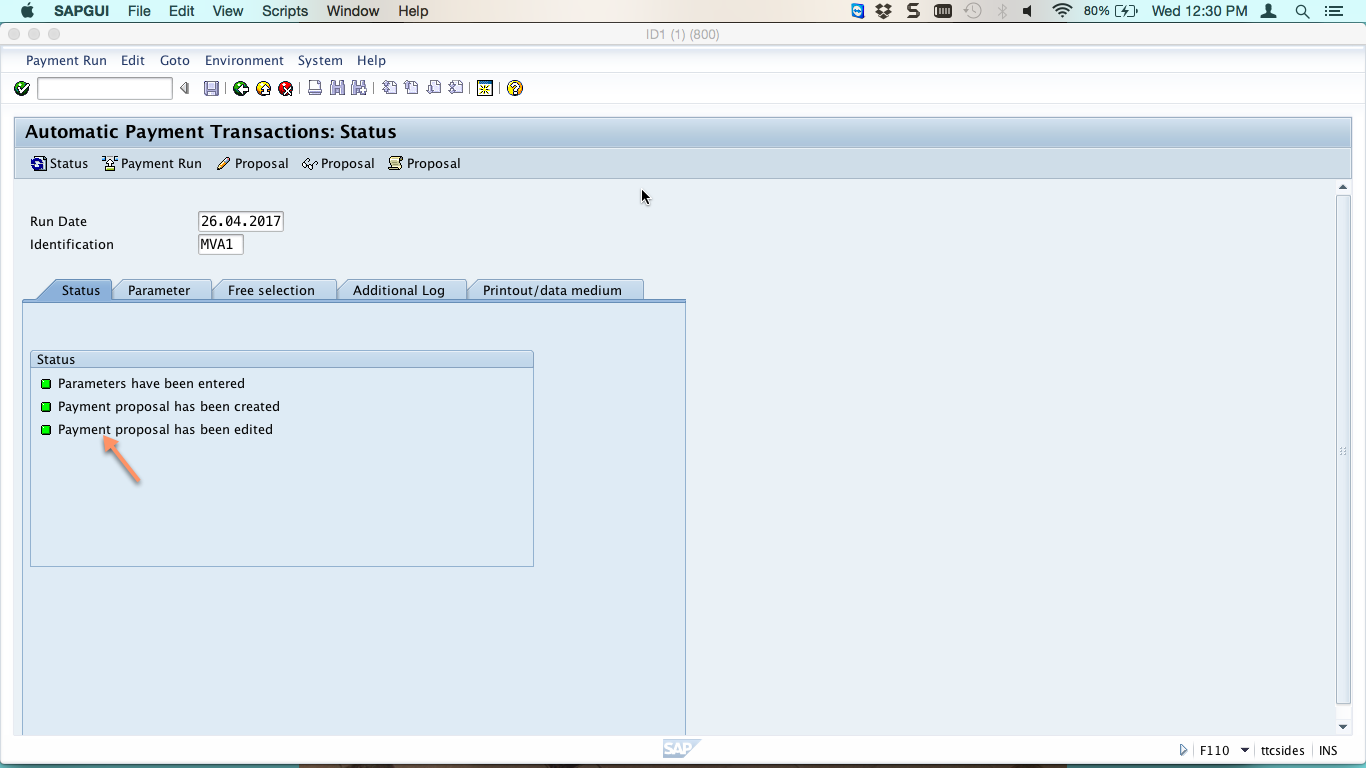
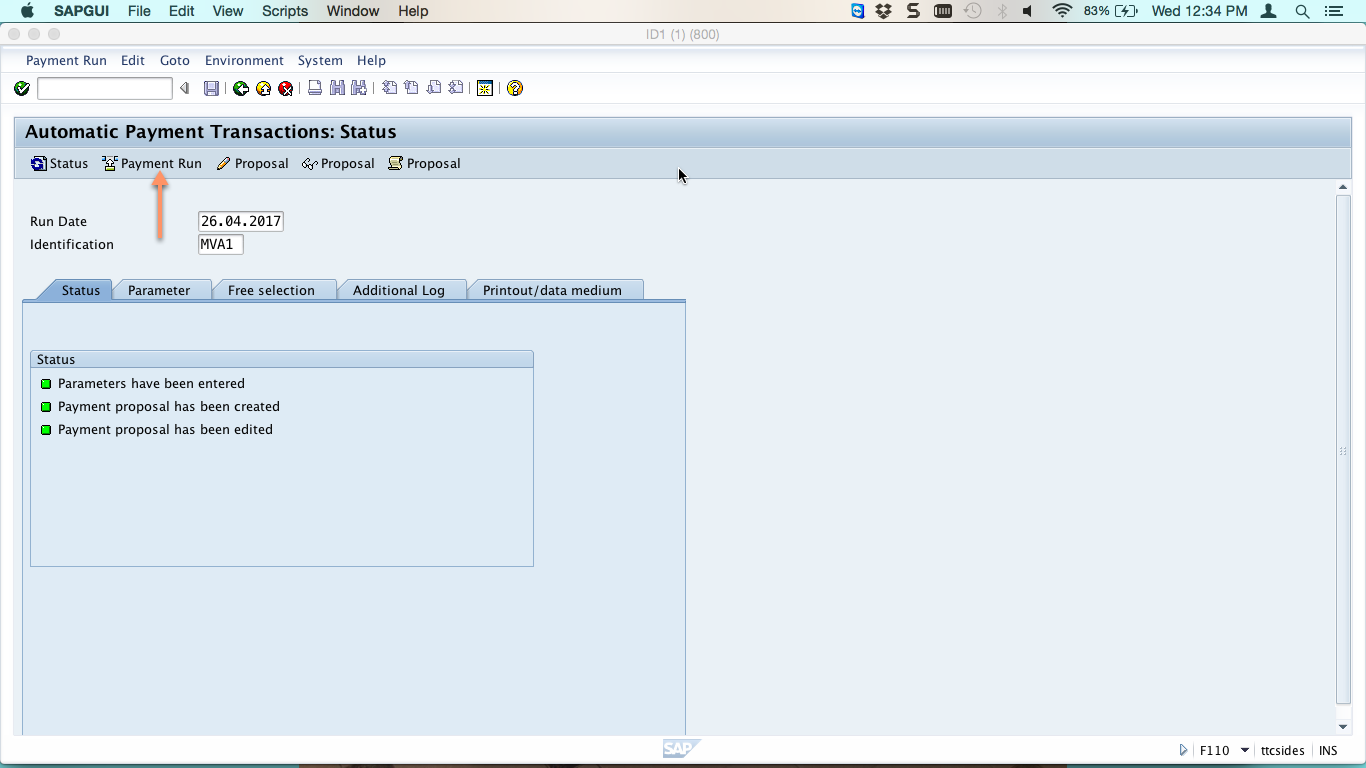
Now, there is a new status saying that the payment proposal has been edited. To start the payment run, click on Payment Run icon as shown below.
Just like in the case of the proposal run, you can schedule the payment run to start later or start it immediately.
If you press Enter, the payment run will be started and a new status will be added.
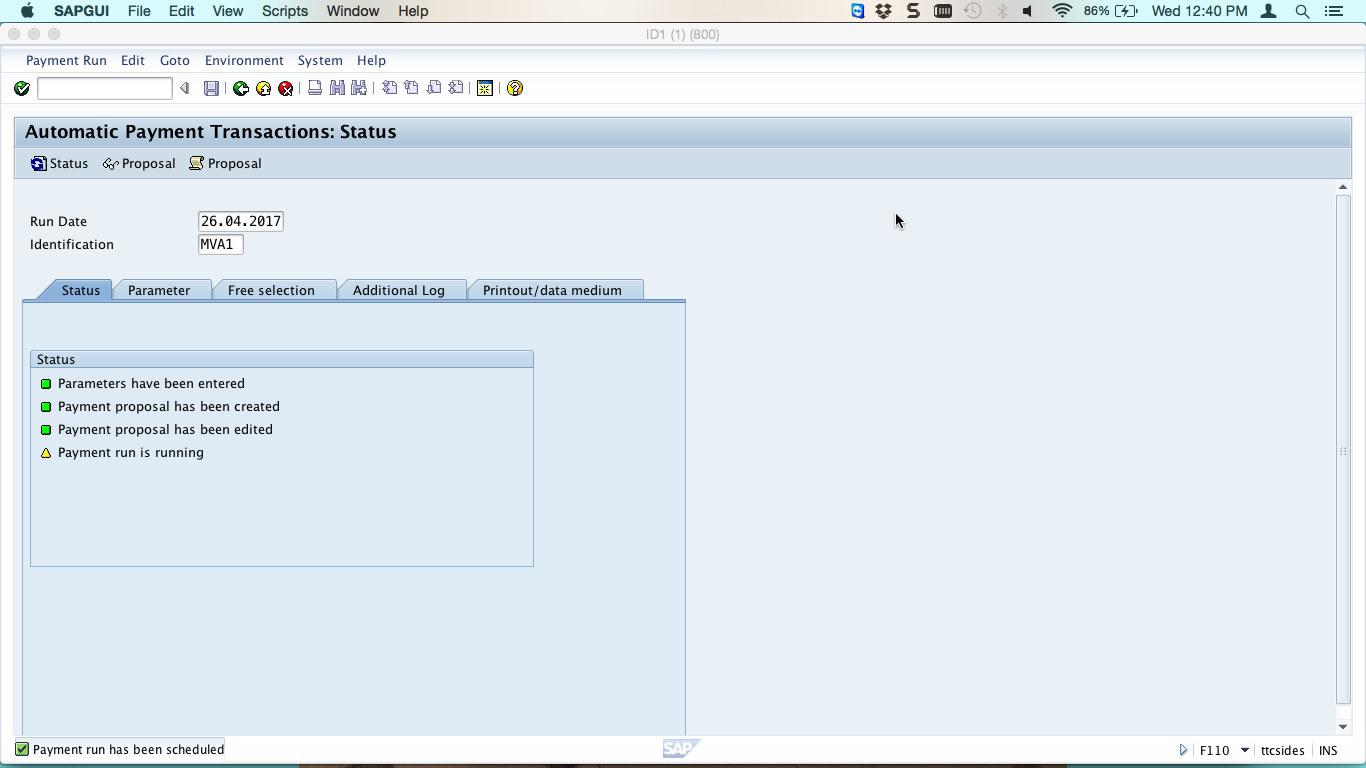
To change the amber status to green, you should click on the refresh status icon ![]() and the status will eventually change to green.
and the status will eventually change to green.

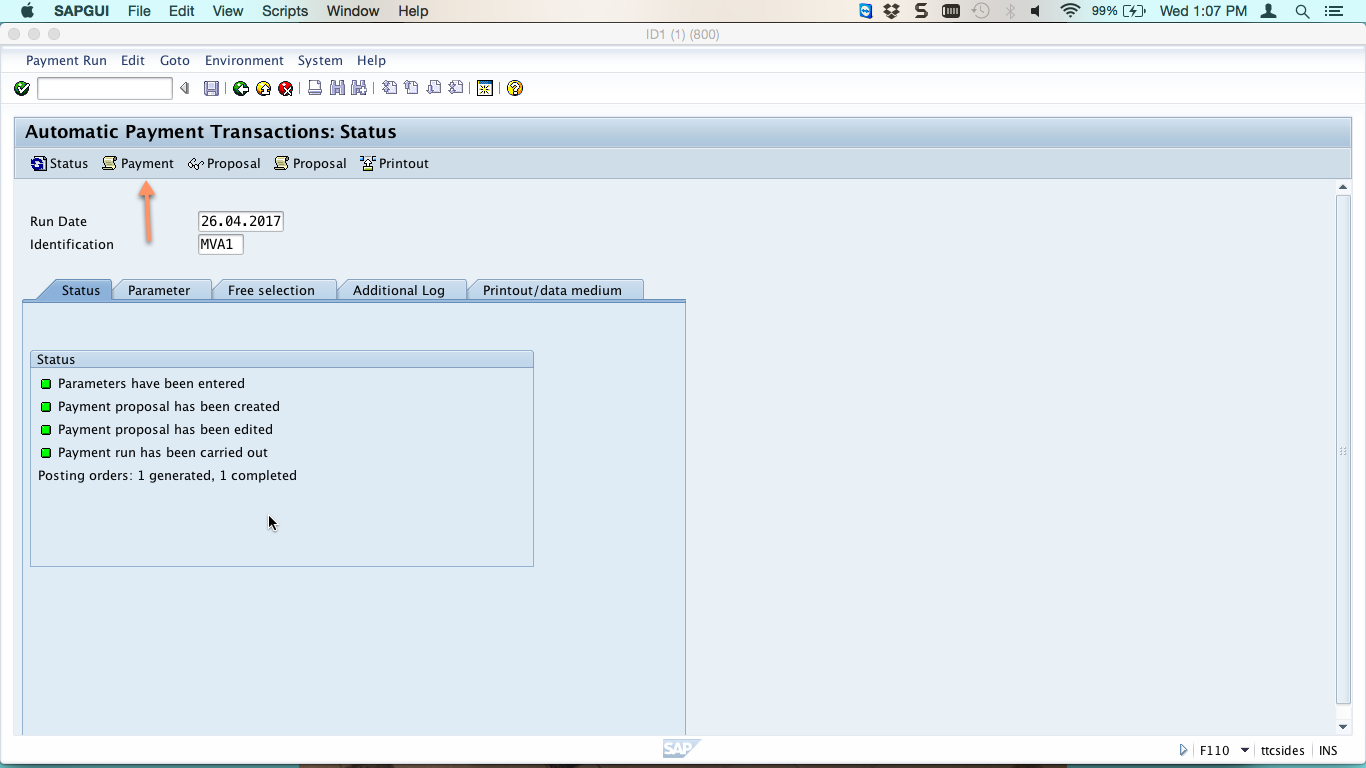
The posting order has been generated and completed. You can view paid items and the items put in the exception list. Click on Payment icon as shown below.
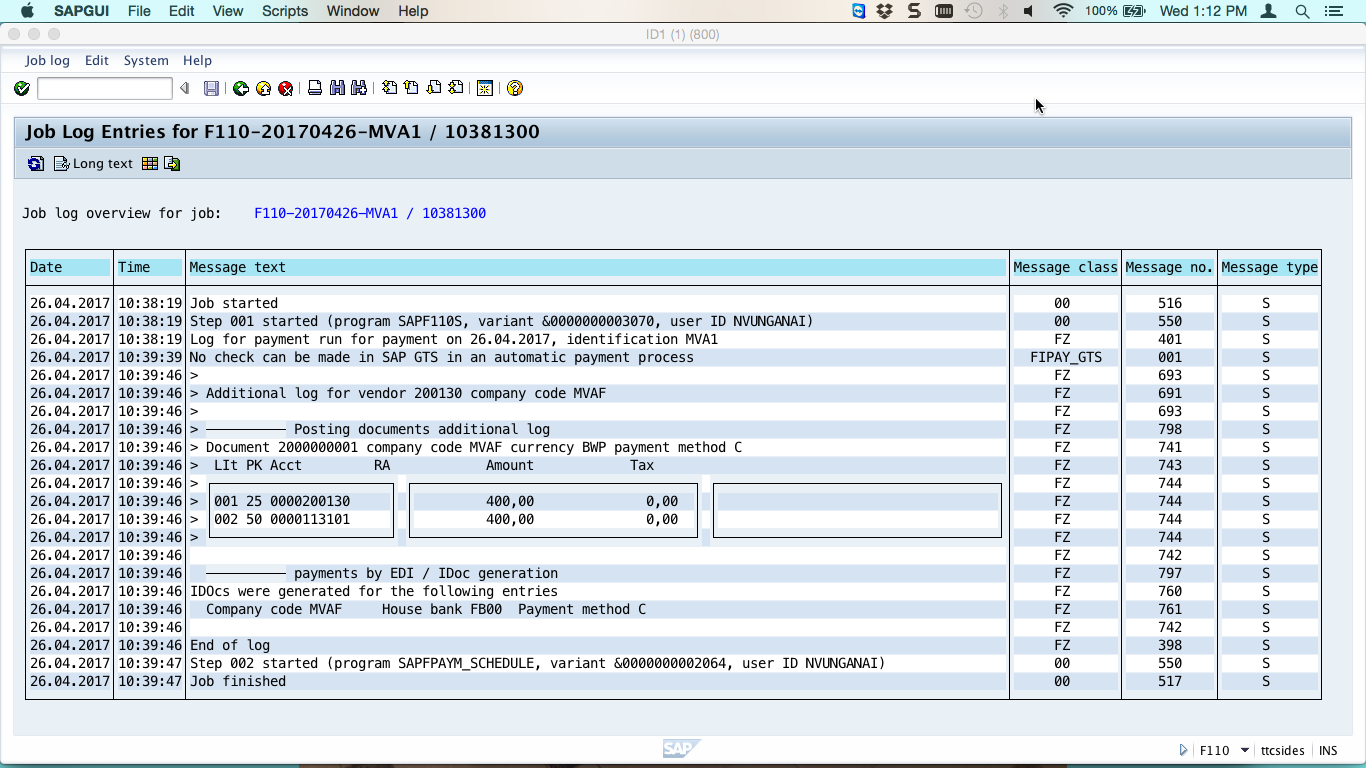
You will see all the items that have been paid. I this case, only one item was paid and you can see the general ledger accounts updated.
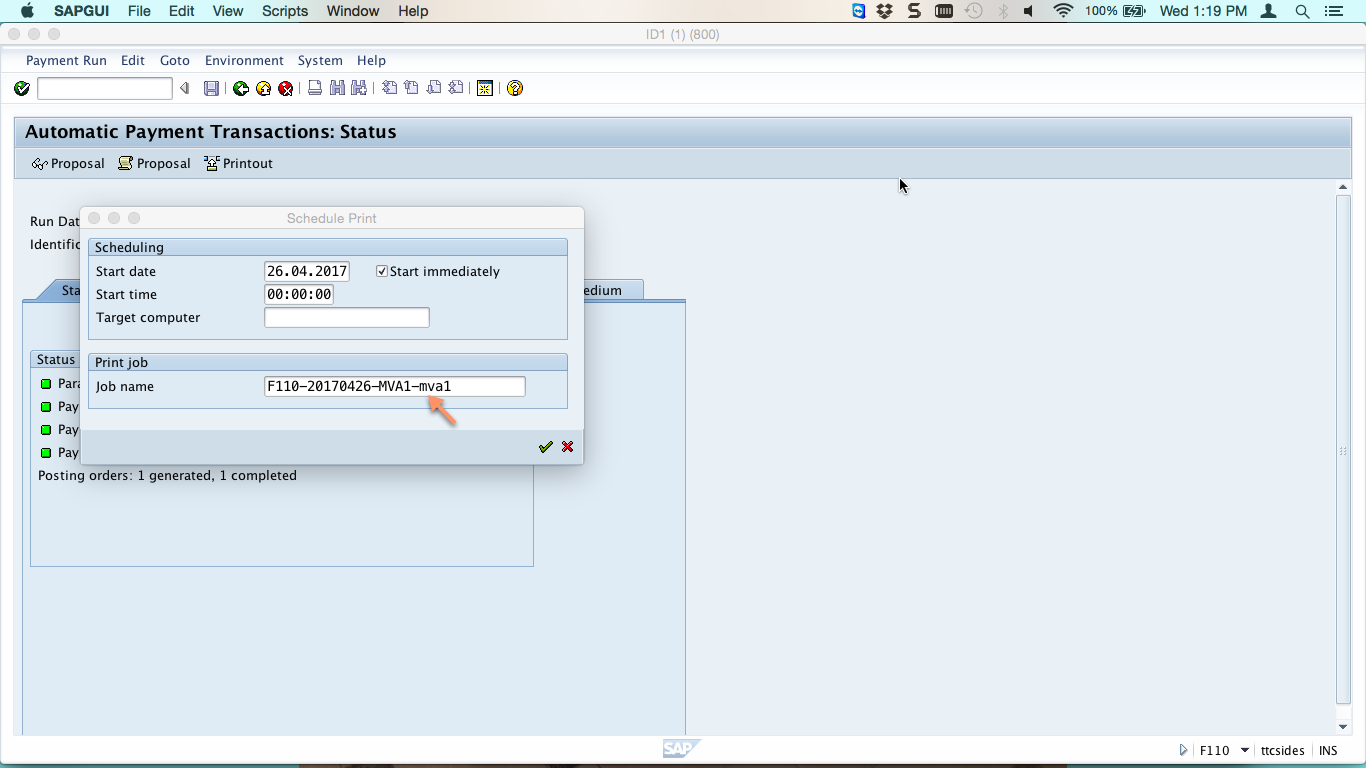
Now to print, click on Printout icon as illustrated below.

On the next screen, select immediately or schedule for a later time. You should remove the question mark at the end of the job name and replace it with the identification code for your payment program.
Congratulations, you have just completed SAP payment run step by step demonstration!
–
Did you like this tutorial? Have any questions or comments? We would love to hear your feedback in the comments section below. It’d be a big help for us, and hopefully it’s something we can address for you in improvement of our free SAP FI tutorials.
Navigation Links
Go to next lesson: SAP Payment Medium Workbench
Go to previous lesson: SAP Payment Program Configuration
Go to overview of the course: SAP FI Training
hi, in the case we have multiple vendor lines and we need to reallocate to move the minimun lines to the one that has more, we have to do it one by one, is there an option to select multiple lines before click reallocate button?
thank you so much!
No, No option as of now may you can expect in S4 Hana
Hi, in case the value date and run date didn’t match. Like we proposed for the payment today and run it by tomorrow. In return we can’t proceed to the payment run of the vendor. Is there any way we can do?
System will allowed to give future posting date as well as past current.
Hi is it possible to have step (1) payment proposal run in day 1 and generate a file for bank processing (for supply chain finance program) step (2) to execute payment run in day 90 to close the liability on the payment to supplier?
Is it possible to have in the Payment Advice Note among the reference/invoice document number, the invoice date and the amount to be paid, the invoice description as well?
hi,
We have this auto run set-up the job but we want to know where i can see if such job run was set to start immediately in payment run. Thanks!
Hello. Can we choose during this step the bank accounts of vendor for who shoul we pay in case if he has several bank accounts in the system.
Automation Question. We are using a third party pay service. So we do the proposal as shown above using the F110. Before hitting run we send the batch to the third party payment service. What we want to do is once the third party says the batch is paid, we want the proposal to run. So the question is can I “kick” of the Run based on an outside event (using some kind of service call) and/or can we insert into F110S based on the same logic to “schedule” the run. Anybody done something like that?
Thank you for the payment run demonstration, basic but helpful for a beginner like me.