
 A previously posted tutorial gave an introduction to the Dunning process within the SAP Financial Accounting Accounts Receivable (AR) submodule. Hopefully, that tutorial gave a general understanding of the purpose of Dunning, listed some of the key elements that must be configured to use the functionality, and a provided a brief explanation of the Dunning program itself. This tutorial will expand on that understanding by explaining the key steps in SAP Dunning configuration within the IMG.
SAP Dunning Configuration
SAP Dunning configuration includes several steps and we will discuss each of them in a separate section of this tutorial.
SAP Dunning Area
As noted in the previously mentioned tutorial, the Dunning area is the starting point for understanding the Dunning process. Dunning Area is typically used by an organization that requires Dunning for specific organizational units within a company code, such as a profit center, sales organization, etc. A Dunning area is configured in the IMG and assigned to a company code. This is the first step in SAP Dunning configuration and is used as an overall grouping level when executing the Dunning program. This step is optional and not required if SAP Dunning process is to be carried out for an entire company code.
The IMG path to configure the Dunning area is as follows:
Transaction SPRO > SAP Reference IMG > Financial Accounting (New) > Accounts Receivable and Accounts Payable > Business Transactions > Dunning > Basic Settings for Dunning > Define Dunning Areas
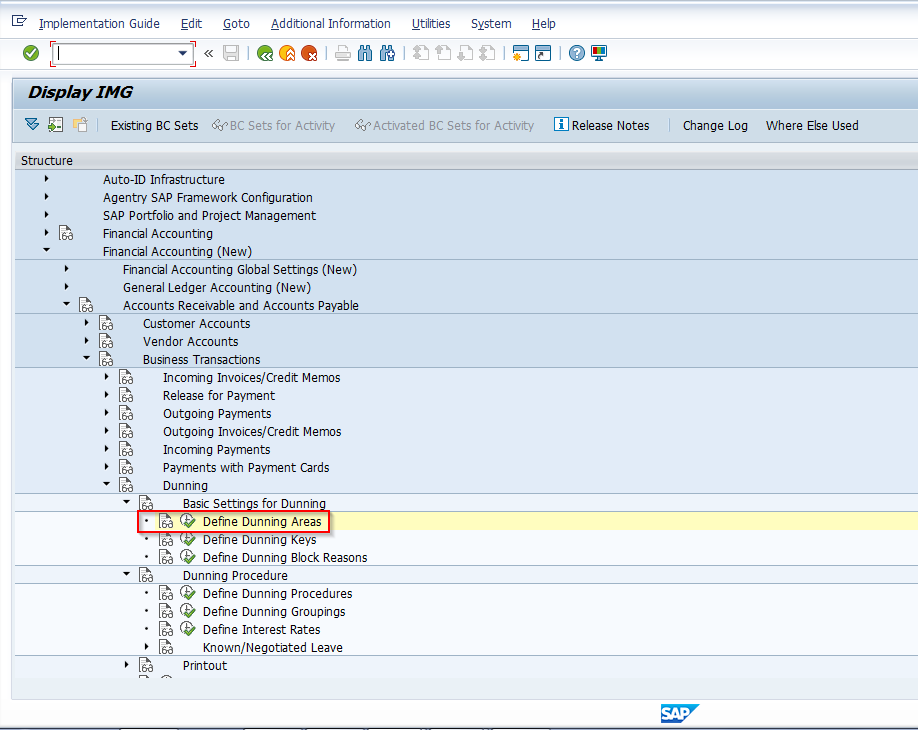
Click on the execute icon to enter the configuration screen. Once in the configuration screen, either click on the “New Entries” button or simply highlight an existing entry and click on the “Copy As” button:
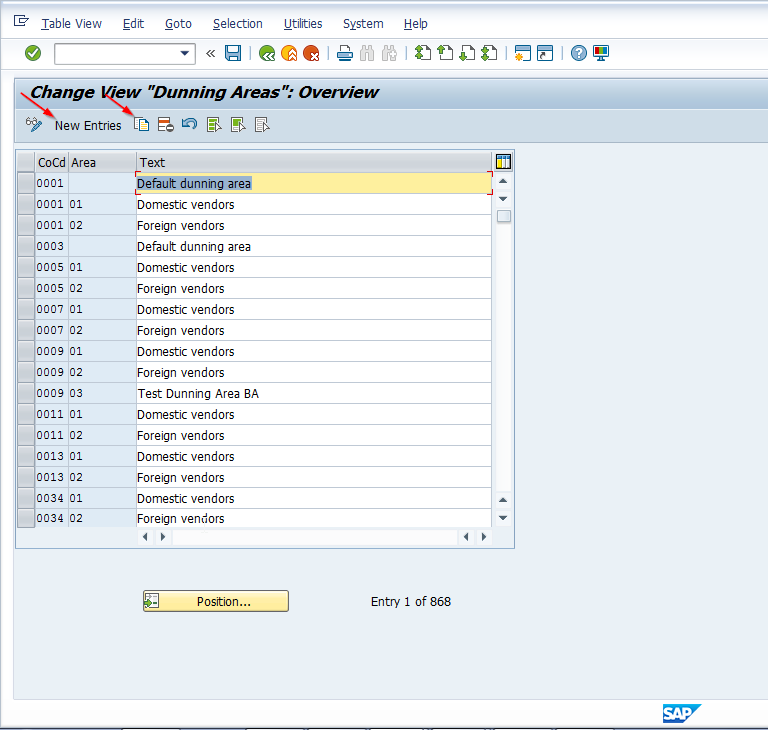
In this example, we will copy the entries from an existing company code to a new company code:

Once your Dunning Areas are configured, save to a transport.
SAP Dunning Keys
The next basic setting to configure are Dunning Keys. These are used to limit specific AR line items to a Dunning Level and/or to print them separately on Dunning Notices.
The IMG path to configure the Dunning Keys is as follows:
Transaction SPRO > SAP Reference IMG > Financial Accounting (New) > Accounts Receivable and Accounts Payable > Business Transactions > Dunning > Basic Settings for Dunning > Define Dunning Keys
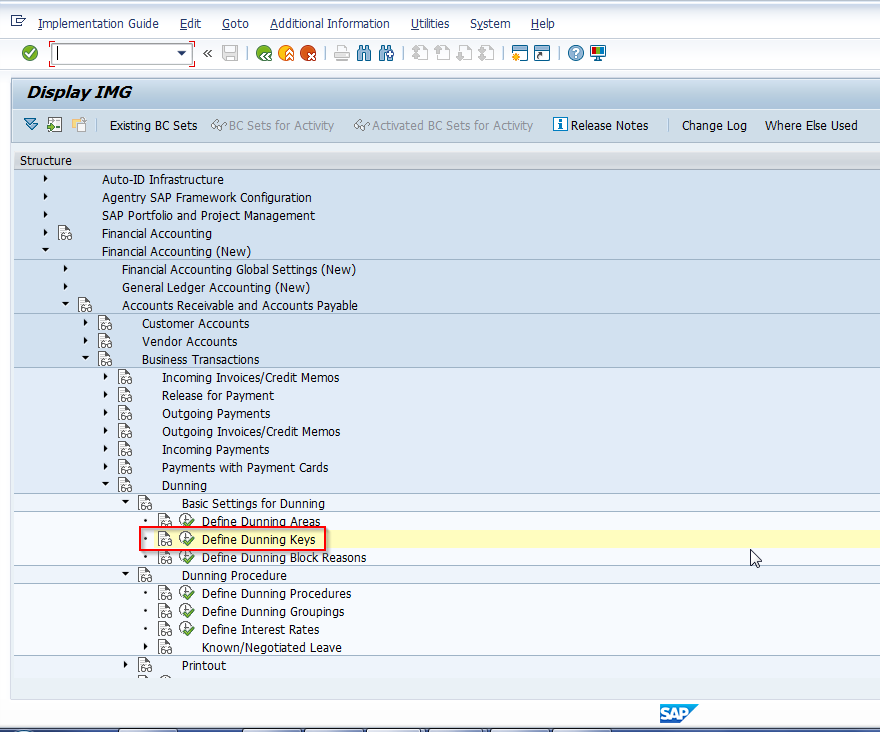
Click on the execute icon to enter the configuration screen. Once in the configuration screen, click on the “New Entries” button or highlight an existing entry and click on the “Copy As” button (same functions available as with Dunning Areas, so we will not show the screenshot here).
Again, we will copy existing entries in this example.

Once Dunning Keys are configured, save the table to your transport.
SAP Dunning Blocks
Dunning blocks can be used to prevent line items from being subject to Dunning. They are configured as followed and either assigned at the specific invoice line item level or at the customer master record level.
The IMG path to configure the Dunning Block Reasons is as follows:
Transaction SPRO > SAP Reference IMG > Financial Accounting (New) > Accounts Receivable and Accounts Payable > Business Transactions > Dunning > Basic Settings for Dunning > Define Dunning Block Reasons
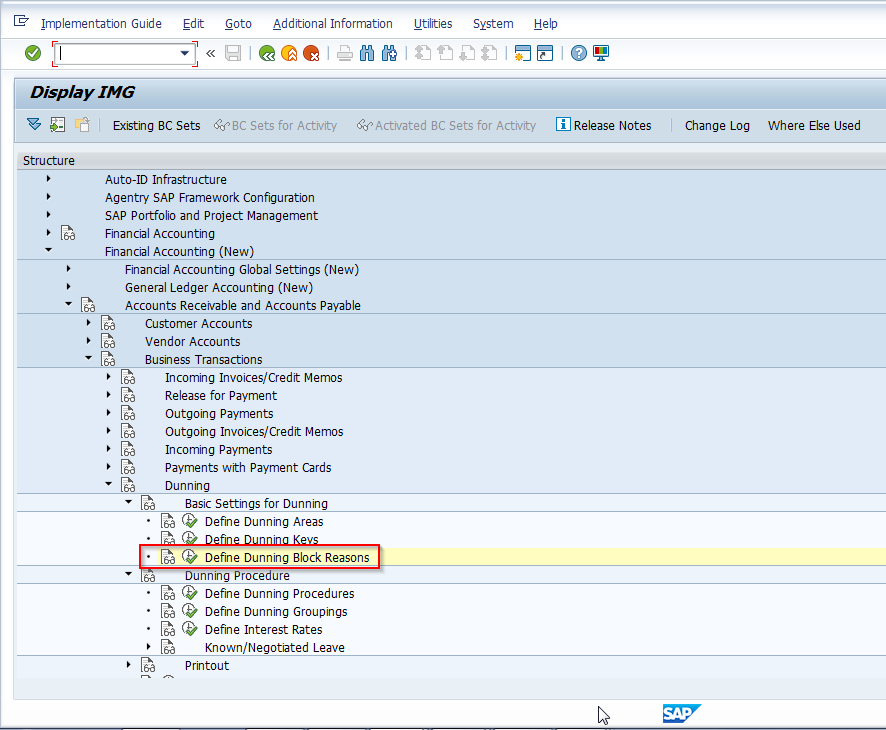
Click on the execute icon to enter the configuration screen. Once in the configuration screen, click on the “New Entries” button or simply highlight an existing entry and click on the “Copy As” button (same functions available as with Dunning Areas, so we will not show the screenshot here).
Again, we will copy an existing entry and give it a unique text.
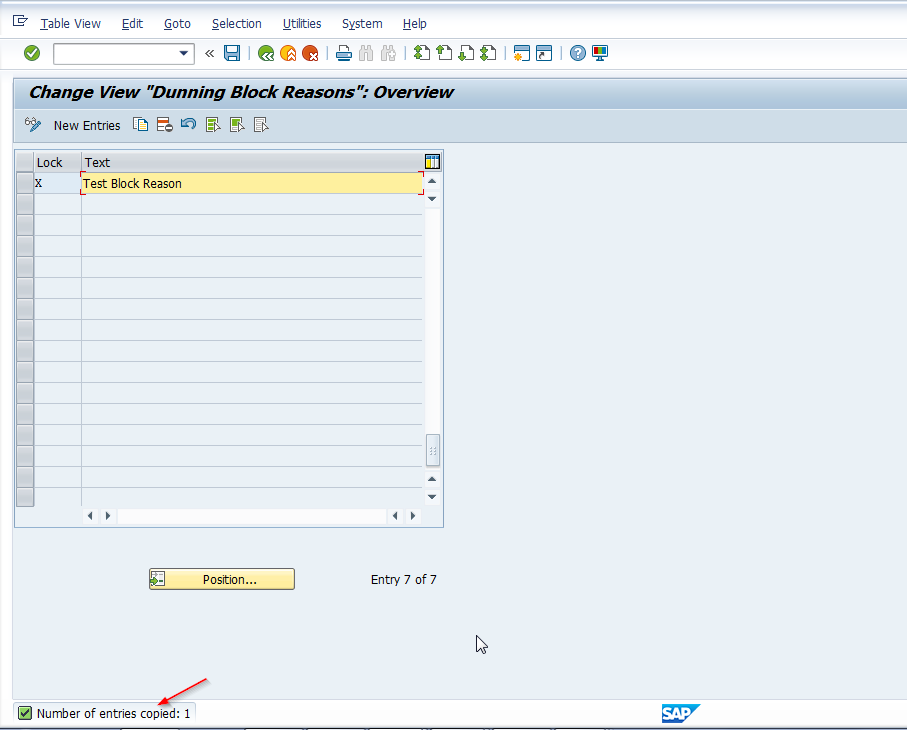
Once the Block Reason is configured, save the table to your transport.
SAP Dunning Procedure
Let’s talk about the role of the Dunning procedure in SAP Dunning configuration. As previously noted, the Dunning procedure is where most of the control of SAP Dunning process occurs. The procedure is configured to hold Dunning level interval days, number of levels that apply to a particular procedure, Dunning charges (cost of the reminder to the customer), minimum charges, whether or not interest is charged and if so at what level, etc. The Dunning Procedure is assigned to each customer in the company code correspondence tab in the customer master record (only one Dunning procedure can be applied to a customer at a time). Keep in mind that Dunning Procedures are company code independent.
The IMG path to configure a Dunning Procedure is as follows:
Transaction SPRO > SAP Reference IMG > Financial Accounting (New) > Accounts Receivable and Accounts Payable > Business Transactions > Dunning > Dunning Procedure > Define Dunning Procedures
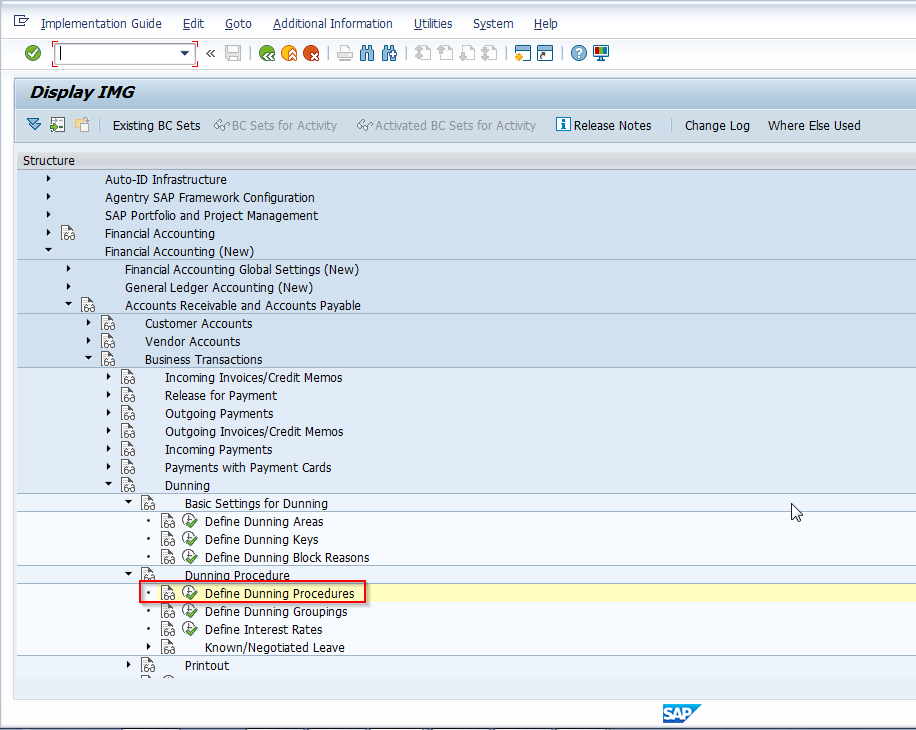
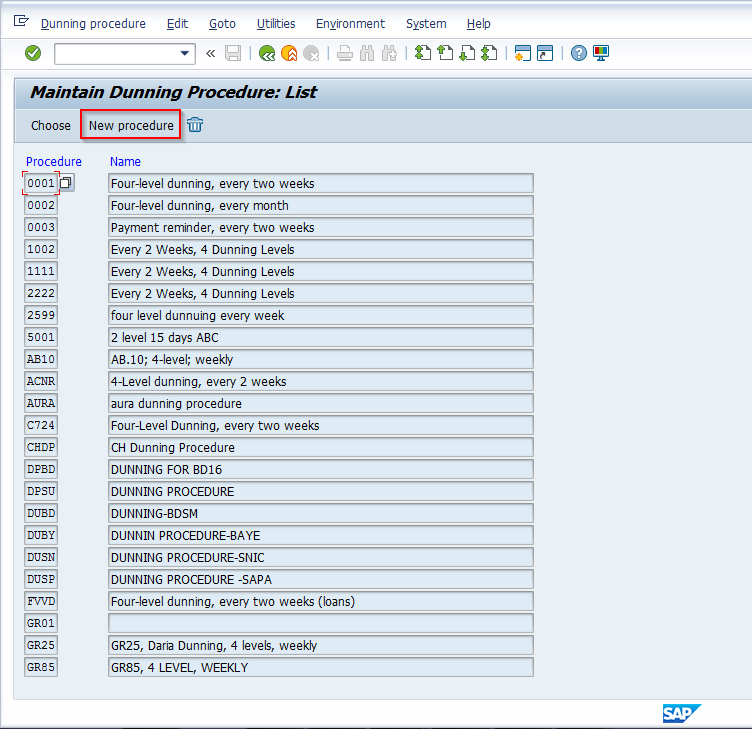
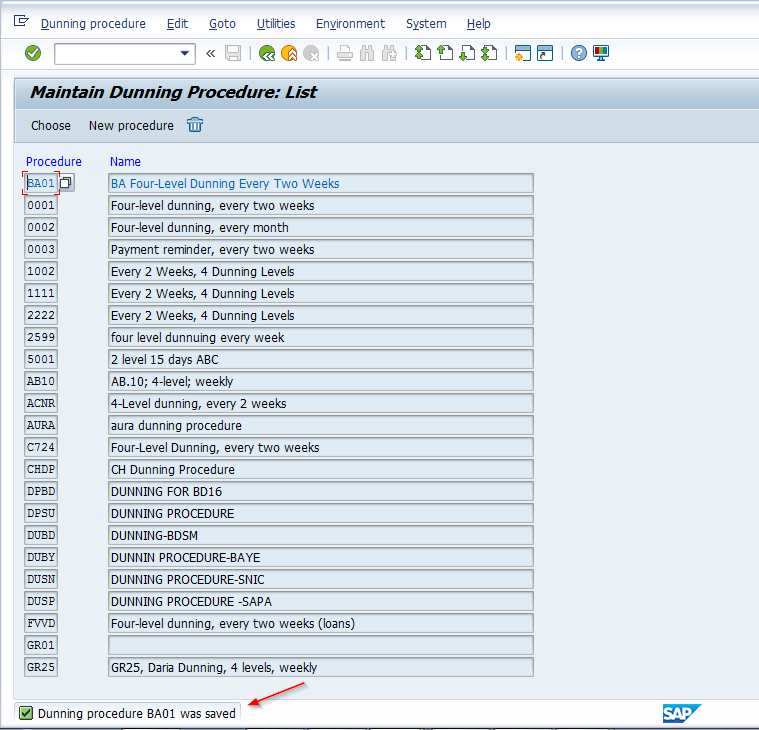
Click on the execute icon to enter the configuration screen. Unlike previously explained screens in which we copied existing entries, we will create our own new entries, so click on the “New procedure” button.
After clicking on the “New procedure” button, the following screen will appear. A brief explanation for each setting we are using is given.
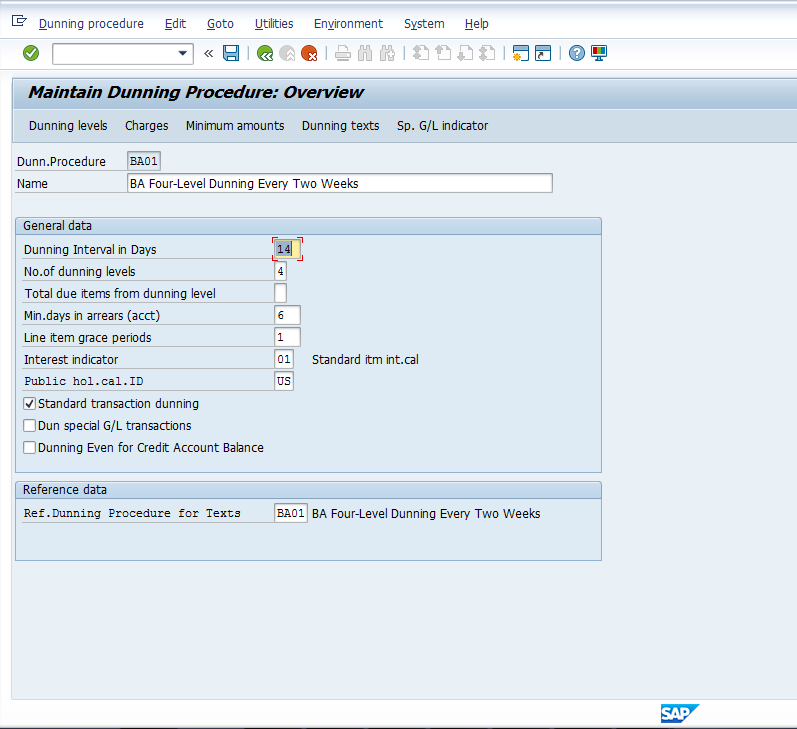
Dunning procedure – assign a new and unique 4-digit ID.
Name – assign a meaningful name.
Dunning interval in days – assign the number of days that will trigger the procedure; this is the number of days between each Dunning run.
No. of Dunning levels – this is the number of levels for the dunning procedure.
Min. days in arrears (acct) – Days in arrears which at least one item in the customer account must have for a dunning notice to be created.
Line item grace periods – grace periods taken into consideration when calculating Dunning notices due.
Interest indicator – this field is used to specify the interest indicator for items on the customer master using this procedure.
Public hol.cal.ID – this is used if a public holiday calendar is to be considered when analyzing overdue items.
Ref. Dunning Procedure for Texts – use this field to reference form names from another procedure that has the same number of levels.
Next, click on the “Dunning levels” button and complete field settings as required. The screen will appear as follows and explanations for fields we are using in this example will be given.
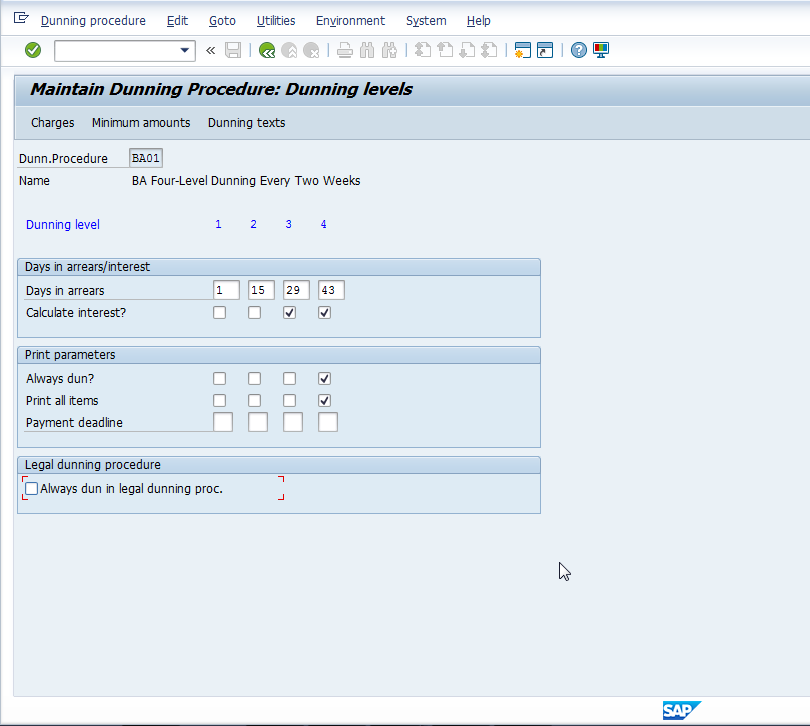
Days in arrears – this indicates the number of days in arrears that will trigger each level.
Calculate interest? – check this field if you want to calculate interest for the specified level.
Always dun? – use this setting for each level you want to Always Dun regardless of whether or not a change has been made to a Dunning proposal; typically used at the highest level of the procedure.
Print all items – use this setting if you want to print all open items for the customer to give them a complete picture of their account balance.
Once the required settings on this screen are completed, click the “Charges” button. This is where we can specify what the Dunning charge is for each level. These charges are dependent on currency, so you will be prompted for a currency key when you click this. The charges screen will appear as follows.
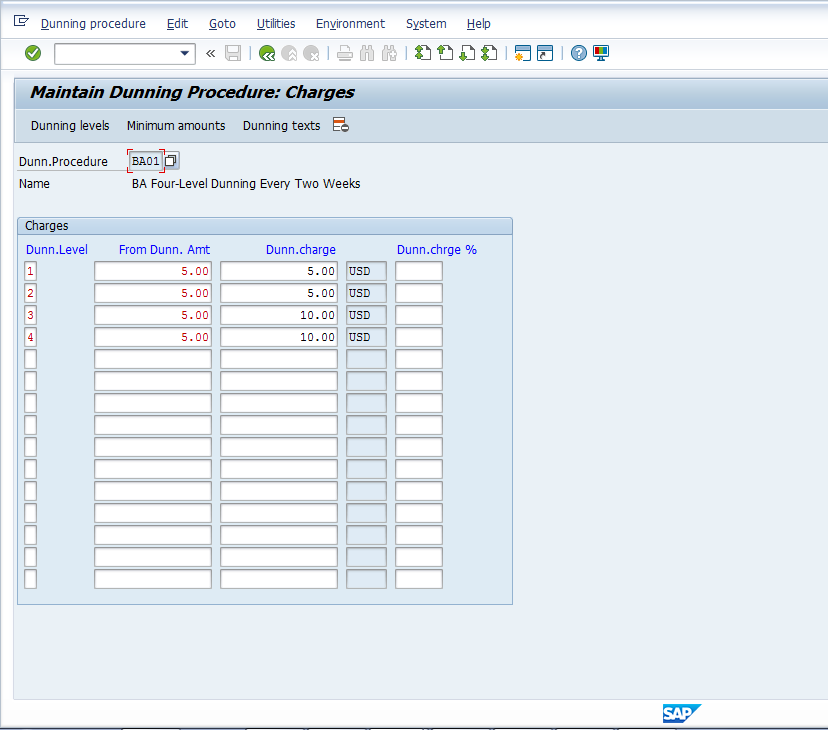
After completing this screen by entering the total open item amount and the required charge for each level (can be either a fixed charge as in this case, or a percentage), click on the “Minimum amounts” button. Again, this will be currency dependent. As the button name indicates, this is where you set the minimum overdue line item amounts that trigger each level and interest. An example of a completed screen will look as follows.
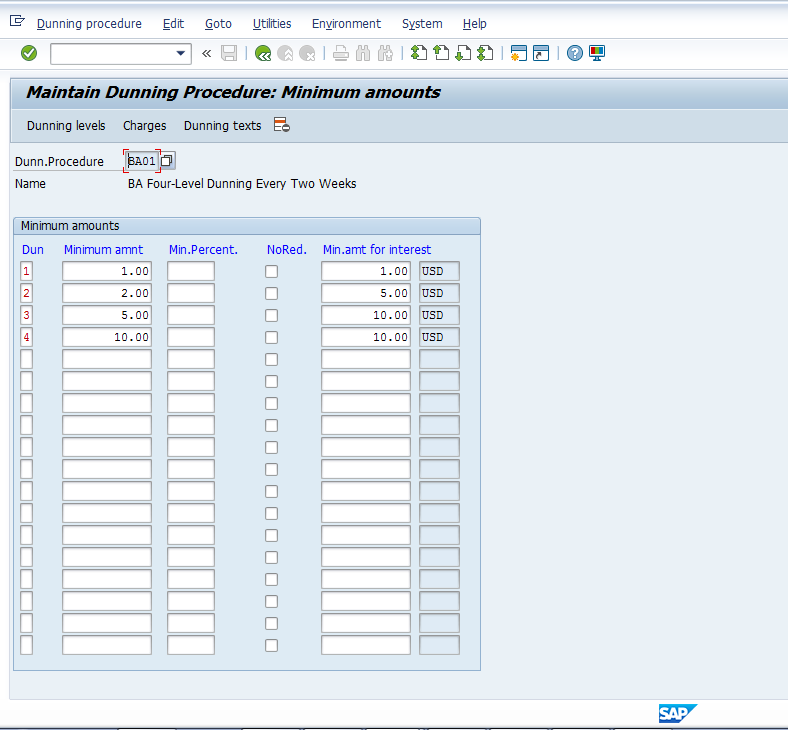
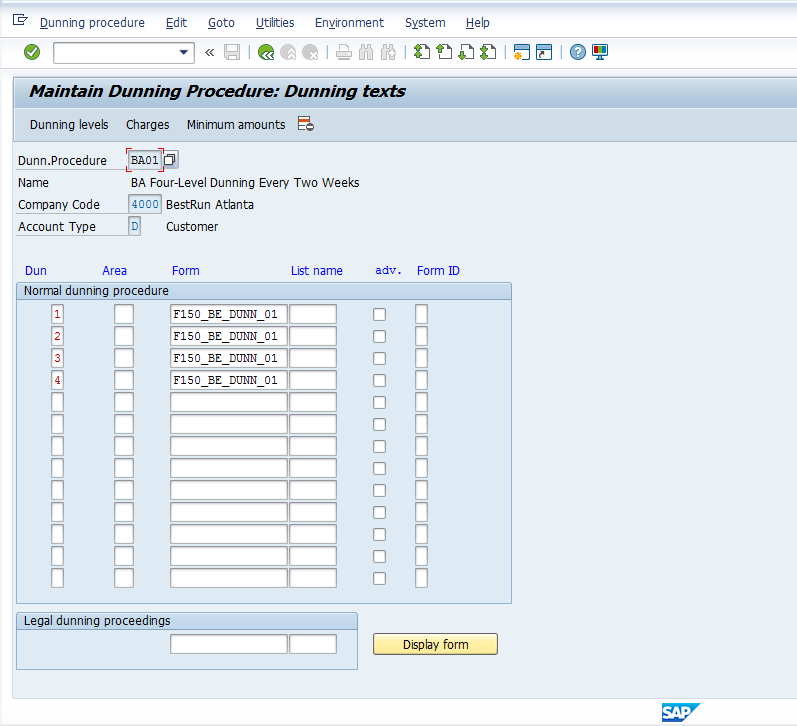
After completing this screen by entering the minimum amount (can be either fixed, as in this example, or a percentage) and minimum interest amount for each level, click on the “Dunning texts” button. As the button name indicates, this is where you set the dunning text for each level. As noted earlier, each level can have a different text which typically escalates in verbiage severity. You can use SAP standard delivered texts, or you can customize your own to meet specific requirements. To see available forms, click into the field and click the drop down. Select either an active standard delivered form or custom form, depending on your business requirements. In this example, for simplicity, we will use a standard for each level. Note: this will be company code dependent, so a company code dialog box will appear prior to entering this screen (not show here). Enter the company code you want and proceed. An example of a completed screen using the same form for each level is as follows.
Once complete, click the green arrow to go back and save the completed configuration to your transport.
This completes SAP Dunning configuration required in the SAP implementation guide to use the Dunning functionality.
Conclusion
These steps outline the basic configuration required to use the Dunning functionality within SAP Financial Accounting Accounts Receivable, however, depending on specific business requirements, other settings may be needed. Explore the help features within the IMG to learn more as you proceed with SAP Dunning configuration. The next steps, which will be outlined in later posts, will be to assign the Dunning Procedure to customer master records, execute the Dunning program, and change the Dunning proposal if required. Additional information will also be provided on Dunning notices.
—
Navigation Links
Go to next lesson: SAP Dunning Run Step by Step Demonstration
Go to previous lesson: SAP Dunning Process
Go to overview of the course: SAP FI Training
First of all very clear explanation..thank you so much
One clarification:
If dunning possible for vendor, there is option coming in dunning text.
Could we make it as possible for vendor to make the stock due from them.
Yes, If Vendor has debit balance.
which currency we have to give in minimum amount and charges field
is it company code currency or vendor posting currency?
Hi, how can a charge be applied to an invoice without customer approval and a special PO for the Dunning charge?
can we assign dunning procedures to either customer or company code.