
 Welcome to the tutorial on SAP quota deduction. We will begin by reiterating two important points that we had explained in the tutorial on SAP Absence quotas:
- The link between an absence type and an absence quota is defined through SAP Deduction rule. In other words, whenever an employee applies for leave, SAP Deduction rules instruct the system as to which absence quota(s) this absence must be deducted from.
- All absence types need not be deducted from absence quotas. For example, unauthorized leave may be entered as the absence type “Leave without pay” and there will not be any quota for this type of absence.
In this tutorial, we will take you through the configuration of SAP quota deduction rules. To make this exercise more relatable, we will consider a practical scenario as described in the following section.
Business Scenario
Let’s assume we want the absence type 9000 (Test Casual leave) to be deducted from the Absence quota type 79 (Test Casual Leave quota). Also, if the employee has multiple records of this quota, then the one with the earliest Deduction from date should be deducted from first. This is logical, as this is the quota that will lapse before the others.
Let’s learn how to configure a deduction rule to meet this requirement.
Configuration of SAP Quota Deduction Rules
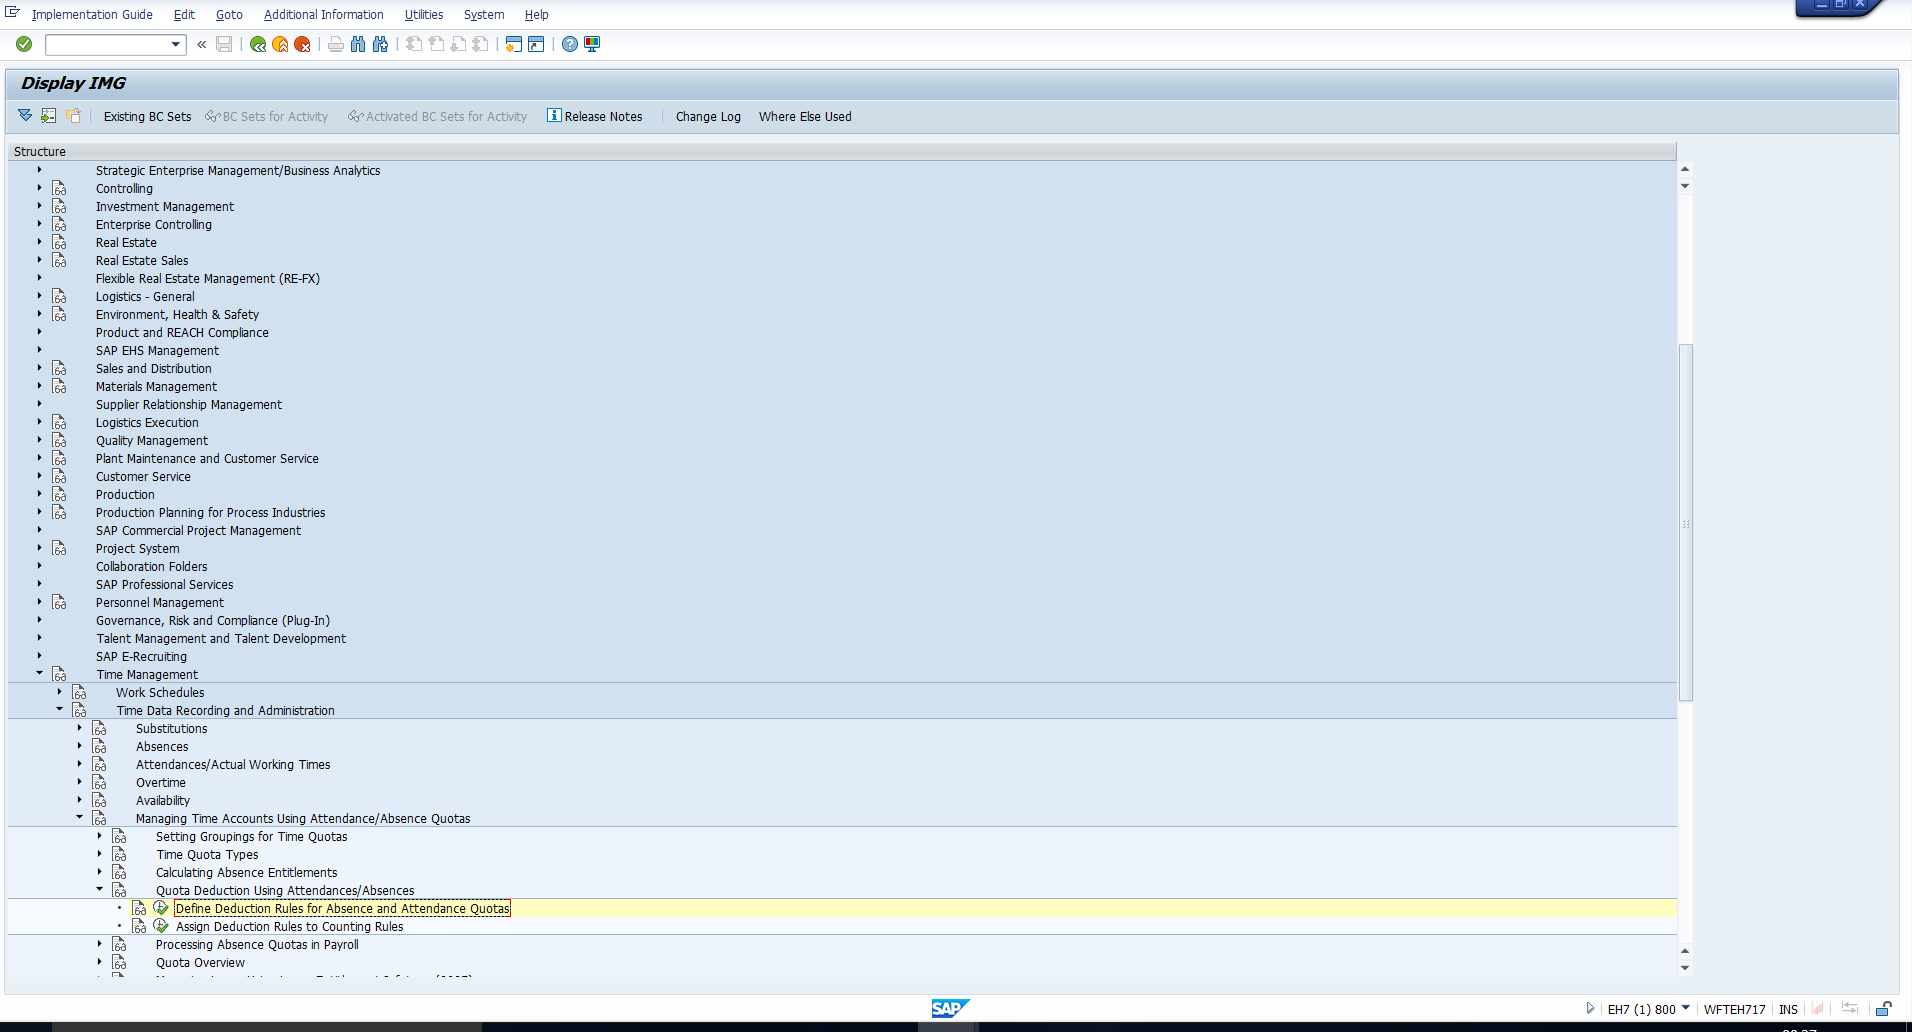
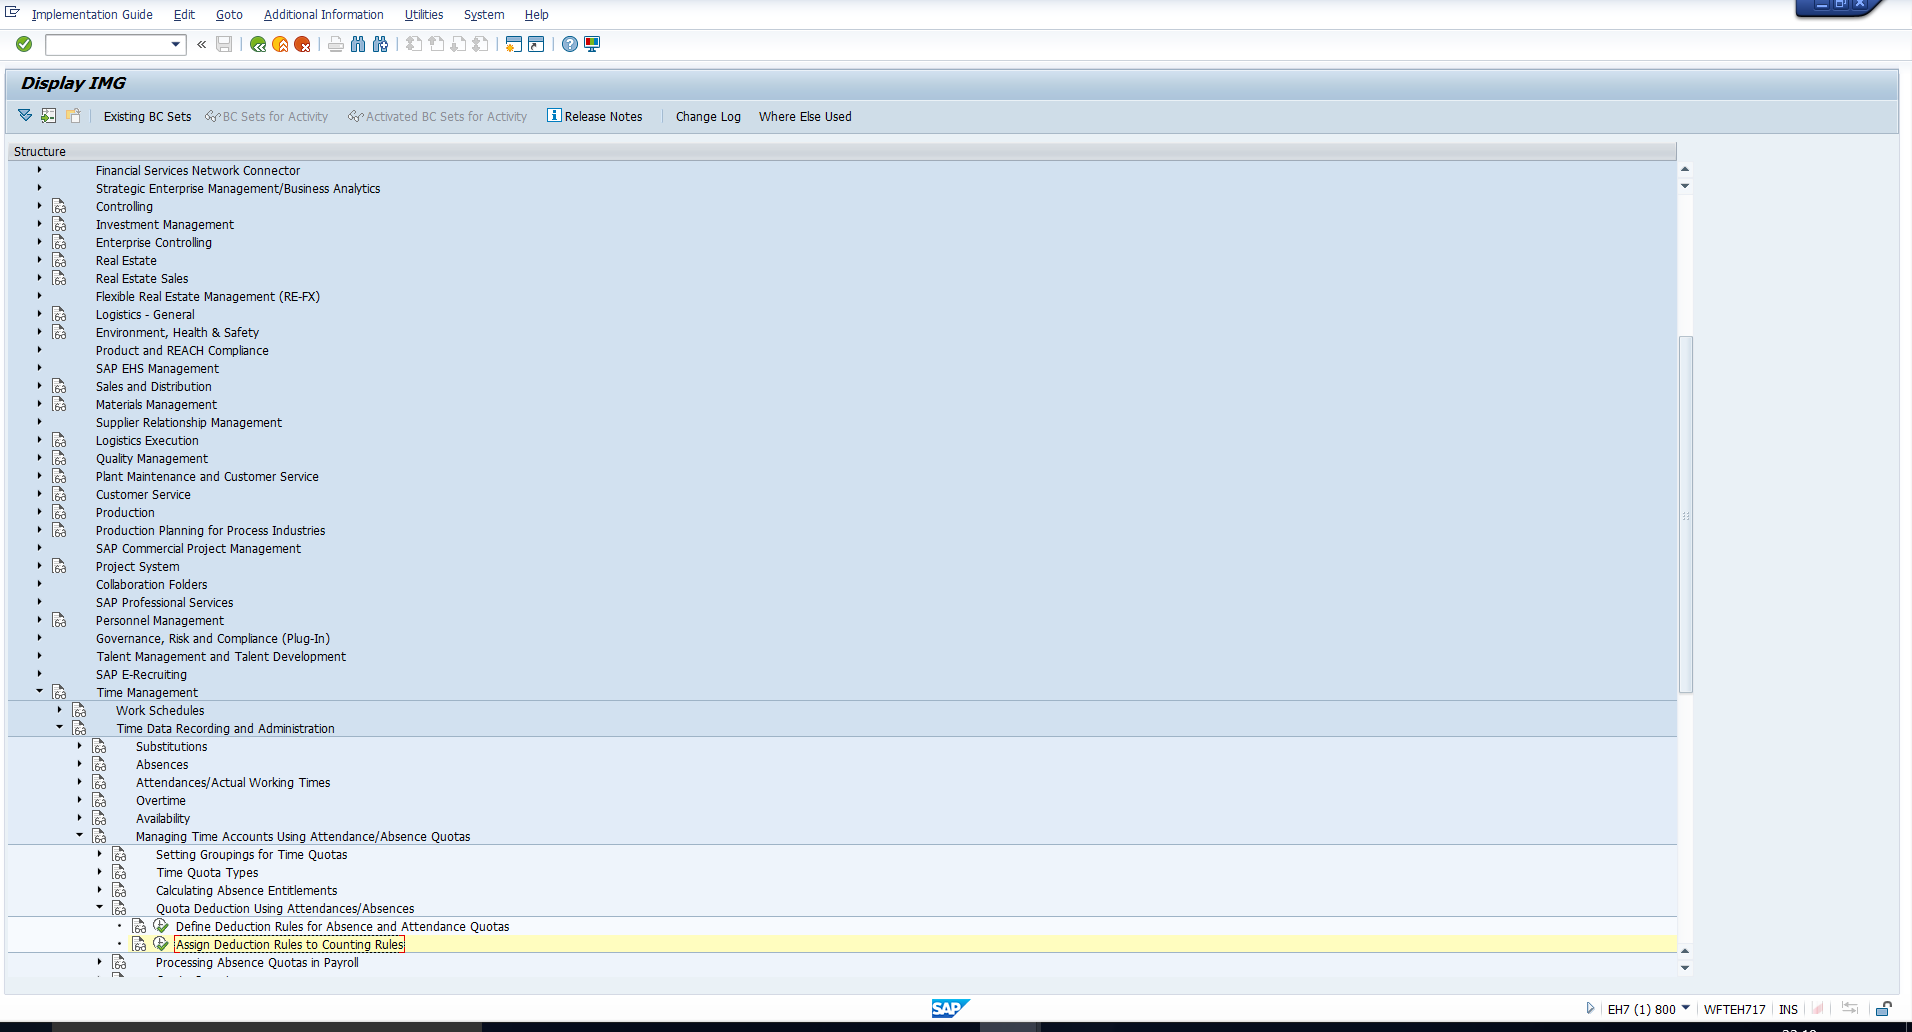
To configure a new deduction rule, follow the IMG path shown in Figure 1.
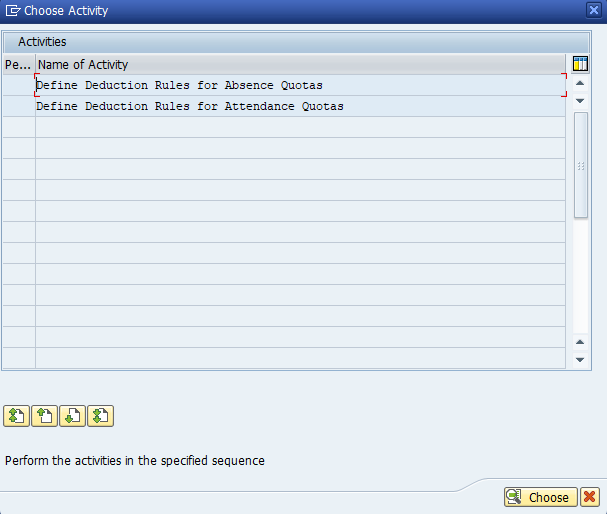
Next, the activity list in Figure 2 will be displayed. Double click on the first activity as this is relevant to SAP Absence quotas.
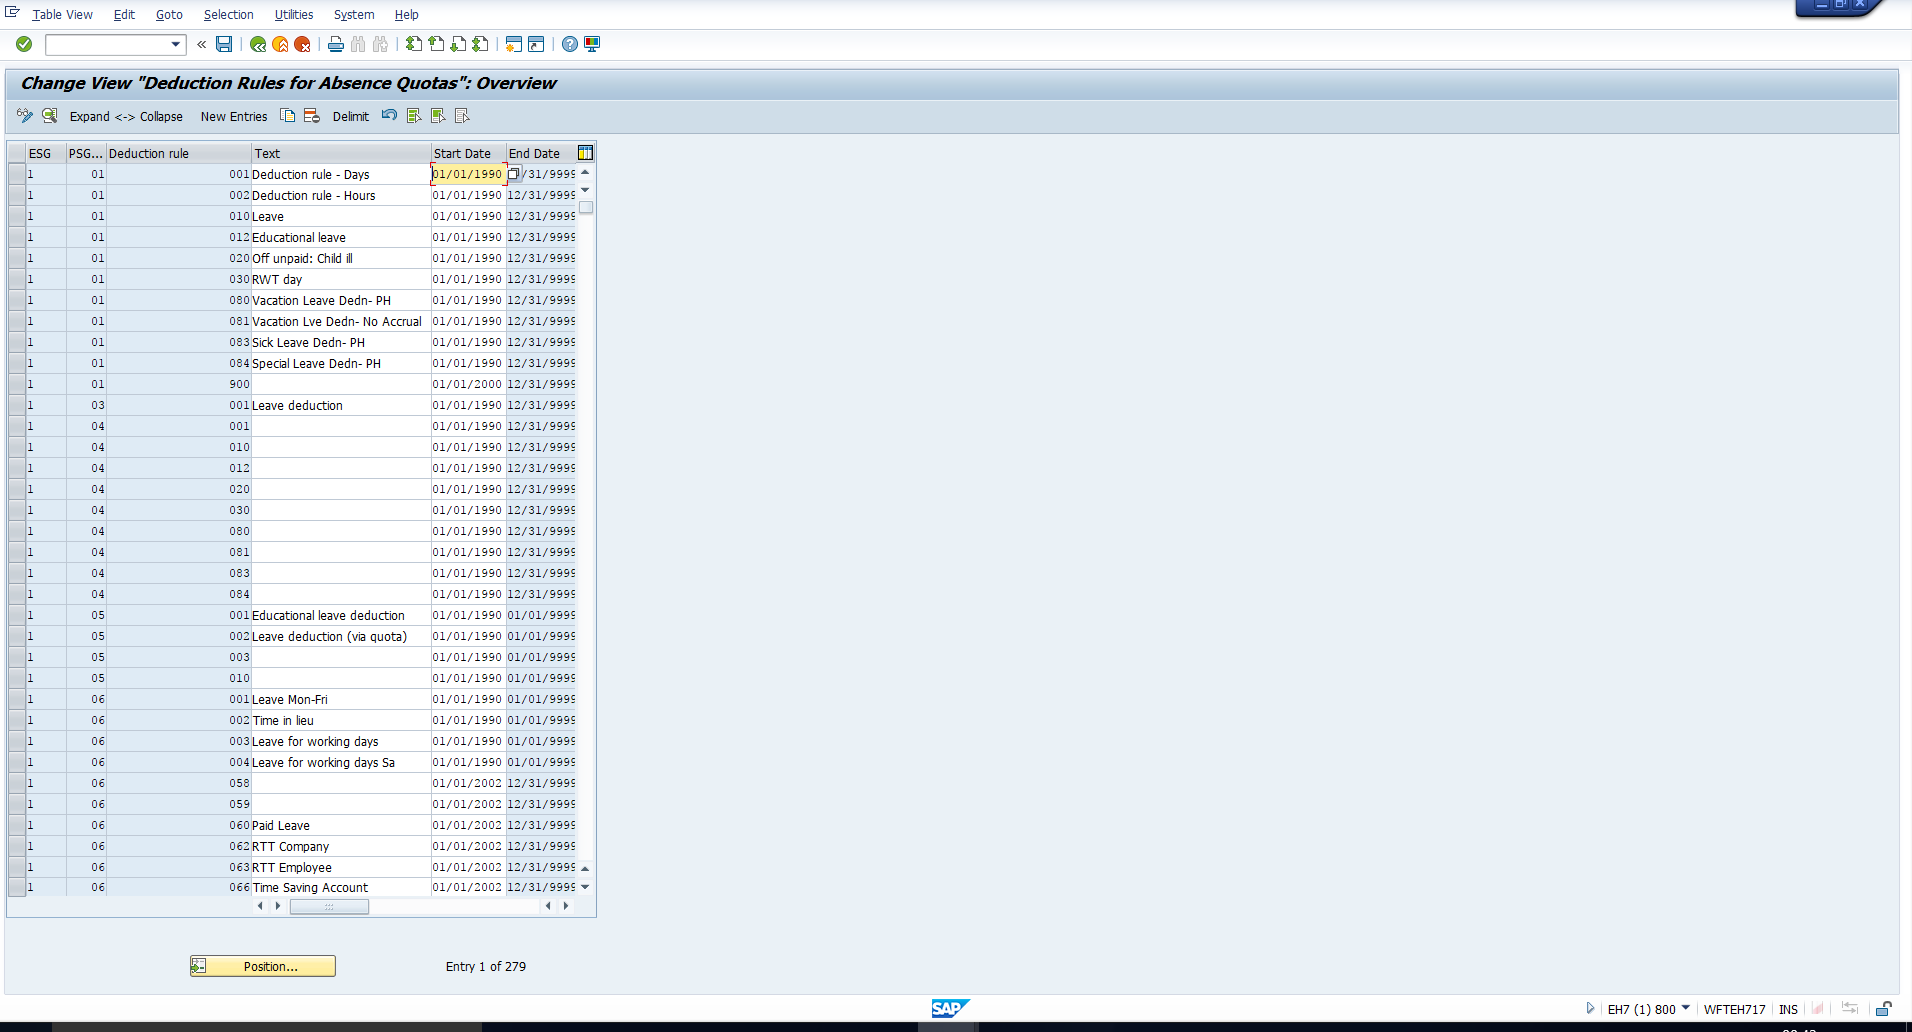
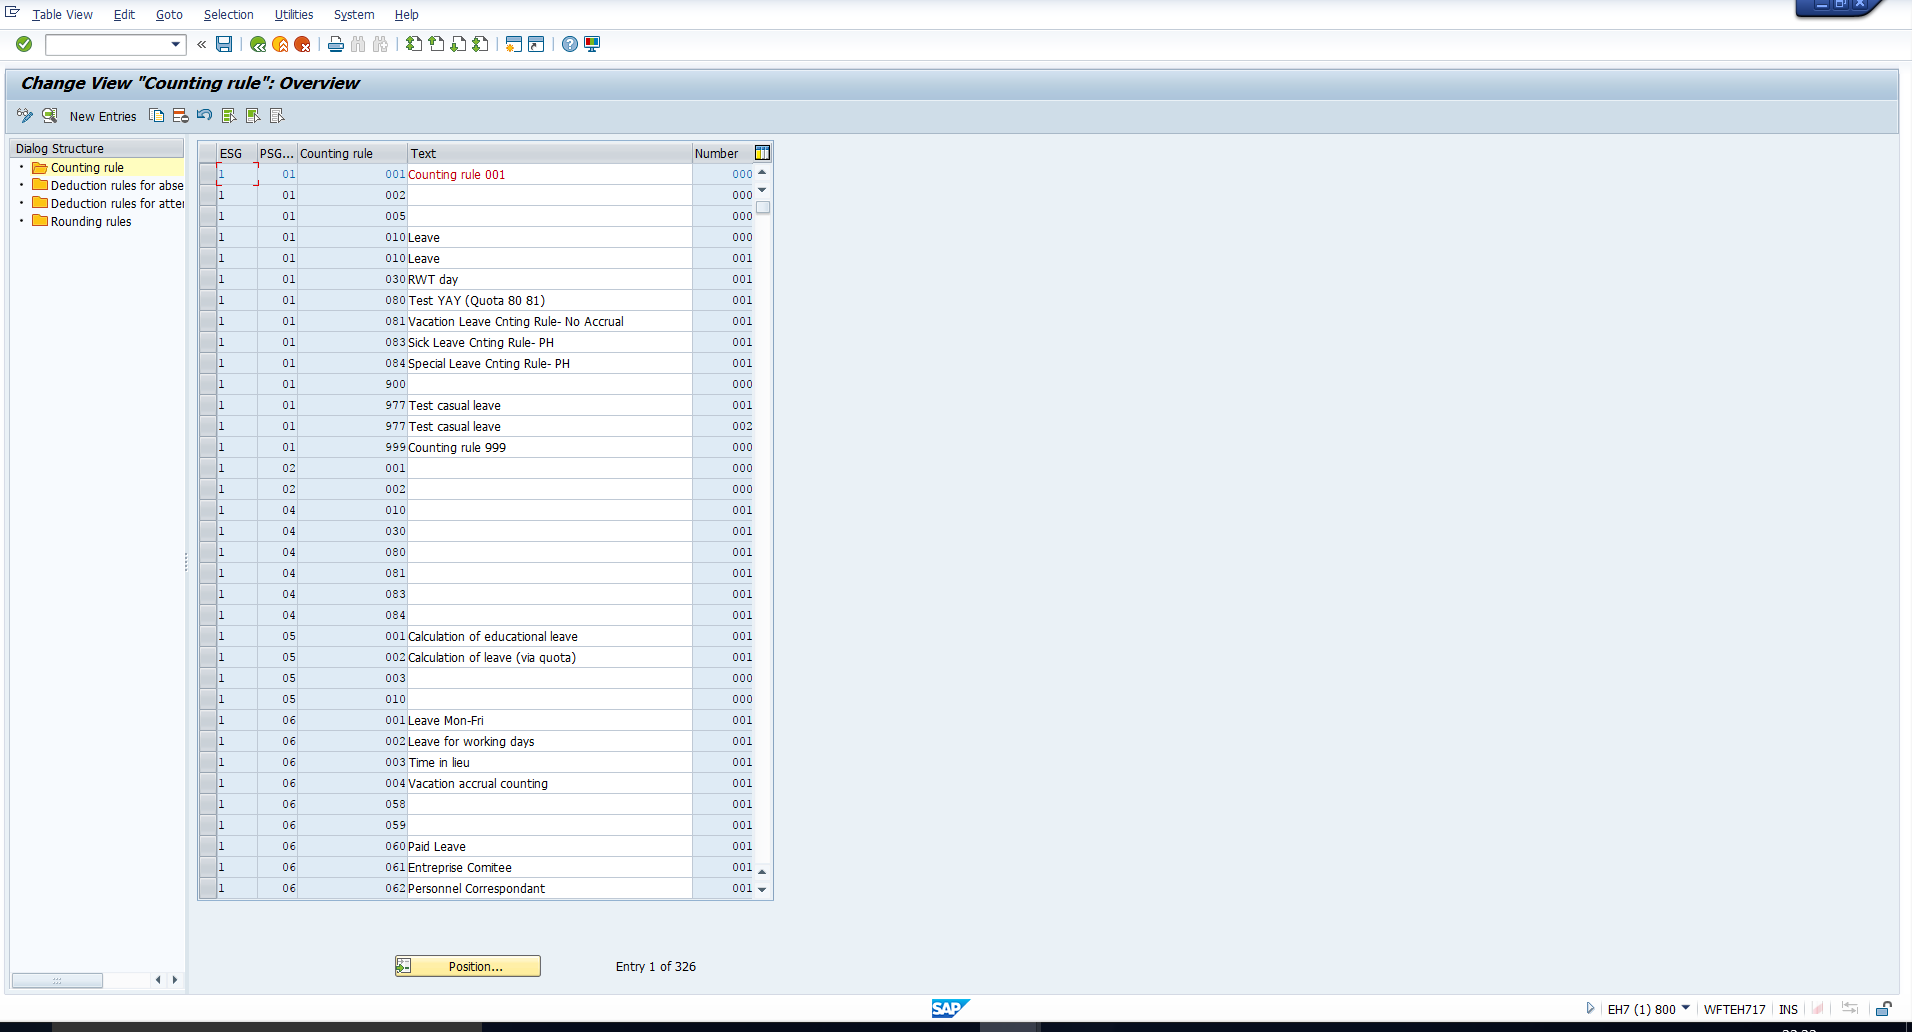
Executing this activity takes you to an overview of Deduction rules for Absence quotas. You may refer to the screenshot in Figure 3.
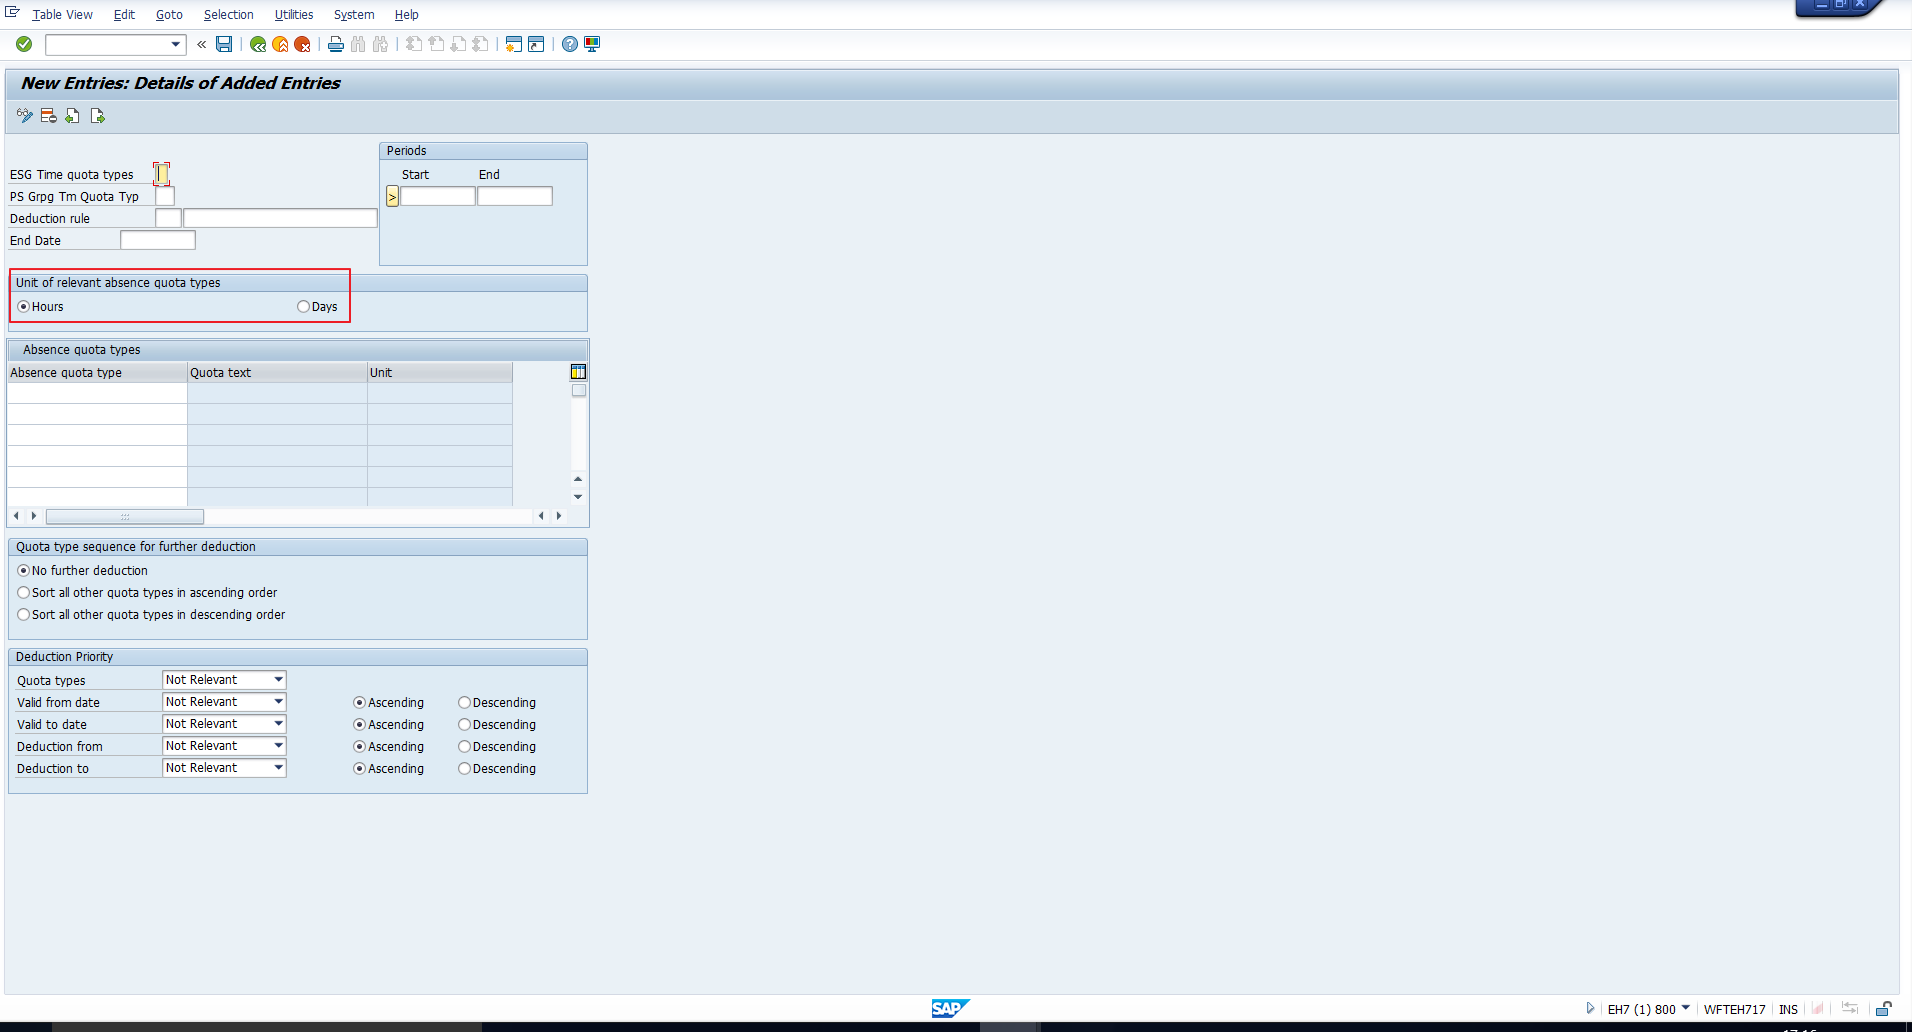
To create a new rule, you can copy an existing one, if you have a suitable reference. Or you can create a new rule from scratch by clicking on the New entries button. The screen that follows has been depicted in Figure 4.

This screen can be visualized as consisting of a header and four sections. Below we will explain the significance of each.
Header
If you have gone through the previous tutorials, you should be familiar with these fields. Nevertheless, we will explain them in brief:
ESG Time quota types – Here you should enter the Employee subgroup grouping for Time quotas, for which this deduction rule is required.
PS Grpg Tm Quota Typ – Similarly, enter the Personnel subarea grouping for Time quotas, for which you want this rule is required.
Deduction rule – Enter a unique 3-digit key as well as a descriptive text for the rule being created.
Start & End – Enter suitable start and end dates to define the rule’s validity.
Unit of Relevant Absence Quota Types
We have highlighted this section in Figure 5. Here you should select the radio button (Hours or Days) that defines the unit in which the absence quotas should be deducted.
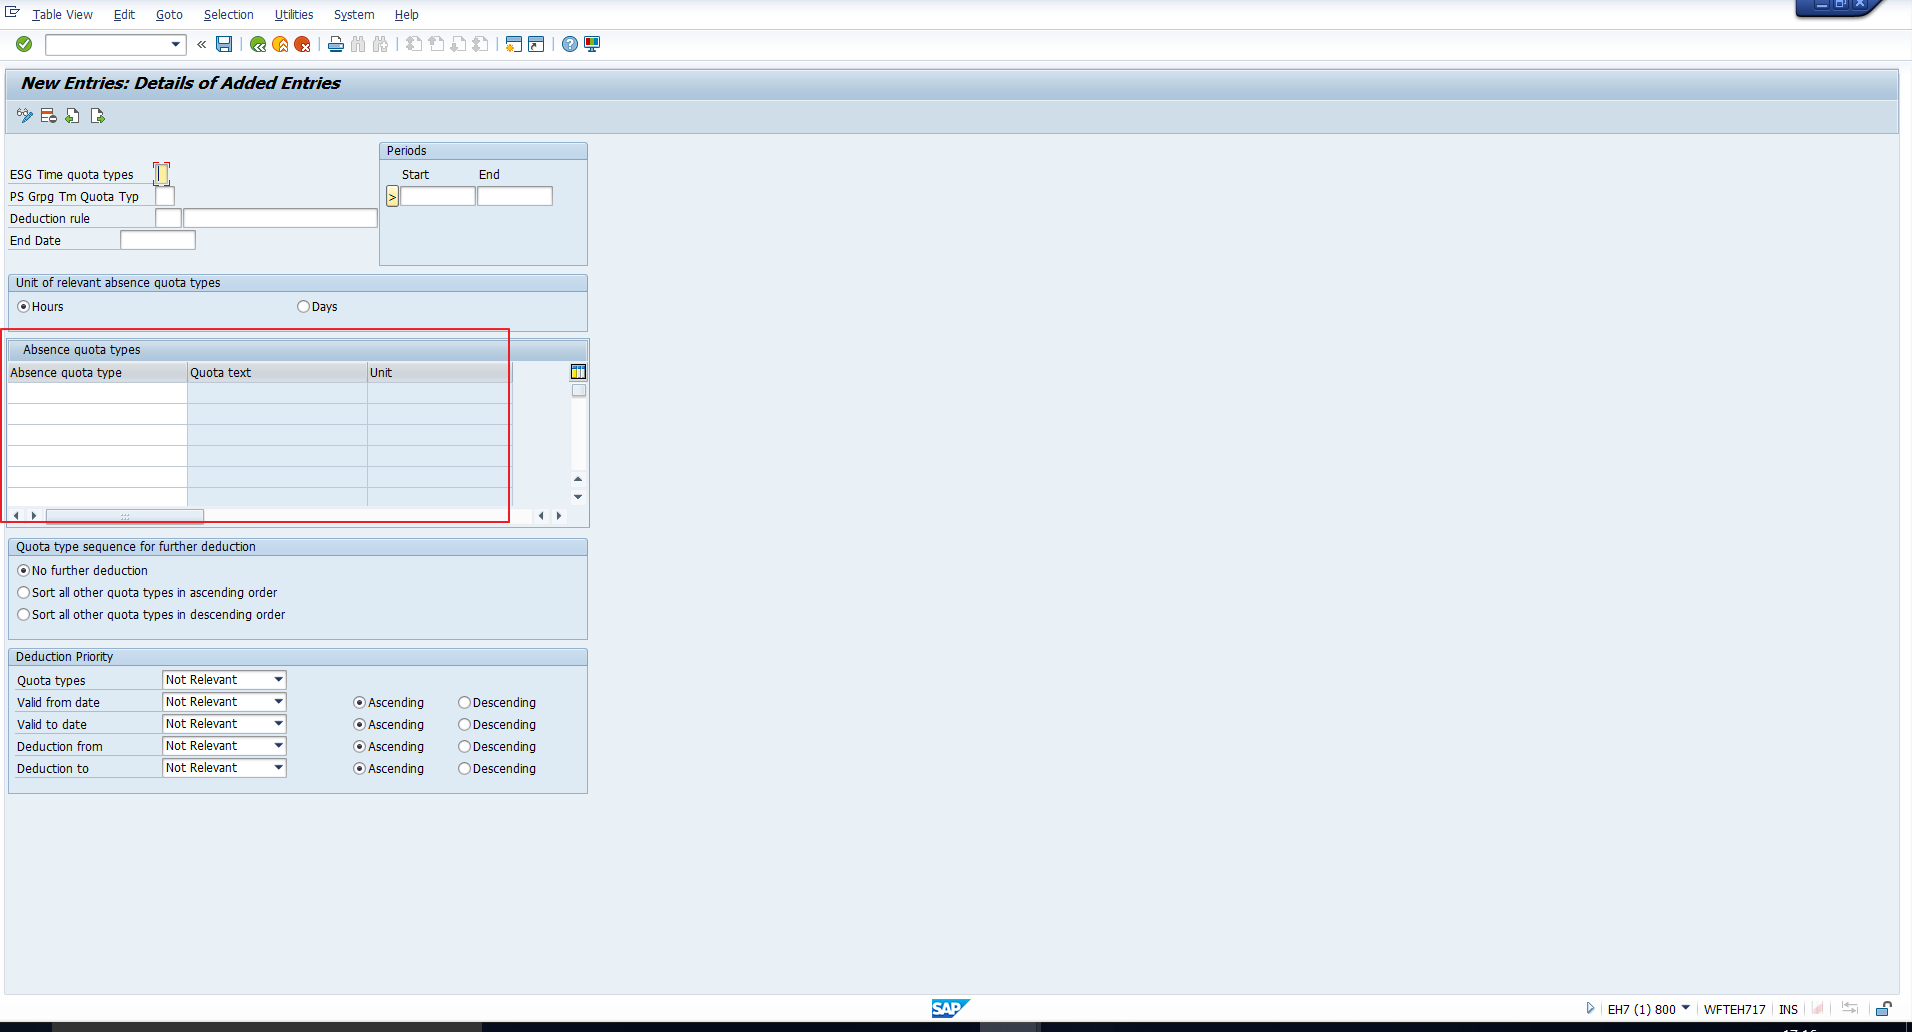
Absence Quota Types
In the section shown in Figure 6, you must enter one or more absence quota types that must be deducted from. You can specify upto 100 quota types in this list!
Quota Type Sequence for Further Deduction
In the Absence quota types section, we entered absence quota types that should always be deducted from. In this section (Figure 7), we can specify whether any additional quotas should be deducted from.
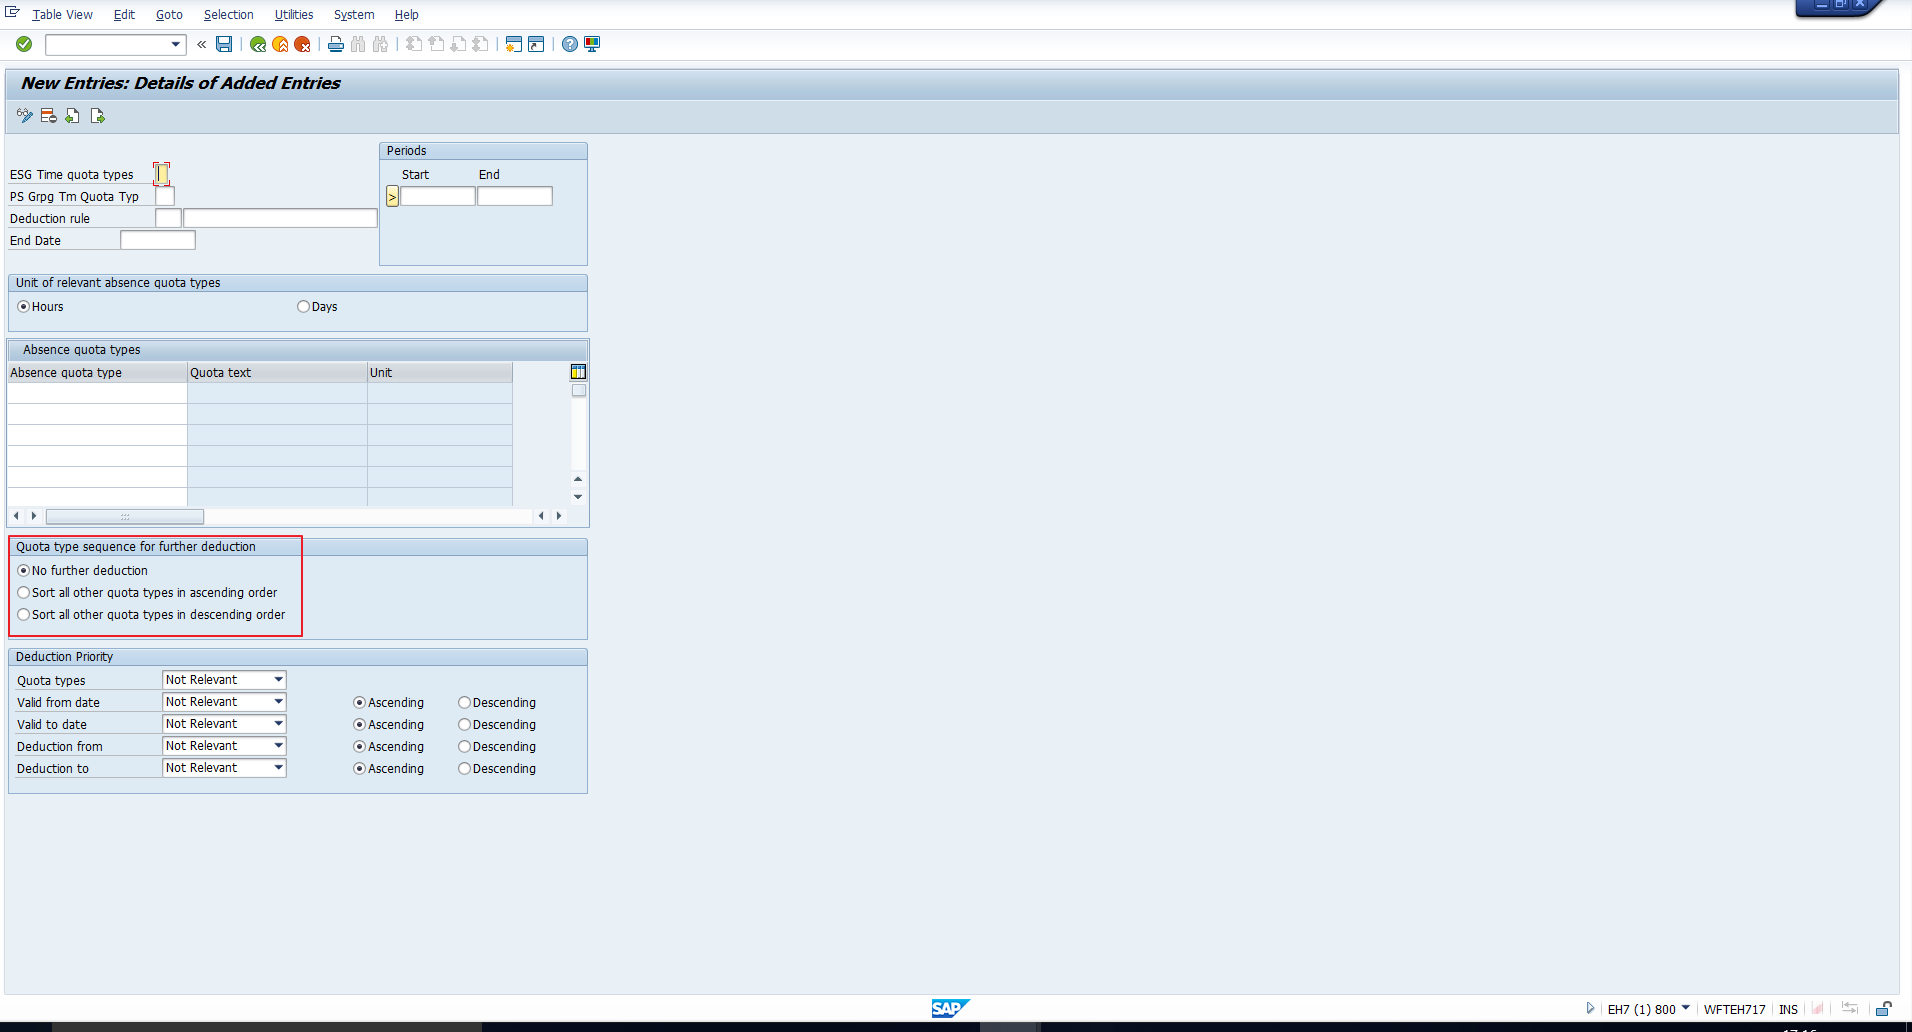
There are three radio buttons:
1. No further deduction
Only the quotas listed in the Absence quota types section should be deducted from.
2. All other quota types sorted in ascending order
If the employee has any other absence quotas in the time unit specified above, they are sorted in ascending order for deduction.
3. All other quota types sorted in descending order
If the employee has any other absence quotas in the time unit specified above, they are sorted in descending order for deduction.
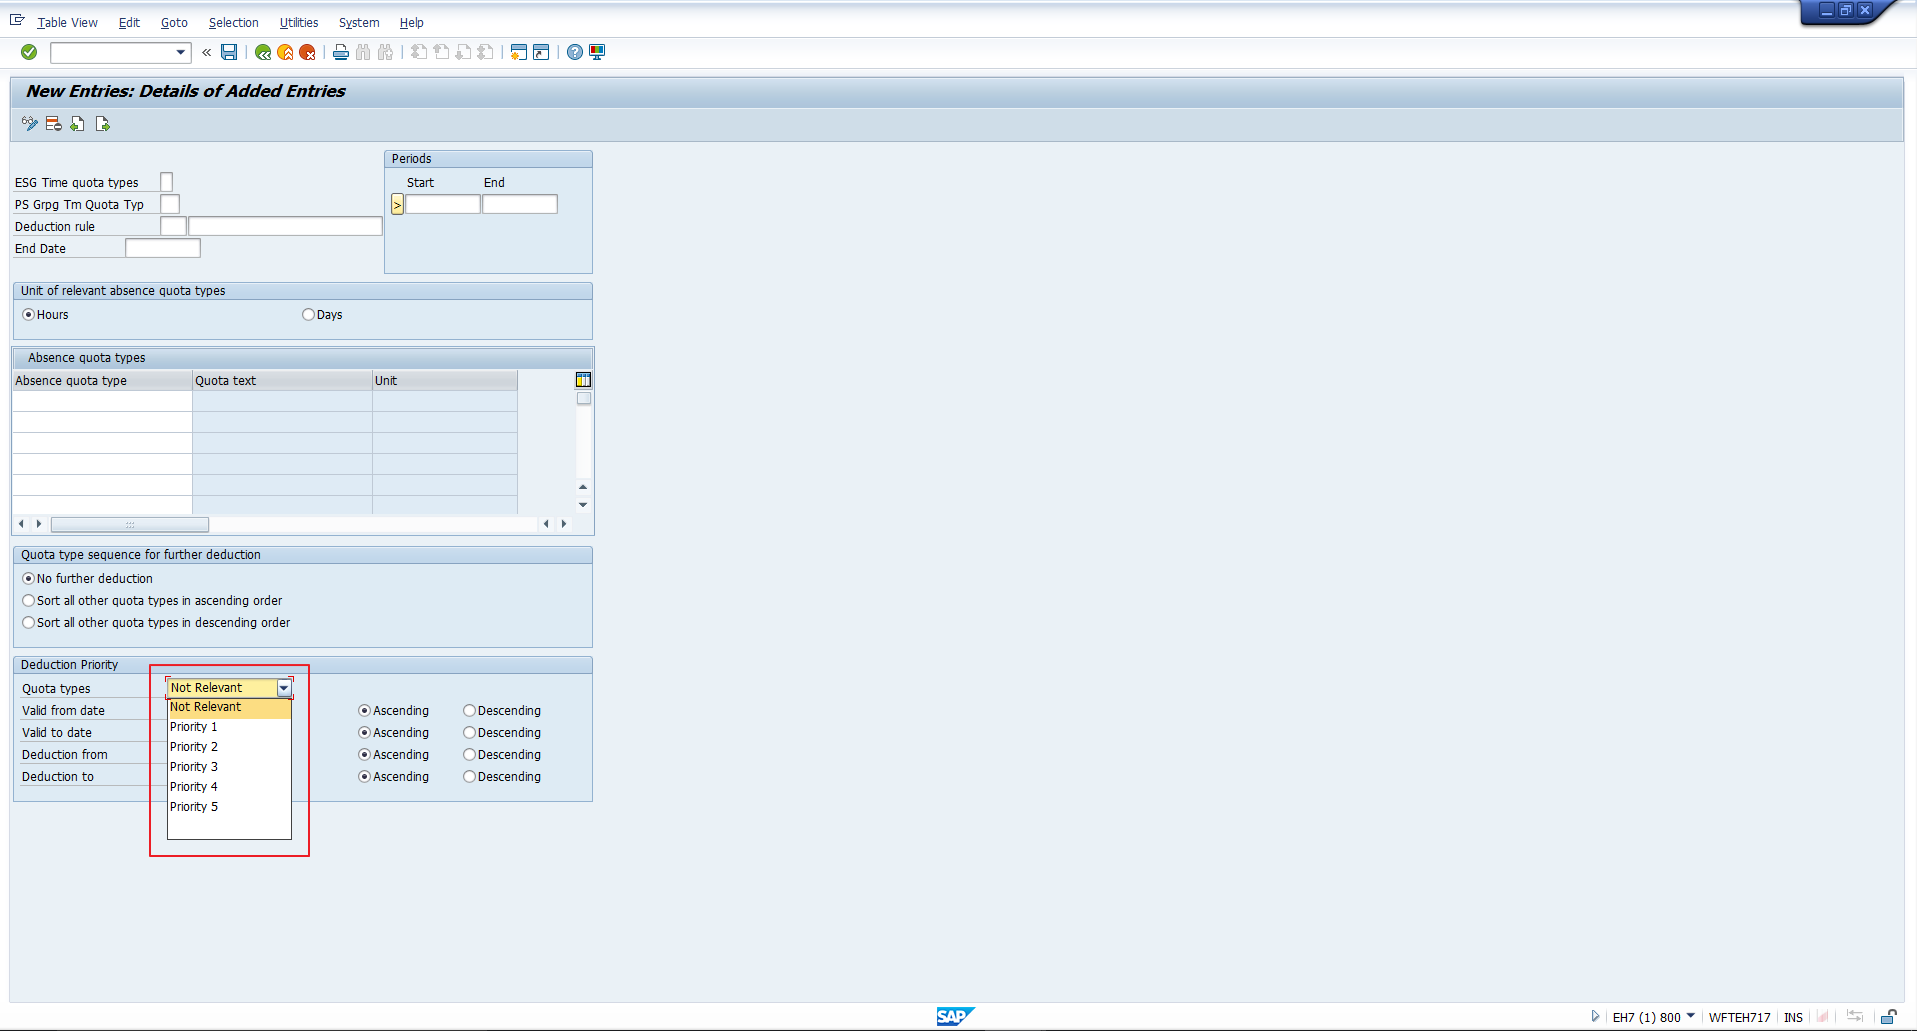
Deduction Priority
In this section, highlighted in Figure 8, you enter the criteria according to which the system should sort an employee’s quotas to form the deduction sequence.
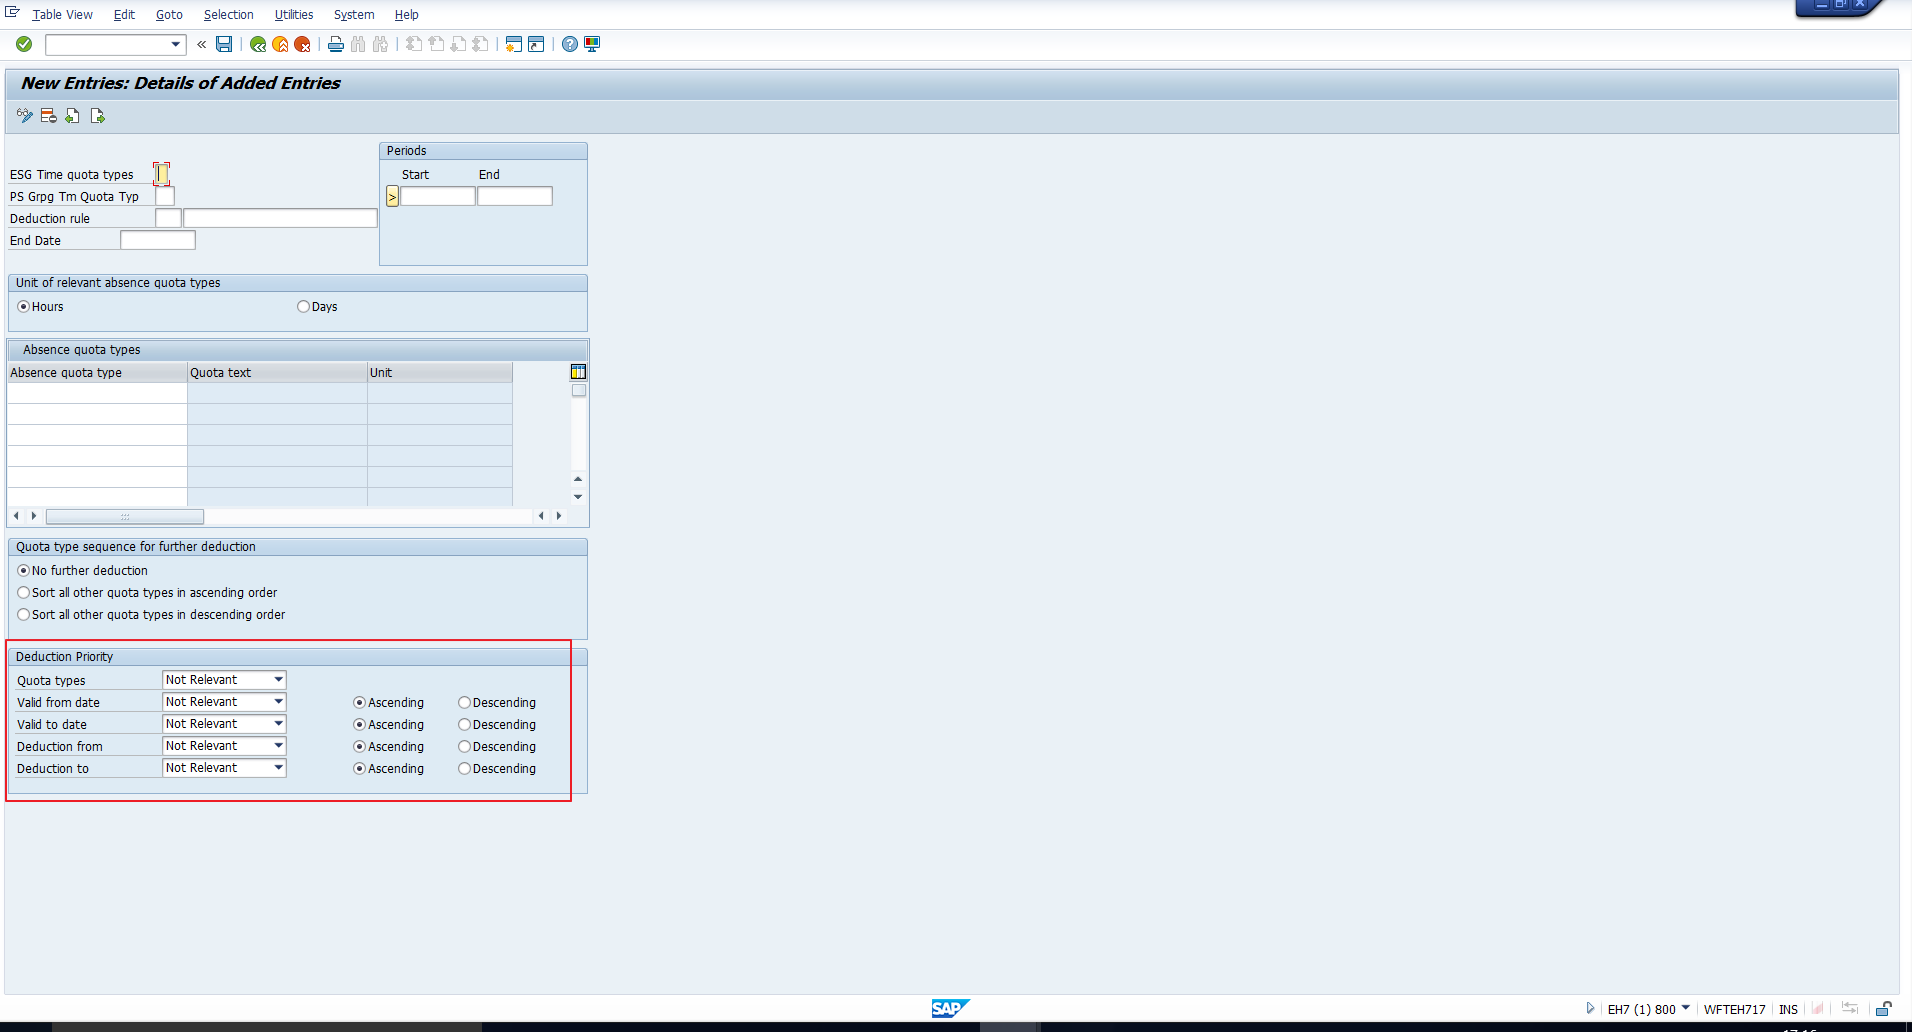
In the above screenshot, you can identify five criteria – Quota type, Valid from date, Valid to date, Deduction from, Deduction to. You can assign a priority level from 1 to 5 (1 being the highest and 5 being the lowest) to each of these criteria, as depicted in Figure 9. In addition, for the date fields, you can assign an ascending or descending sort order by selecting the appropriate radio button against each criterion.
Additionally, we’d like to highlight a few points:
- If you do not assign a priority to a criterion, then it will not be considered when sorting the absence quotas for deduction.
- If you do not assign a priority to the criterion Quota type, then neither the Absence quota types sequence nor the Quota type sequence for further deduction will be considered.
- You must assign a priority to at least one of the five criteria. If this is not done, the system will first sort all available absence quota records in ascending order according to their deduction end date, then according to their deduction start date and then according to the quota type.
Now, to create a deduction rule for our example, enter the values illustrated in Figure 10.
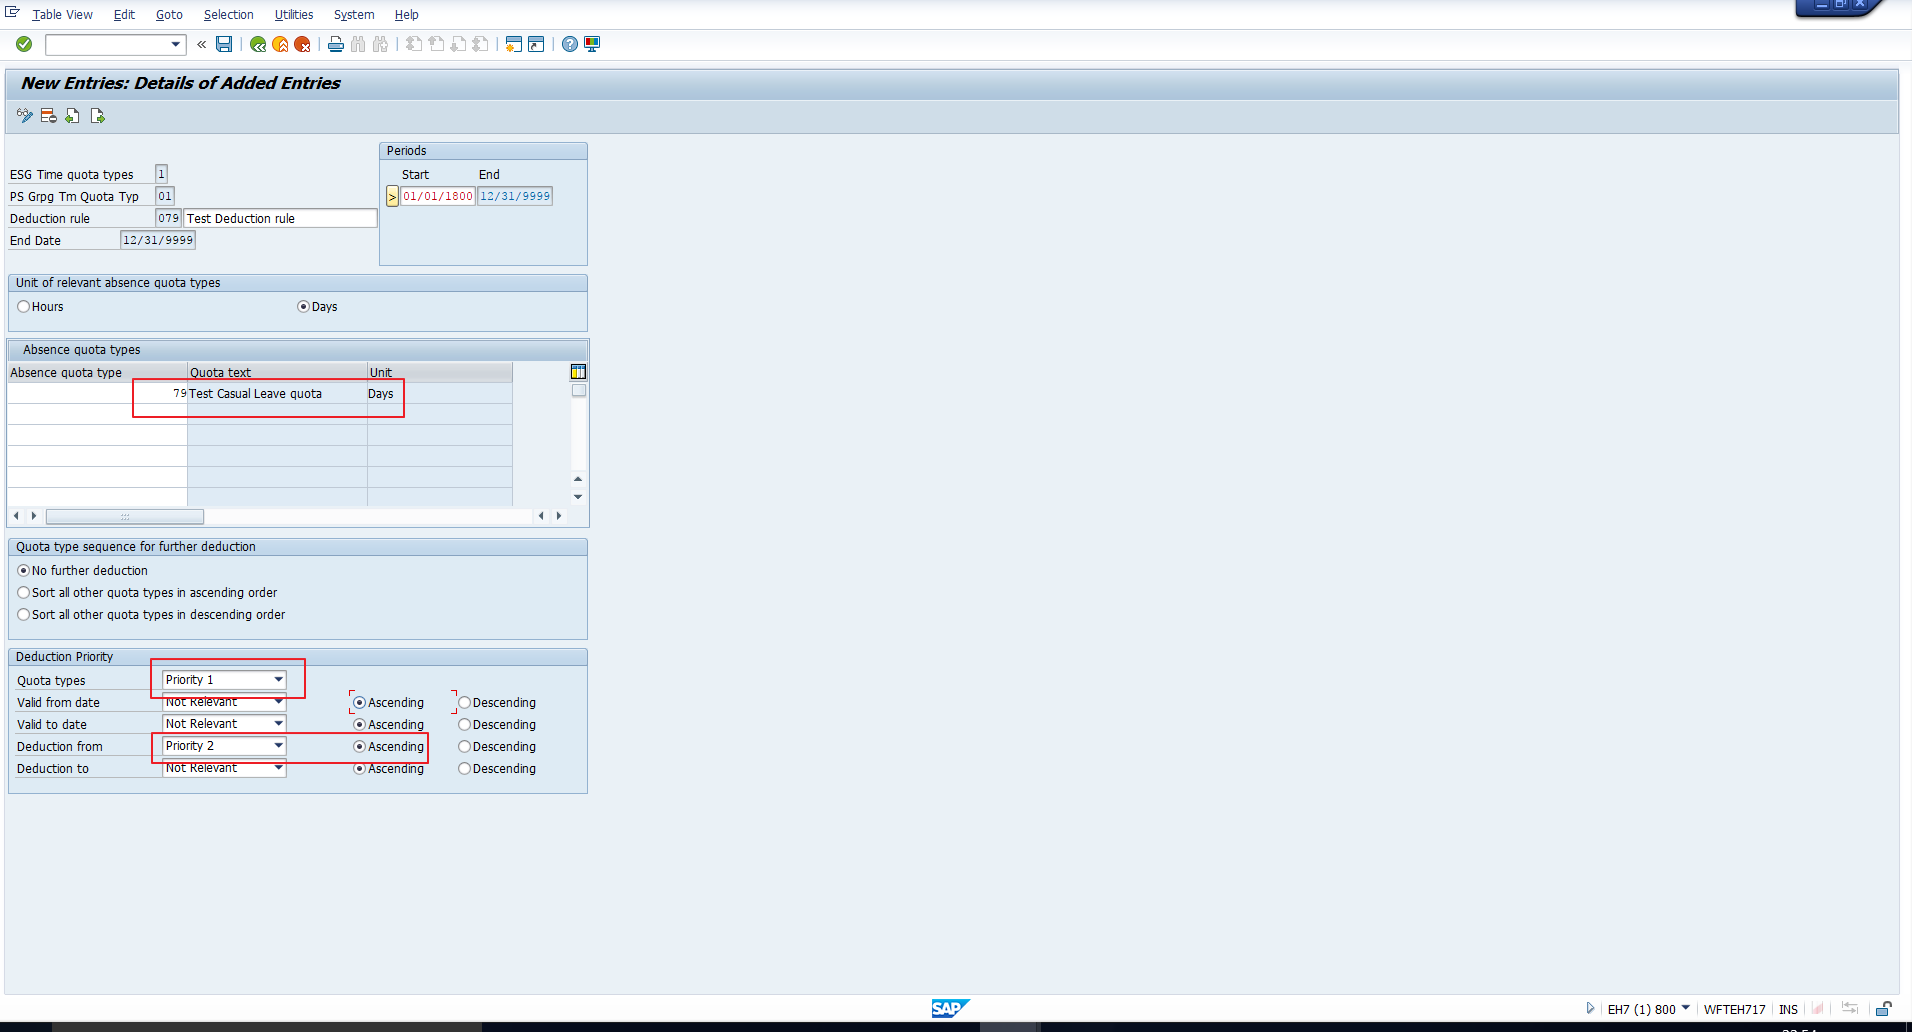
Once you enter the necessary data, save the changes using the Save icon. Our deduction rule 079 is now ready to be assigned to a Counting rule.
Assign Deduction Rules to Counting Rules
The next step is to assign the newly created deduction rule to a counting rule. Consequently, all absences with quota deduction that are counted using the counting rule are processed using this deduction rule.
To carry out this assignment, follow the path depicted in Figure 11.
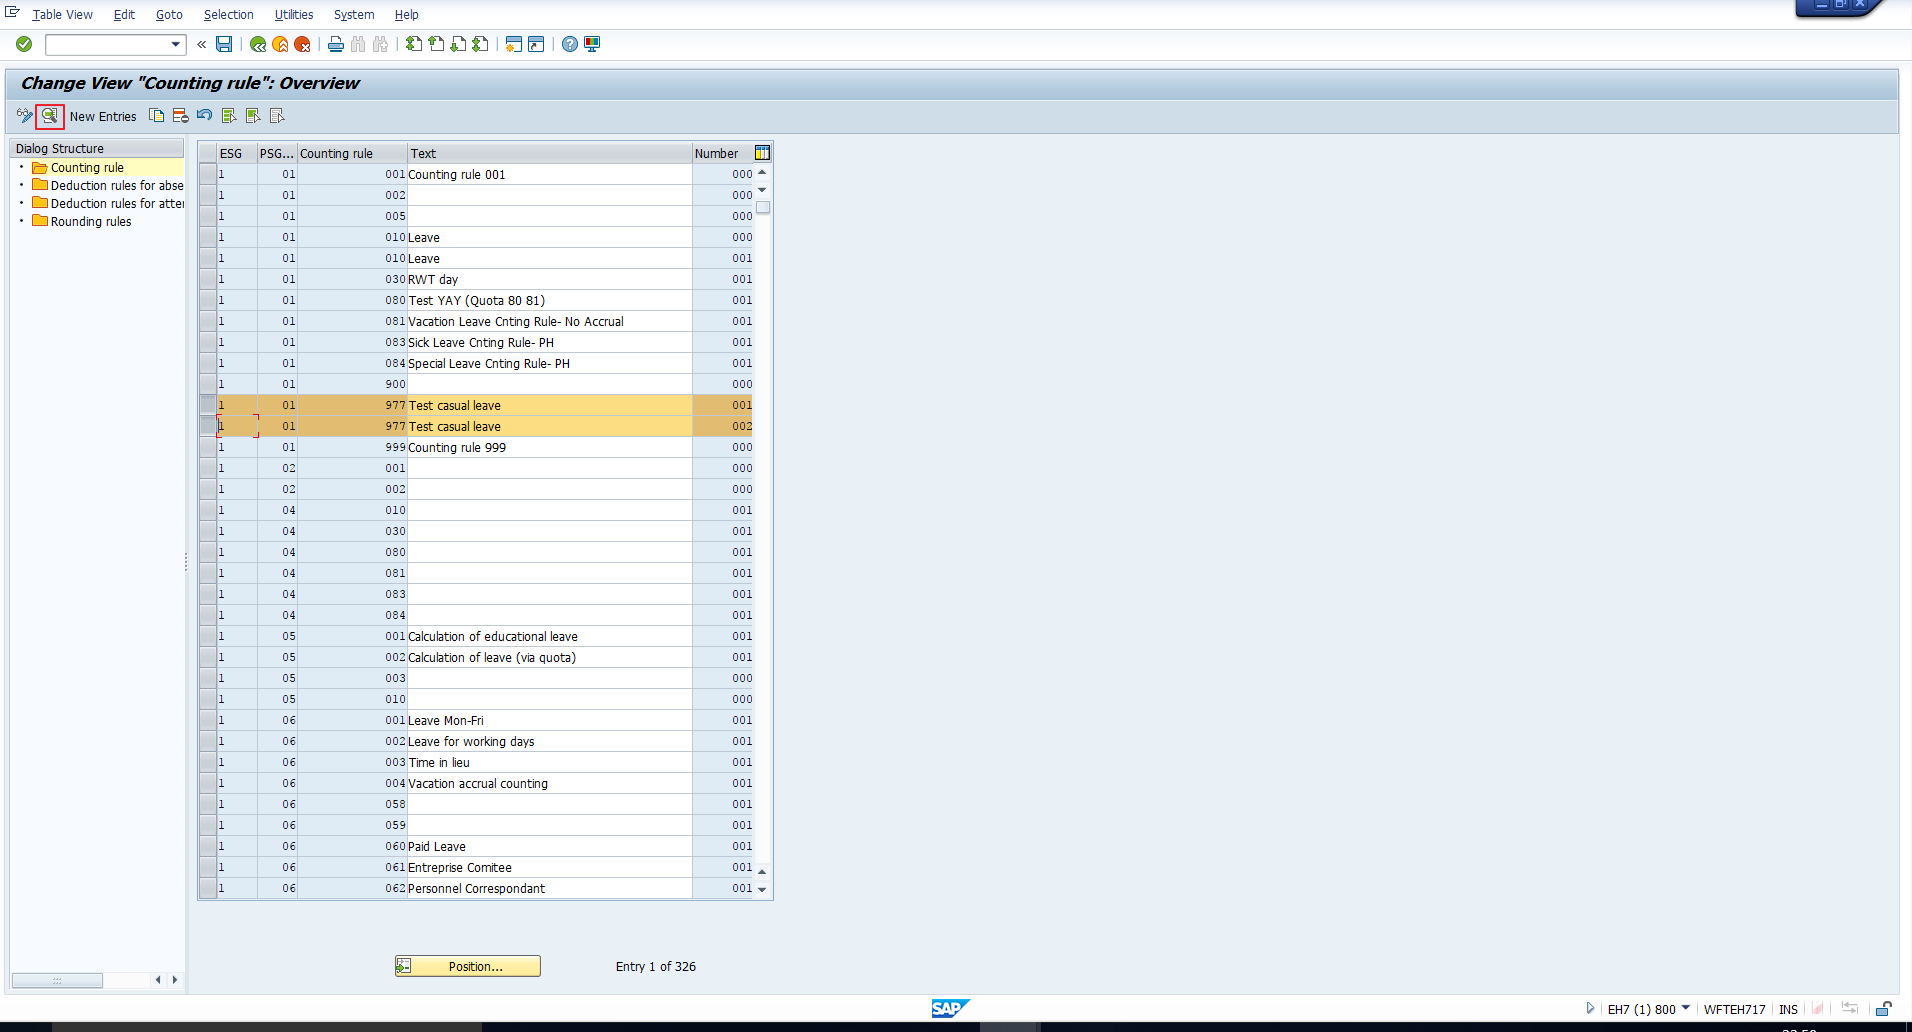
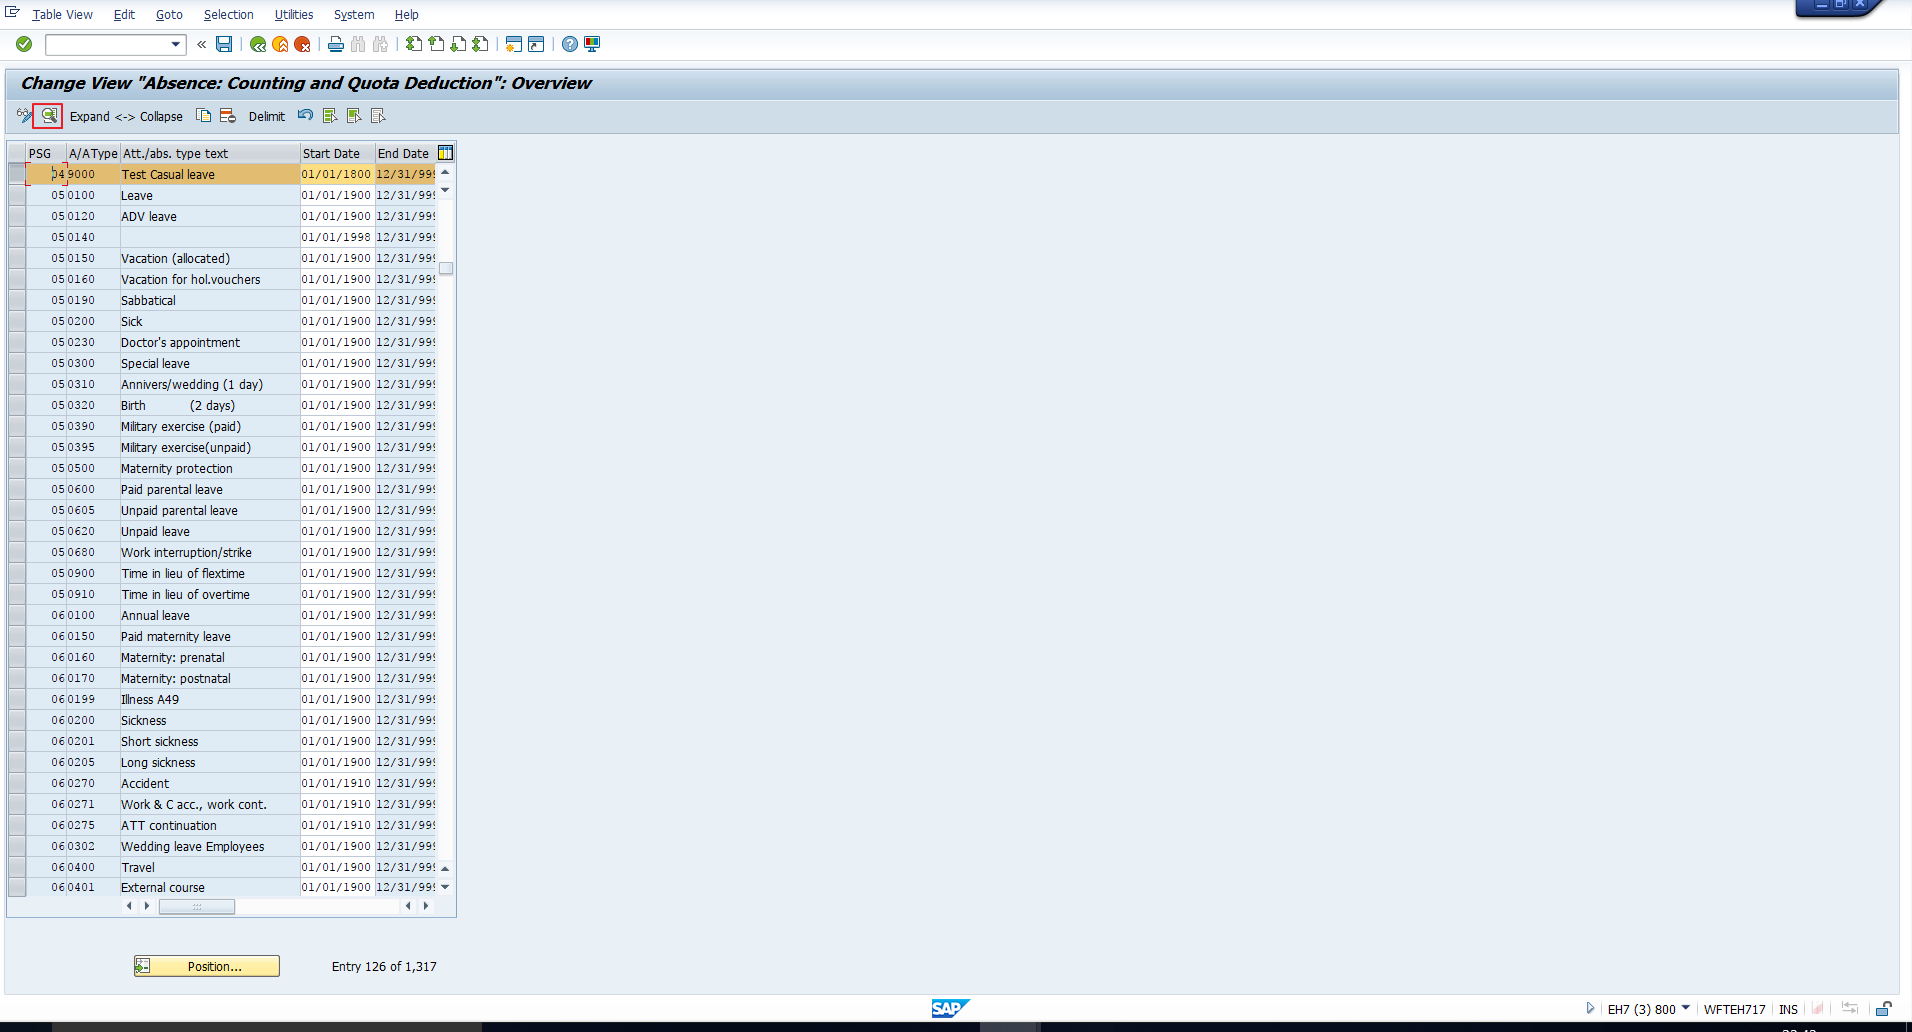
You may recognize the next screen from the tutorial on SAP Absence counting rules. This screen is simply an overview of Counting rules and is depicted in Figure 12.
Select the Counting rule to which you want to assign the deduction rule. For our example, we will select the entries corresponding to Counting rule 977, as this was the Counting rule we had assigned to the absence type 9000 in the tutorial SAP Absence management.
Once you select the entries, click on the details icon highlighted in Figure 13.
The Counting rule details screen will follow. Scroll down until you can see the Deduction rule section. You can then assign the deduction rule in the Absence quotas sub-section, as illustrated in Figure 14.
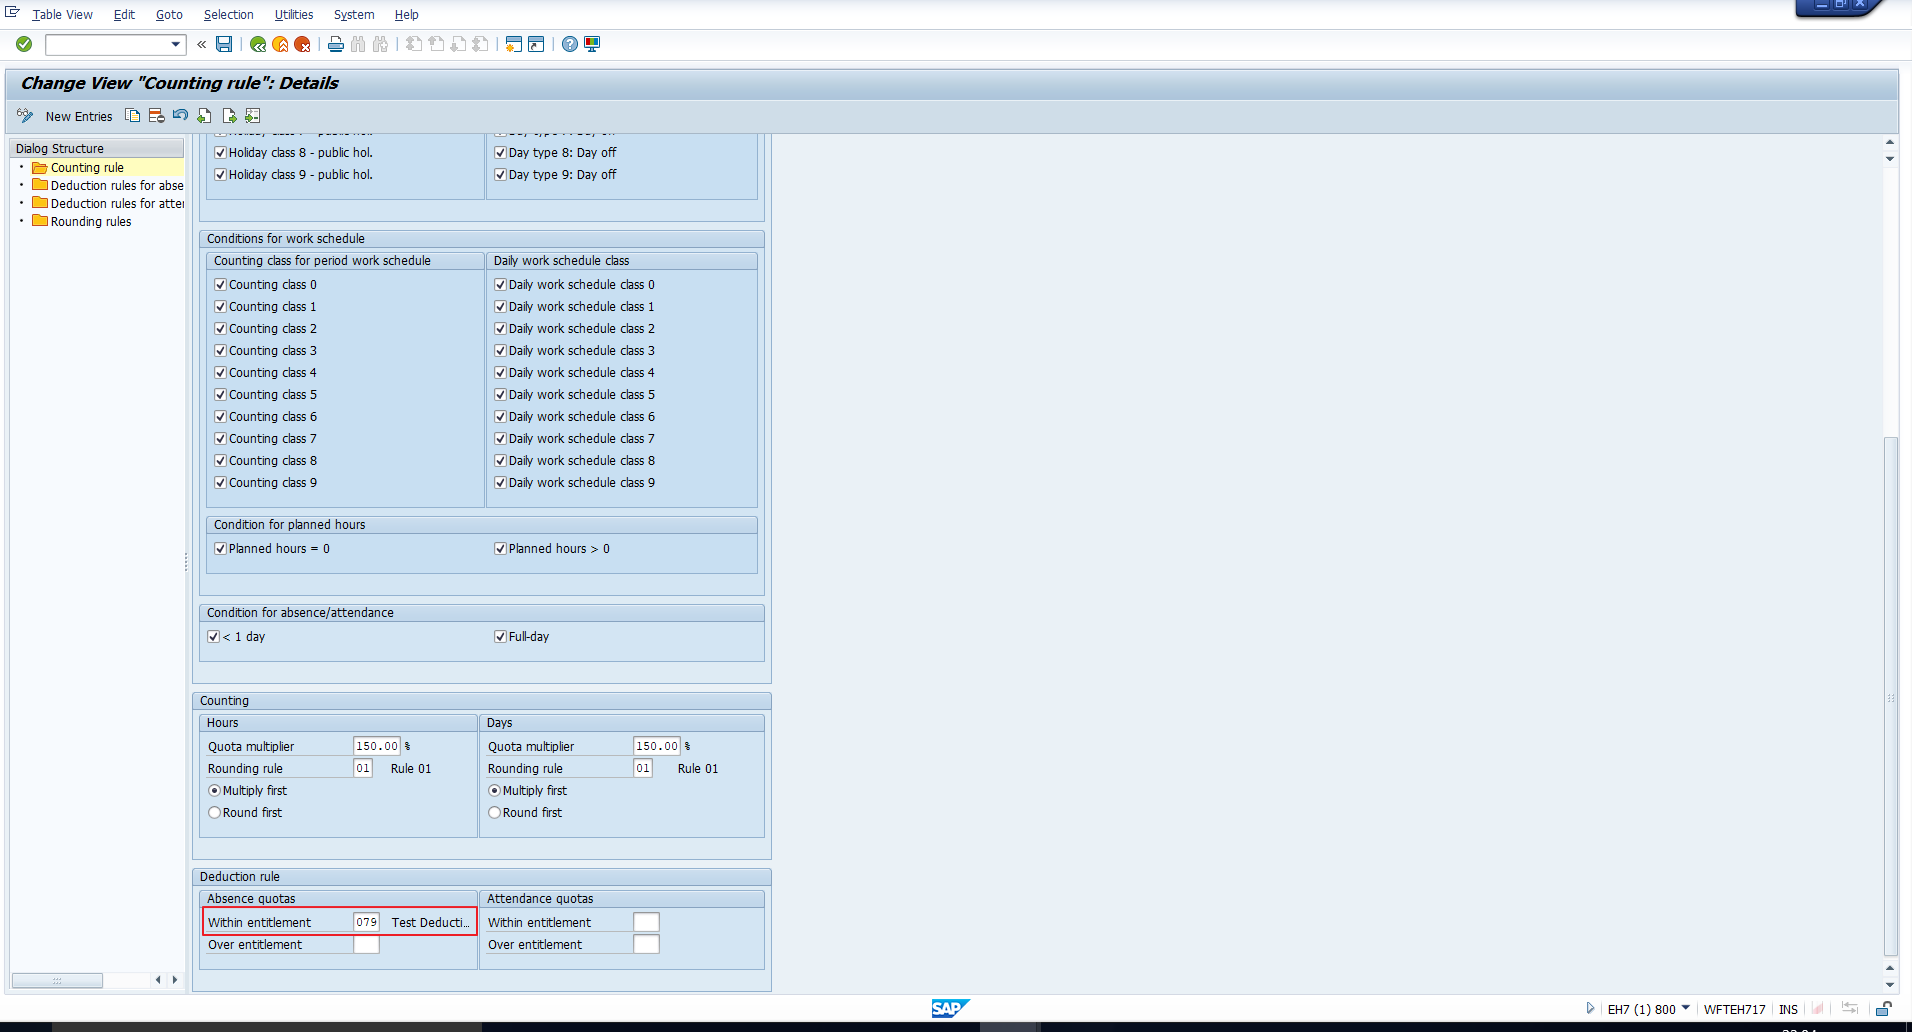
You may observe that there are two fields in this sub-section:
Within entitlement – Assign a deduction rule for quota deduction assuming there is a quota entitlement greater than 0. We have assigned the rule in this field.
Over entitlement – If your policy allows quota deduction over and above the entitlement, assign a suitable deduction rule here. We have left this blank, as our requirement does not specify this.
Once you do the needful, save the changes. Repeat this activity for all the table entries corresponding to the Counting rule.
Activate SAP Quota Deduction for Absence Type
This configuration is usually done while assigning a counting rule to an absence type. Since we chose not to activate quota deduction at that point, we are including it here instead.
Follow the path in Figure 15 to activate quota deduction for an absence type.

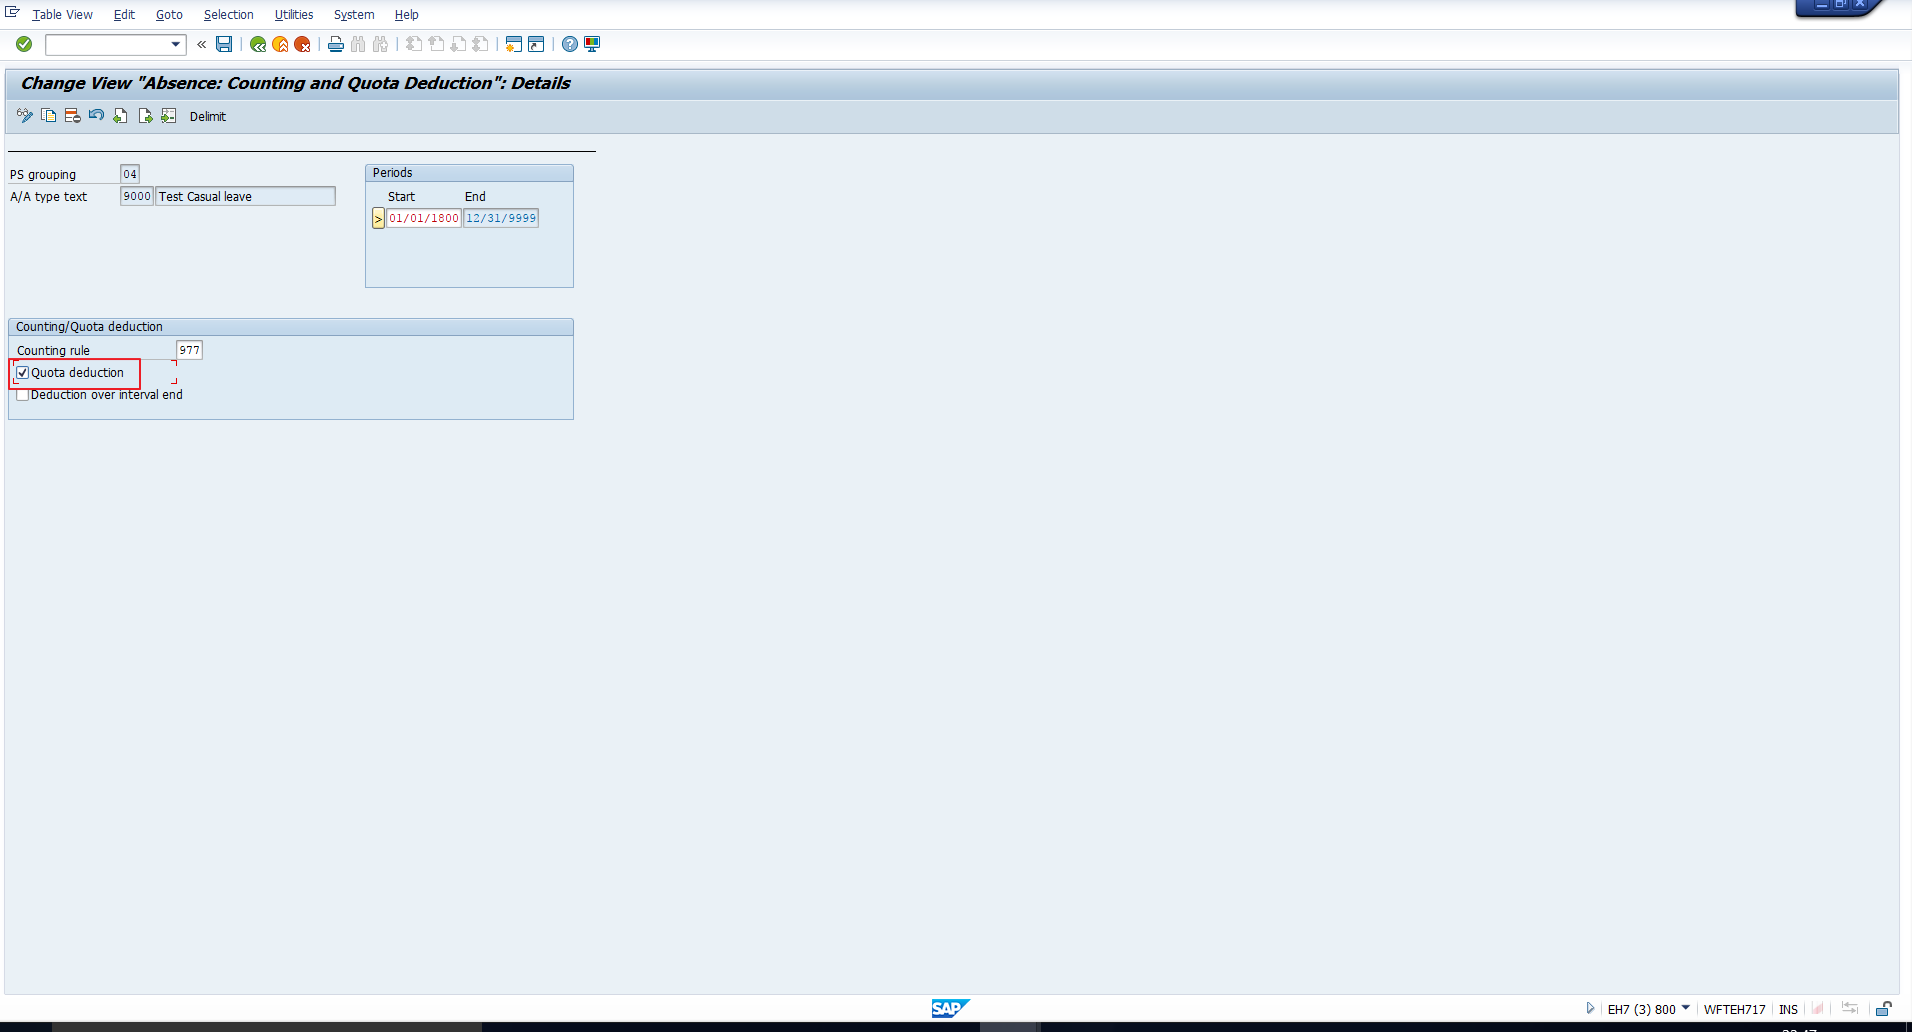
Executing this activity will take you to the screen in Figure 16. Select the absence type 9000 and then click on the Details icon.
In the next screen, select SAP quota deduction checkbox as shown in Figure 17. Then save the data.
With this, we complete the configuration steps. We will test the configuration in the following section.
Testing Configuration of SAP Quota Deduction
Let’s consider an employee who has two records of the quota type Test Casual Leave quota. You may refer to the screenshot of the Absence quotas infotype in Figure 18.
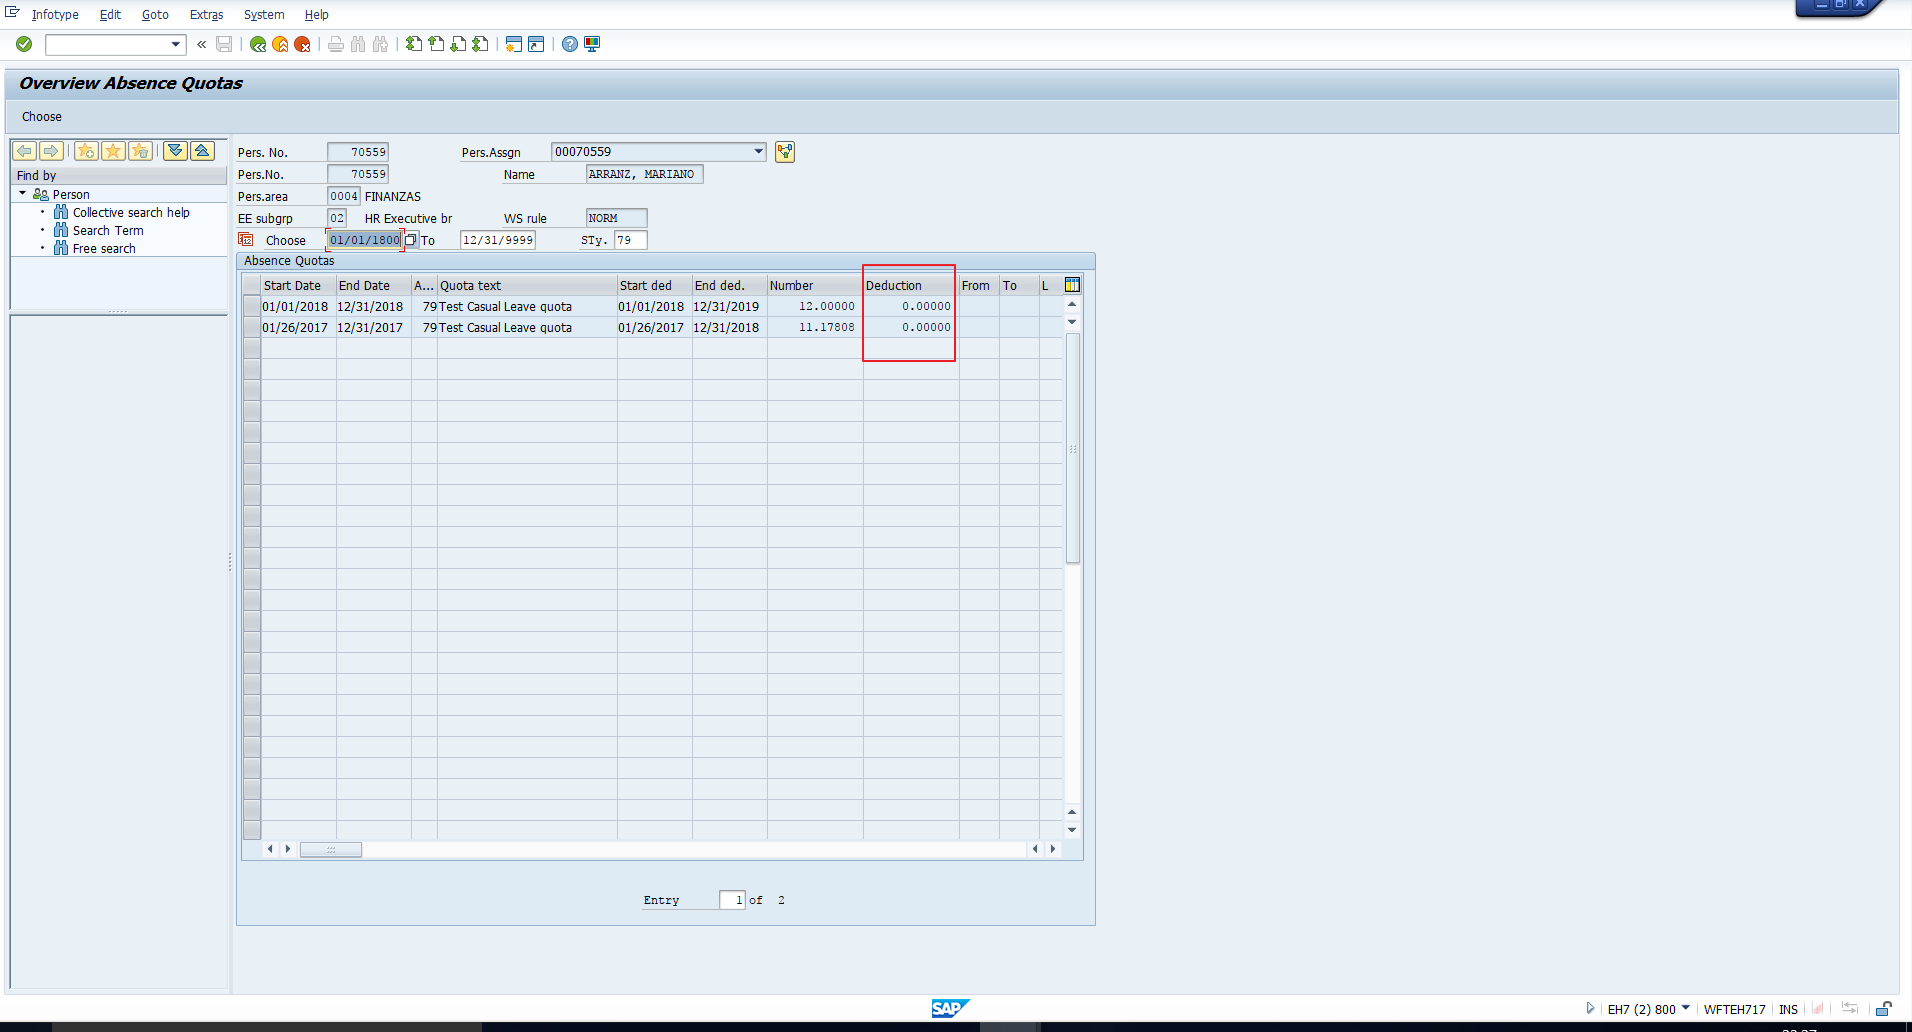
It is evident that there is currently no deduction from either record.
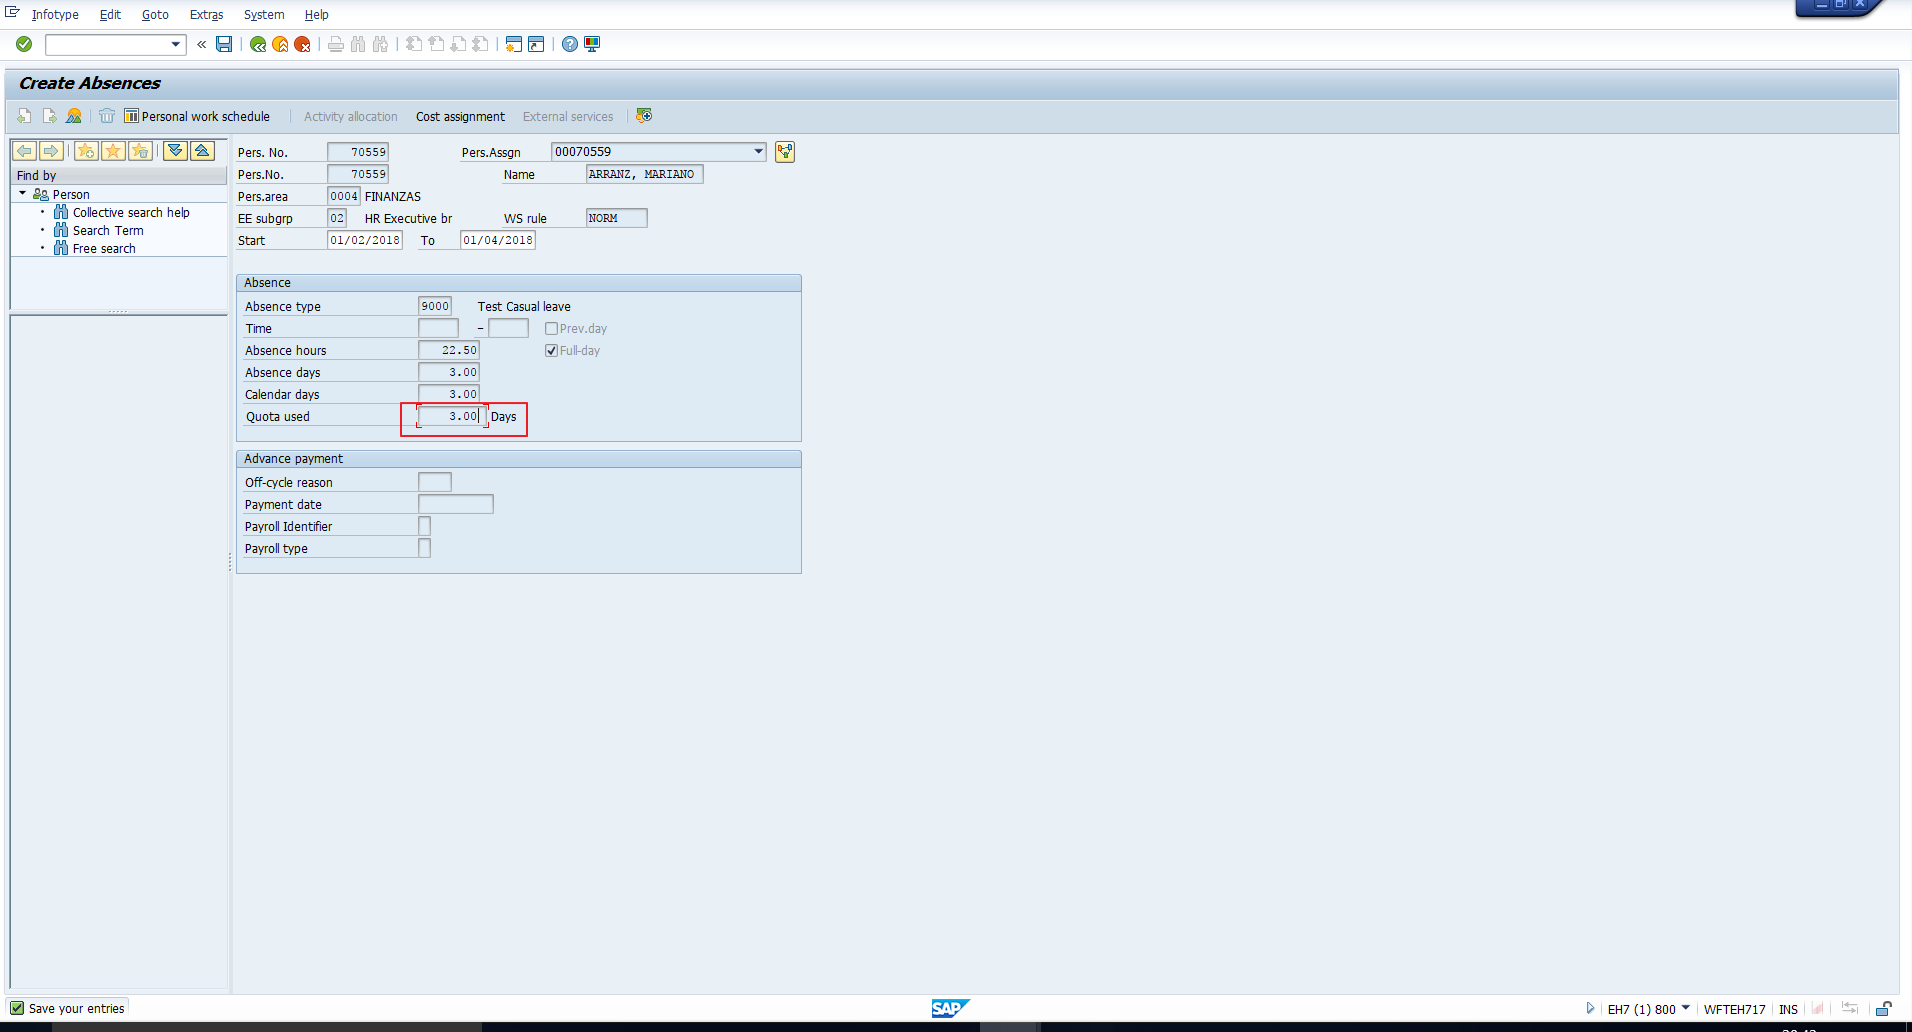
Let’s now create an absence for the employee using transaction code PA30. As depicted in Figure 19, the absence has been entered for the period 01/02/2018 – 01/04/2018 (in mm/dd/yyyy format). Now, the Quota used field indicates the number of days that will get deducted from the Absence quota. Its value in this record is 3 days, as highlighted below. Save the data.
Next, let’s revisit the Absence Quotas infotype to verify that the deduction has taken place correctly. In Figure 20, we can see that the deduction has been done from the qualifying record with the earliest Deduction from date. This is in accordance with our SAP quota deduction rule.

—
Did you like this tutorial? Have any questions or comments? We would love to hear your feedback in the comments section below. It’d be a big help for us, and hopefully it’s something we can address for you in improvement of our free SAP HR tutorials.
Navigation Links
Go to next lesson: SAP Time Management Reports
Go to previous lesson: SAP RPTQTA00 Quota Generation Report
Go to overview of the course: SAP HR Training