
 Welcome to our tutorial on the SAP sales to employees process. Certain companies offer incentives to their employees by offering them produce or finished goods at reduced prices. A factory outlet or fair price shop is setup within the business location and employees can purchase them at offered rates. This is handled in through the SAP sales to employees process. In this tutorial, as part of our free SD training, we will explain the process, show how it is configured, then walk through a scenario.
SAP Sales to Employees Process
The SAP sales to employees process is similar to the conventional SAP SD order to cash cycle, with a few variations. For one, the sales to employees process does not require availability check as the customers/employees are only able to purchase goods on hand. Also, delivery and picking are not relevant to such type of sales as the selling is done onsite and the picking is done by the customer/employee when they select the goods. Further, rather than a customer placing an order with a sales operator, the sales clerk at the checkout kiosk creates the sales order directly to replenish the goods that the customer/employee has just purchased.
To facilitate the SAP sales to employees process, first the AR clerk creates a generic customer under either a specifically-created account group or as a one-time customer. Next, the sales order is created by the sales clerk to trigger the sales process. As a result, a delivery document is created automatically. A goods issue can either be done manually each time goods are moved from the warehouse to the shop or at the end of the day via a scheduled job. Finally, billing occurs based on the sales order quantity. The accounting entry will hit a cash-related general ledger account and there shall be no receivables in this process.
Configure SAP Sales to Employees Process
To configure the SAP sales to employees process, there are a couple steps:
- Set up a specific sales document type where delivery is created immediately
- Define a delivery item category as not relevant for picking
To set up a new sales document type, use the customizing path below in transaction code SPRO:
Sales and Distribution – Sales – Sales Documents – Sales Document Header – Define Sales Document Types
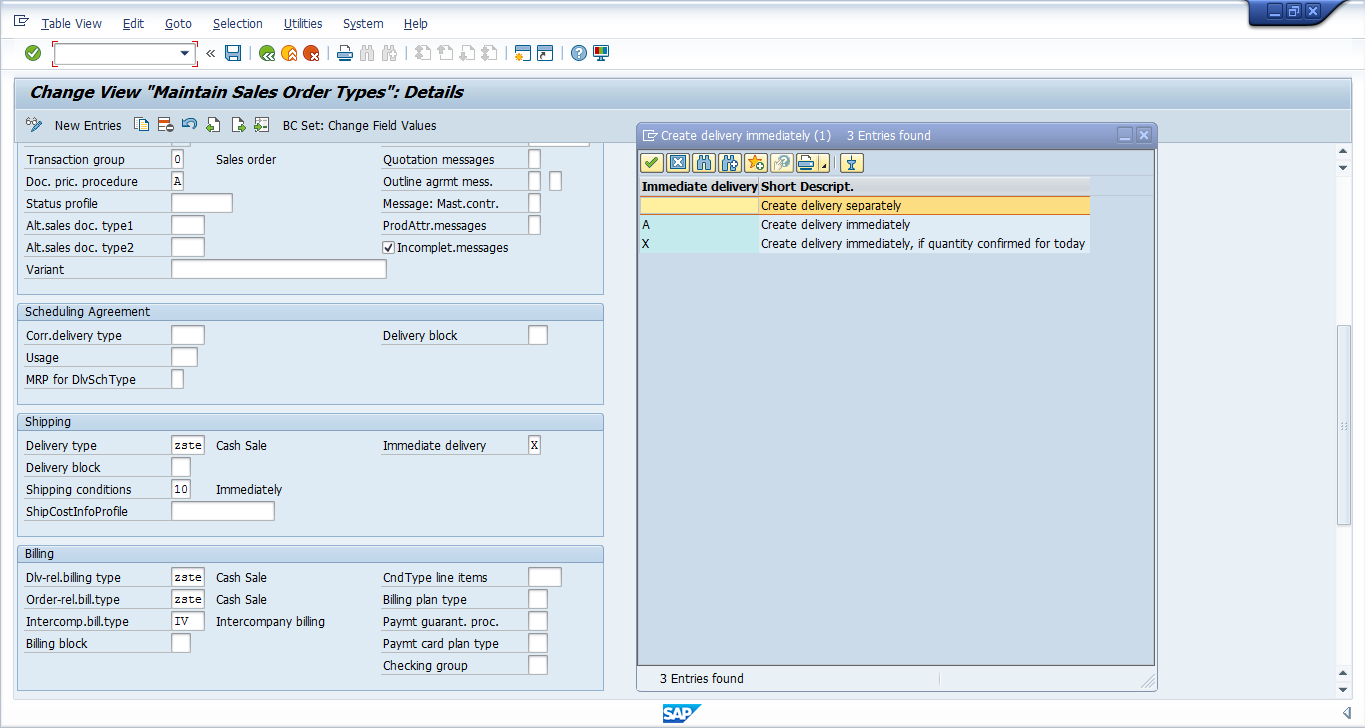
Click the New Entries button ![]() to create a new sales document type or repurpose an existing one. The key configuration relevant to the sales to employees process is found in the Shipping section. Enter X – Create deliver immediately, if quantity confirmed for today. This setting triggers the automatic creation of the delivery document as soon as a sales order is saved.
to create a new sales document type or repurpose an existing one. The key configuration relevant to the sales to employees process is found in the Shipping section. Enter X – Create deliver immediately, if quantity confirmed for today. This setting triggers the automatic creation of the delivery document as soon as a sales order is saved.
To define an item category, use the customizing path below in transaction code SPRO:
Logistics Execution – Shipping – Picking – Define Relevant Item Categories
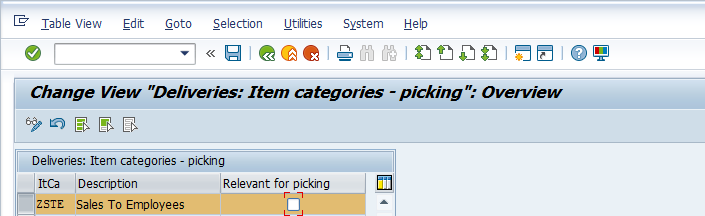
Click the Position button ![]() to search for the relevant item category. Remove the Relevant for picking tickbox as shown below:
to search for the relevant item category. Remove the Relevant for picking tickbox as shown below:
Hit Enter then Save ![]() to save the definition.
to save the definition.
Execute SAP Sales to Employees Process
Now we shall walk through a scenario of the entire SAP sales to employee process to illustrate the functionality. The steps of the process are listed below:
- Create customer master
- Maintain discount pricing condition record
- Create output condition record
- Process sales order
- Check output
- Post goods issue
- Issue billing output
Note: In advance of creating the sales order, you should assign an incompletion procedure to your sales order type to control the required fields.
Create Customer Master
First we create a customer master record with an appropriate account group.
| Menu path | Logistics > Sales and Distribution > Master Data > Business Partner > Customer > Create > Complete |
| Transaction code | XD01 – Complete |
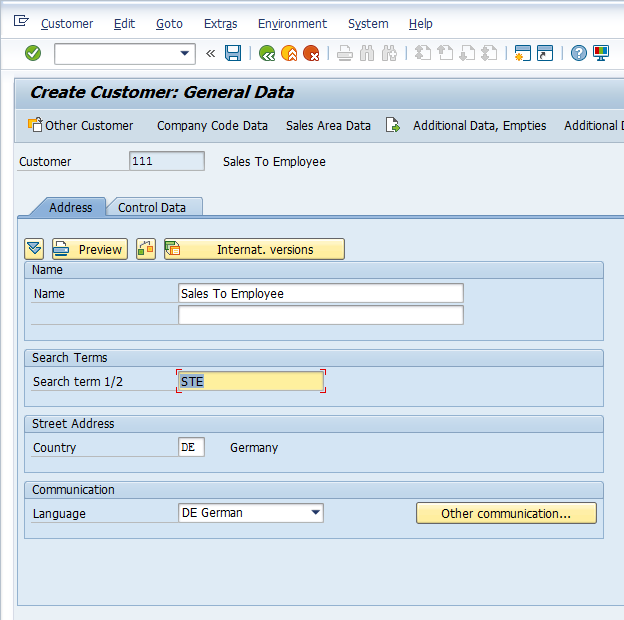
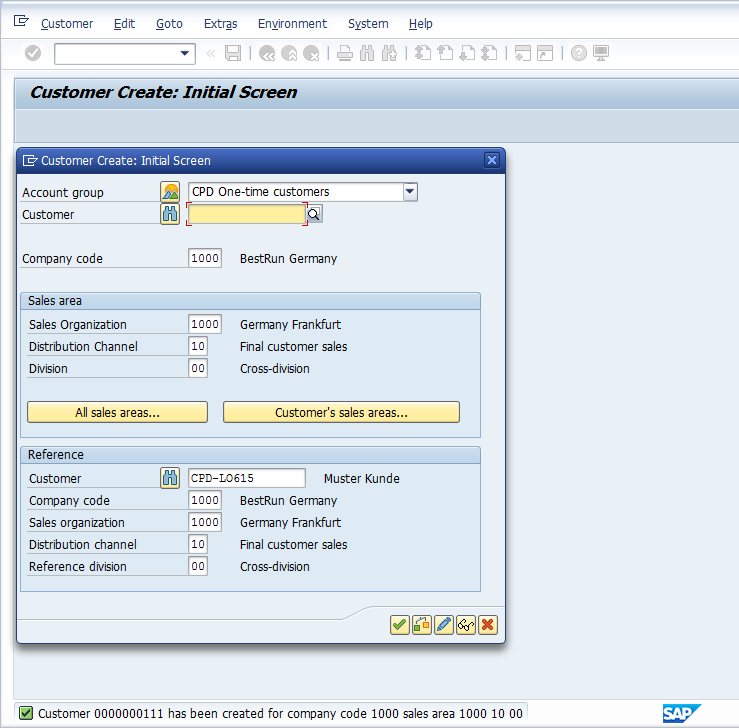
In the initial screen of transaction code XD01, select either the specifically created account group or use a one-time customer account group. If you have a template customer master, enter that customer information in the Reference area. In our example below, we have selected the CDP: One-time customers account group and used a reference customer to create customer number 111 – Sales To Employee:
Hit Save ![]() to create the customer.
to create the customer.
Maintain Discount Pricing Condition Record
Next we maintain the pricing relevant to employees in the pricing condition master record.
| Menu path | Logistics > Sales and Distribution > Master Data > Conditions > Select Using Condition Type > Create |
| Transaction code | VK11 – Create |
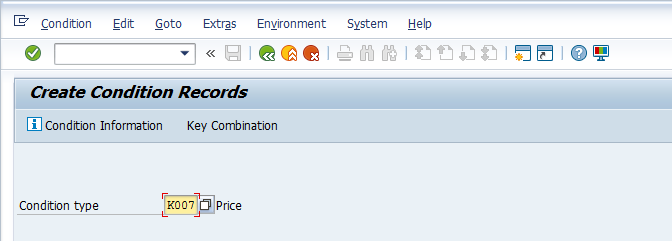
On the initial screen of transaction code VK11 enter the standard customer discount condition type K007.
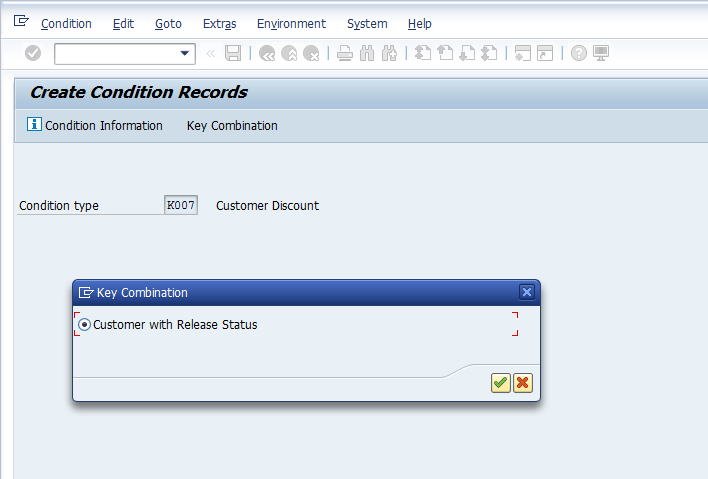
Hit Enter to continue. Select the radial button next to the key combination that relates to the way you want to maintain the condition record. These combinations are customizable. In our example, we only have the option of Customer with Release Status as shown below:
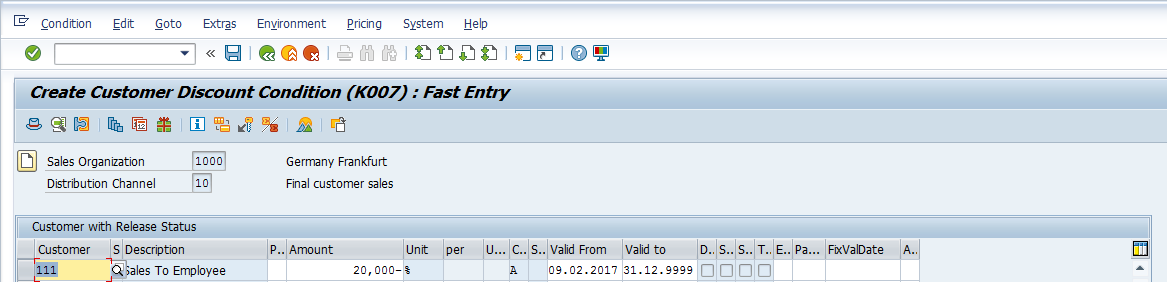
Press Enter to create the discount condition record. Enter the following information:
- Sales organization
- Distribution channel
- Sales to employee customer created previously as line item
- Discount percentage for sales to employees
- Validity dates for customer discount
Hit Save ![]() . The pricing condition will be saved with a confirmation message:
. The pricing condition will be saved with a confirmation message: ![]()
Create Output Condition Record
Then we create the output for the cash sales invoice.
| Menu path | Logistics > Sales and Distribution > Master Data > Output > Sales Document > Create |
| Transaction code | VV11 – Create |
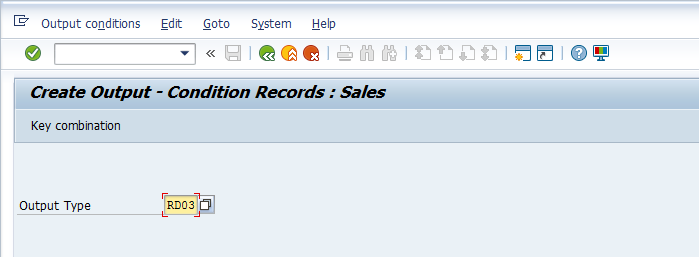
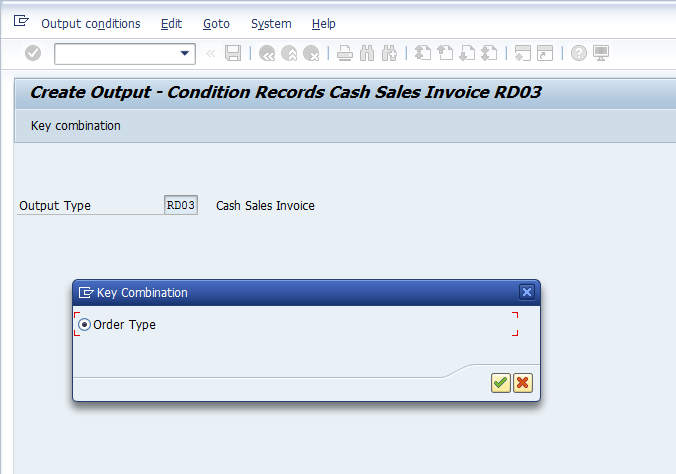
On the initial screen of transaction code V11 enter the standard cash sales invoice condition type RD03.
Hit Enter to continue. Select the radial button next to the key combination that relates to the way you want to maintain the output condition record. These combinations are customizable. In our example, we only have the option of Order Type as shown below:
Press Enter to create the output condition record. Enter the following information:
- Sales document type you configured for sales to employees
- Partner function PY – Payer
- Output medium 01 – Printout
- Timing of 04 – Send immediately (when saving the application)

Then, select the line and press the Communication button ![]() for further maintenance. Enter the local printer LP01 as the output device, 1 as the number of messages and select the Print immediately and Release after output tickboxes as shown below:
for further maintenance. Enter the local printer LP01 as the output device, 1 as the number of messages and select the Print immediately and Release after output tickboxes as shown below:

Hit Save ![]() . The output condition will be saved with a confirmation message:
. The output condition will be saved with a confirmation message: ![]()
Process Sales Order
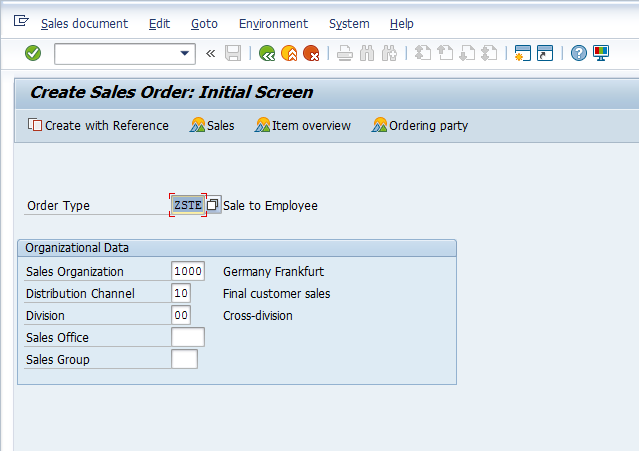
Now, it’s time to create the sales order using the sales document type you created for sales to employees. This will occur when the sales clerk in the employee shop needs to replenish goods from the warehouse. To create a sales order, execute transaction code VA01. On the initial screen, enter the sale to employee order type. In our example, we use ZSTE as demonstrated below:
Press Enter to create the sales order. Enter the Sold-To Party as the sales to employees customer created in the first step, customer 111 in our case:
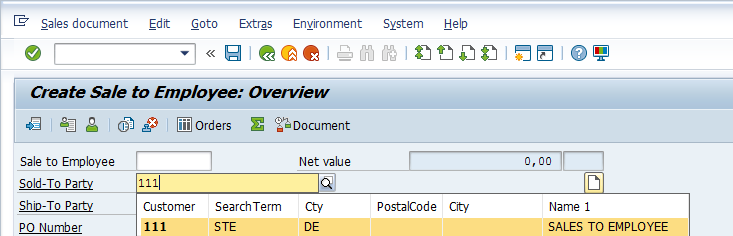
If you created this customer using the one-time customer account group, press Enter to fill in the customer details.

Press Enter to fill in the remainder of the sales order details. Be sure to use the item category you defined as not relevant to picking in the configuration activity. Hit Enter to trigger the defined incompletion procedure.
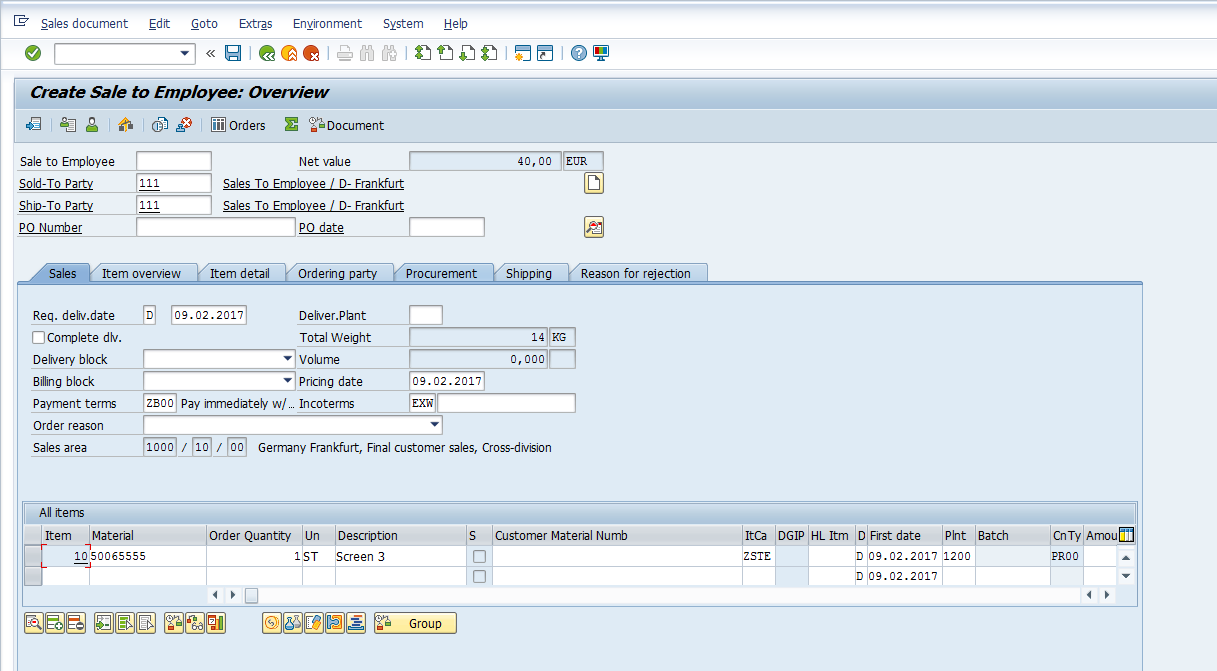
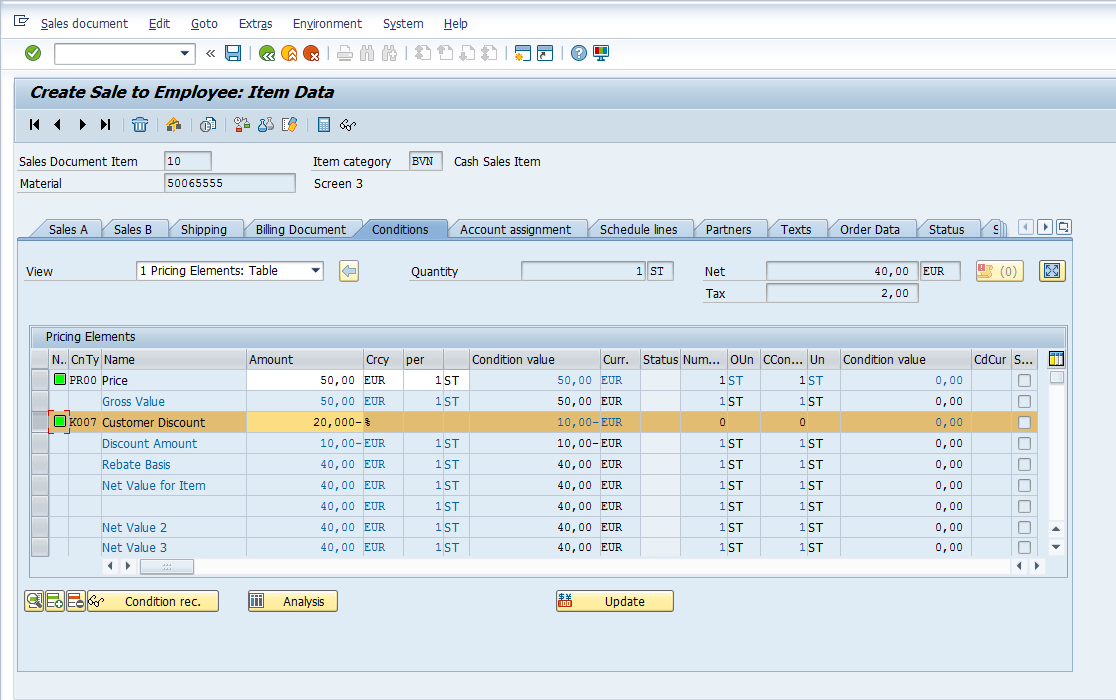
Double click a line item to see the item data. Select the Conditions tab to view the pricing behavior. You can see the discount pricing condition K007 you created in the second step is active. Check the calculation of the discount. In our case, the price of our one unit is 50 EUR, with a discount of 20%, making the net price of the sales order 40 EUR, as you can see below:
Having confirmed that our pricing is correct, we can now post the sales order. Hit Save ![]() . The sales order will be created with a confirmation message stating that the delivery was automatically created (thanks to our sales order type configuration). Note down the delivery document number, in our case 80018002 as shown below:
. The sales order will be created with a confirmation message stating that the delivery was automatically created (thanks to our sales order type configuration). Note down the delivery document number, in our case 80018002 as shown below:

Check Output
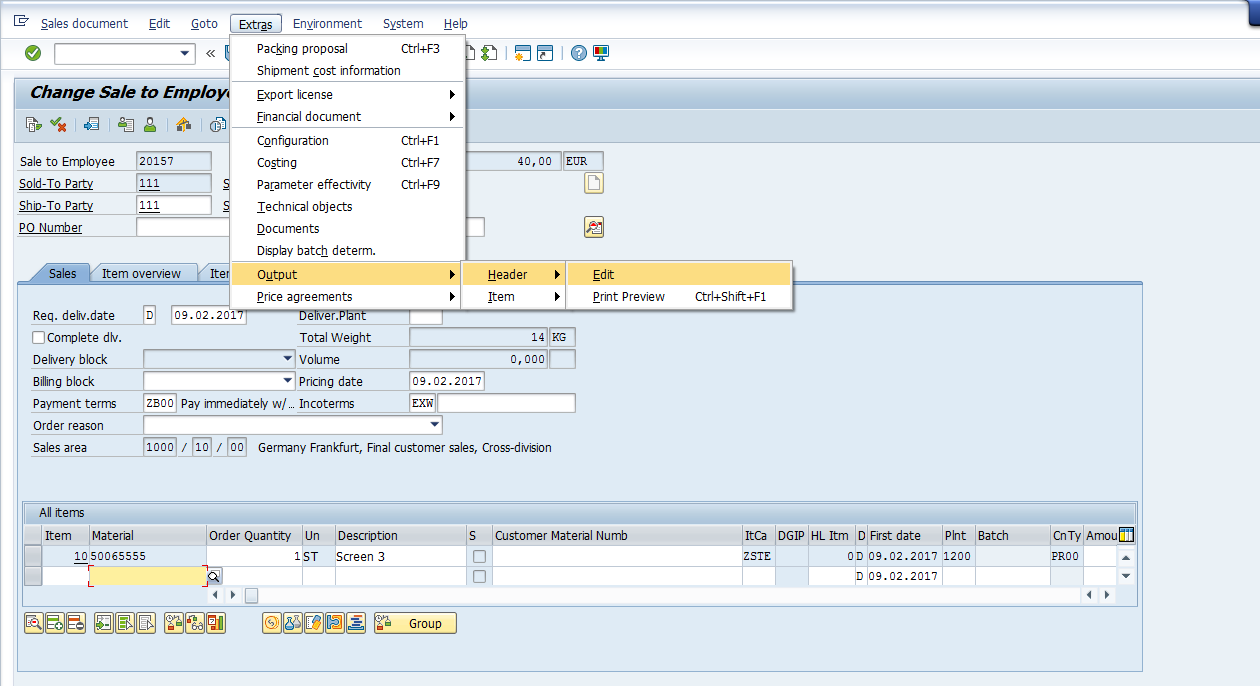
Now let’s double-check that the output was processed successfully. Pull up the sales order in change mode via transaction code VA02. From the toolbar select Extras > Output > Header > Edit as demonstrated below:
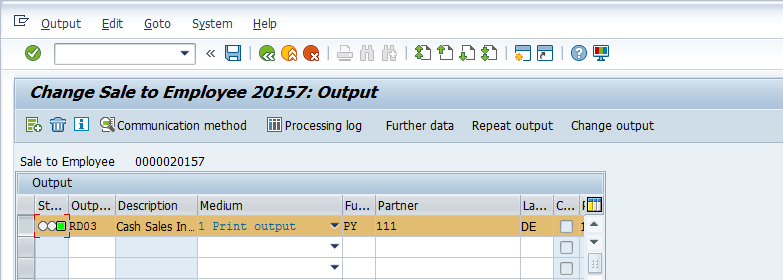
A green status indicator shows that the output has been executed successfully.
Post Goods Issue
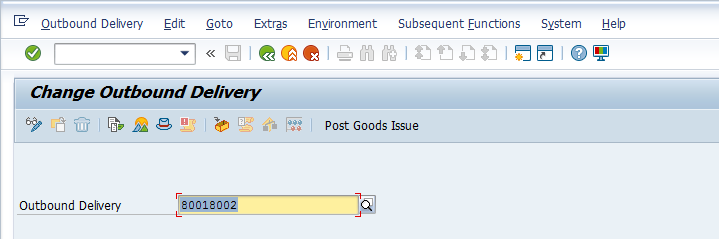
Since the delivery is automatically created and picking is not relevant, the next step is to post the goods issue. This will occur when the ordered goods are transferred from the warehouse to the shop and can be executed via transaction code VL02N. In the initial screen, enter the delivery number produced when creating the sales order, in our case 80018002:
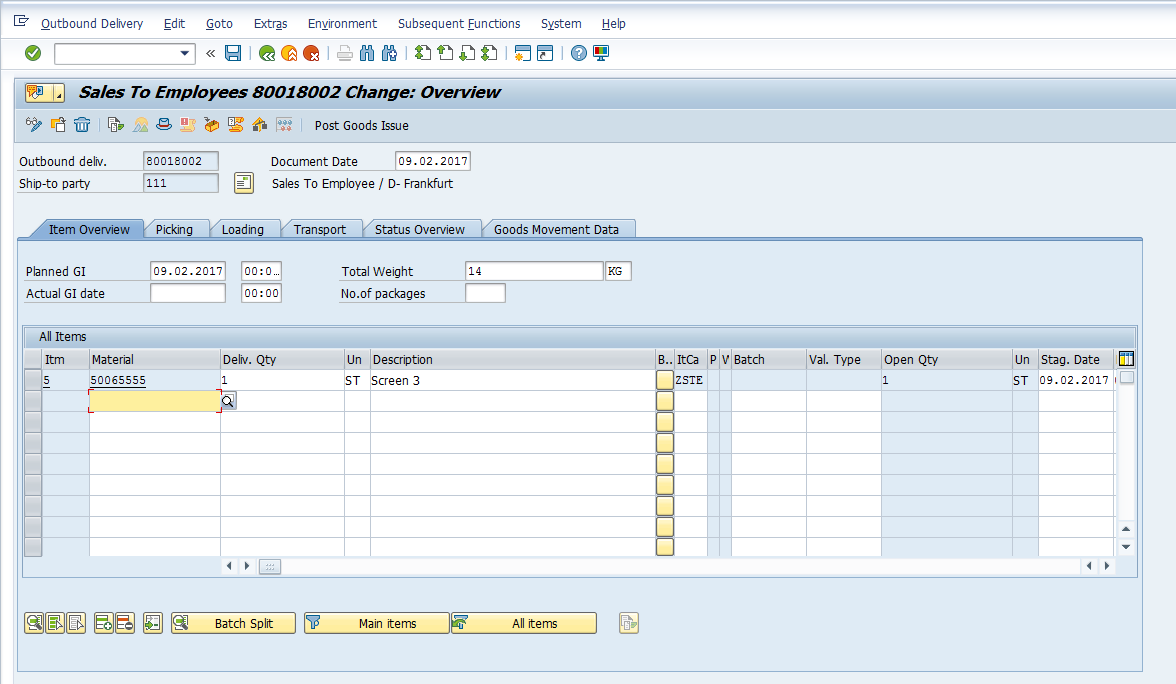
Press Enter to continue to select the goods for issue. The materials and quantities are defaulted from the sales order. Adjust them as necessary to represent what is being replenished to the employee store.
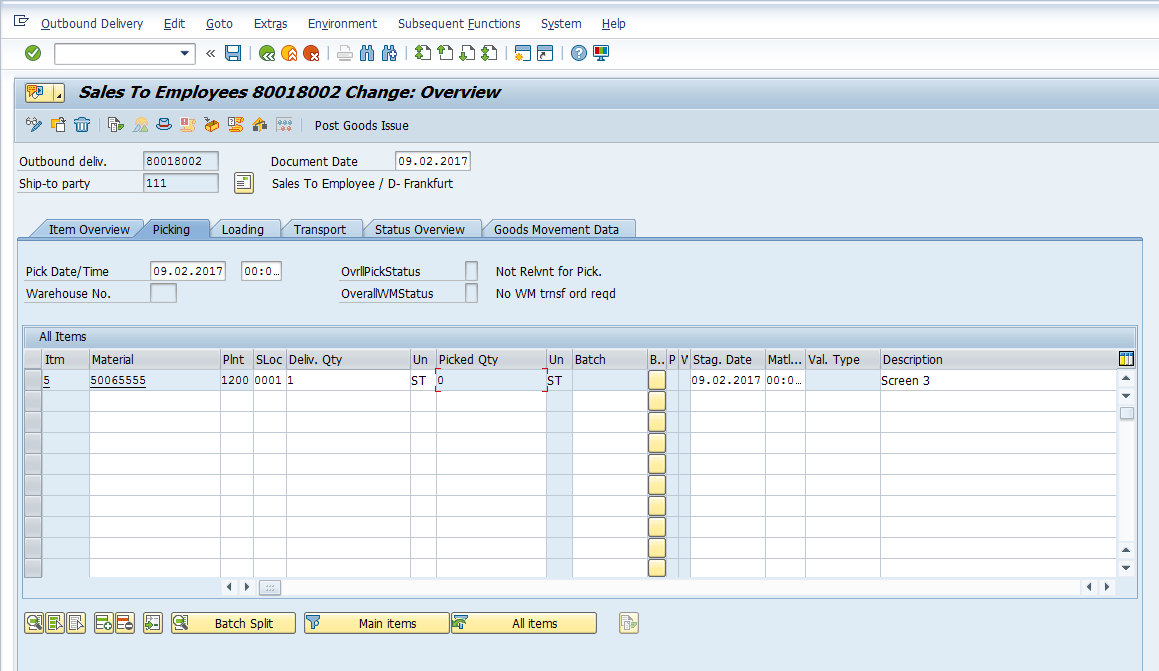
Click the Picking tab. Notice that the Picked Quantity field is greyed out the sales order was not relevant for picking.
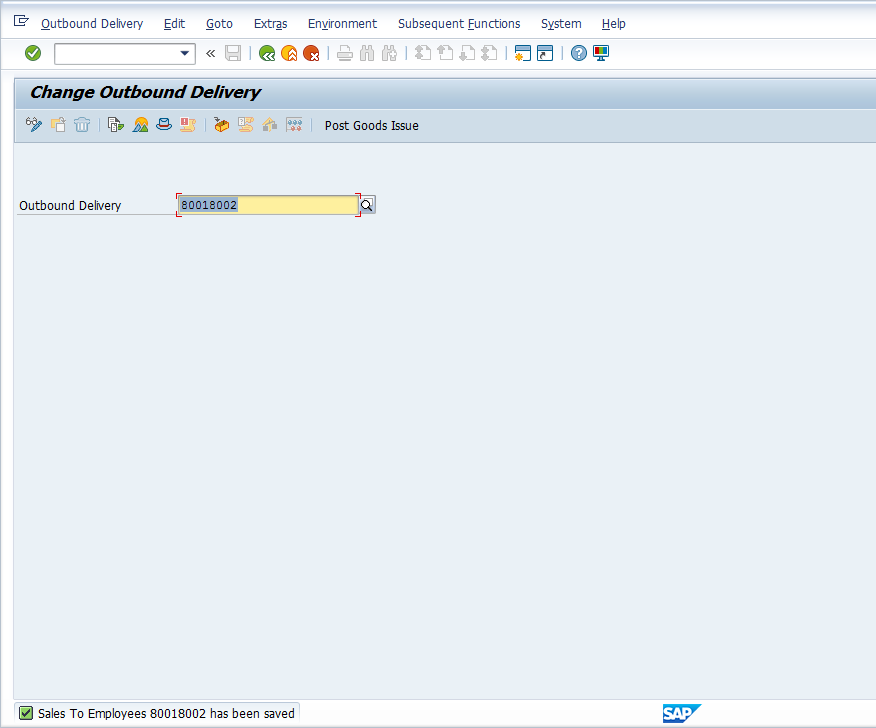
Press the Post Goods Issue button ![]() to save the movement. The delivery document will be updated with a confirmation message as shown below:
to save the movement. The delivery document will be updated with a confirmation message as shown below:
Issue Billing Output
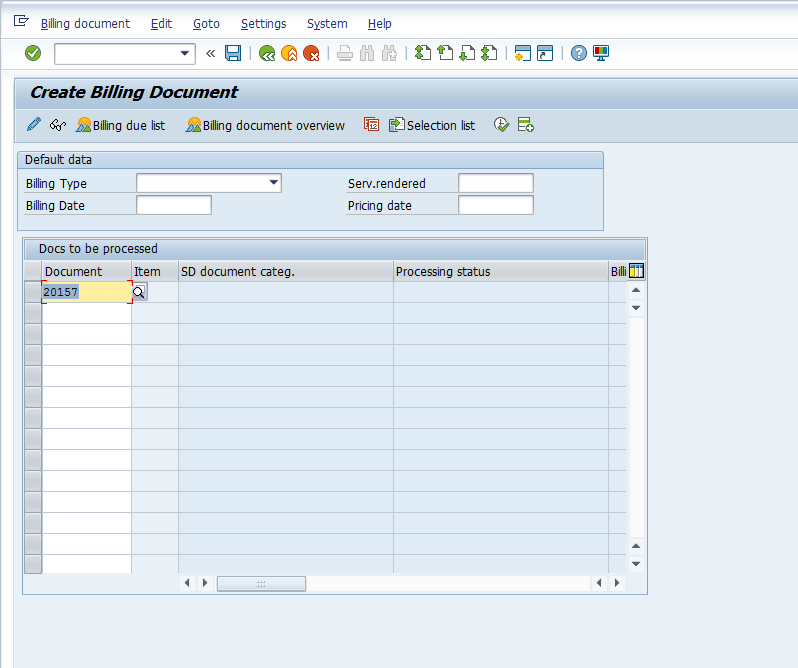
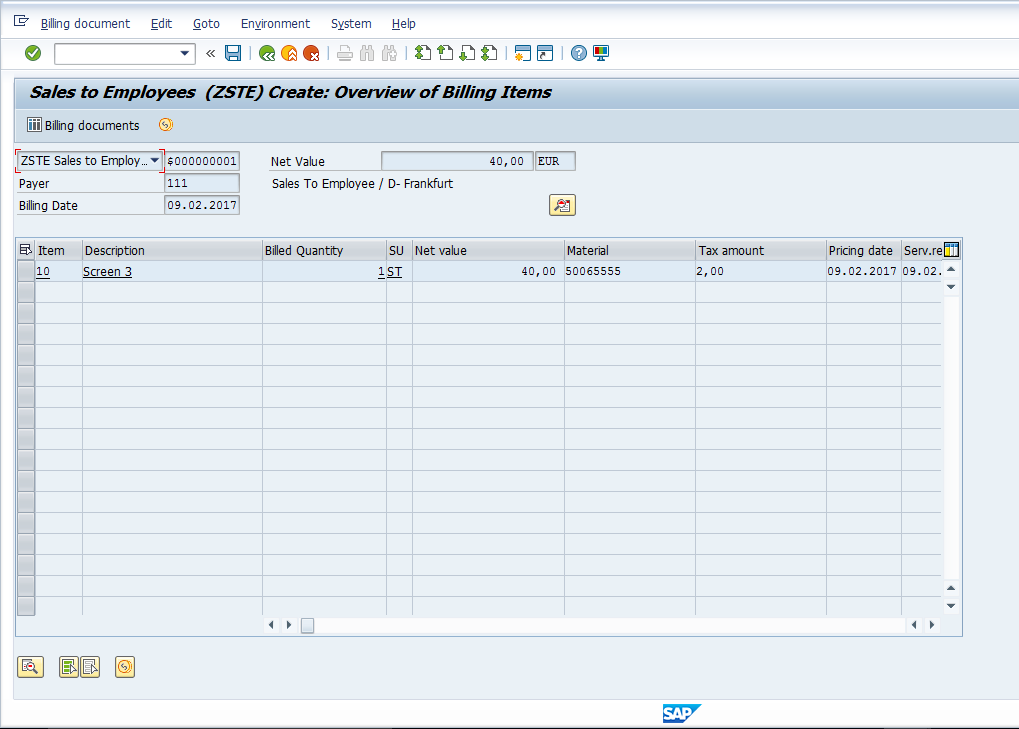
Finally, the billing can be executed for the sale of the ordered product. This occurs when the customer/employee pays the clerk for the goods in the employee shop. Execute billing via transaction code VF01. Enter the sales order number and press Enter to create the billing document.
The goods issued in the last step will be displayed. Hit Save ![]() to post the billing document, print the invoice for the employee, and post the accounting document.
to post the billing document, print the invoice for the employee, and post the accounting document.
—
Did you like this tutorial? Have any questions or comments? We would love to hear your feedback in the comments section below. It’d be a big help for us, and hopefully it’s something we can address for you in improvement of our free SAP SD tutorials.
Navigation Links
Go to next lesson: SAP Delivery Block Functionality
Go to previous lesson: SAP Free Goods
Go to overview of the course: SAP SD Training